Lately, it seems like all the projects I’ve tackled recently have had to do with bringing more function and organization into our home. Which, is perfect for me! I, myself, feel better and less stressed when I have the space around me organized. I typically spend most of my time in the kitchen, so organizing in there definitely seems key. What better way to get organized in the kitchen then creating a spice drawer organizer!
This post may contain affiliate links where we earn a small commission on your purchases at no additional cost to you.
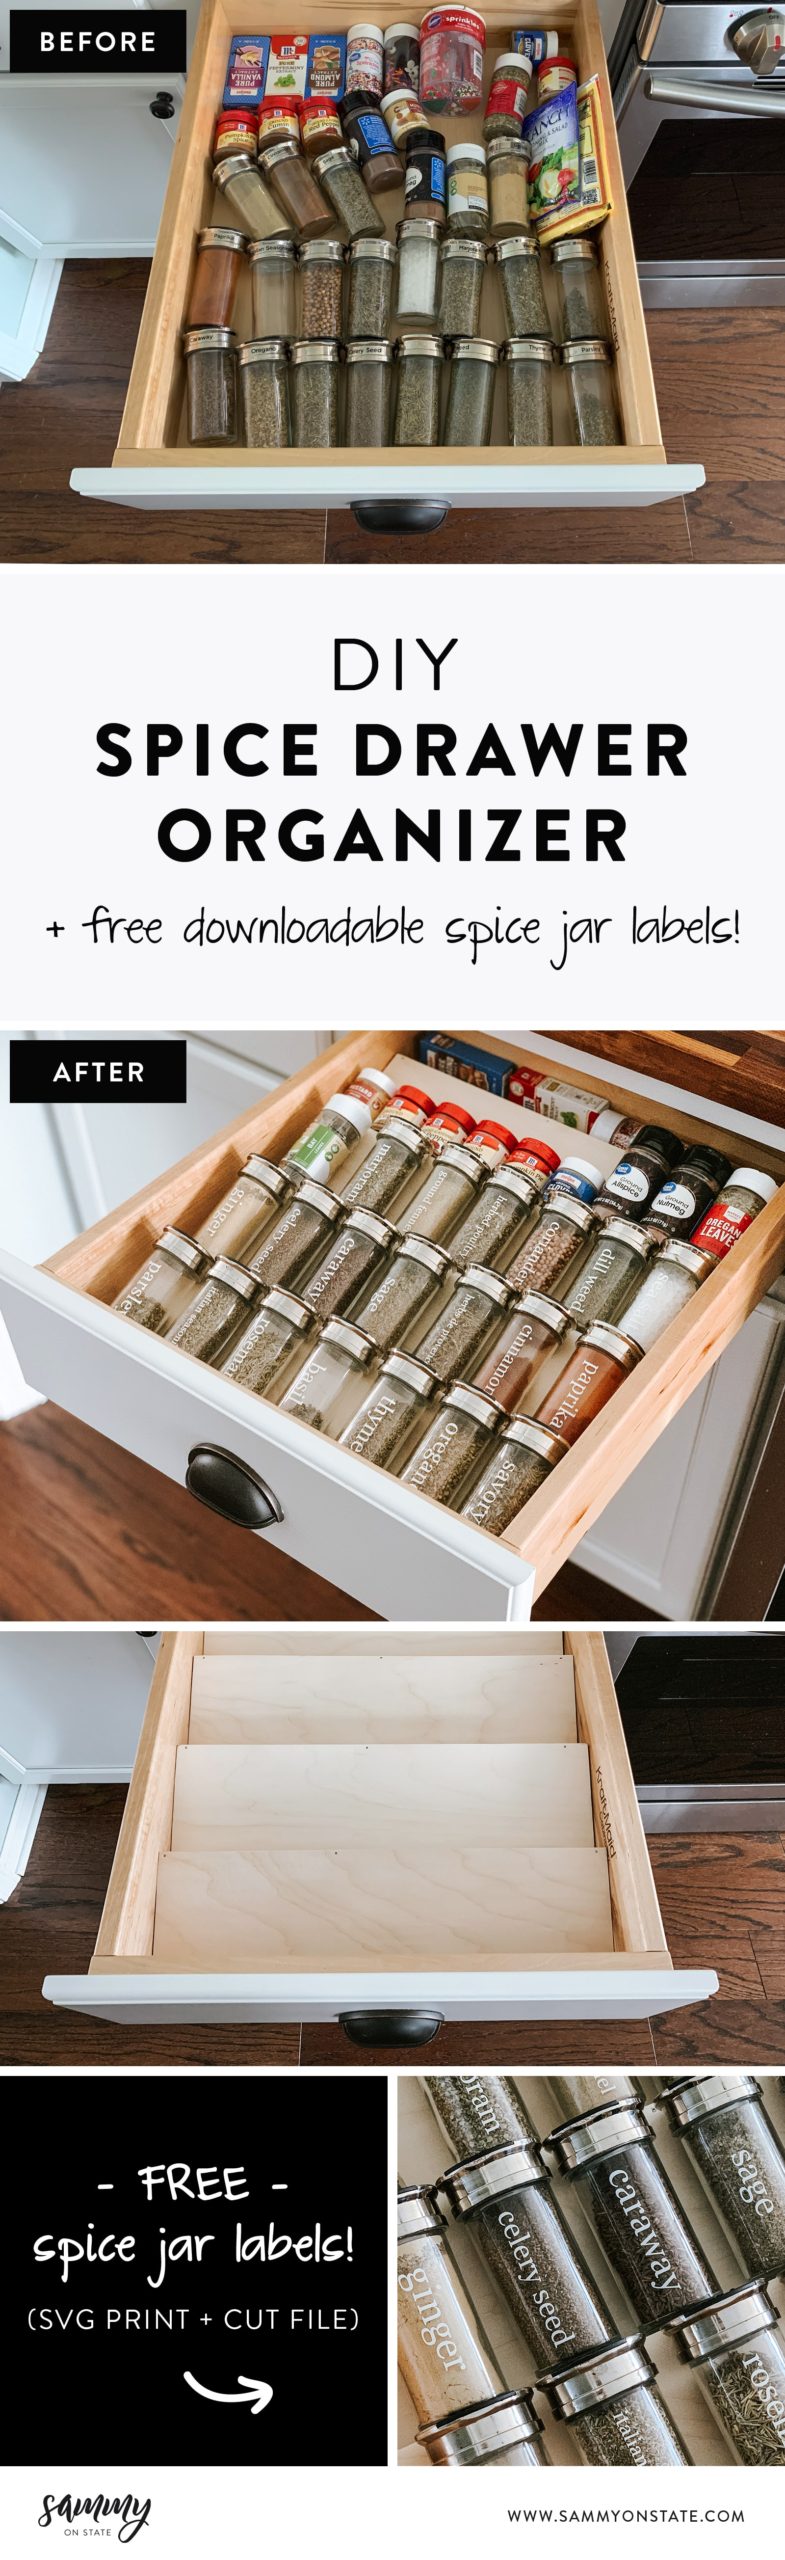
As you can see, our spice drawer needed some love. We originally had all our spices in one of those revolving countertop spice racks, but it was bulky and taking up counter space that we could use. So we moved them into a drawer and it quickly became a hot mess (especially when trying to find a specific spice!). It definitely was time to get this drawer organized!
I was able to whip up this DIY spice drawer organizer within a few hours and with just a few tools. The best part? This project was $3.39! Yep, that’s right. Three dollars. And thirty-nine cents. I had the wood glue on hand and the tools, so there were no additional costs. And to think you can buy these spice drawer organizers for $40-60!! ?No thanks! I’ll stick with the $3.39 DIY.
THE SUPPLIES
- 1/4″ thick 2′ x 2′ Plywood Panel (I got this one from Menards)
- Wood Glue
THE TOOLS
- Circular Saw or Table Saw ( I have this circular saw and love the ExacTrack!)
- Clamps
- Brad Nailer (my favorite tool!)
- Measuring tape
- Speed Square
- Pencil
- Safety Glasses
How to Build a DIY Spice Drawer Organizer
First things first – clean out the drawer! This is the perfect time to clean it out, give it a good wipe down and also to wipe down the outside of all your spice jars.
STEP 1 – Measure Drawer & Spice Jar Height
Grab your tape measure and measure the inside width and length of your drawer. Then, grab one of your spice jars/containers and measure the height of it. This will help determine how tall you need your rows to be for the organizer itself.
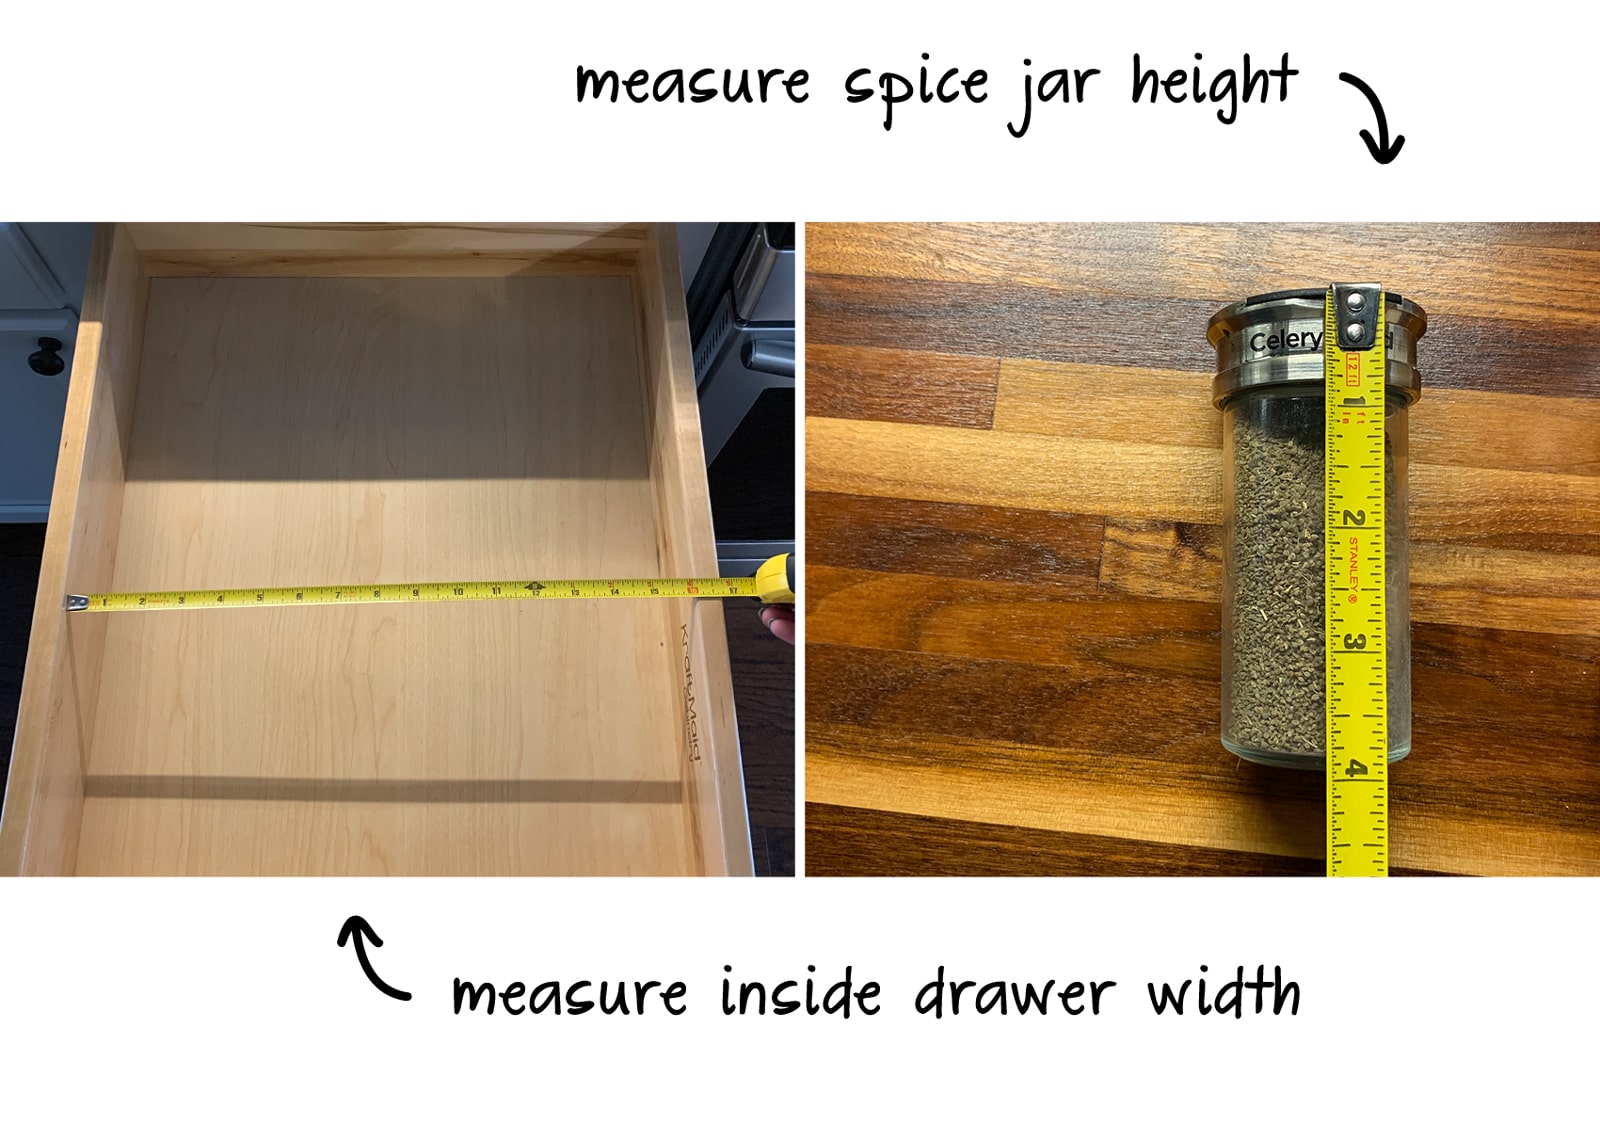
My drawer happened to be 16″ wide, and my spice jars were about 4″ tall. With these measurements, you’ll determine how long and tall you’ll need to cut your wood pieces.

I made my spice rows 16″ wide (the inside width of my drawer), and the height of each row backing 4 ¼”. You can make your row backings taller or shorter depending on your spice jar height. As a guestimate, I figured 1 ½” was a good height for the row riser, which will create that sloped looked. Since my drawer inside length was 19 ¼”, I knew I was only going to be able to fit 4 rows, with a little room in the back.
STEP 2 – Cut Wood Pieces
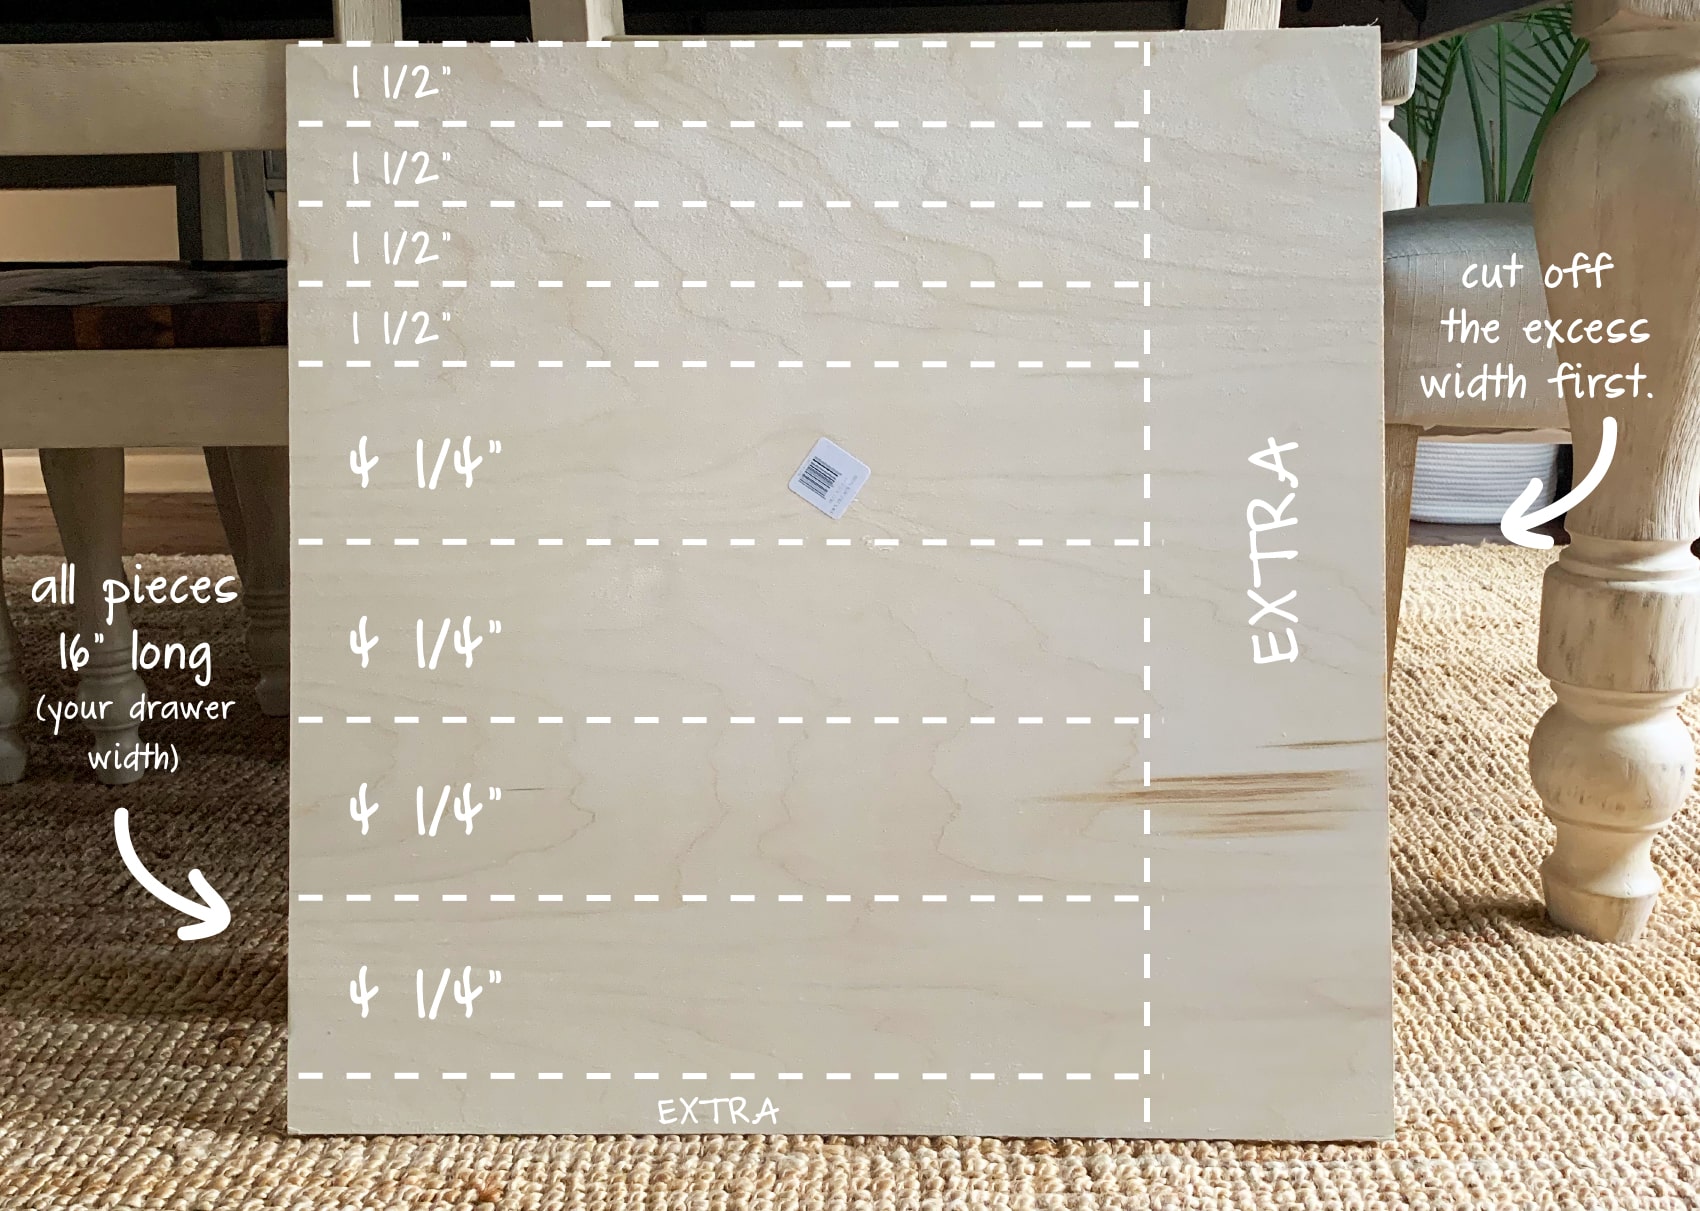
Cut out all your pieces needed from your 1/4″ plywood panel. For me, I needed to cut out (4) 4 ¼” pieces & (4) 1 ½” pieces. That’s it! 8 simple cuts. You can cut your pieces using a circular saw, or a table saw.
We don’t have a table saw, so I used my handy circular saw with a built-in ExacTrack making it super easy to get straight cuts.
Tip – Once you have all your pieces cut, make sure they fit inside your drawer before you assemble!
STEP 3 – Glue & Nail Together
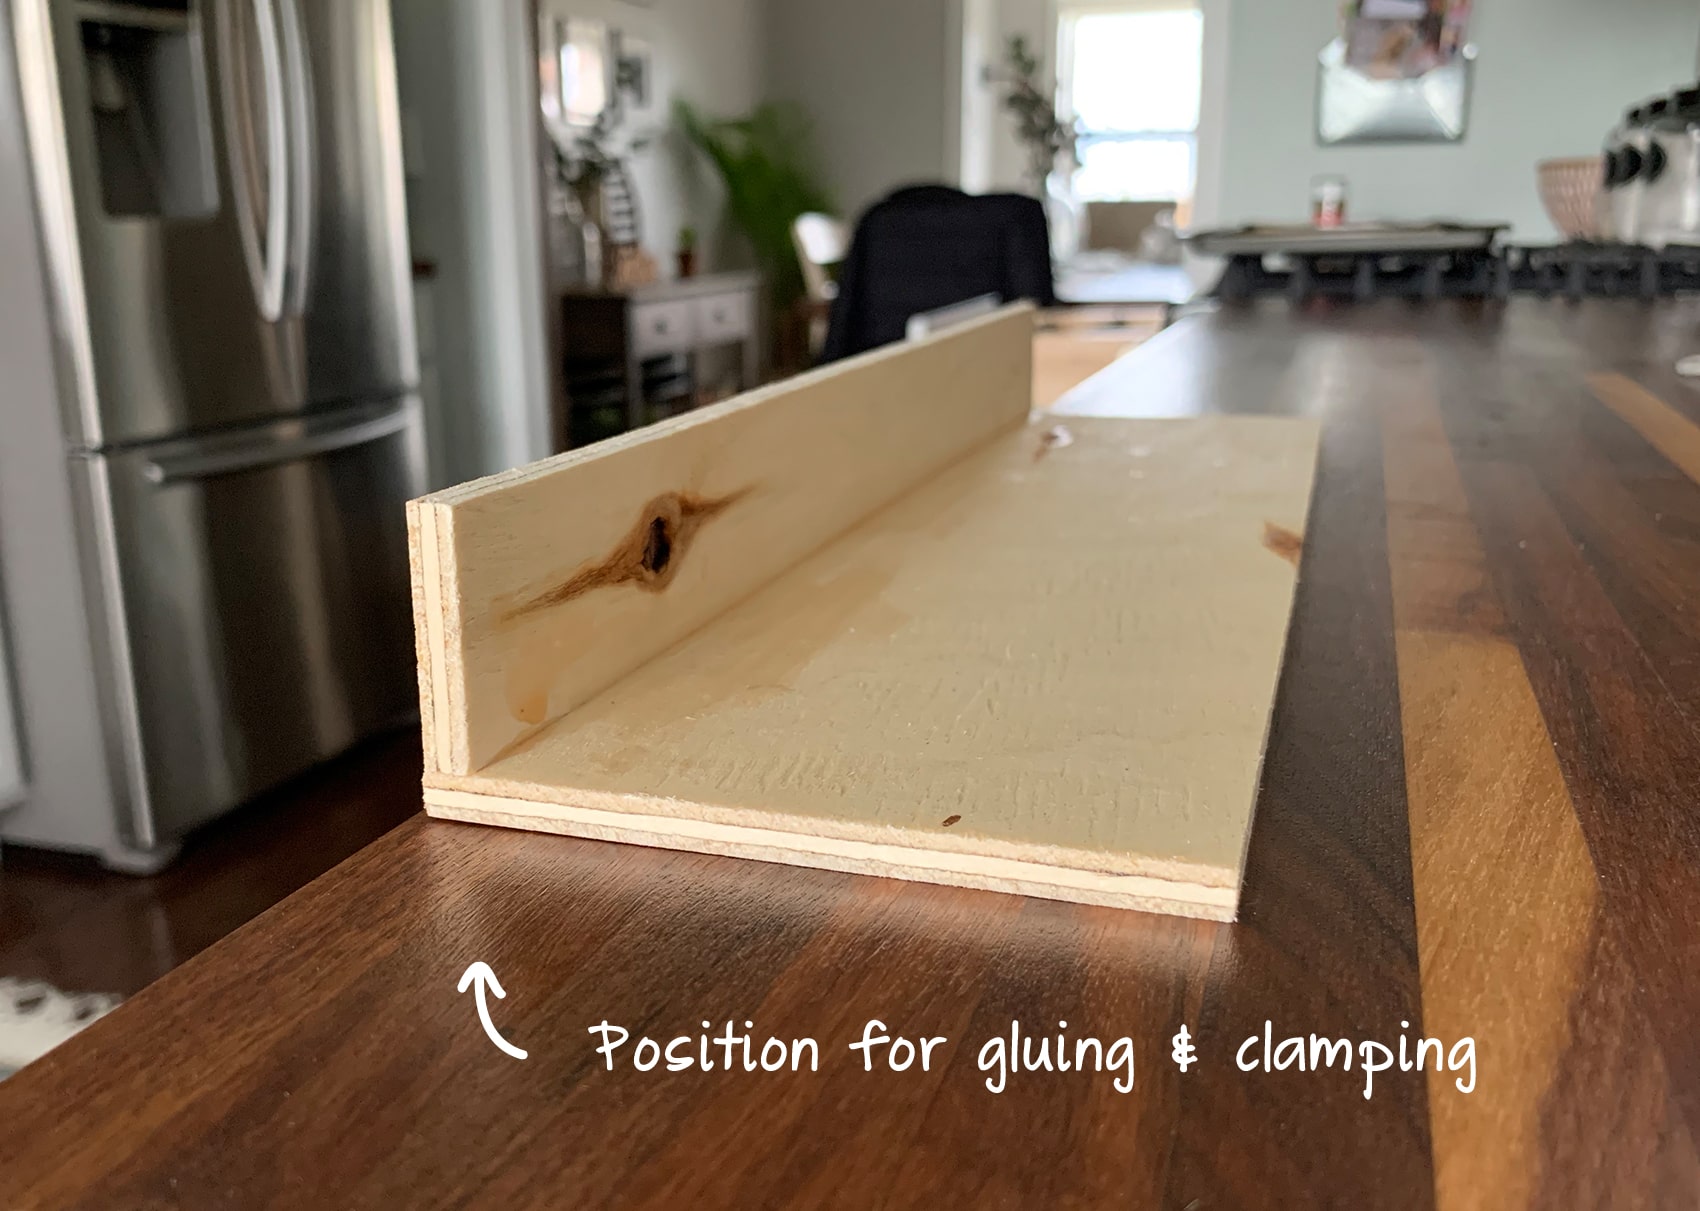
This is where the clamps will come in handy! Grab one of the 1 ½” pieces, and one of your 4 ¼” pieces. I found it best to lay the spice row down (the 4 ¼” piece) and then glue the riser (1 ½” piece) to the edge of the row.
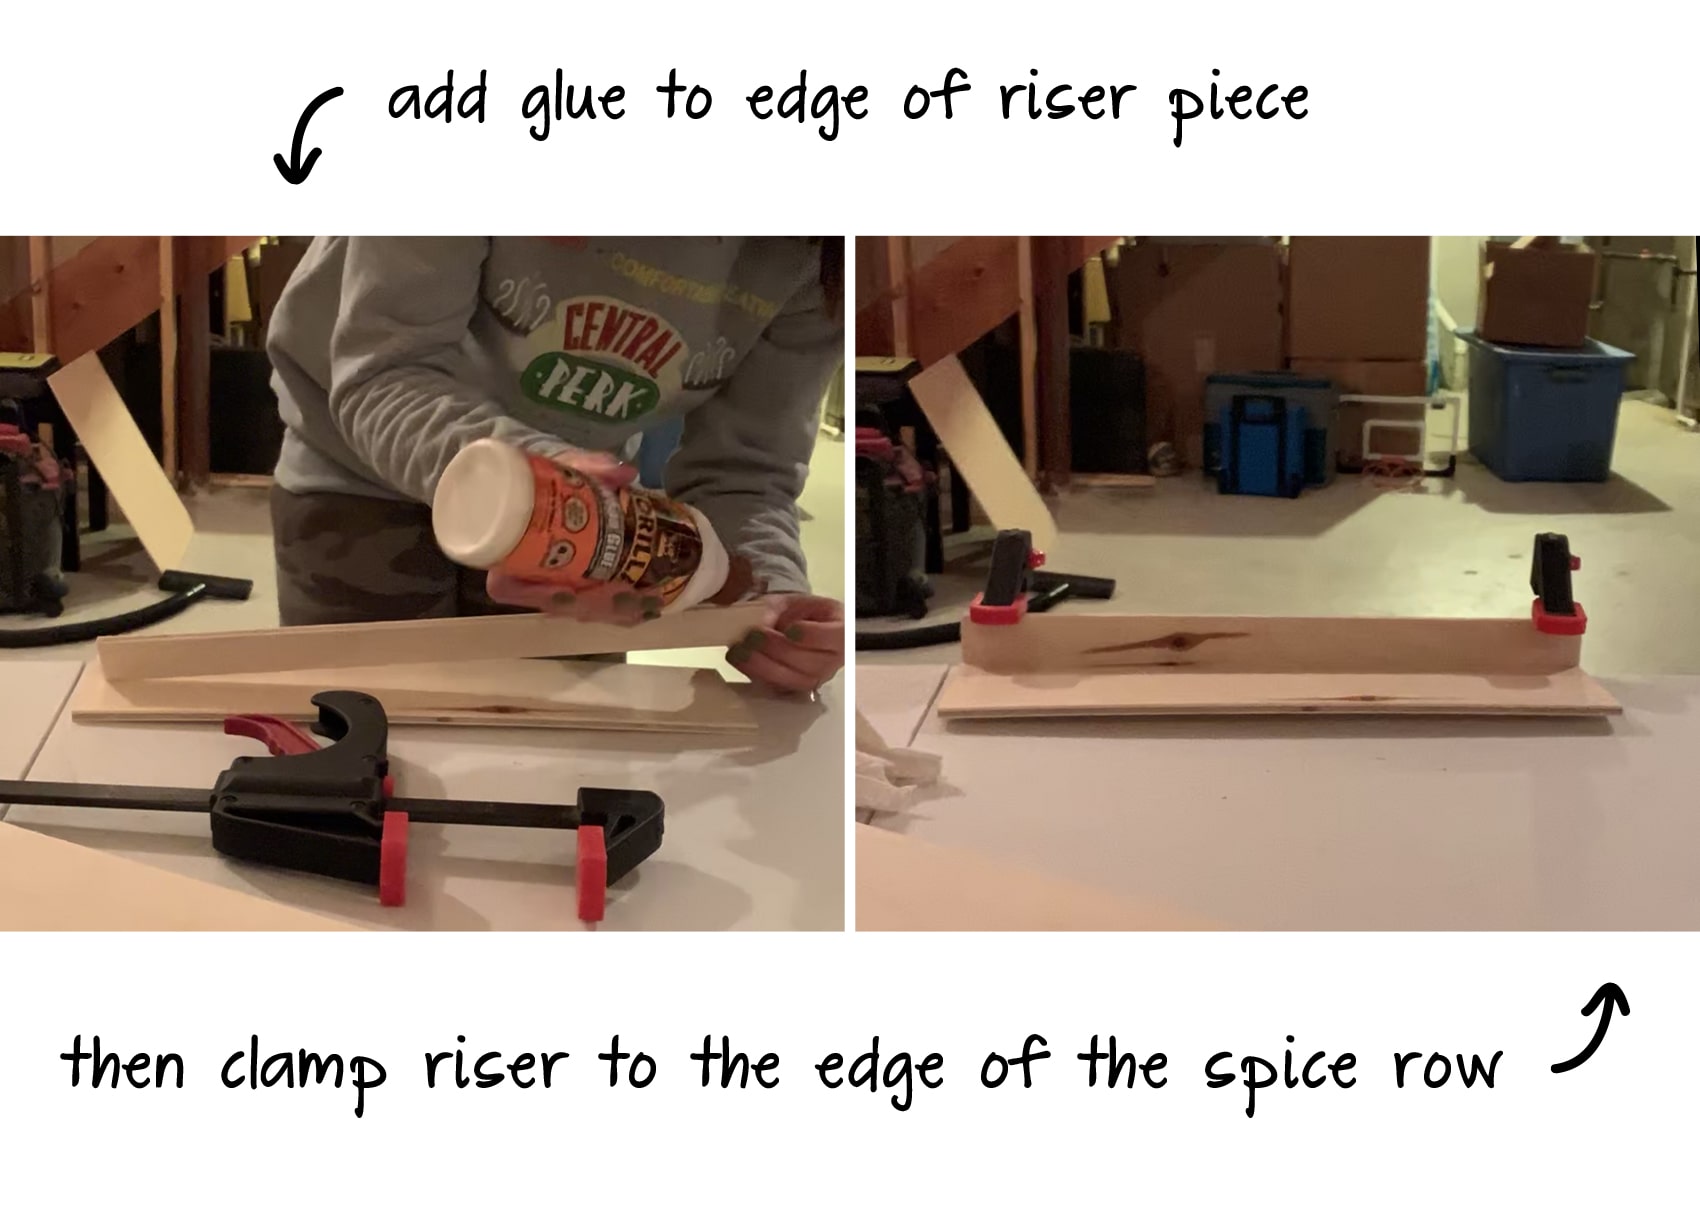
Add wood glue to the edge of the riser that is being attached to the spice row. Then, grab your clamps and clamp the riser down onto the spice row while the glue dries.
Tip – it’s helpful to use the clamps at the edge of a table, so you have additional support when clamping down.
Let the glue dry for 30-45 minutes, and then carefully add a few brad nails (or finishing nails) through the spice row, into the riser. I added 3 brad nails per row.
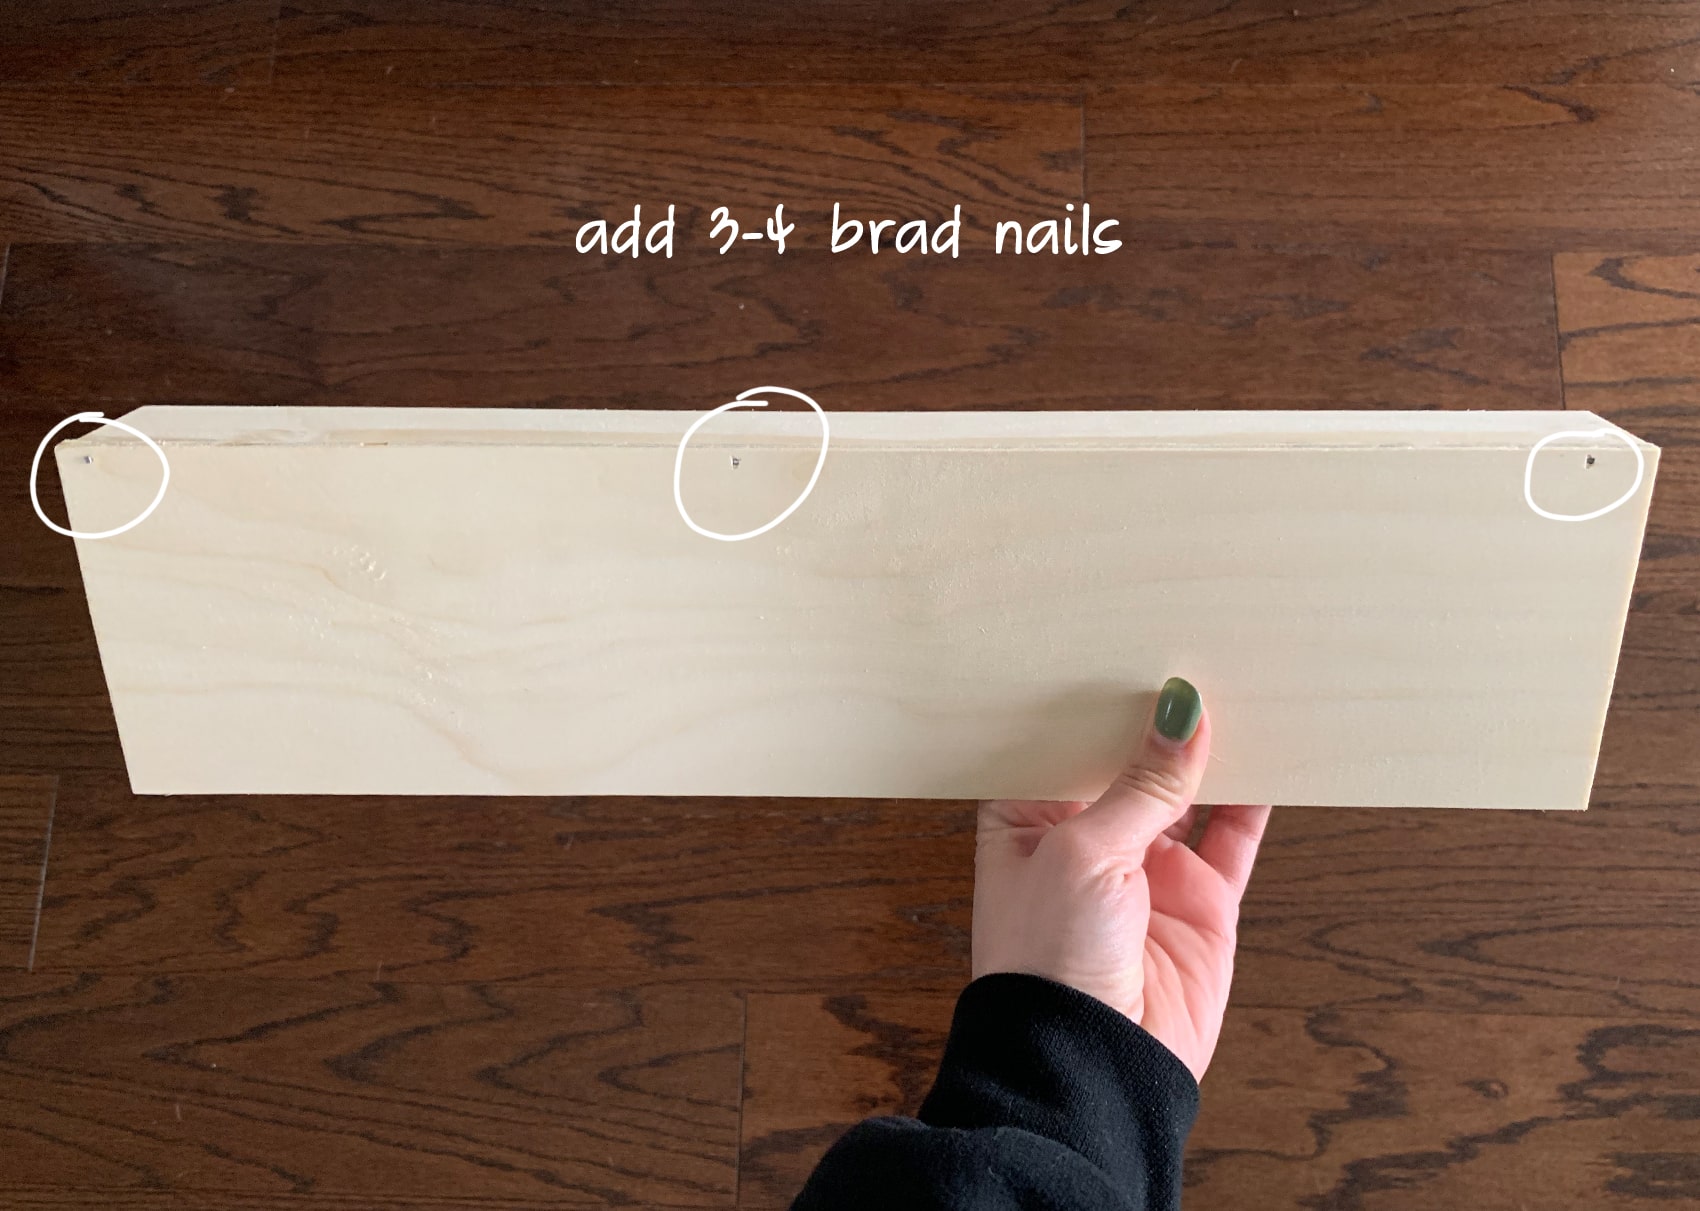
Repeat the above for each spice row you are creating.
STEP 4 – Add Spice Organizer To Your Drawer
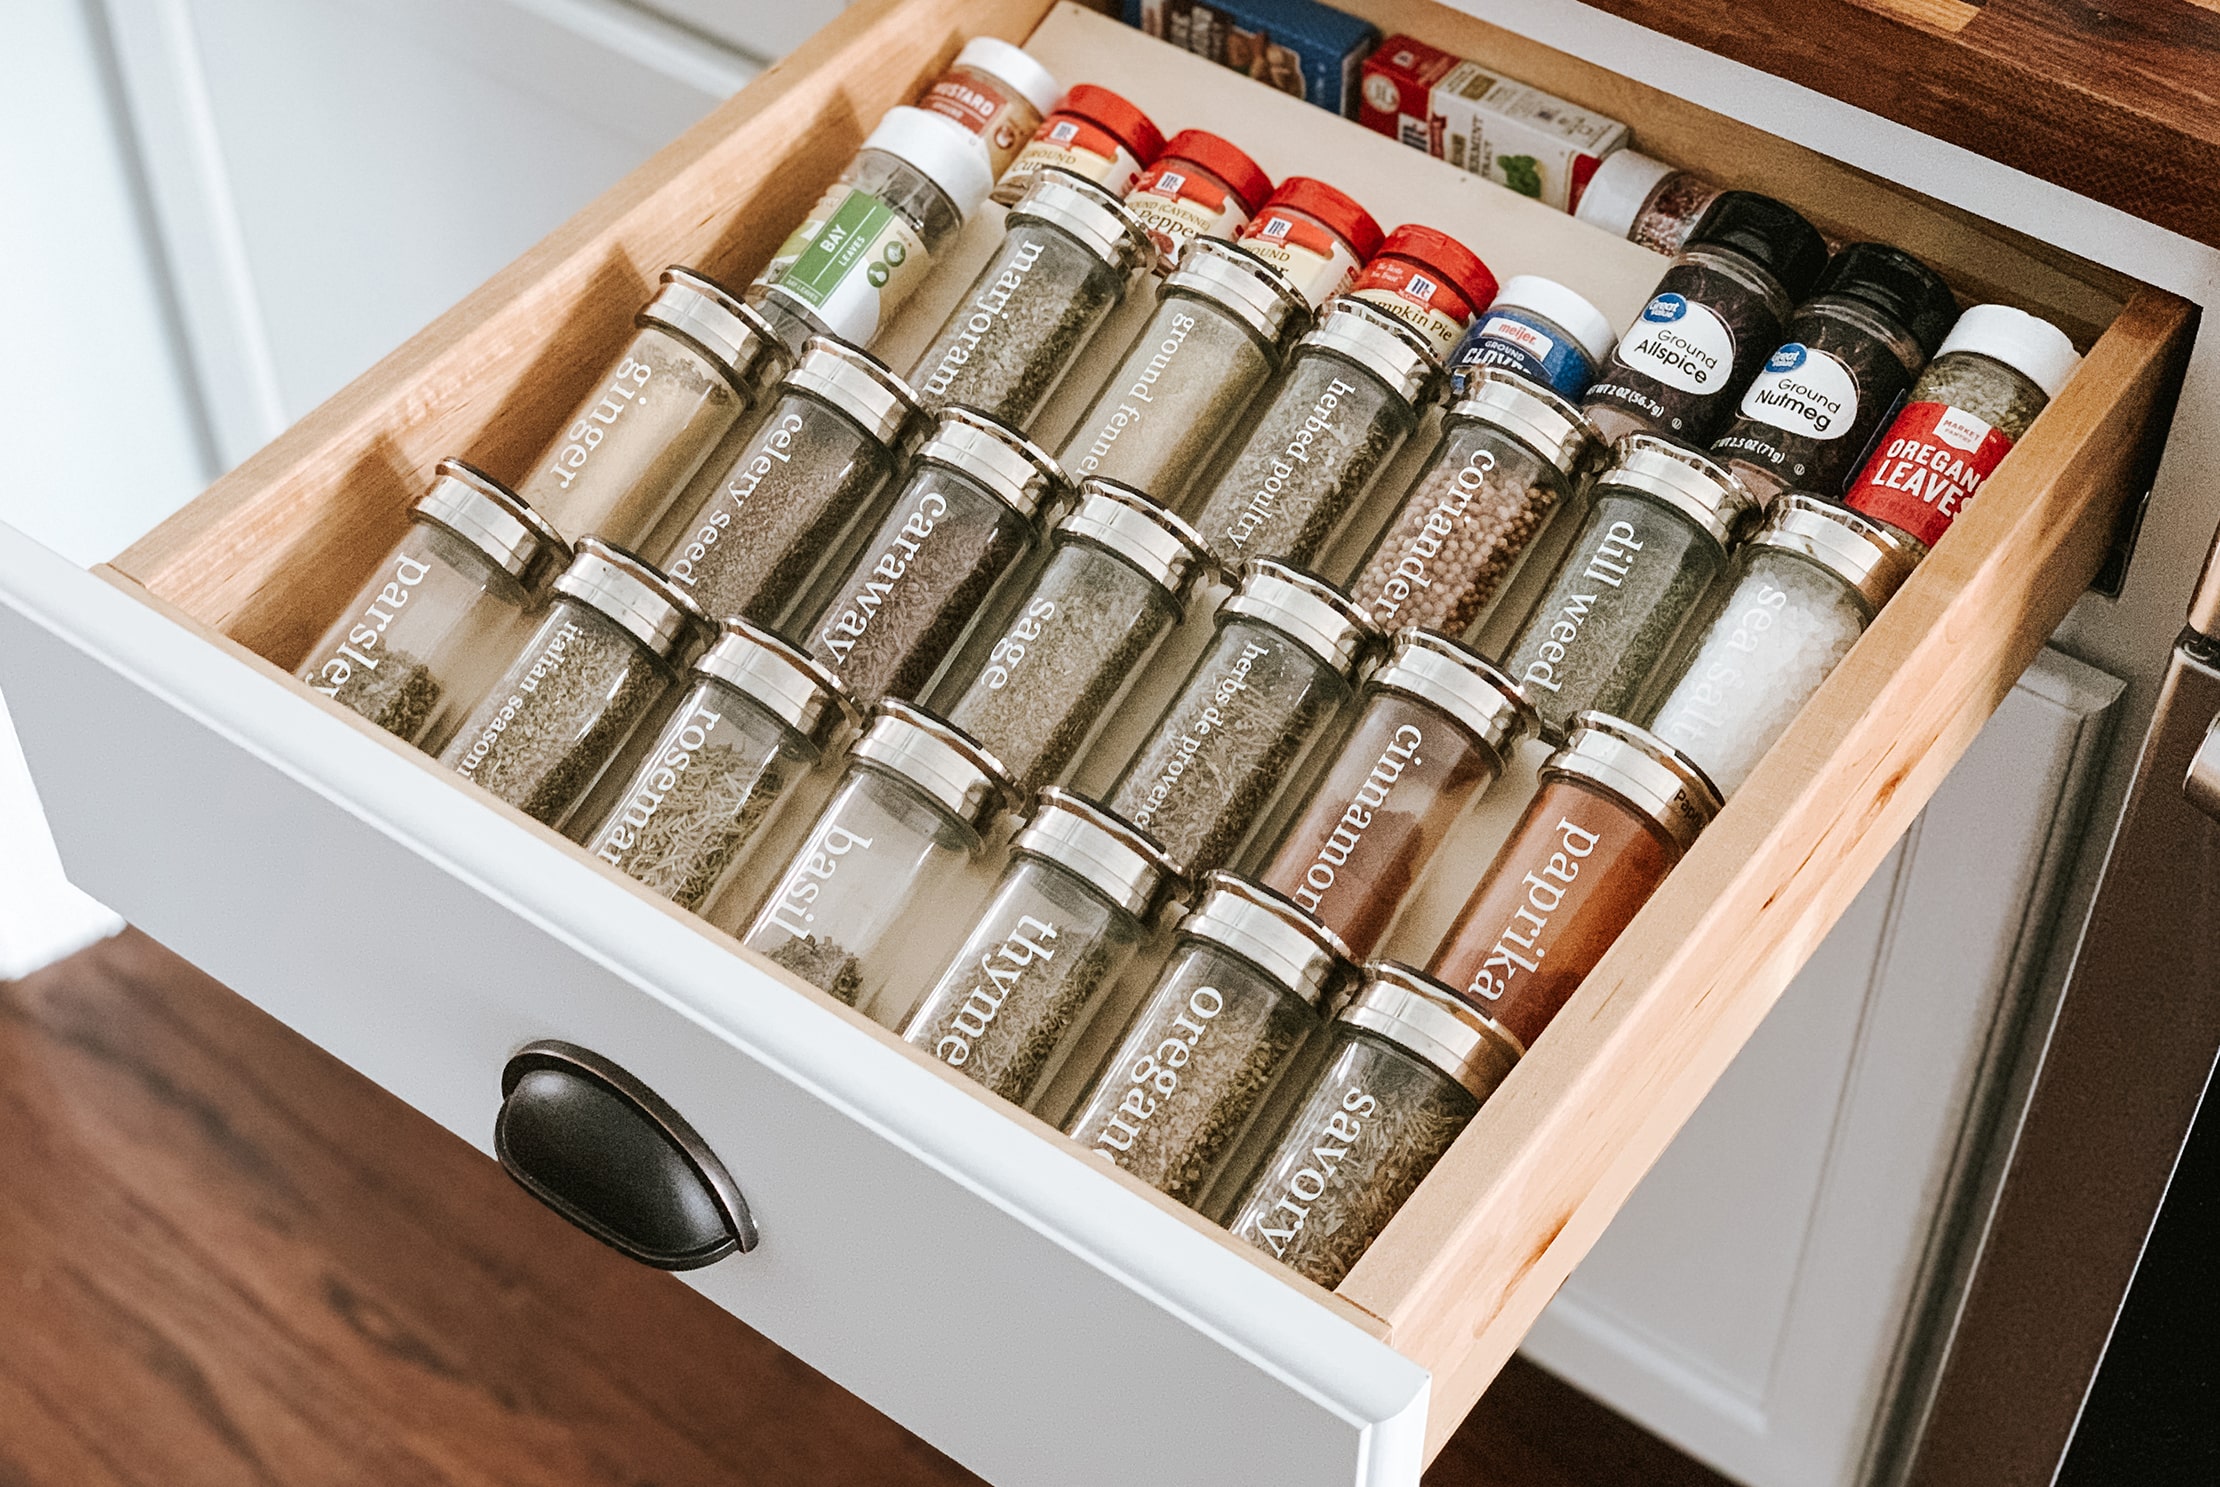
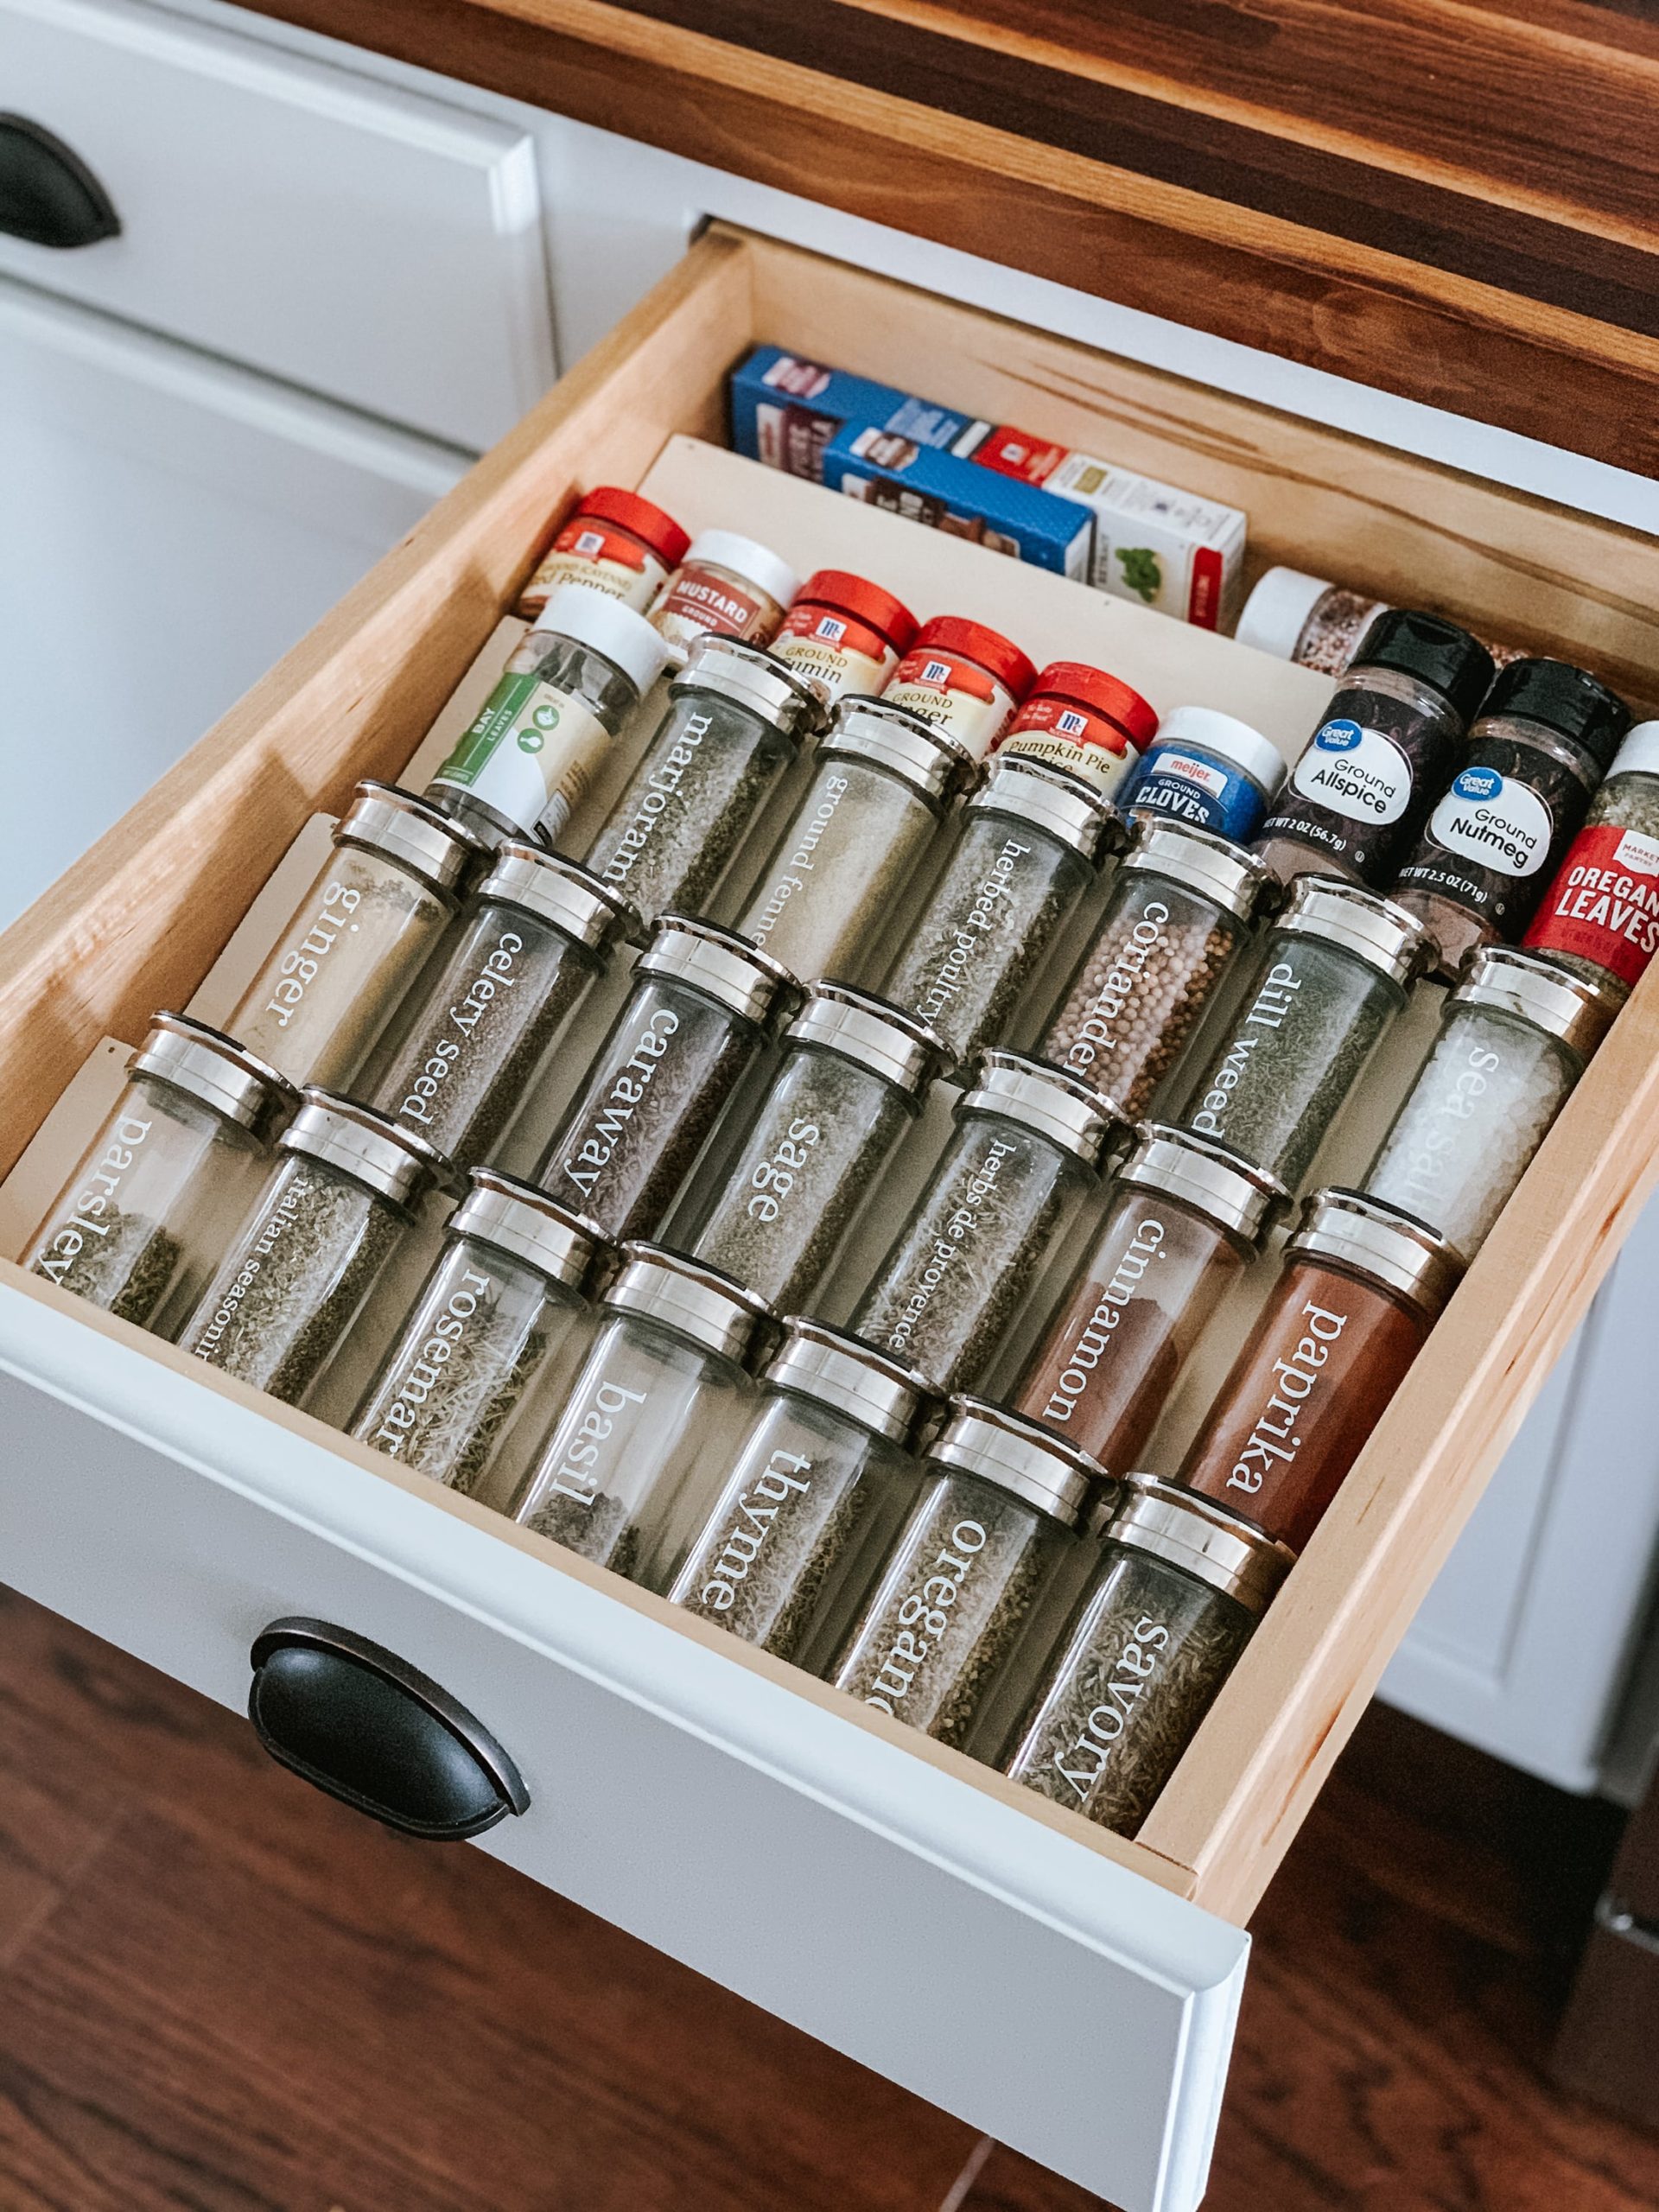
Once all the rows are built and the glue is dried, place them in your drawer. That’s it!
Quick and easy organizational projects like this are definitely one of my favorites! Now, onto organizing the rest of the drawers and cabinets in our kitchen 😉

Style It Up!
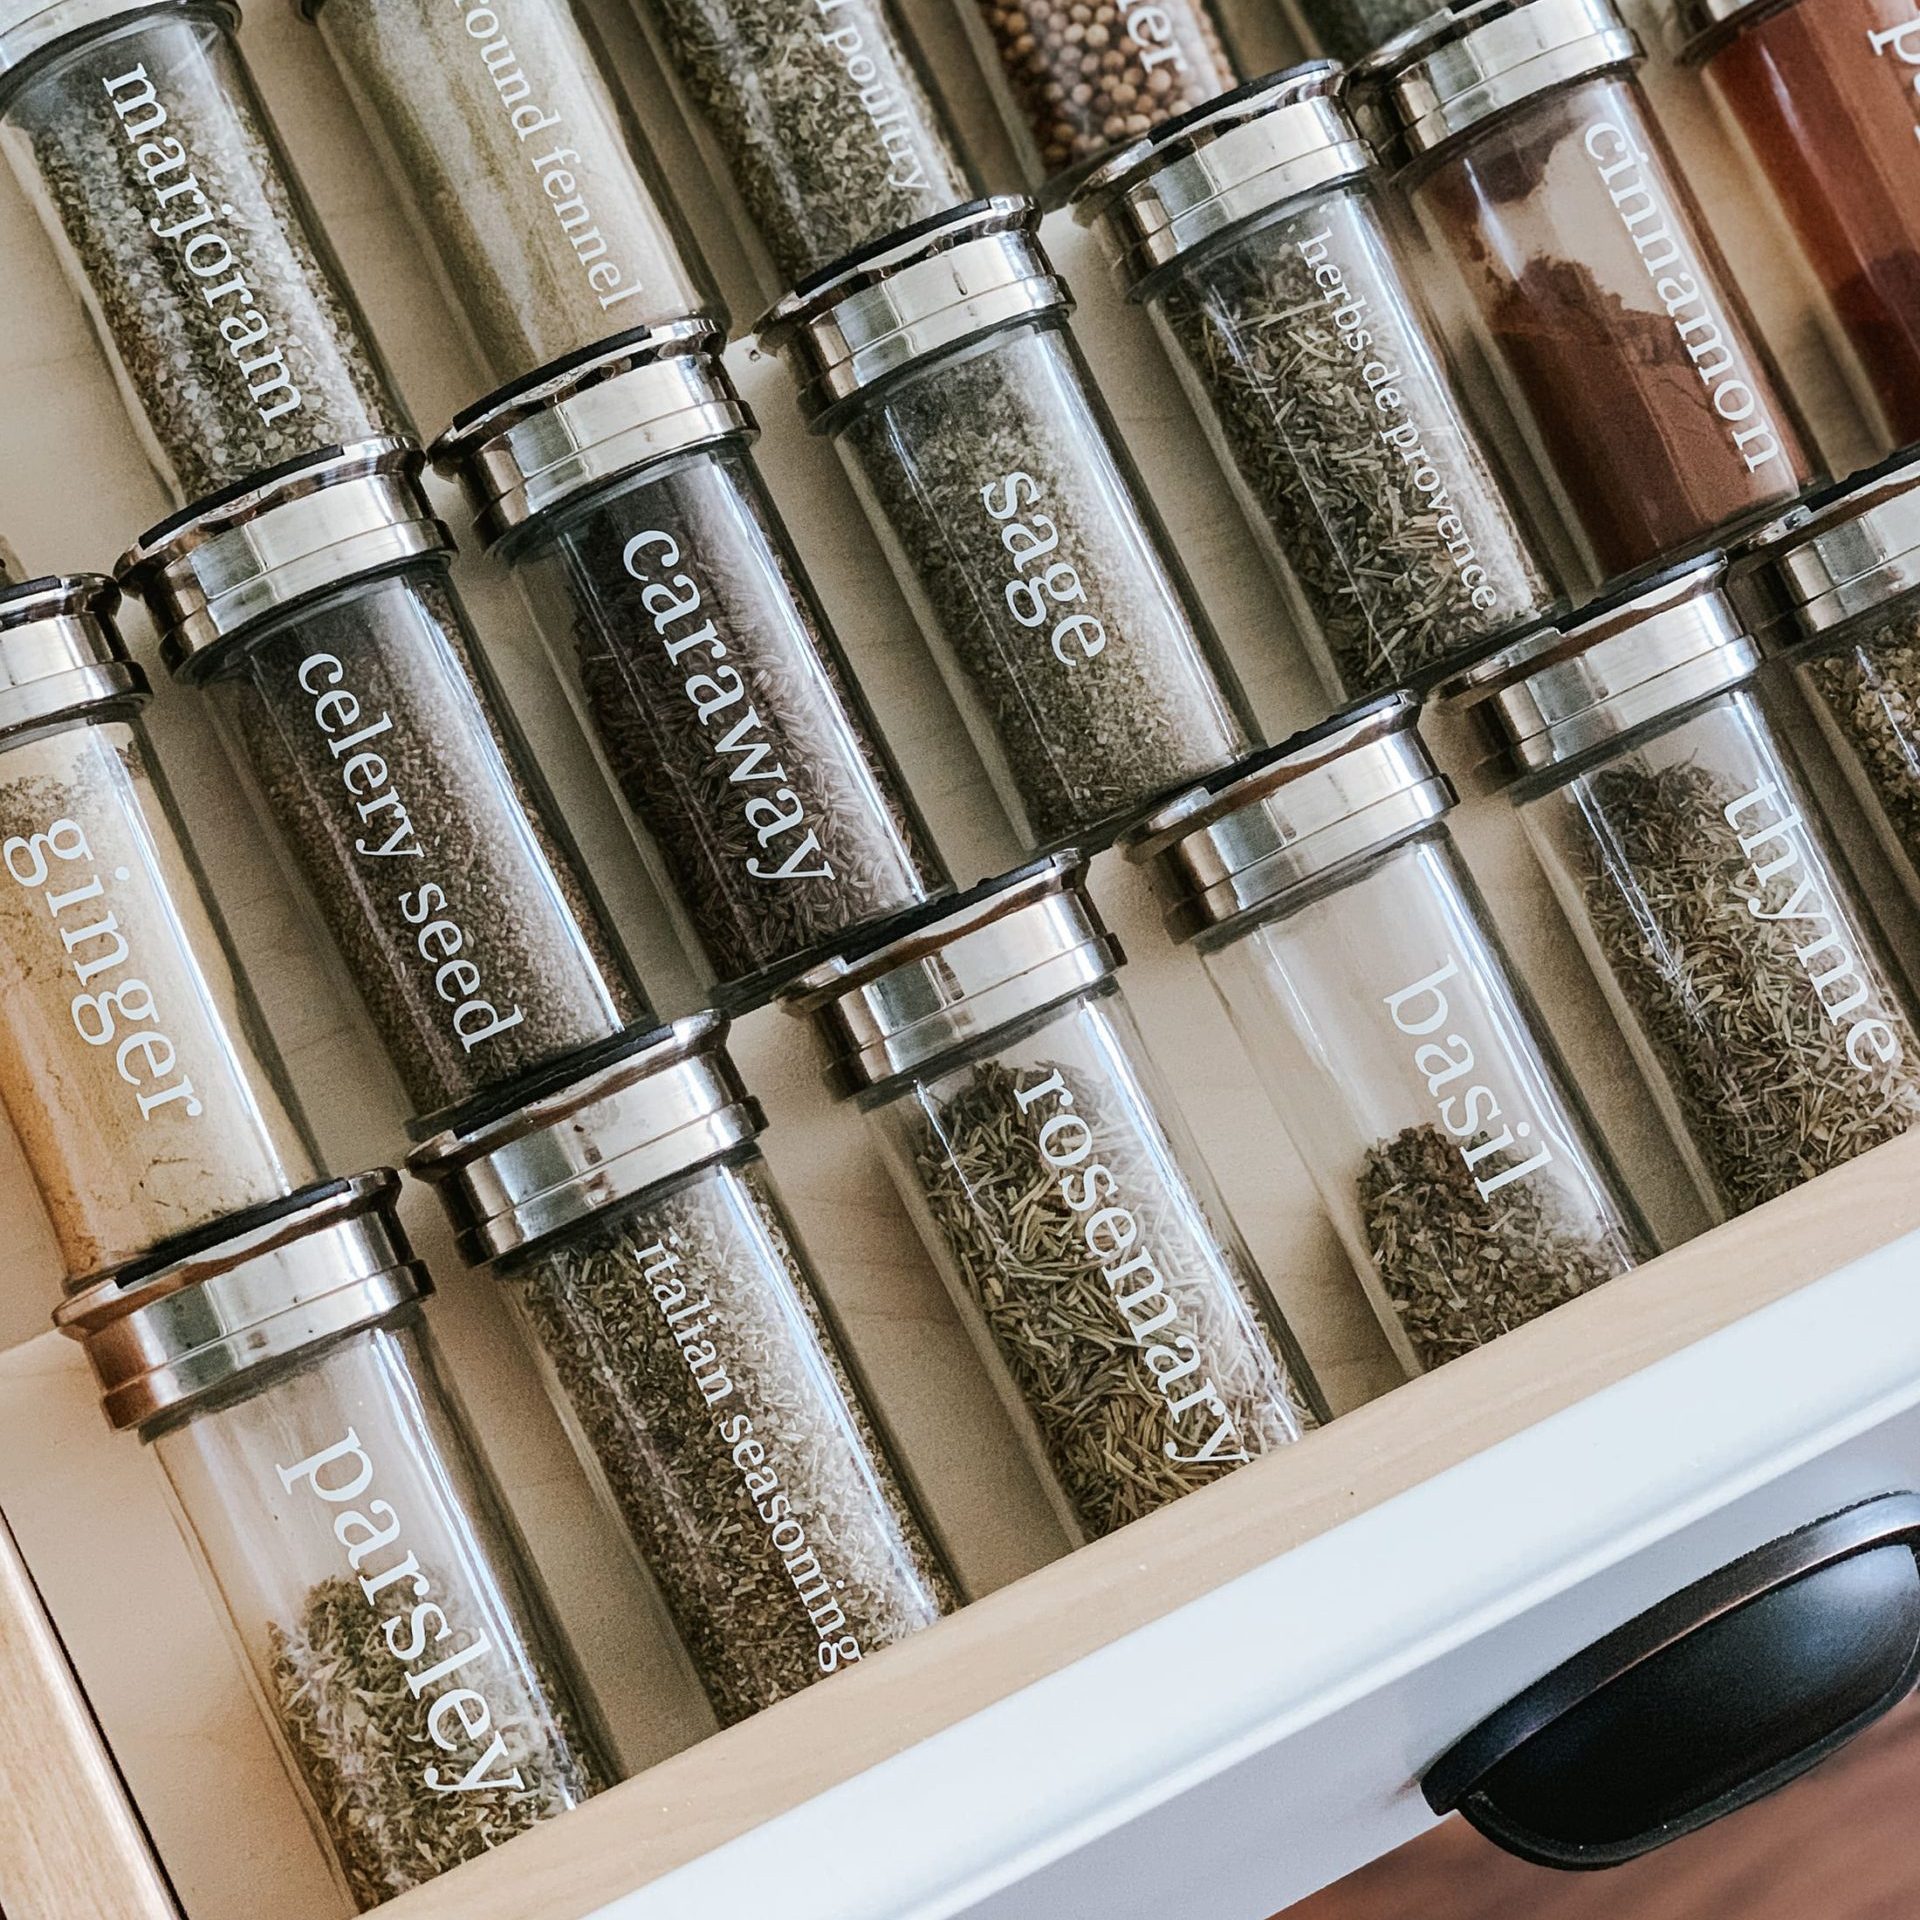
Even though my spice drawer was now organized, I still wanted to make it easier to find spices. So, I decided to add some simple name labels to the jars using my Circut Explore Air 2. I cut them out on some white vinyl I had.
Free Spice Jar Labels
Since I already have all the labels created, I thought why not share the file with you all. Who doesn’t love a free SVG file! 😉
I created quite a few more labels than you see in my drawer (as you can see above, I need to order some new jars for those store-bought ones!). You can download the SVG file to cut or print out these labels at home on your own Cricut or Silhouette Machine!
If you decide to tackle this DIY spice drawer organizer or use these labels, we’d love to see how they turn out! Be sure to follow us on Instagram and tag us!


