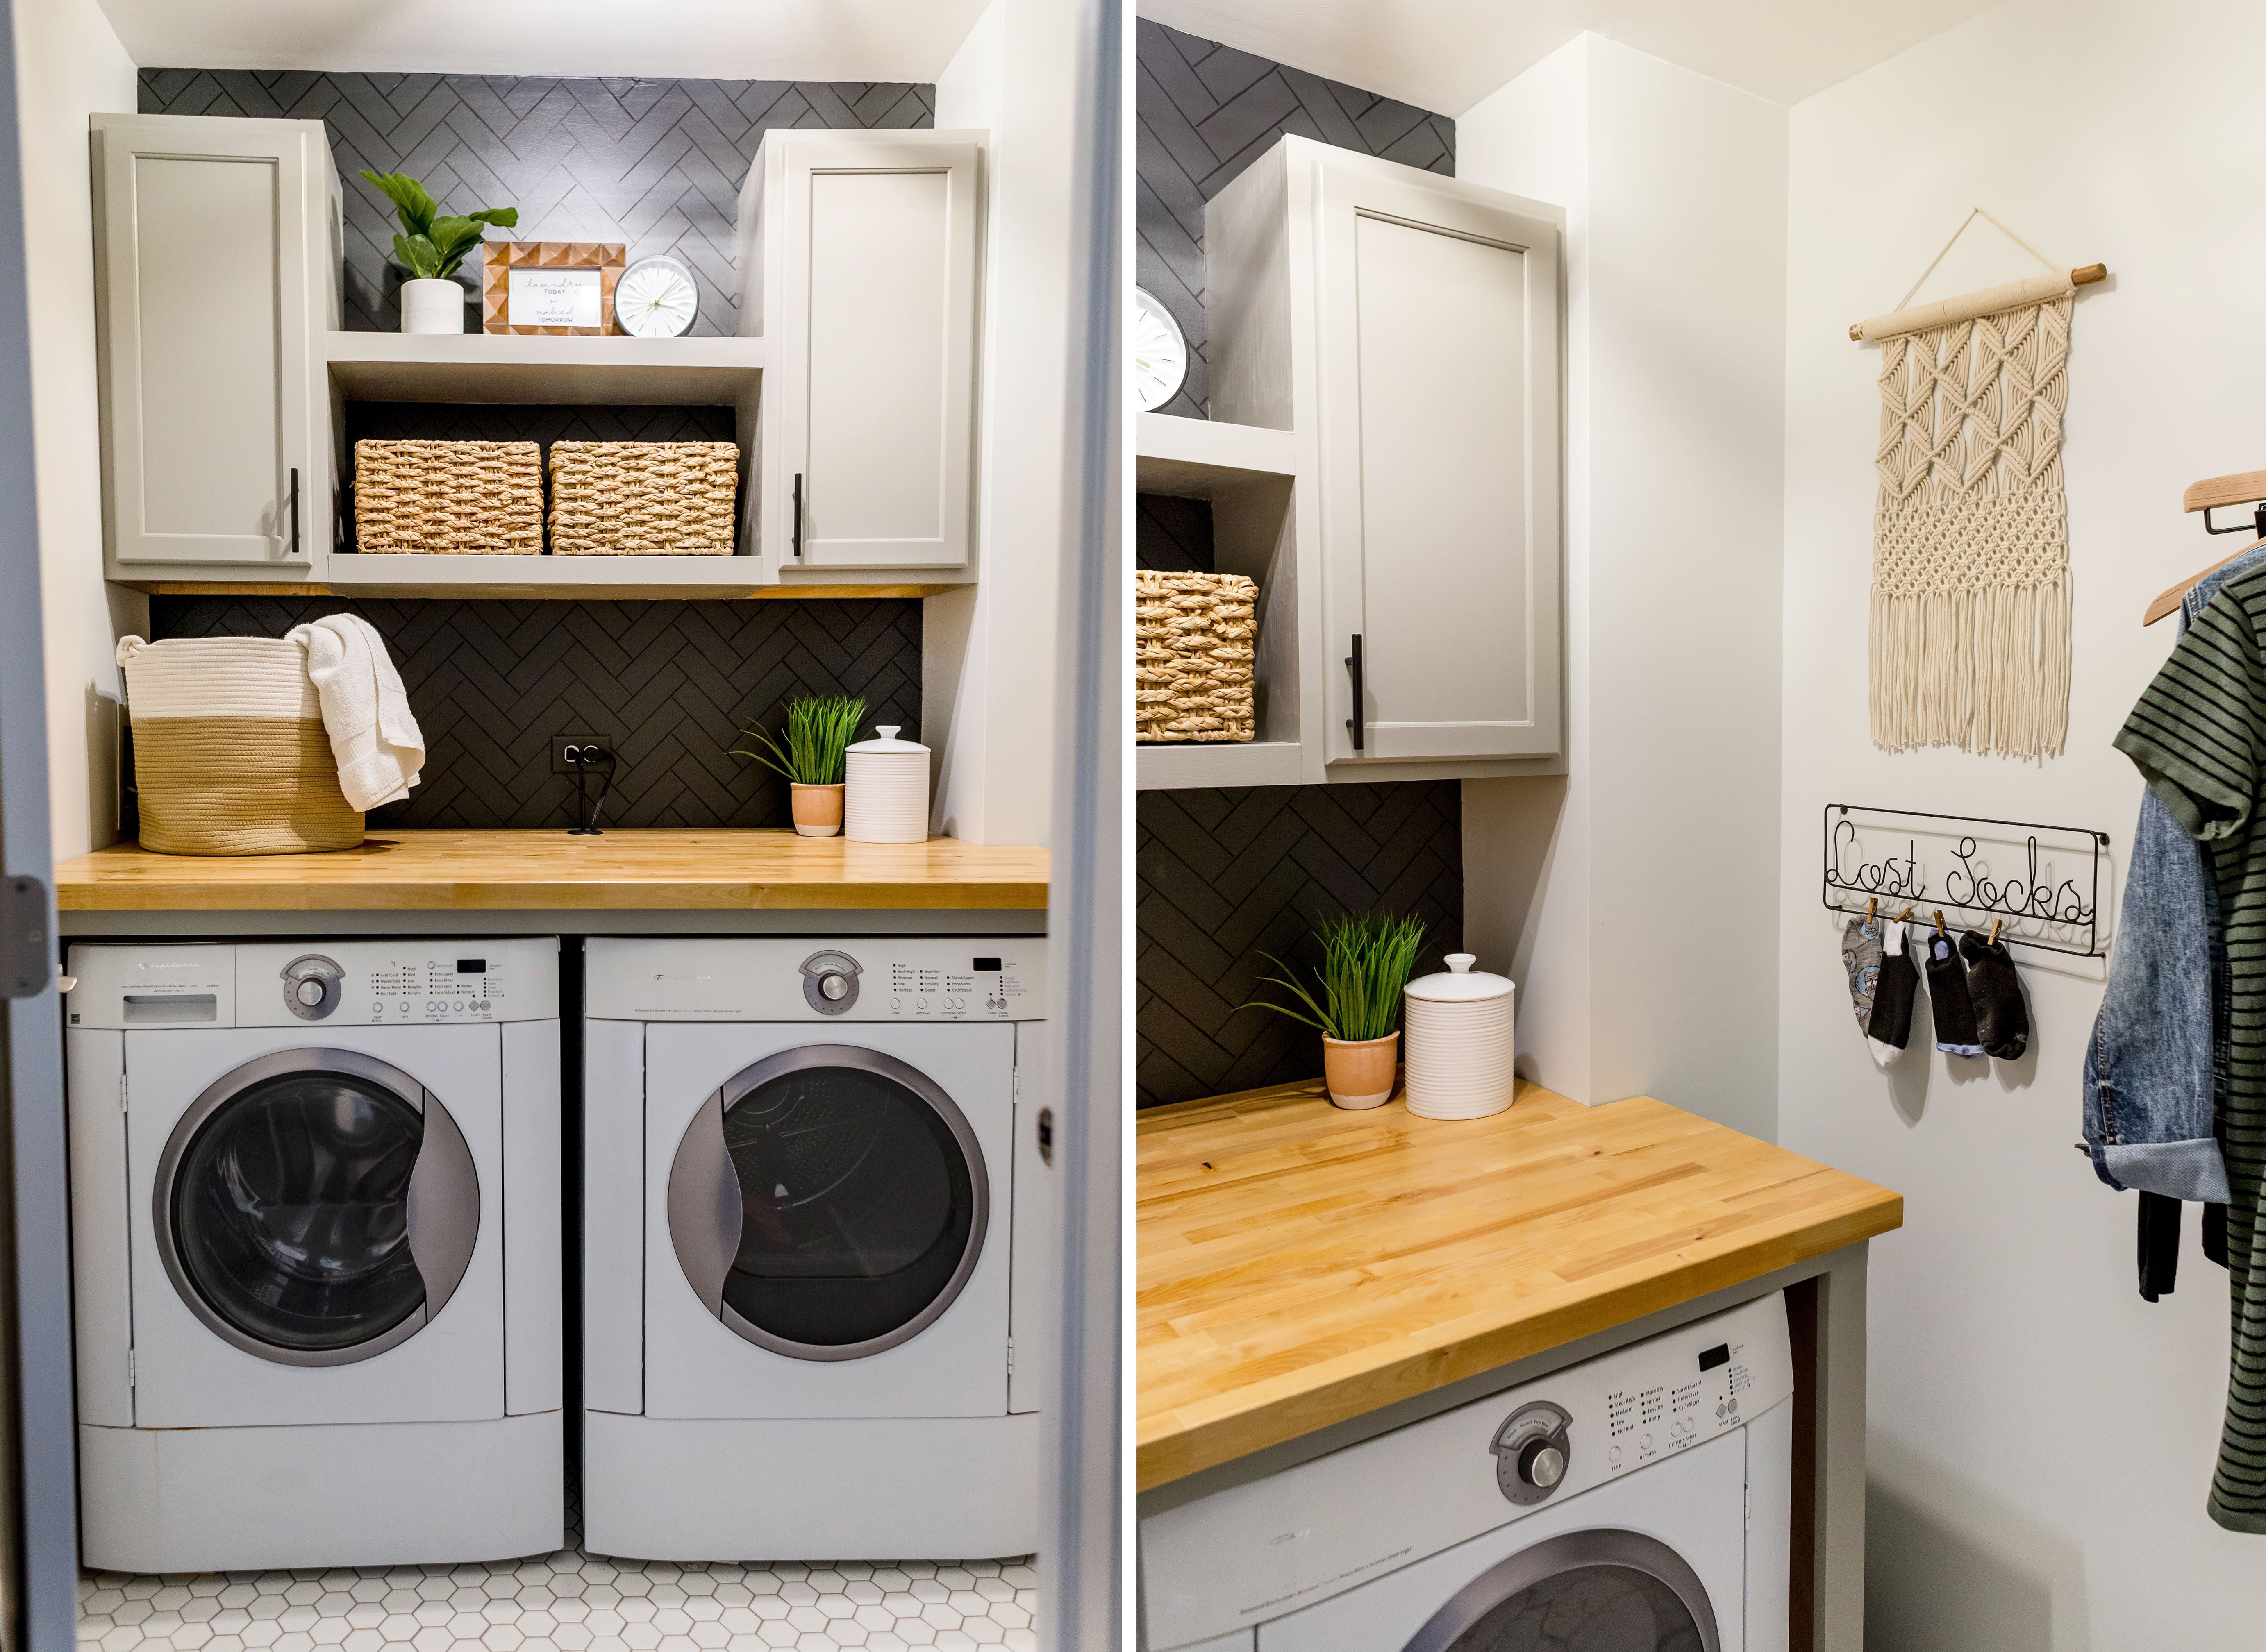
Here it is!!! The big reveal of my laundry room makeover! I have to say… this is probably my favorite project to date! (As I say that after every finished project, LOL!)
This room is so functional now compared to before, it blows my mind. We had a small space to work with and I wanted to make it as functional as possible! I’d like to say we did JUST THAT! 😀
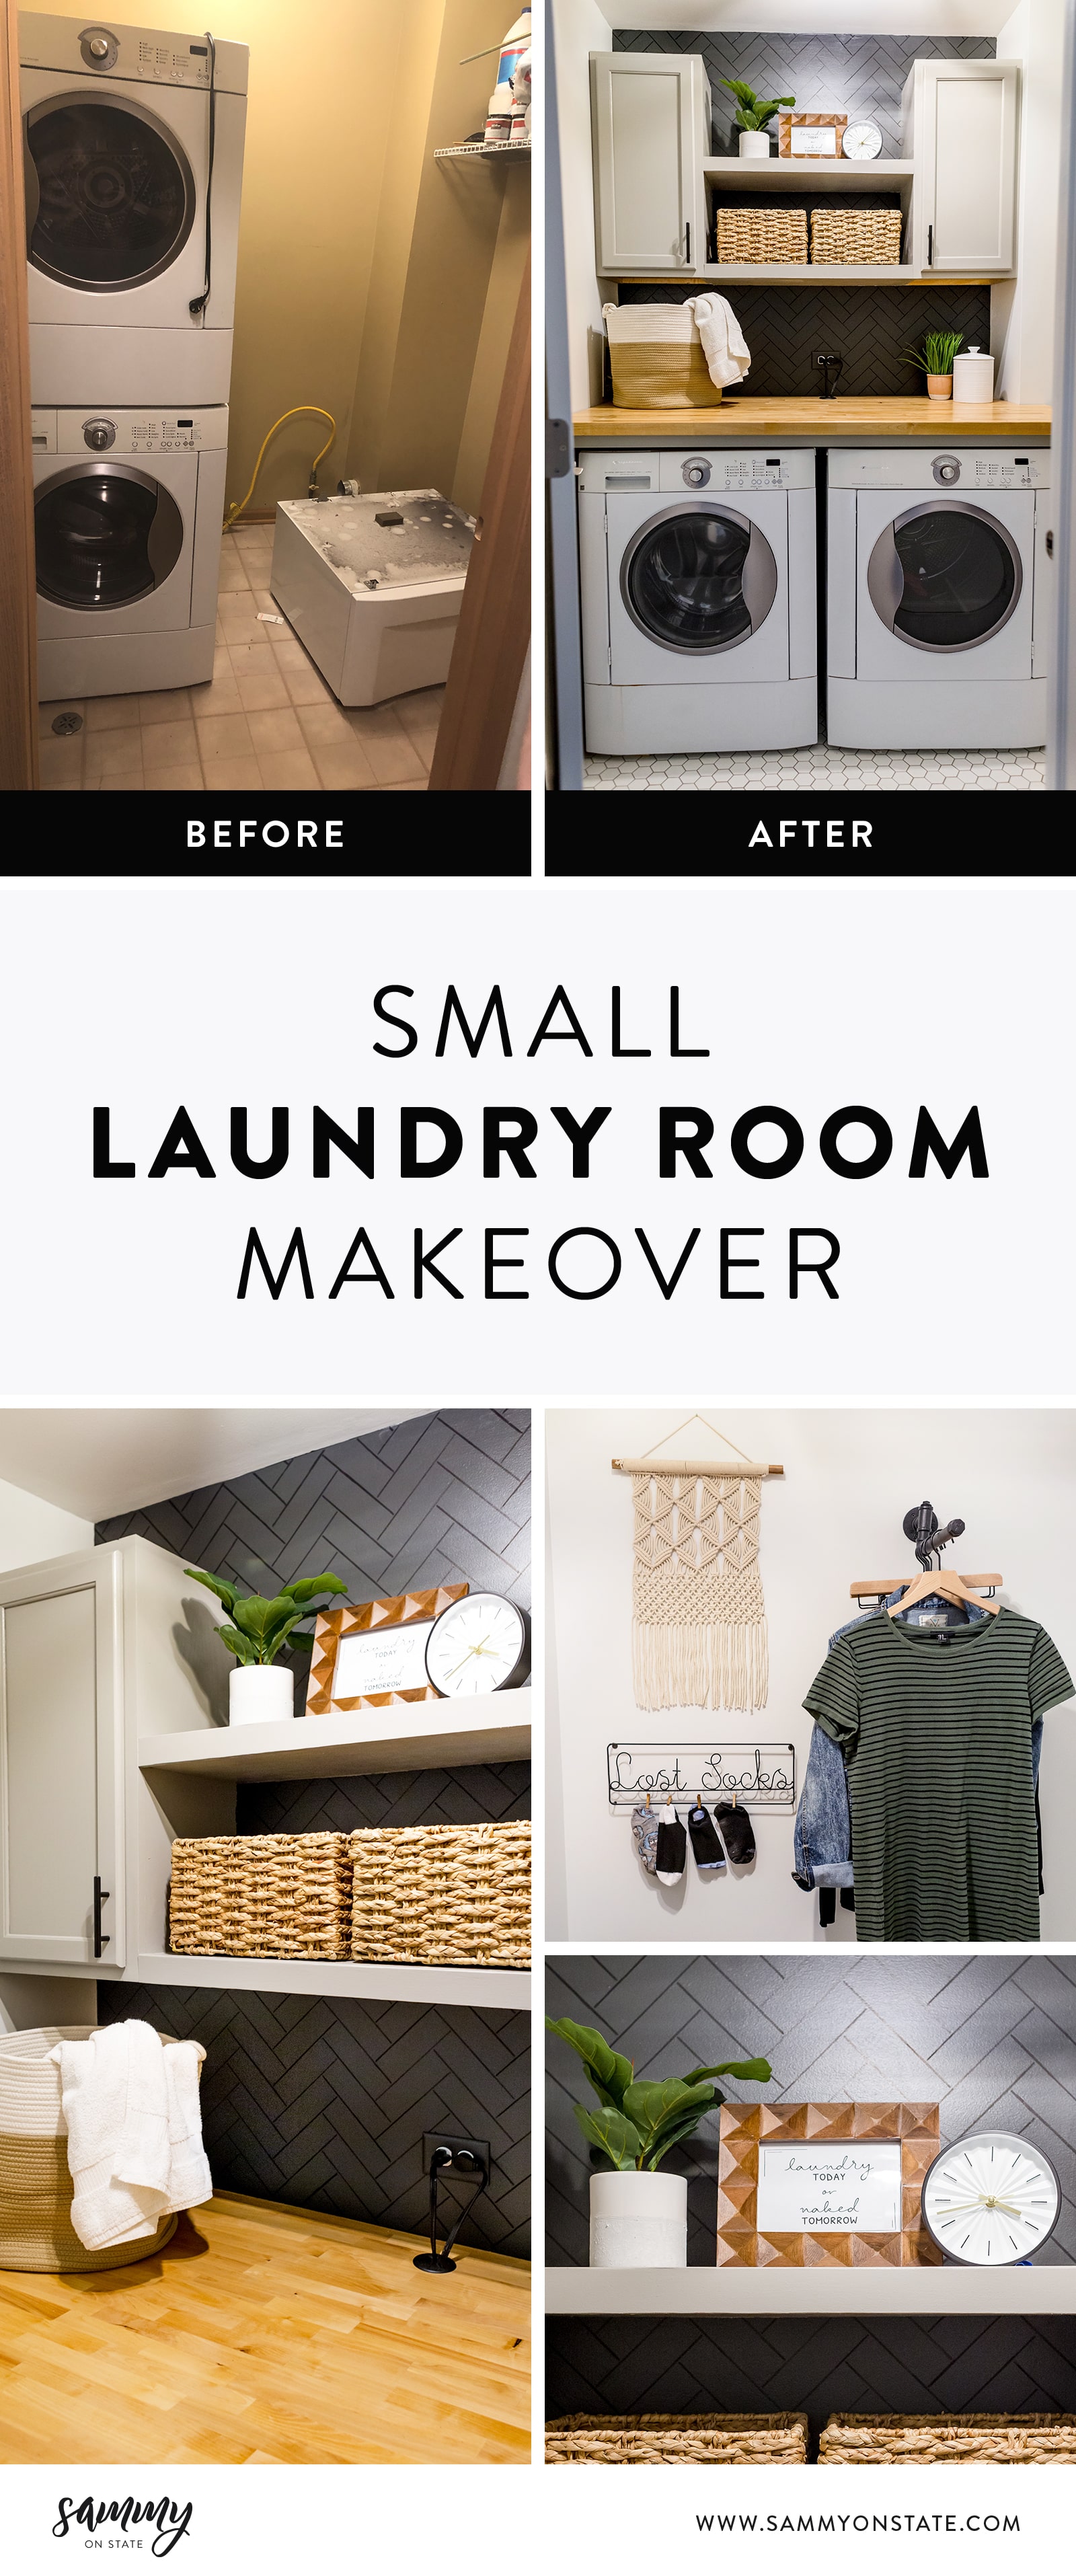
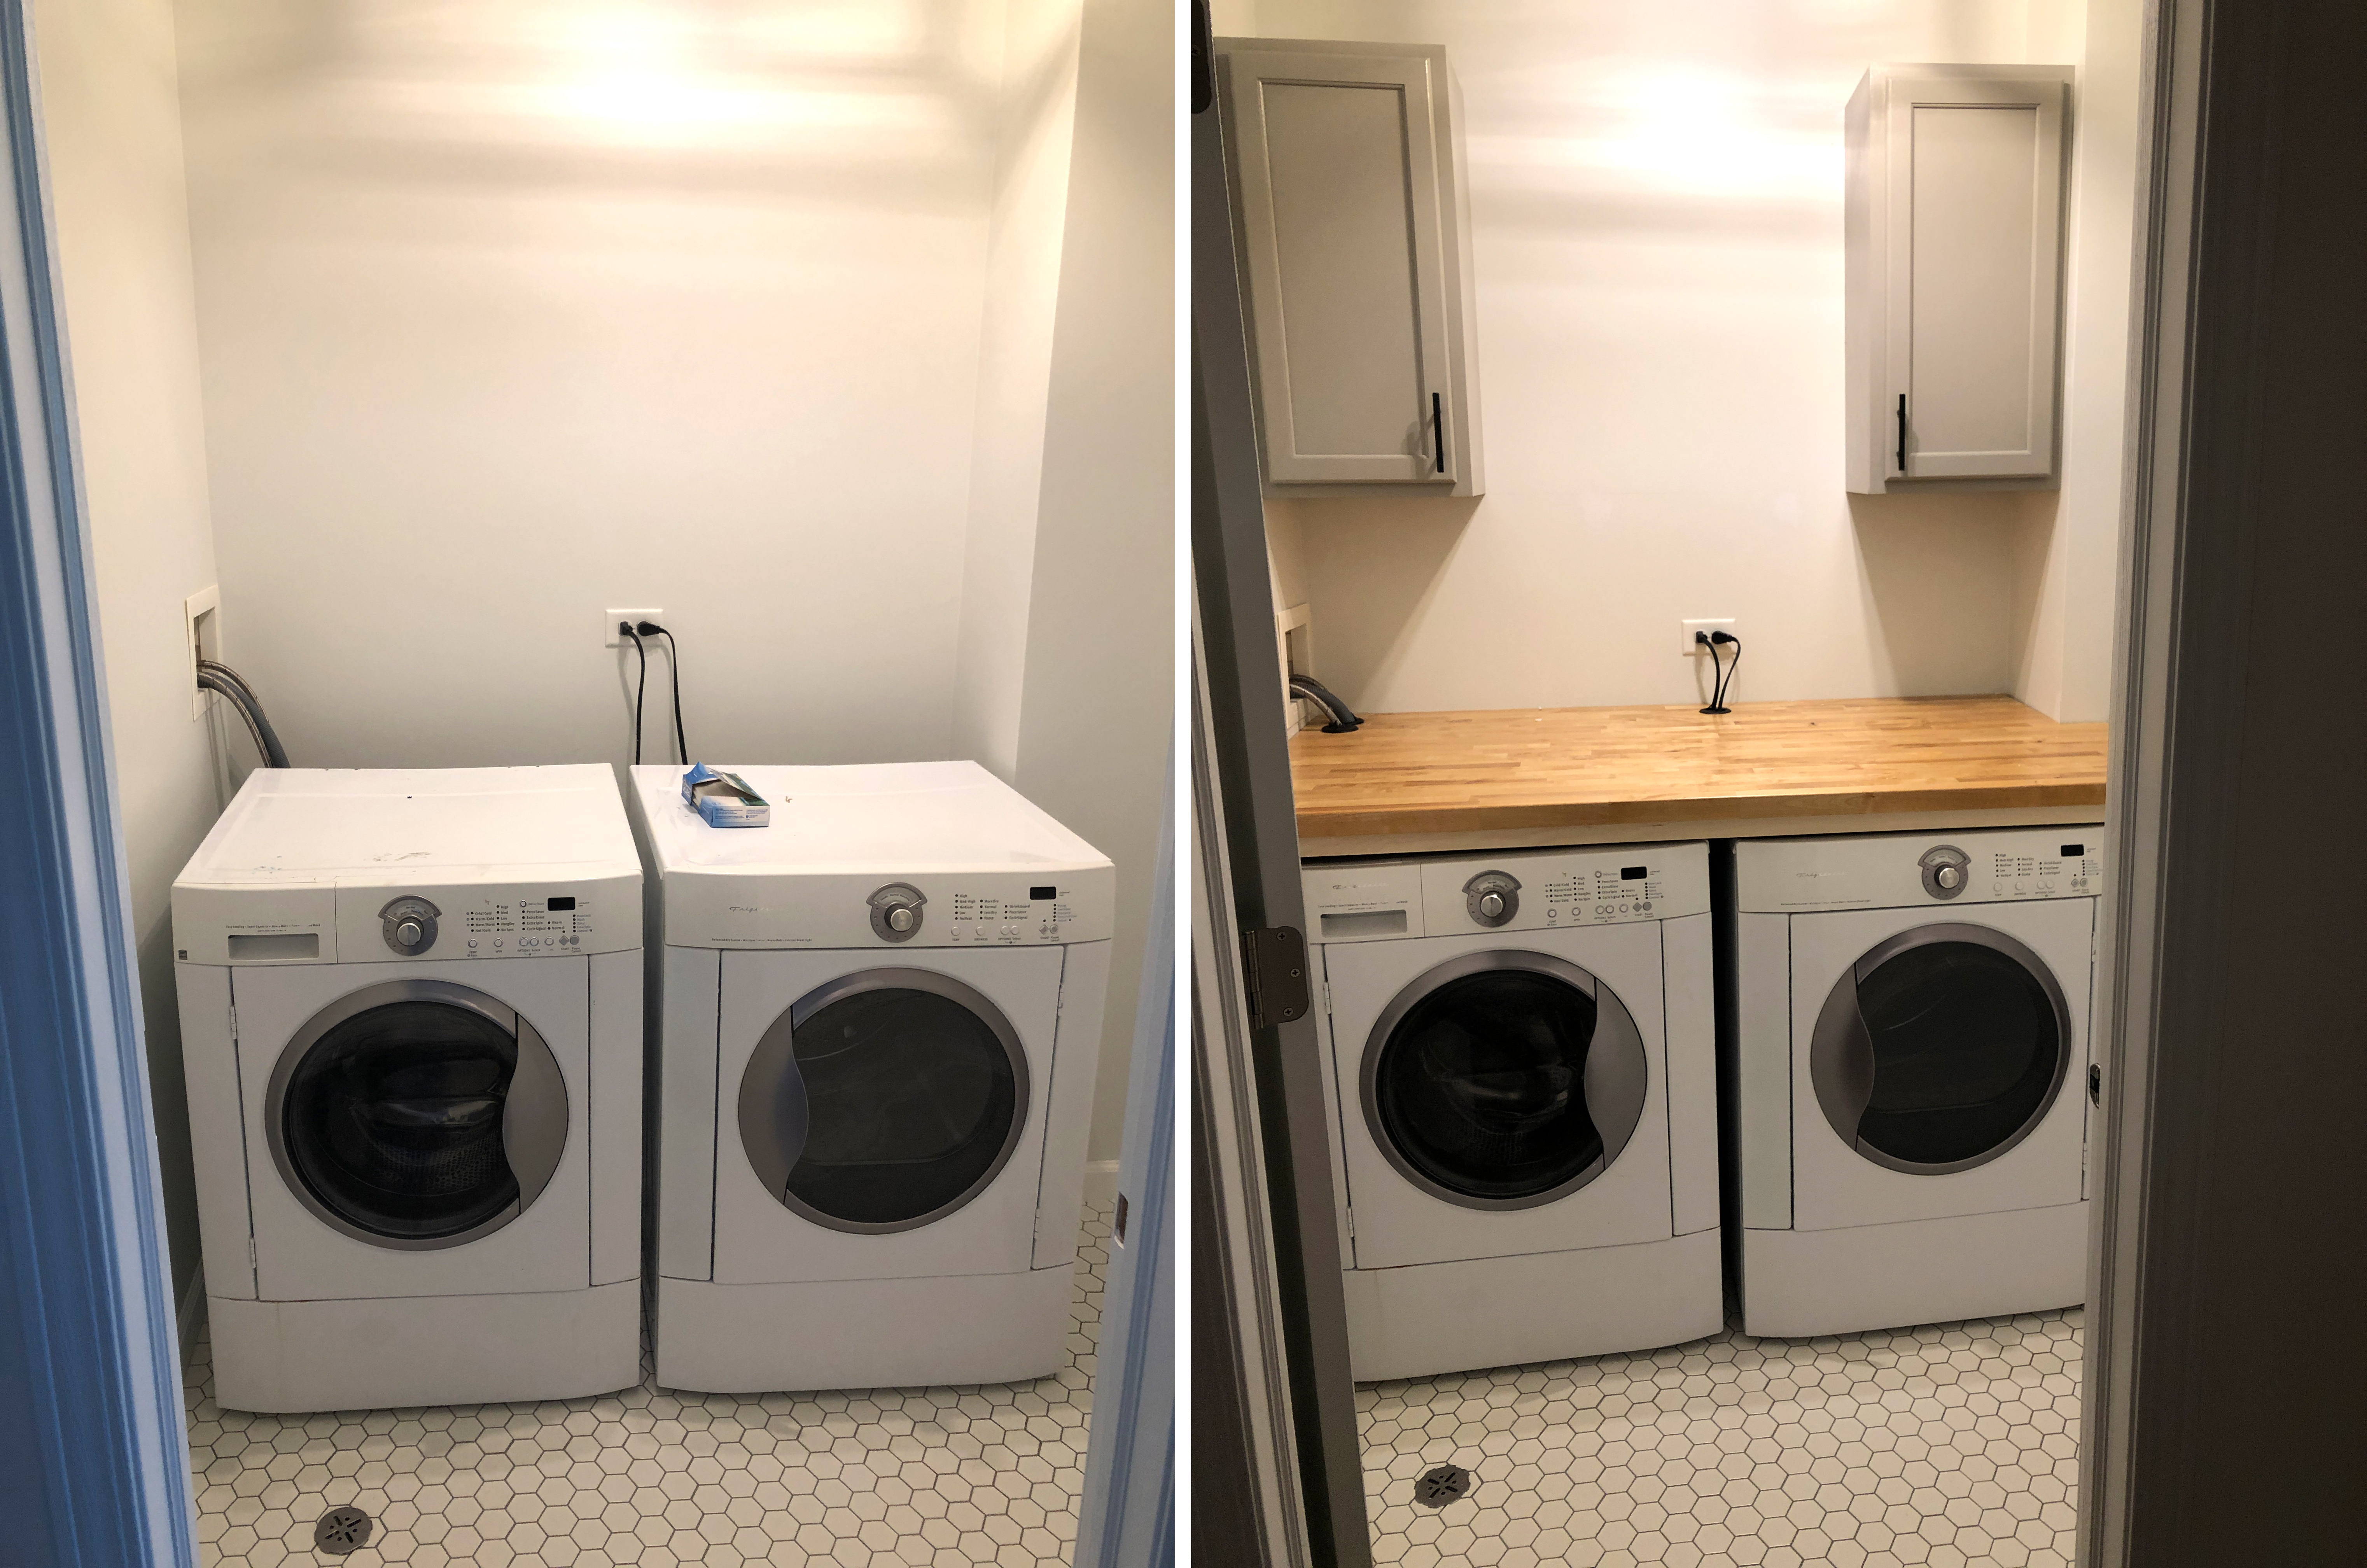
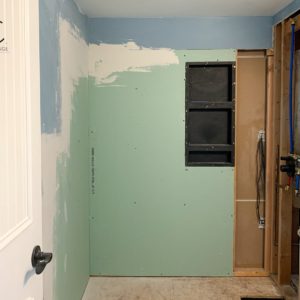
BEFORE
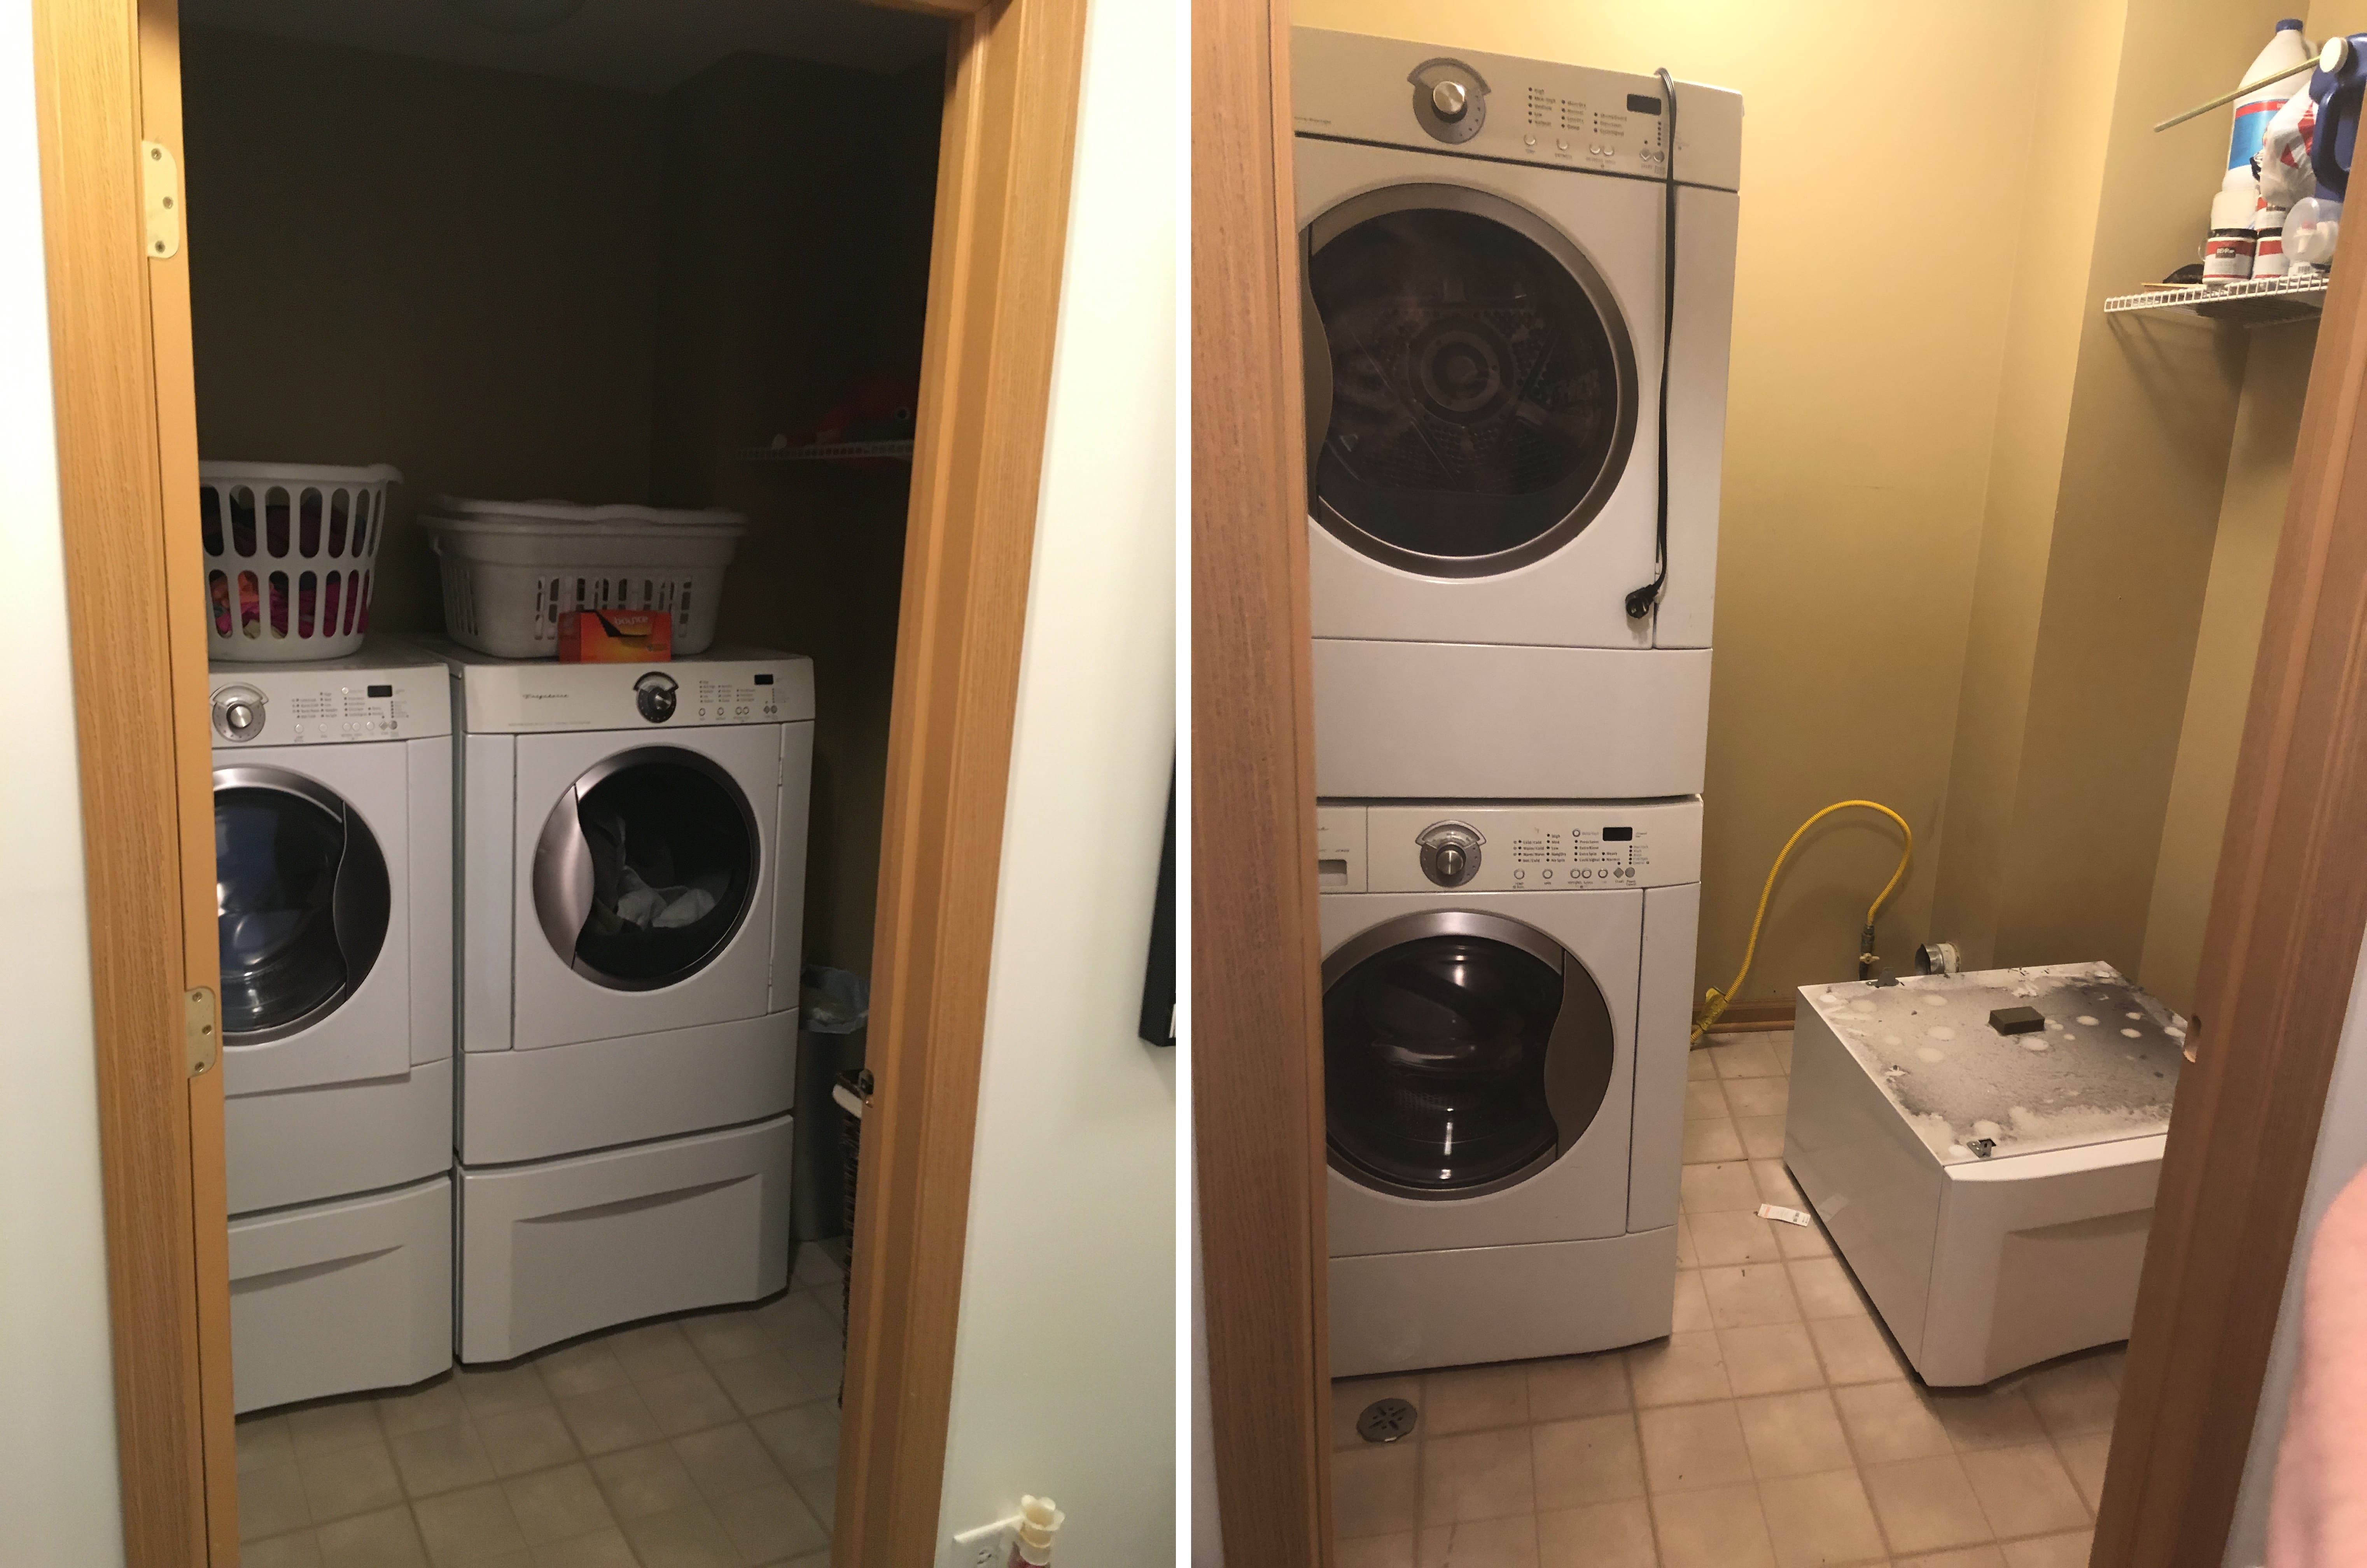
Here is the lovely before shot of the room. This was clearly designed in the early 2000s. LOL! Poop wall colors and nice brown/beige linoleum flooring. Hey, it was “in” at the time, I get it. But sorry, now its definitely OUT. Time to go, BUH BYE.
OUR SMALL LAUNDRY ROOM MAKEOVER
This post may contain affiliate links where we earn a small commission on your purchases at no additional cost to you.
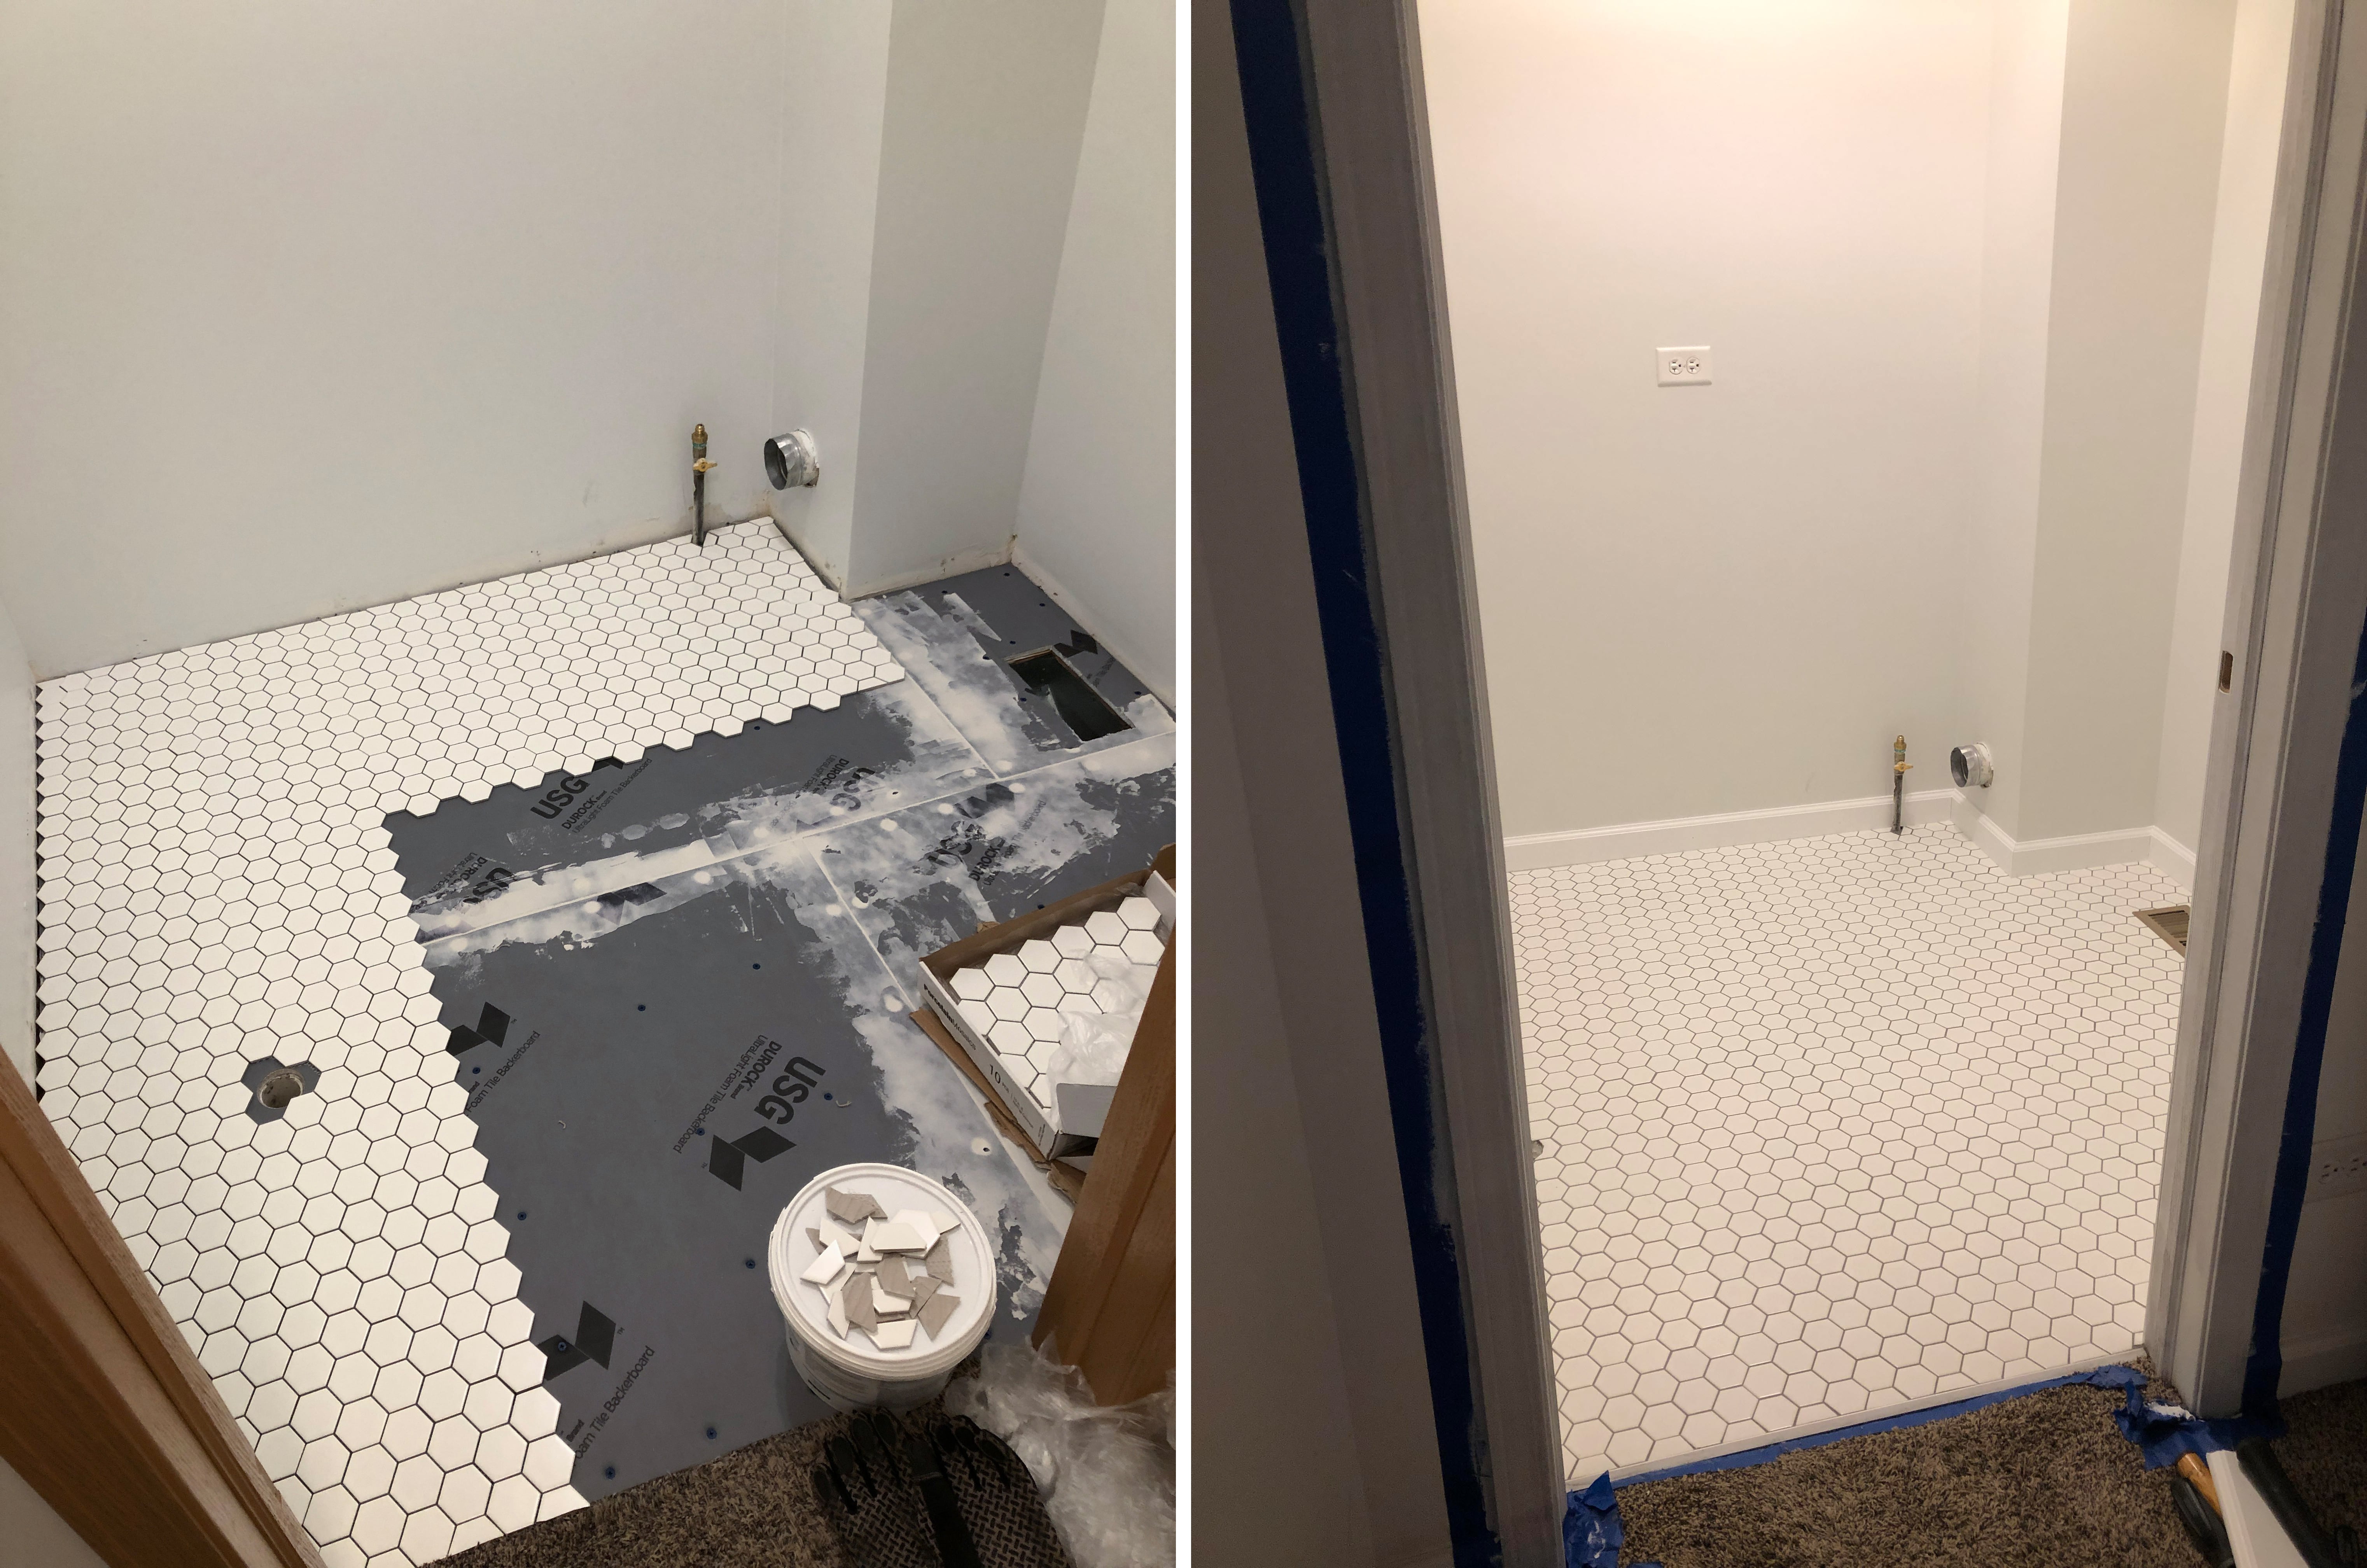
NEW PAINT & FLOORING
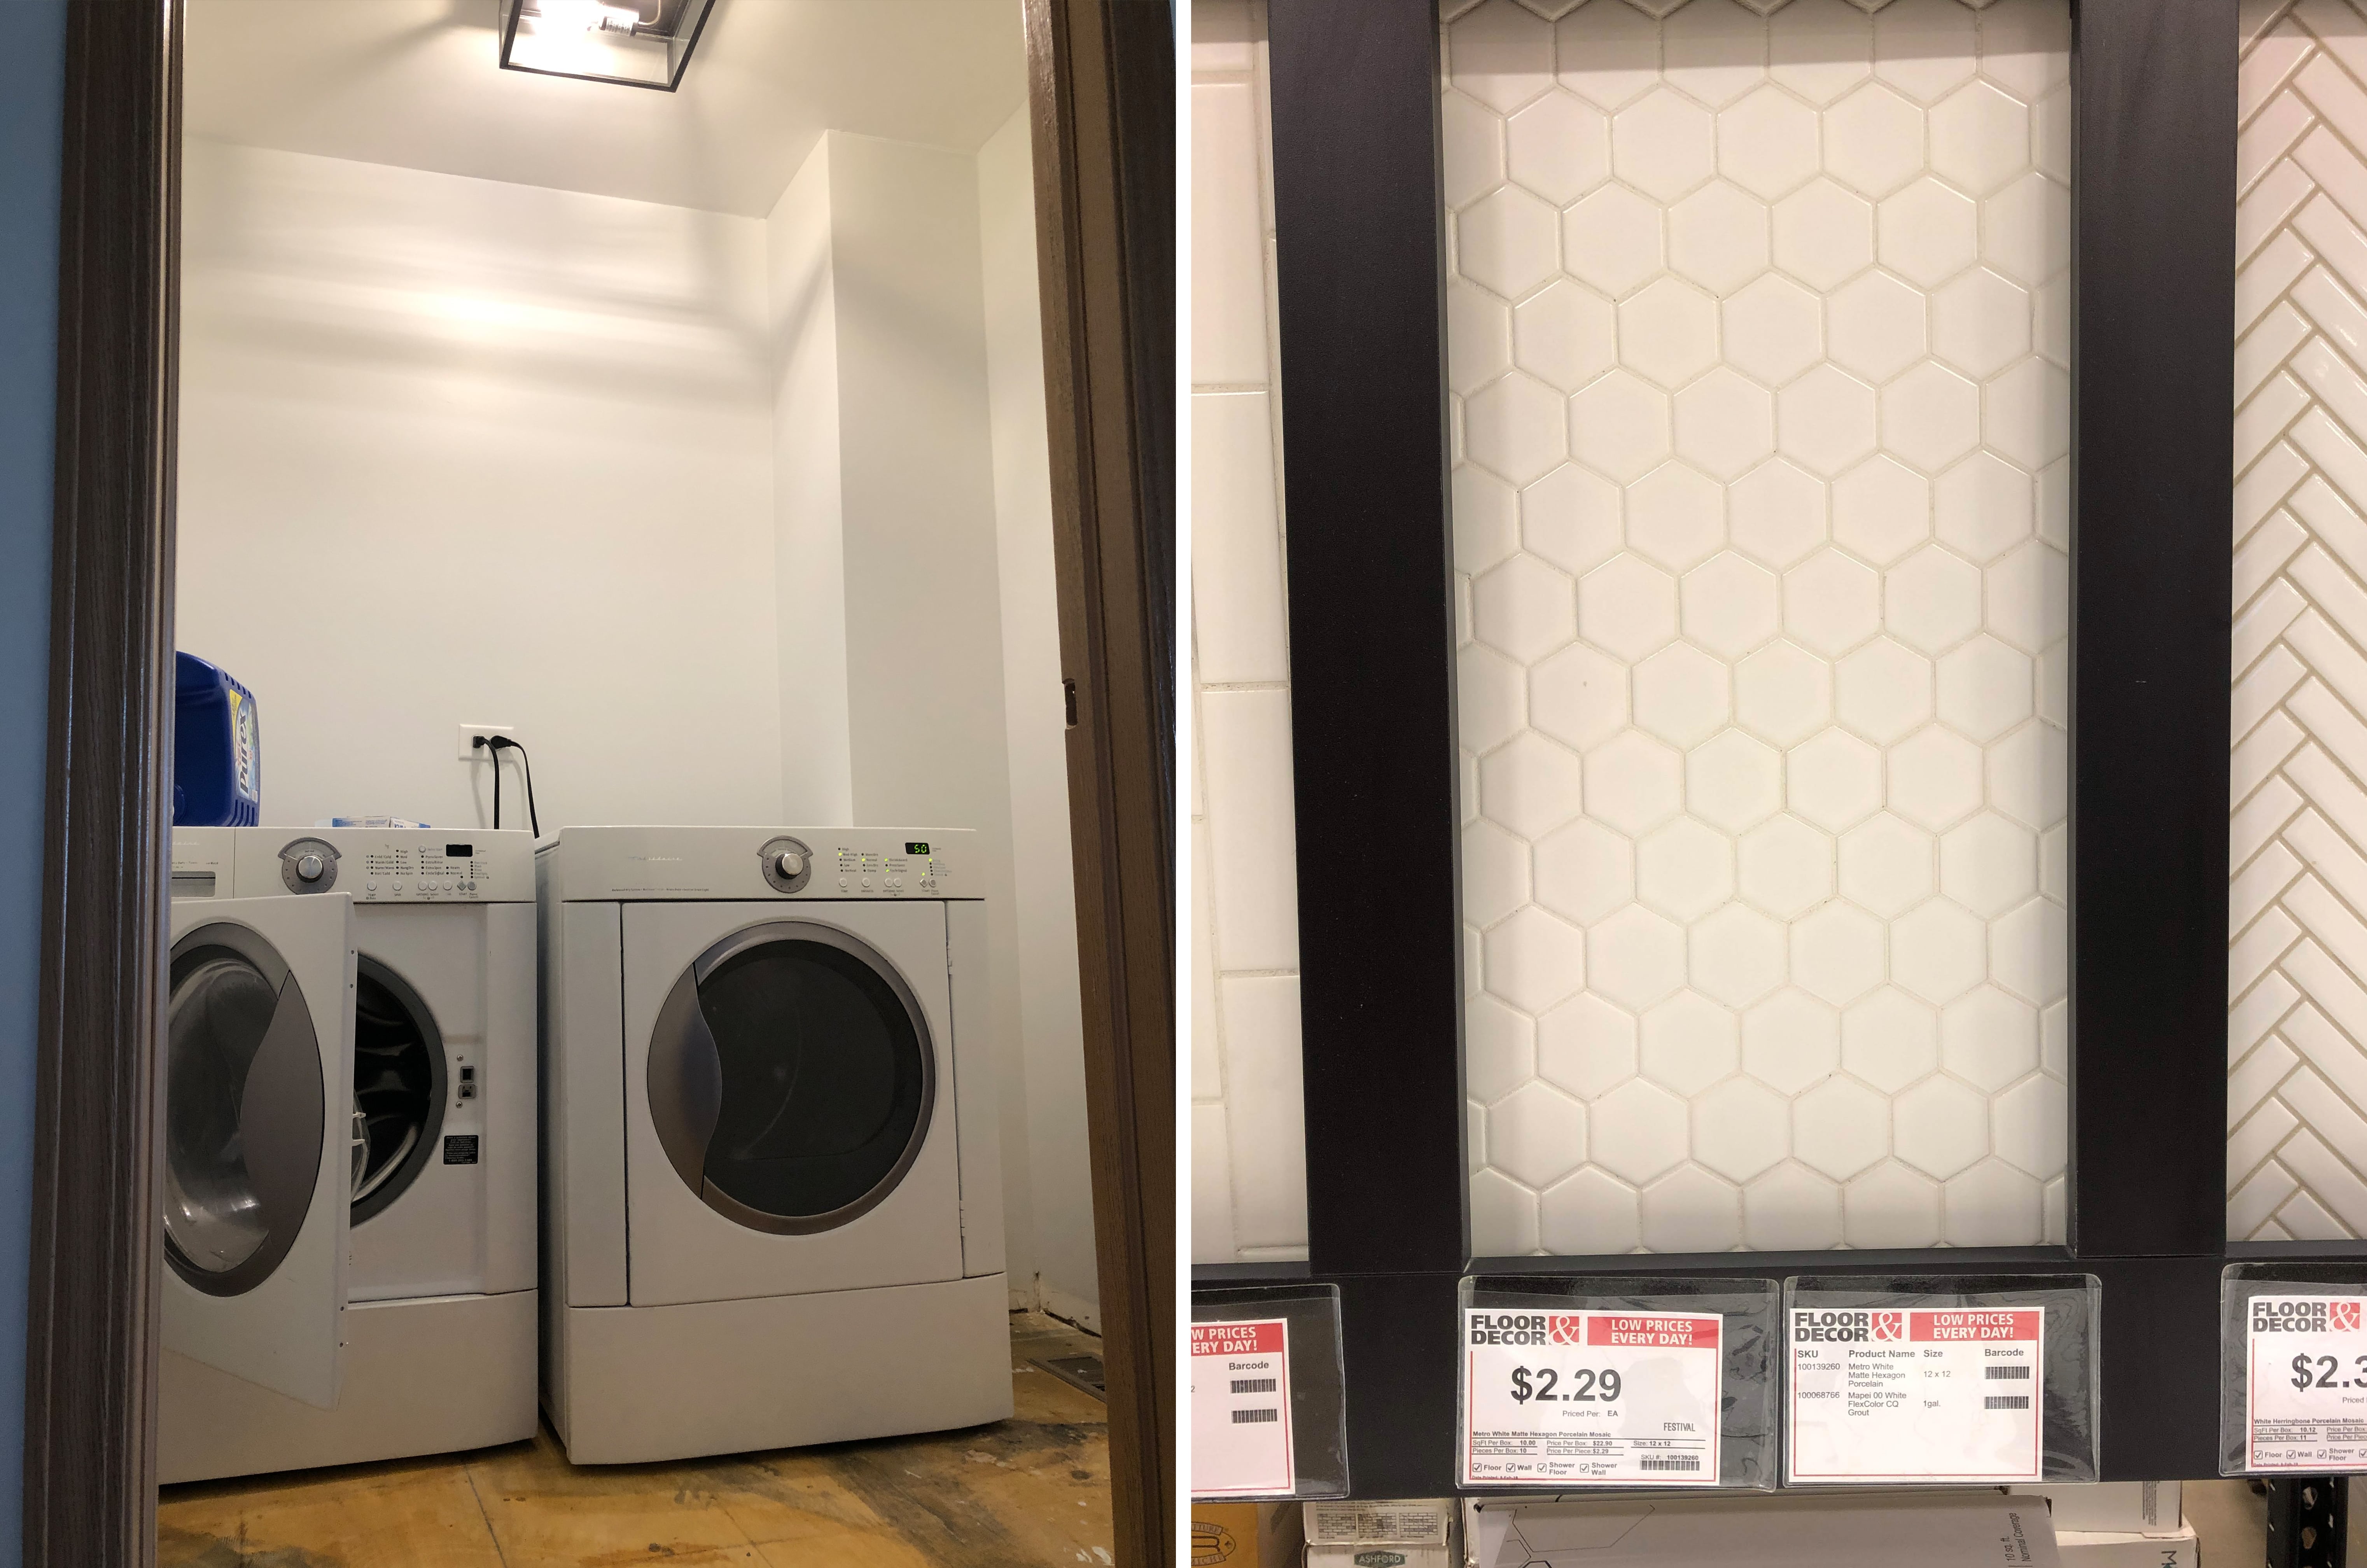
I decided to keep it neutral of course with the wall color. I didn’t want to go TOTALLY white, so I went with ‘Winds Breath‘ from Behr. It was a nice subtle grey. Of course, before picking the paint color, I brought some samples home to see what they were going to look like with the new light fixture I added to the space. Colors almost ALWAYS look different in the room compared to the store so always sample first.
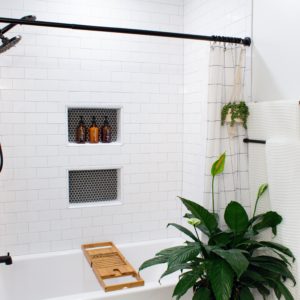
For the flooring, we went with small white hexagon tiles from Floor & Decor. This is definitely an older style coming back to life and I love it! We chose a dark grey grout to add some contrast for a nice modern touch.
COUNTERTOP & STORAGE
This part was basically the whole point of this project…the countertop to fold clothes and the cabinets for extra storage space. We bought a butcher block countertop from Menard’s as well as basic unfinished wall cabinets. We stained the countertop with Minwax “Natural” stain and painted the cabinets, Sherwin Williams Dorian Gray. If you’re interested in seeing the whole process of me staining the countertop you can check our Instagram story highlight, “Laundry Room”!
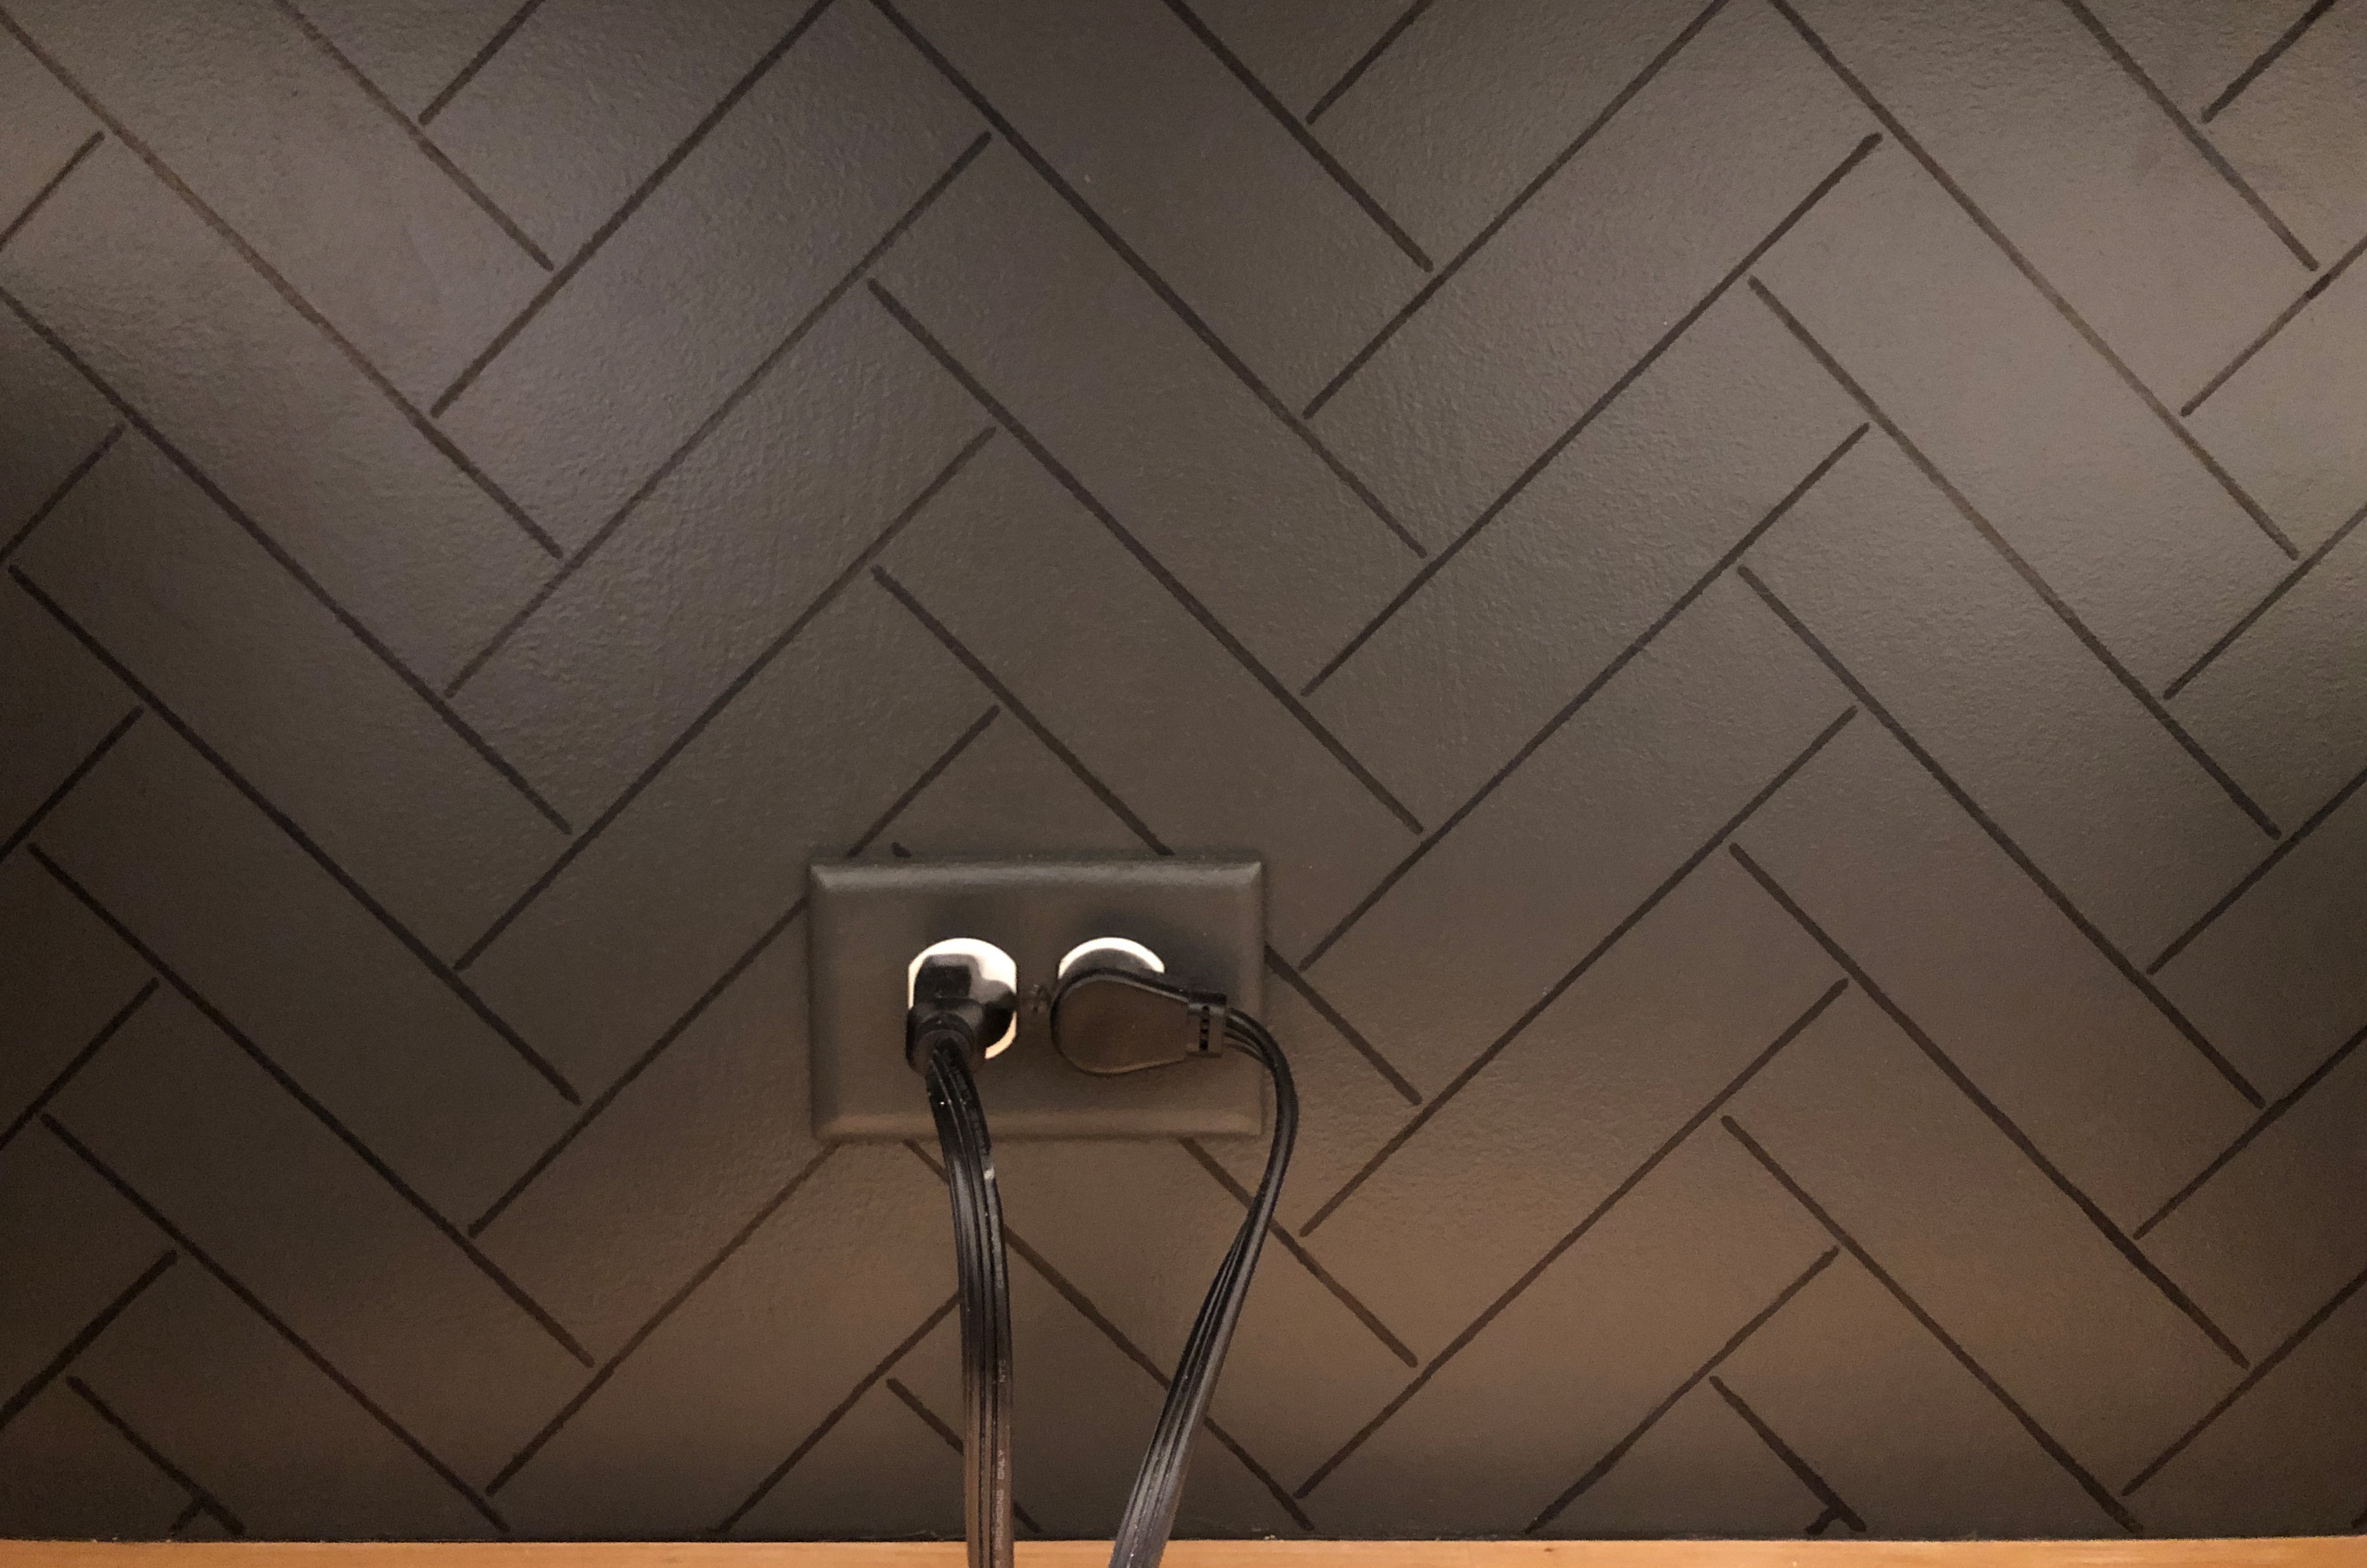
ACCENT WALL WITH “HERRINGBONE TILE” STENCIL

I always laugh thinking about this part of the project. LOL. Of course, I had to add in a last-minute accent wall.
The original plan was to just add open-shelving in between the cabinets and call it a day. But you know, always gotta go that extra mile! We already put up the cabinets and my husband and I looked at each other like…these aren’t coming down after we just hung them… So I painted and stenciled around the already hung cabinets. – I know… that’s harder Sarah and more work for yourself. Why would you do that?! – Well, let’s just not talk about it and just be happy it’s complete.

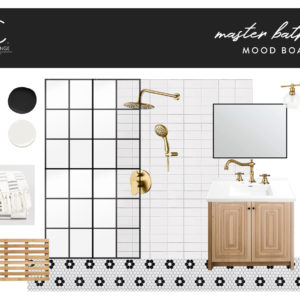
The inspiration behind the stencil wall was honestly, Starbucks. LOL, of course!
There are a couple of Starbucks locations in downtown Chicago that have this ‘black on black’ tile look that I thought looked SO GOOD. I really love the look of herringbone tile, but there was no way I was about to tile this wall just for the look of it. The functional part of the tile wasn’t necessary in this space. So, I figured why not create a stencil to make it have that appearance!
I decided on the color Behr ‘Space Black’ for the accent wall. It’s more of a dark grey which I wanted so that my Black Sharpie Paint Pen could be seen over the top of it. (You can purchase the stencil on our Etsy Shop!)
OPEN-SHELVING
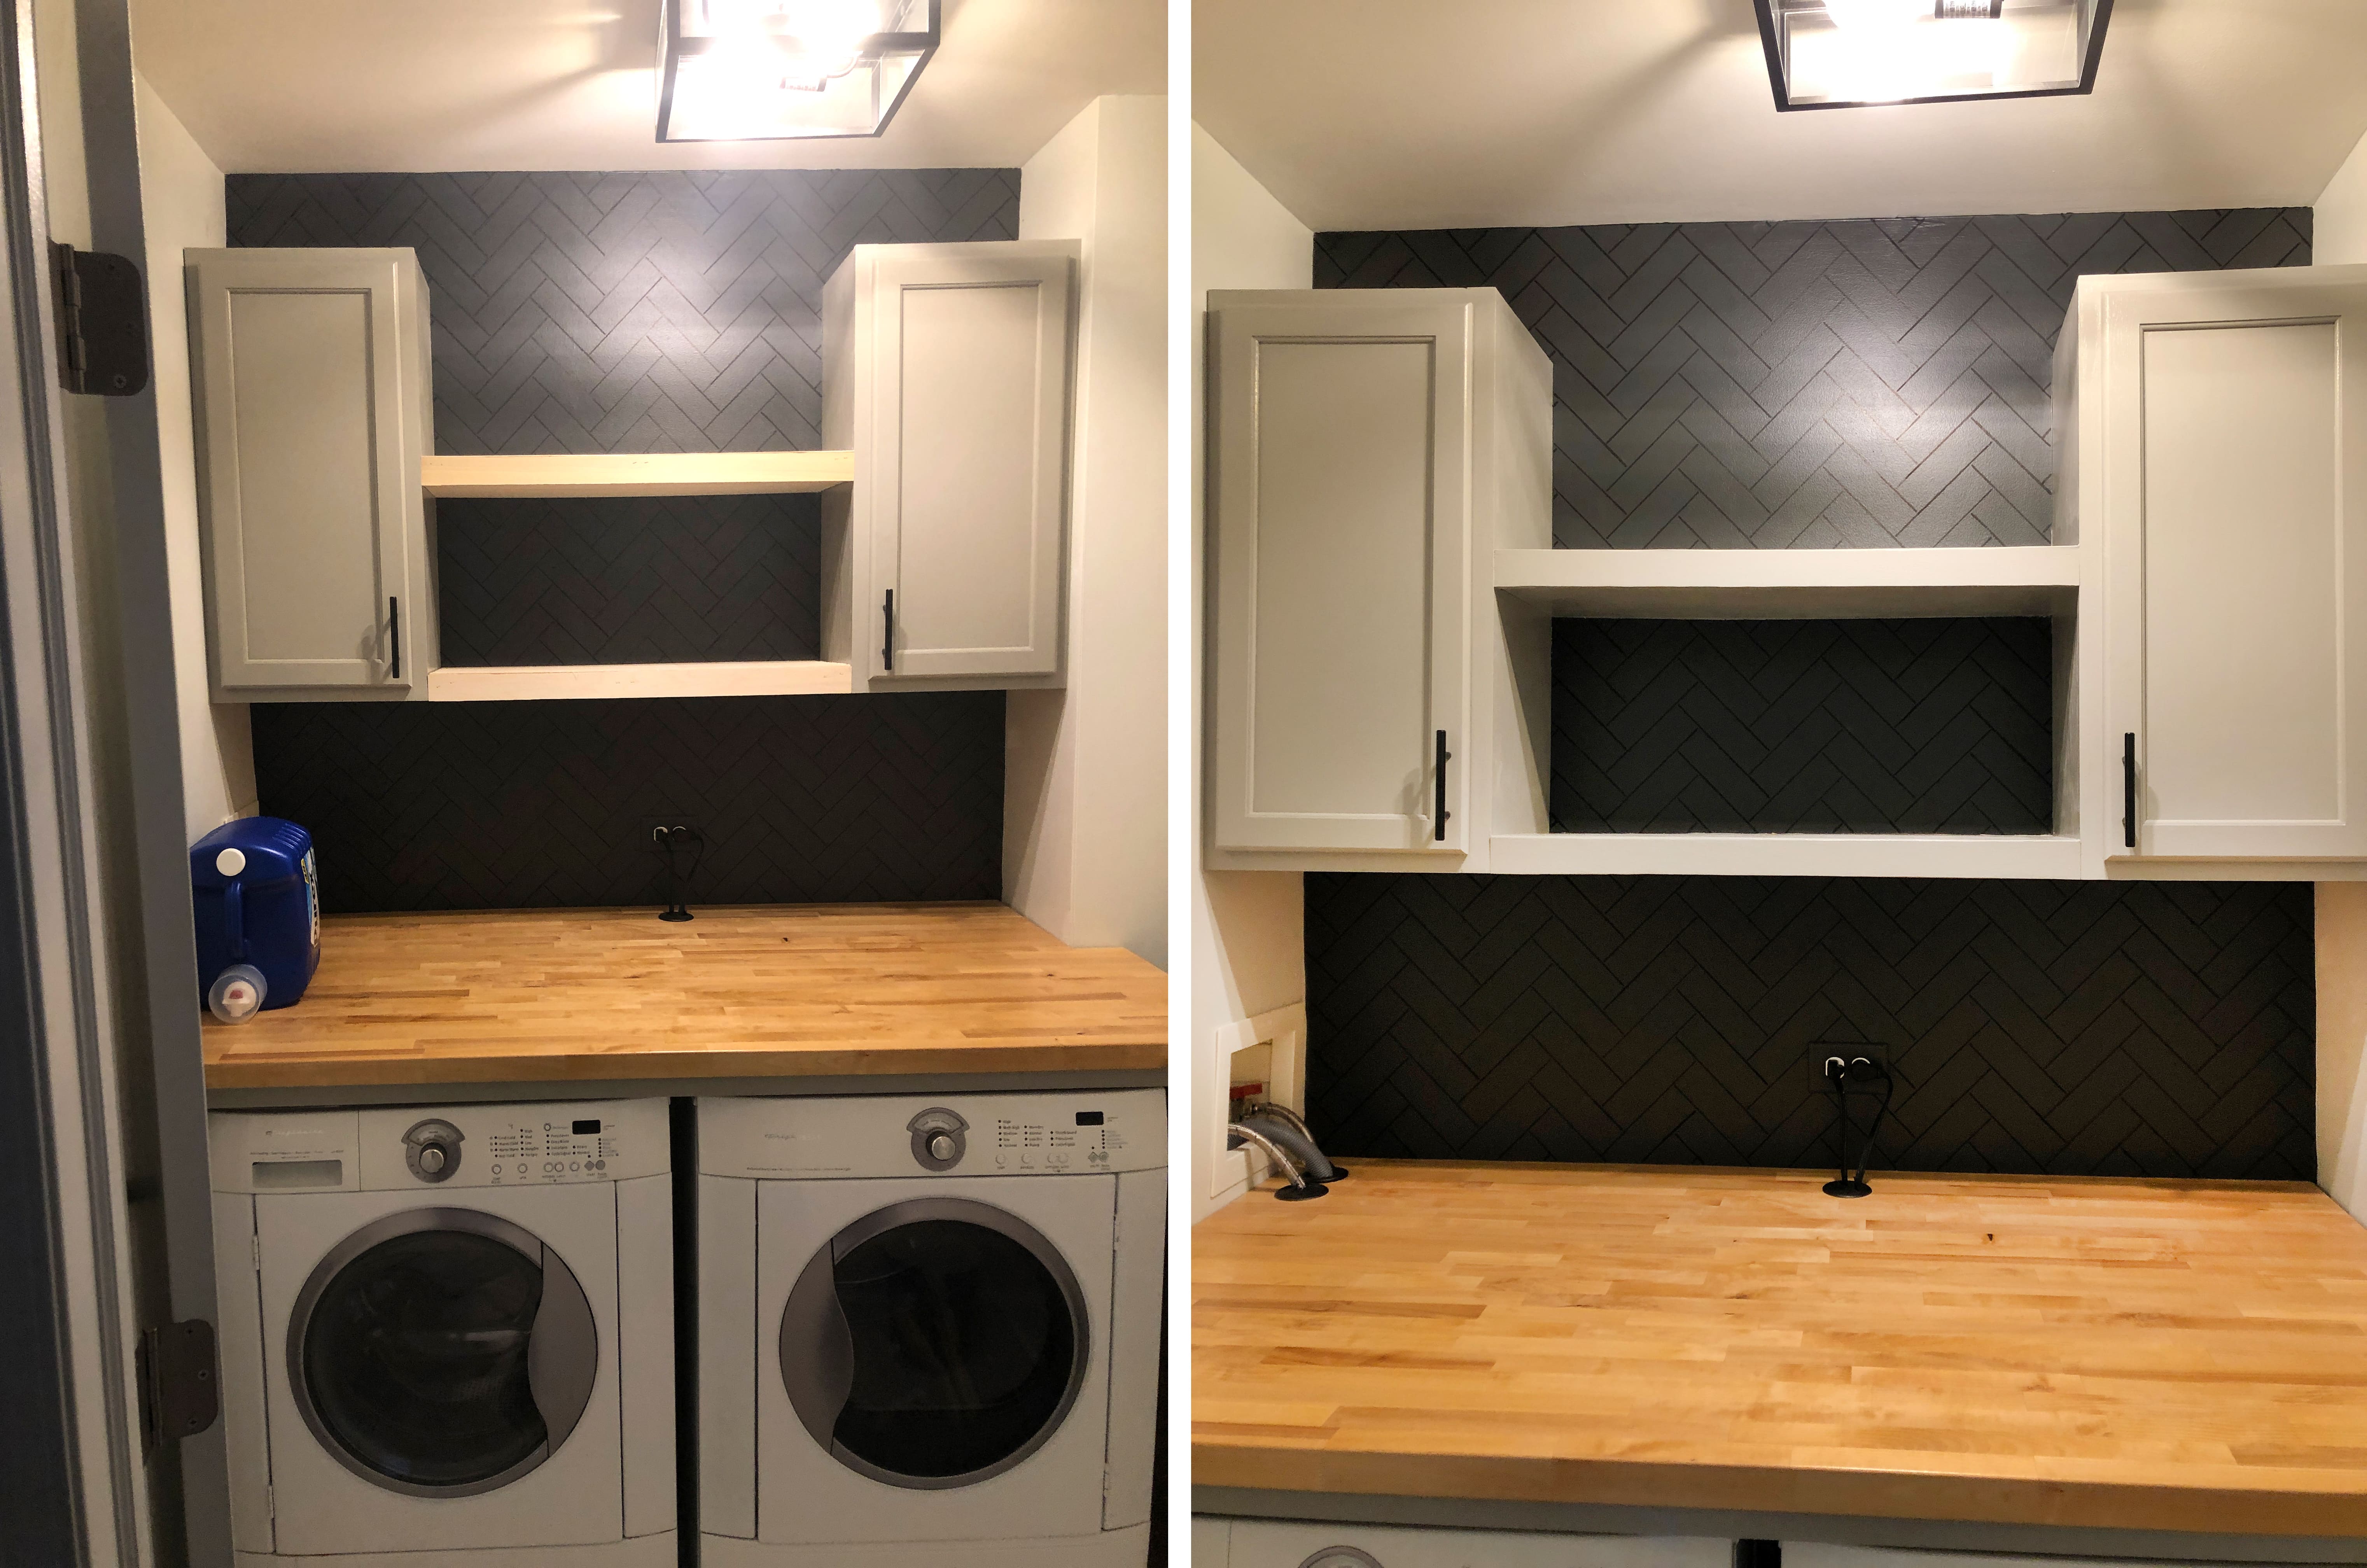
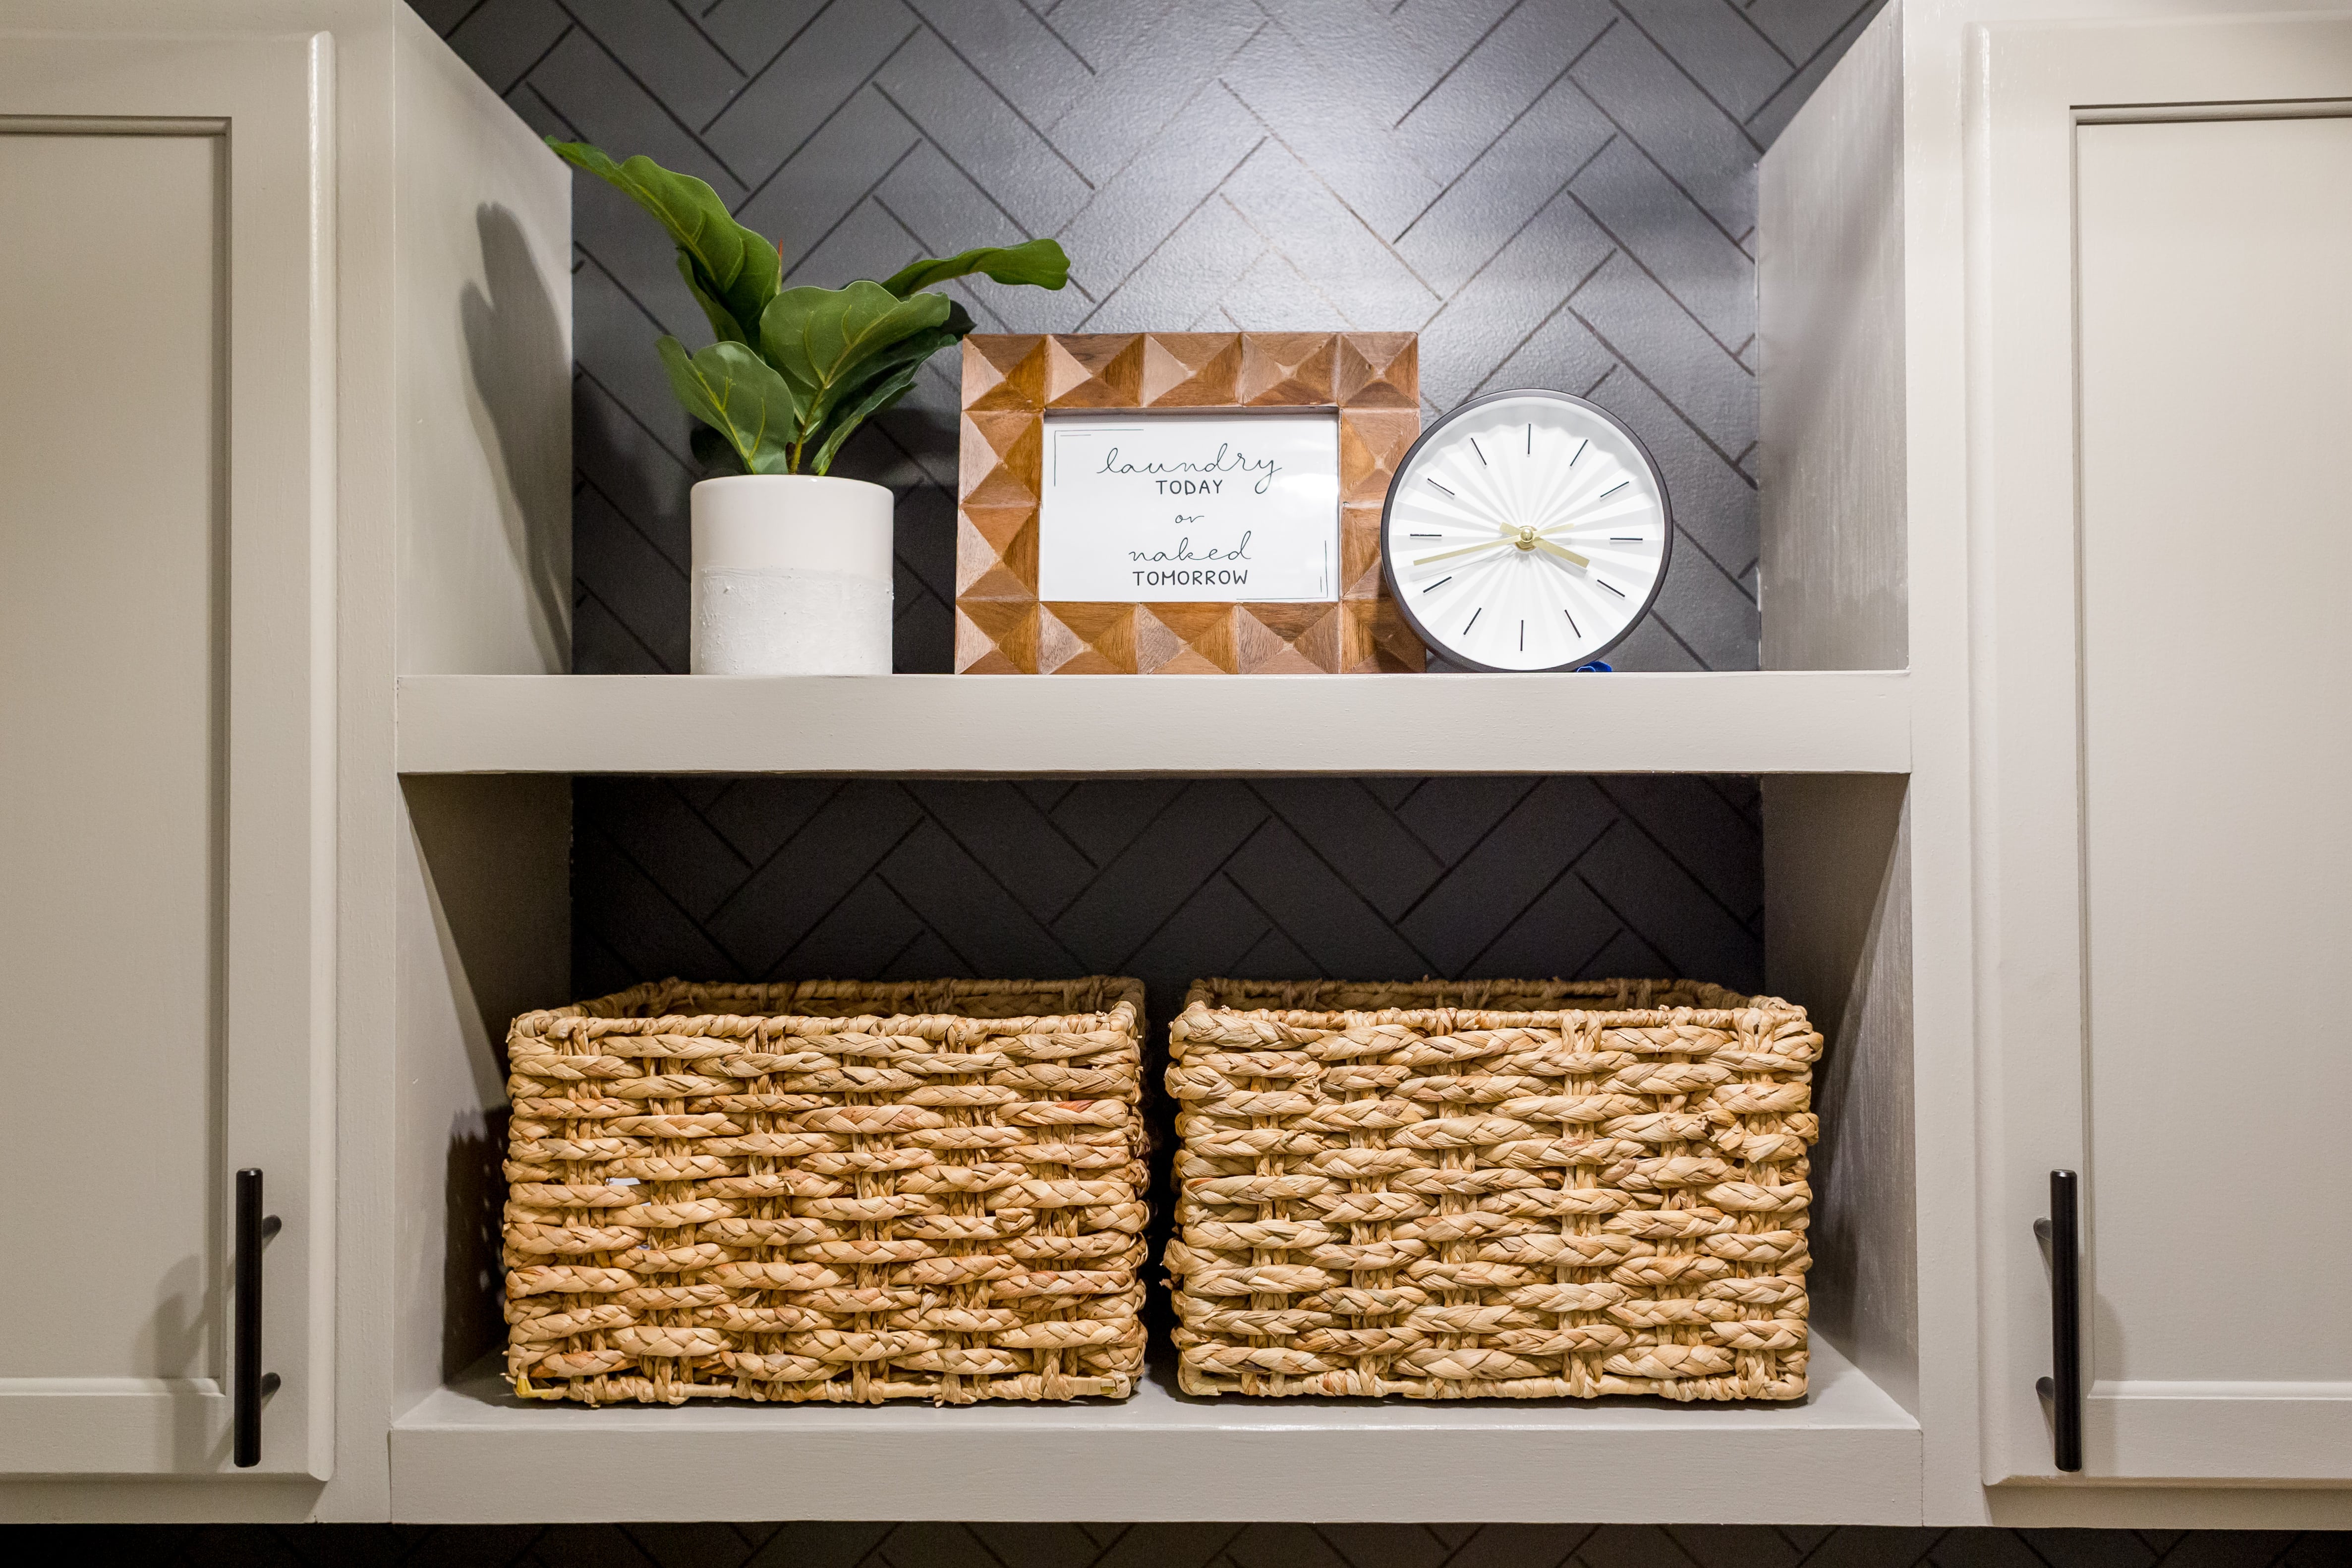
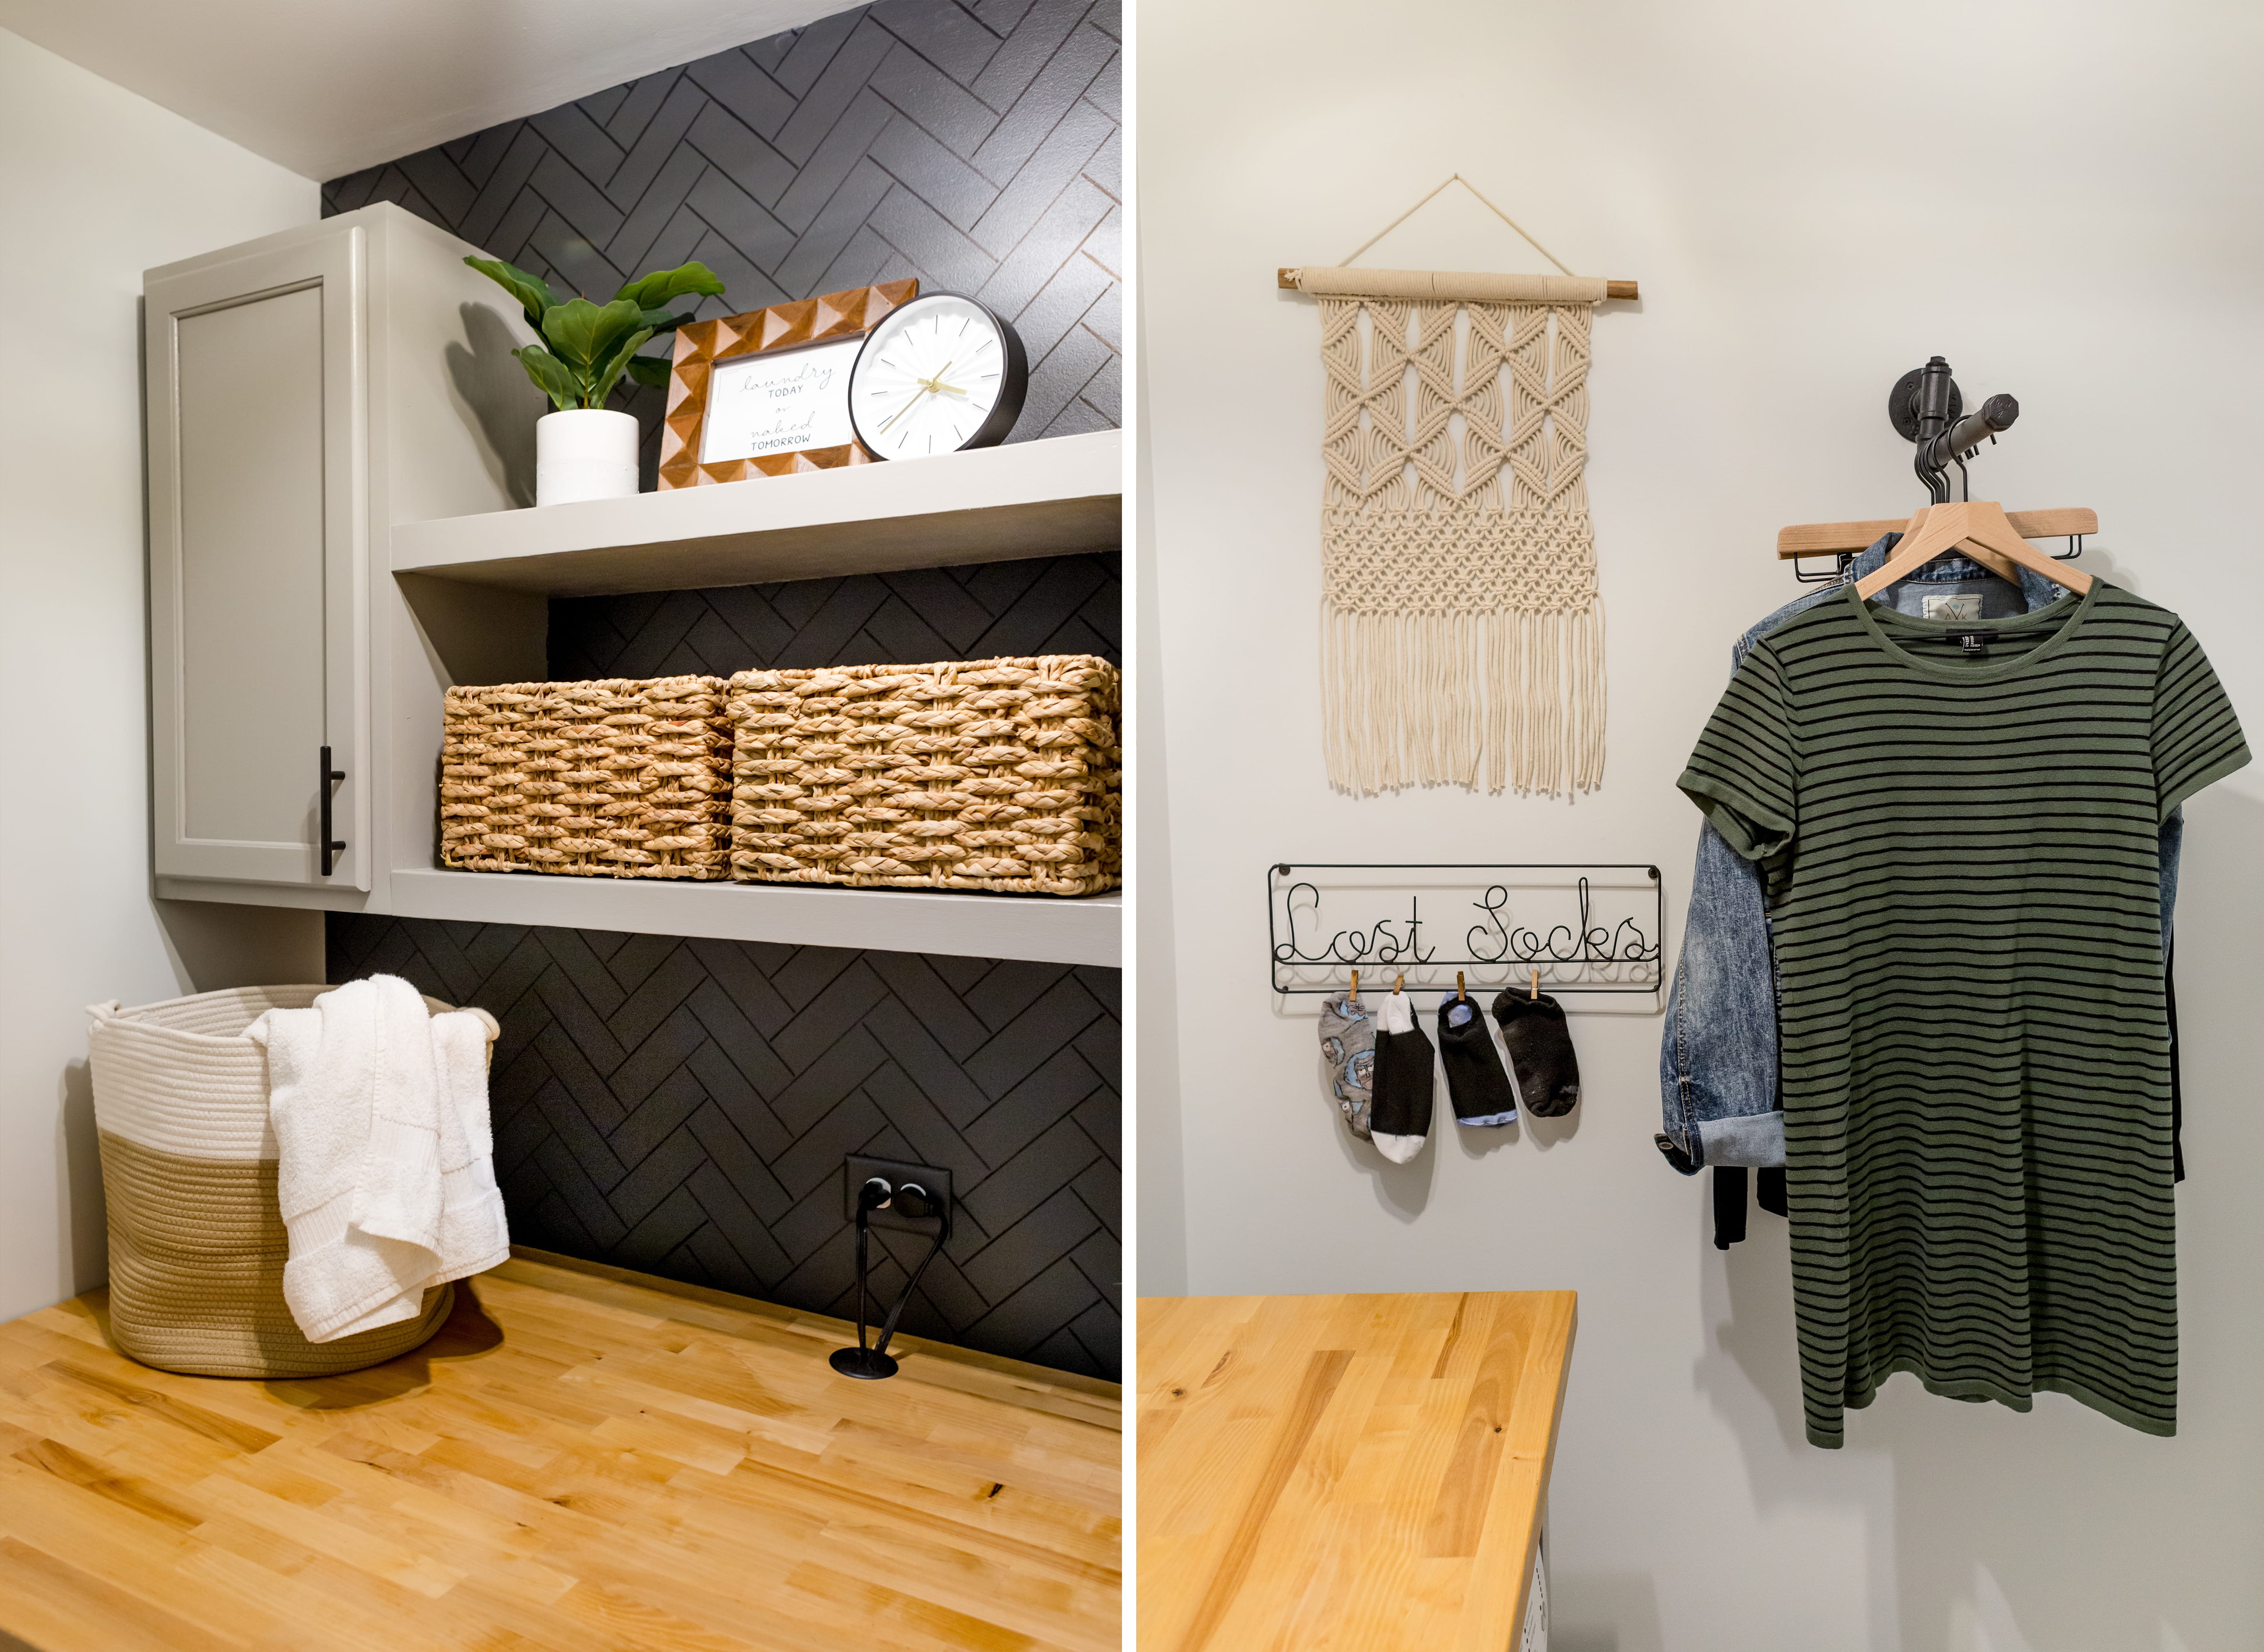
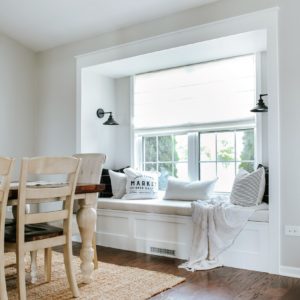
We added some open-shelving in between the cabinets. I thought the space would be too empty without something there. Plus, it gave me an excuse for a little decorating ;). We finished the shelving off with the same color paint as the cabinets and just like that… it was time for the final touches!
THE FINISHED SPACE
SOURCE LIST
Hopefully, we can start incorporating separate DIY posts for all the stuff we made in this room. In the meantime, here’s the list:
PAINT
- Walls: Sherwin Williams ‘Winds Breath’
- Cabinets & Open Shelving: Sherwin Williams ‘Dorian Gray’
- Accent Wall: Behr ‘Space Black’
- Accent Wall Stencil: Etsy
COUNTERTOP
- Butcher Block: Menard’s Butcher Block Countertop
- Pre-stain: Minwax Pre-stain Wood Conditioner
- Stain: Minwax “Natural”
- Sealant: Minwax Polycrylic Water-Based Protective Finish
CABINETS
- Unfinished Cabinets: 15″ x 30″ Unfinished Oak Kitchen Wall Cabinet
- Hardware: Black Matte Pulls
DECOR
- Light Fixture: Wayfair
- Cotton Rope Basket: Amazon (Little Hippo)
- Wicker Baskets: Amazon (I got mine from Home Goods, but I linked ones similar!)
- Clock: Target
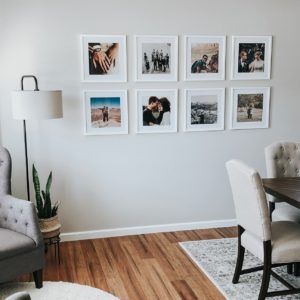
- Wood 5X7 Frame: Target
- Faux Fiddle Leaf Plant: Amazon (I got mine from TjMaxx but I linked one similar)
- Macrame Wall Art: Amazon
- ‘Lost Socks’ Sign/Hanger: Amazon
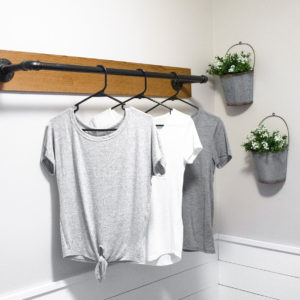
- Clothes Rack: Amazon
- Hangers: Target
Again, I’m SOOOOO happy with how this turned out. It’s one of the most used rooms in our house! 😀 Have any of you tackled a laundry room remodel? Send us photos on our Instagram account!


Hi there! Love how your laundry room turned out! Tackling ours this weekend and we purchased a butcher block as well which is super heavy! I saw on your Instagram stories the ledge strips and bracket you placed underneath. Can you share how you made the framing underneath (the part that you painted gray?) Thanks!!!
Hi Lauren!
Thank you so much!
For the outside framing (the painted gray pieces), it’s 2 (1×3’s) for the front legs, then the top wood piece that runs across directly under the countertop is a 1×2. The left front leg we screwed into the wall and to the 1×2. And the top 1×2 is screwed into the counter!
The right side was the only side that needed to be enclosed because the left side is up against the wall. So, for the right side of it, we used a 1-inch thick board cut down to size to fit up against the wall and against the front 1×3 leg. We then secured that side piece to the wall, to the front leg 1×3, as well as the countertop.
Here is a diagram I drew up quickly for you so you can get a better understanding! Basically, anything that’s touching each other we secured together with screws! After everything was screwed together, we filled all the screw holes with wood filler and sanded it down so it looks like one connected piece!
I hope this helps! Let me know if you have any other questions!
Sarah
This is SO helpful! Thank you so so much!
hi – I’m upgrading my laundry room and it looks just like yours! Love it! I just wondered how you mounted the floating shelving..thanks!
Hi!
I made a quick diagram for you which hopefully helps! We actually built a support frame made from 1×3’s and screwed that into the wall. Then, we just nailed thin sheets of wood to the front, top & bottom of the support frame.