Hello everyone!
Our next DIY project we wanted to share with you guys was the rustic blanket ladder. Don’t know about you…. but we LOVE blankets. We just can’t get enough! A lot of blankets means cluttered couch space.
So, here’s an awesome DIY blanket ladder tutorial that keeps things cute, cozy and functional!
This post may contain affiliate links where we earn a small commission on your purchases at no additional cost to you.
THE SUPPLIES
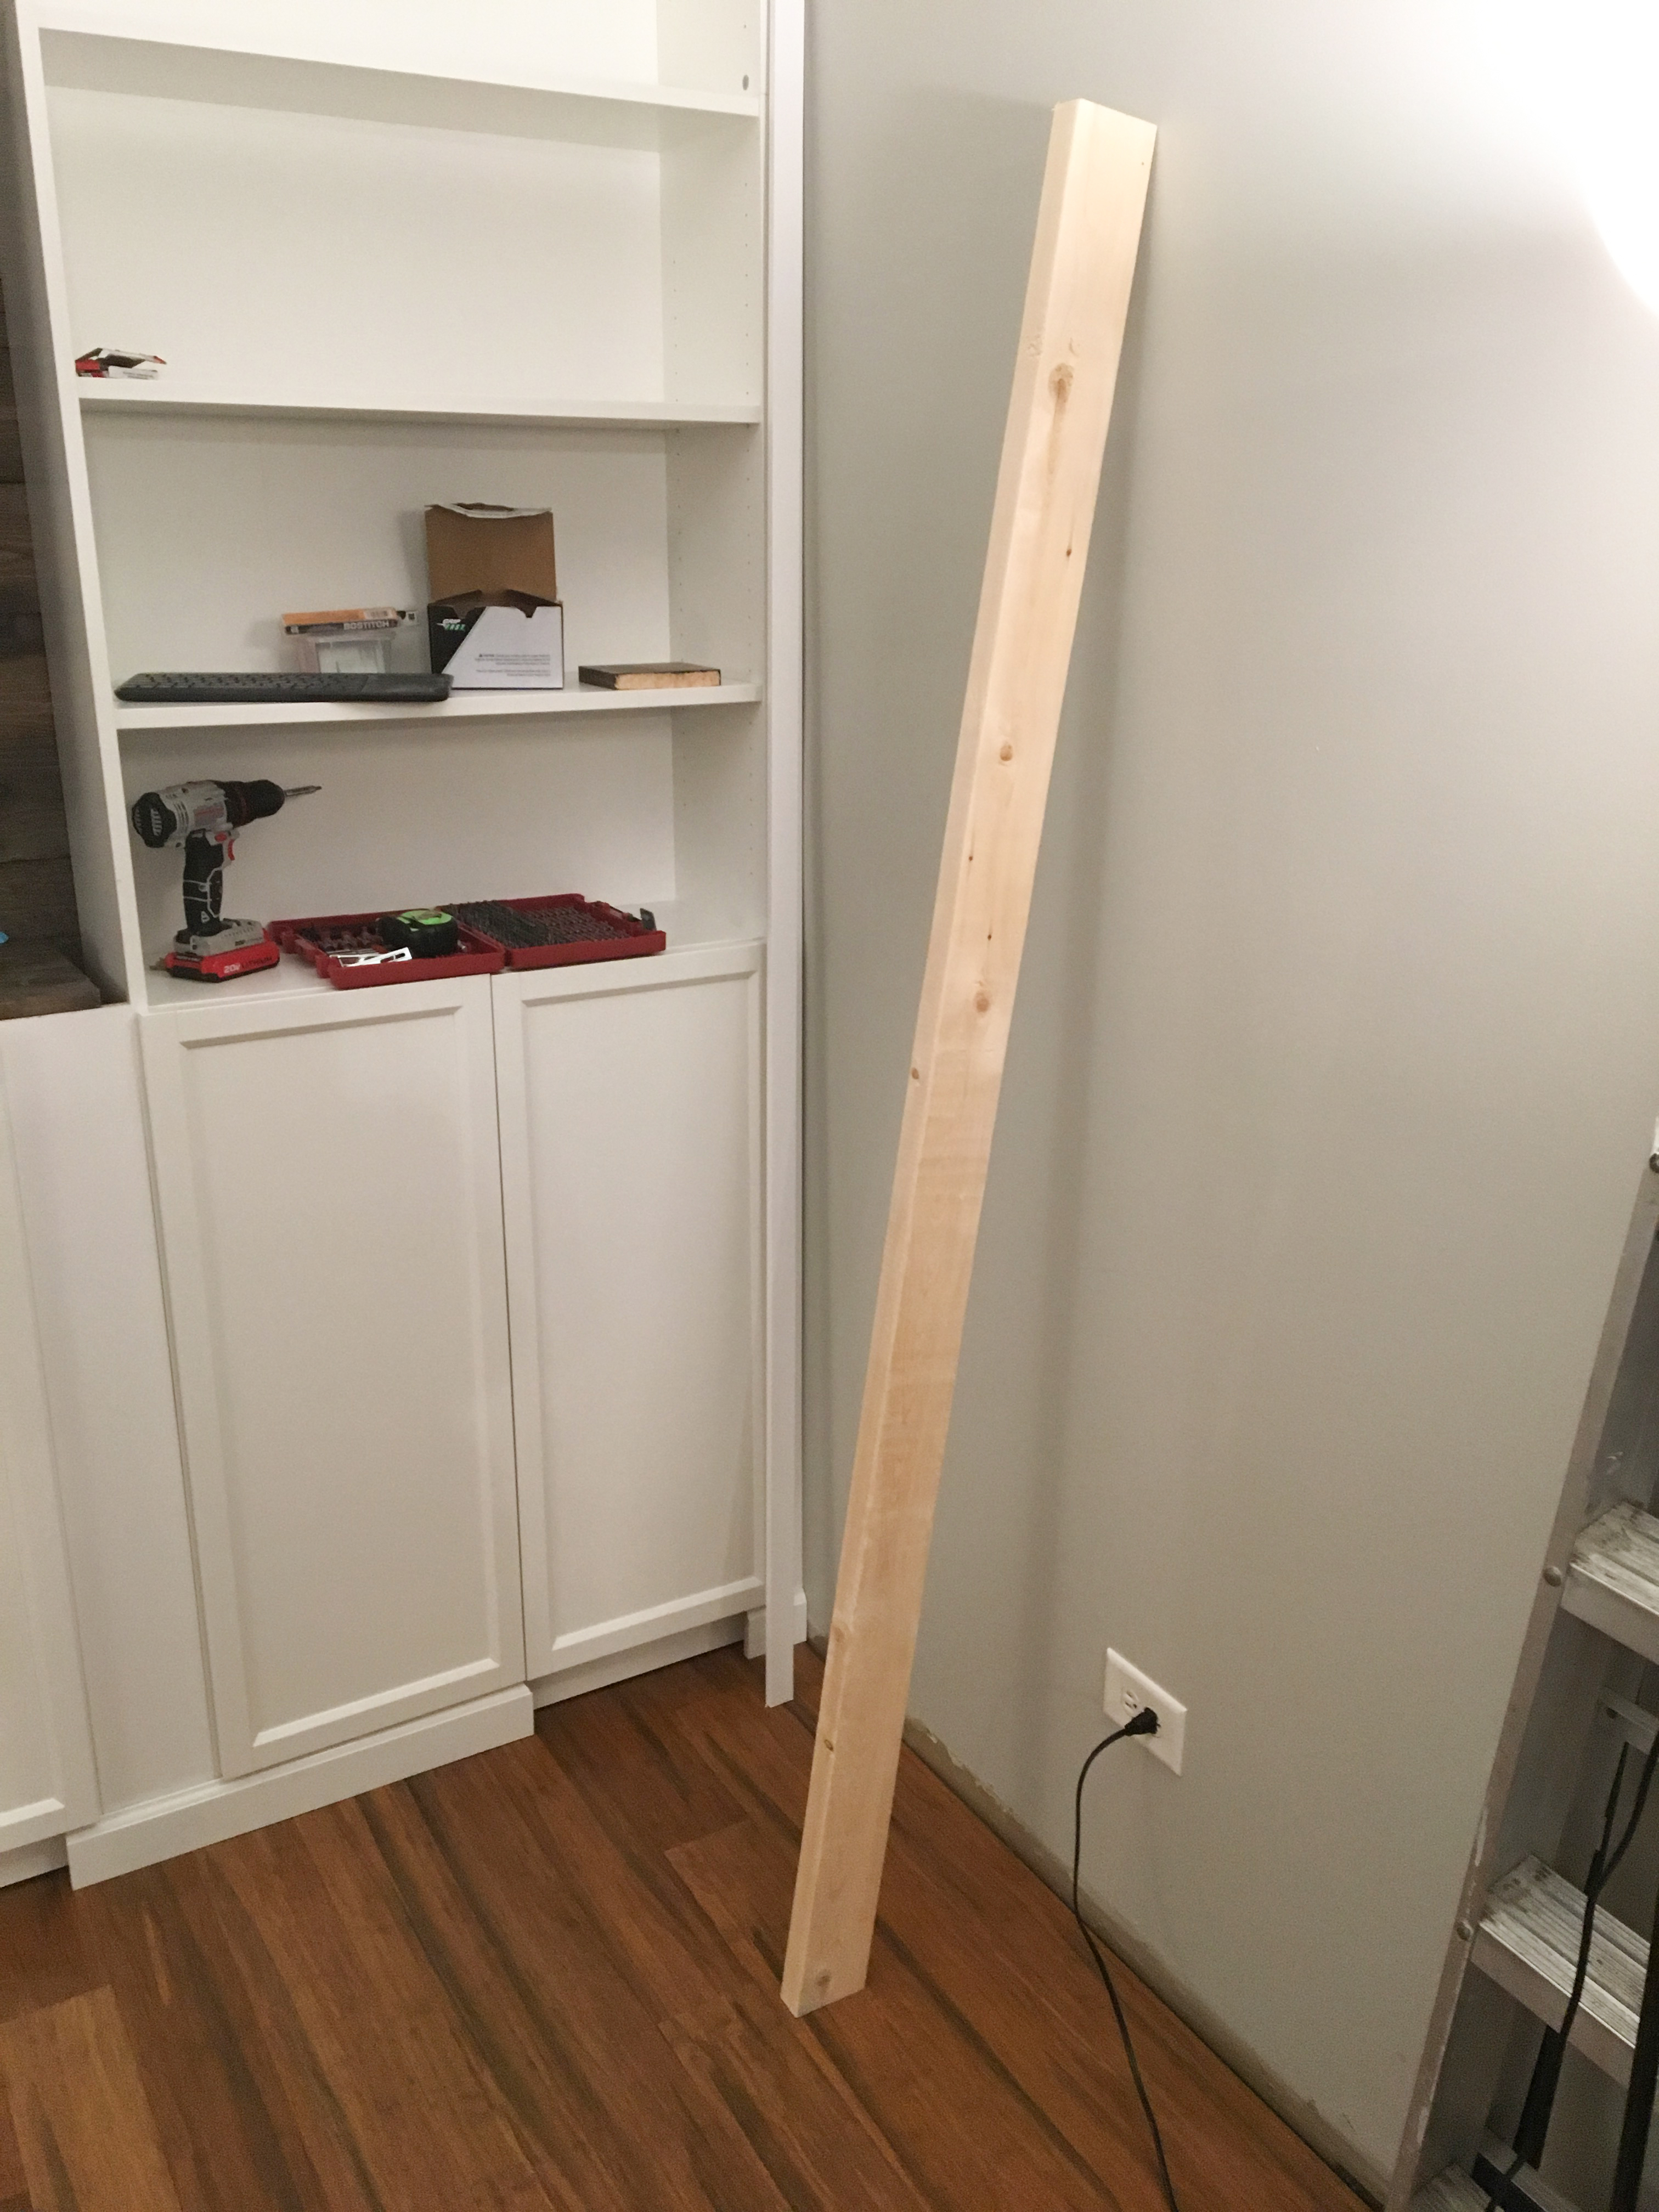
- (2) 8-foot 2×4’s
- (1) 8-foot 1×4
- Minwax Special Walnut Stain
- Foam Brushes
- Cheap/old Lint-free rags
- Gloves – optional
- Screws & Drill
STEP 1 – Cut bottom angle & determine height
The first two things you want to do is decide on the height of the ladder as well as what angle you want your ladder to sit up against the wall at.
I have about 10′ ceilings, so I decided to make our ladder about 6′ 4″ (76″). (Not too tall and not too short.) You can cut the 2×4’s to whatever height works best for your space.
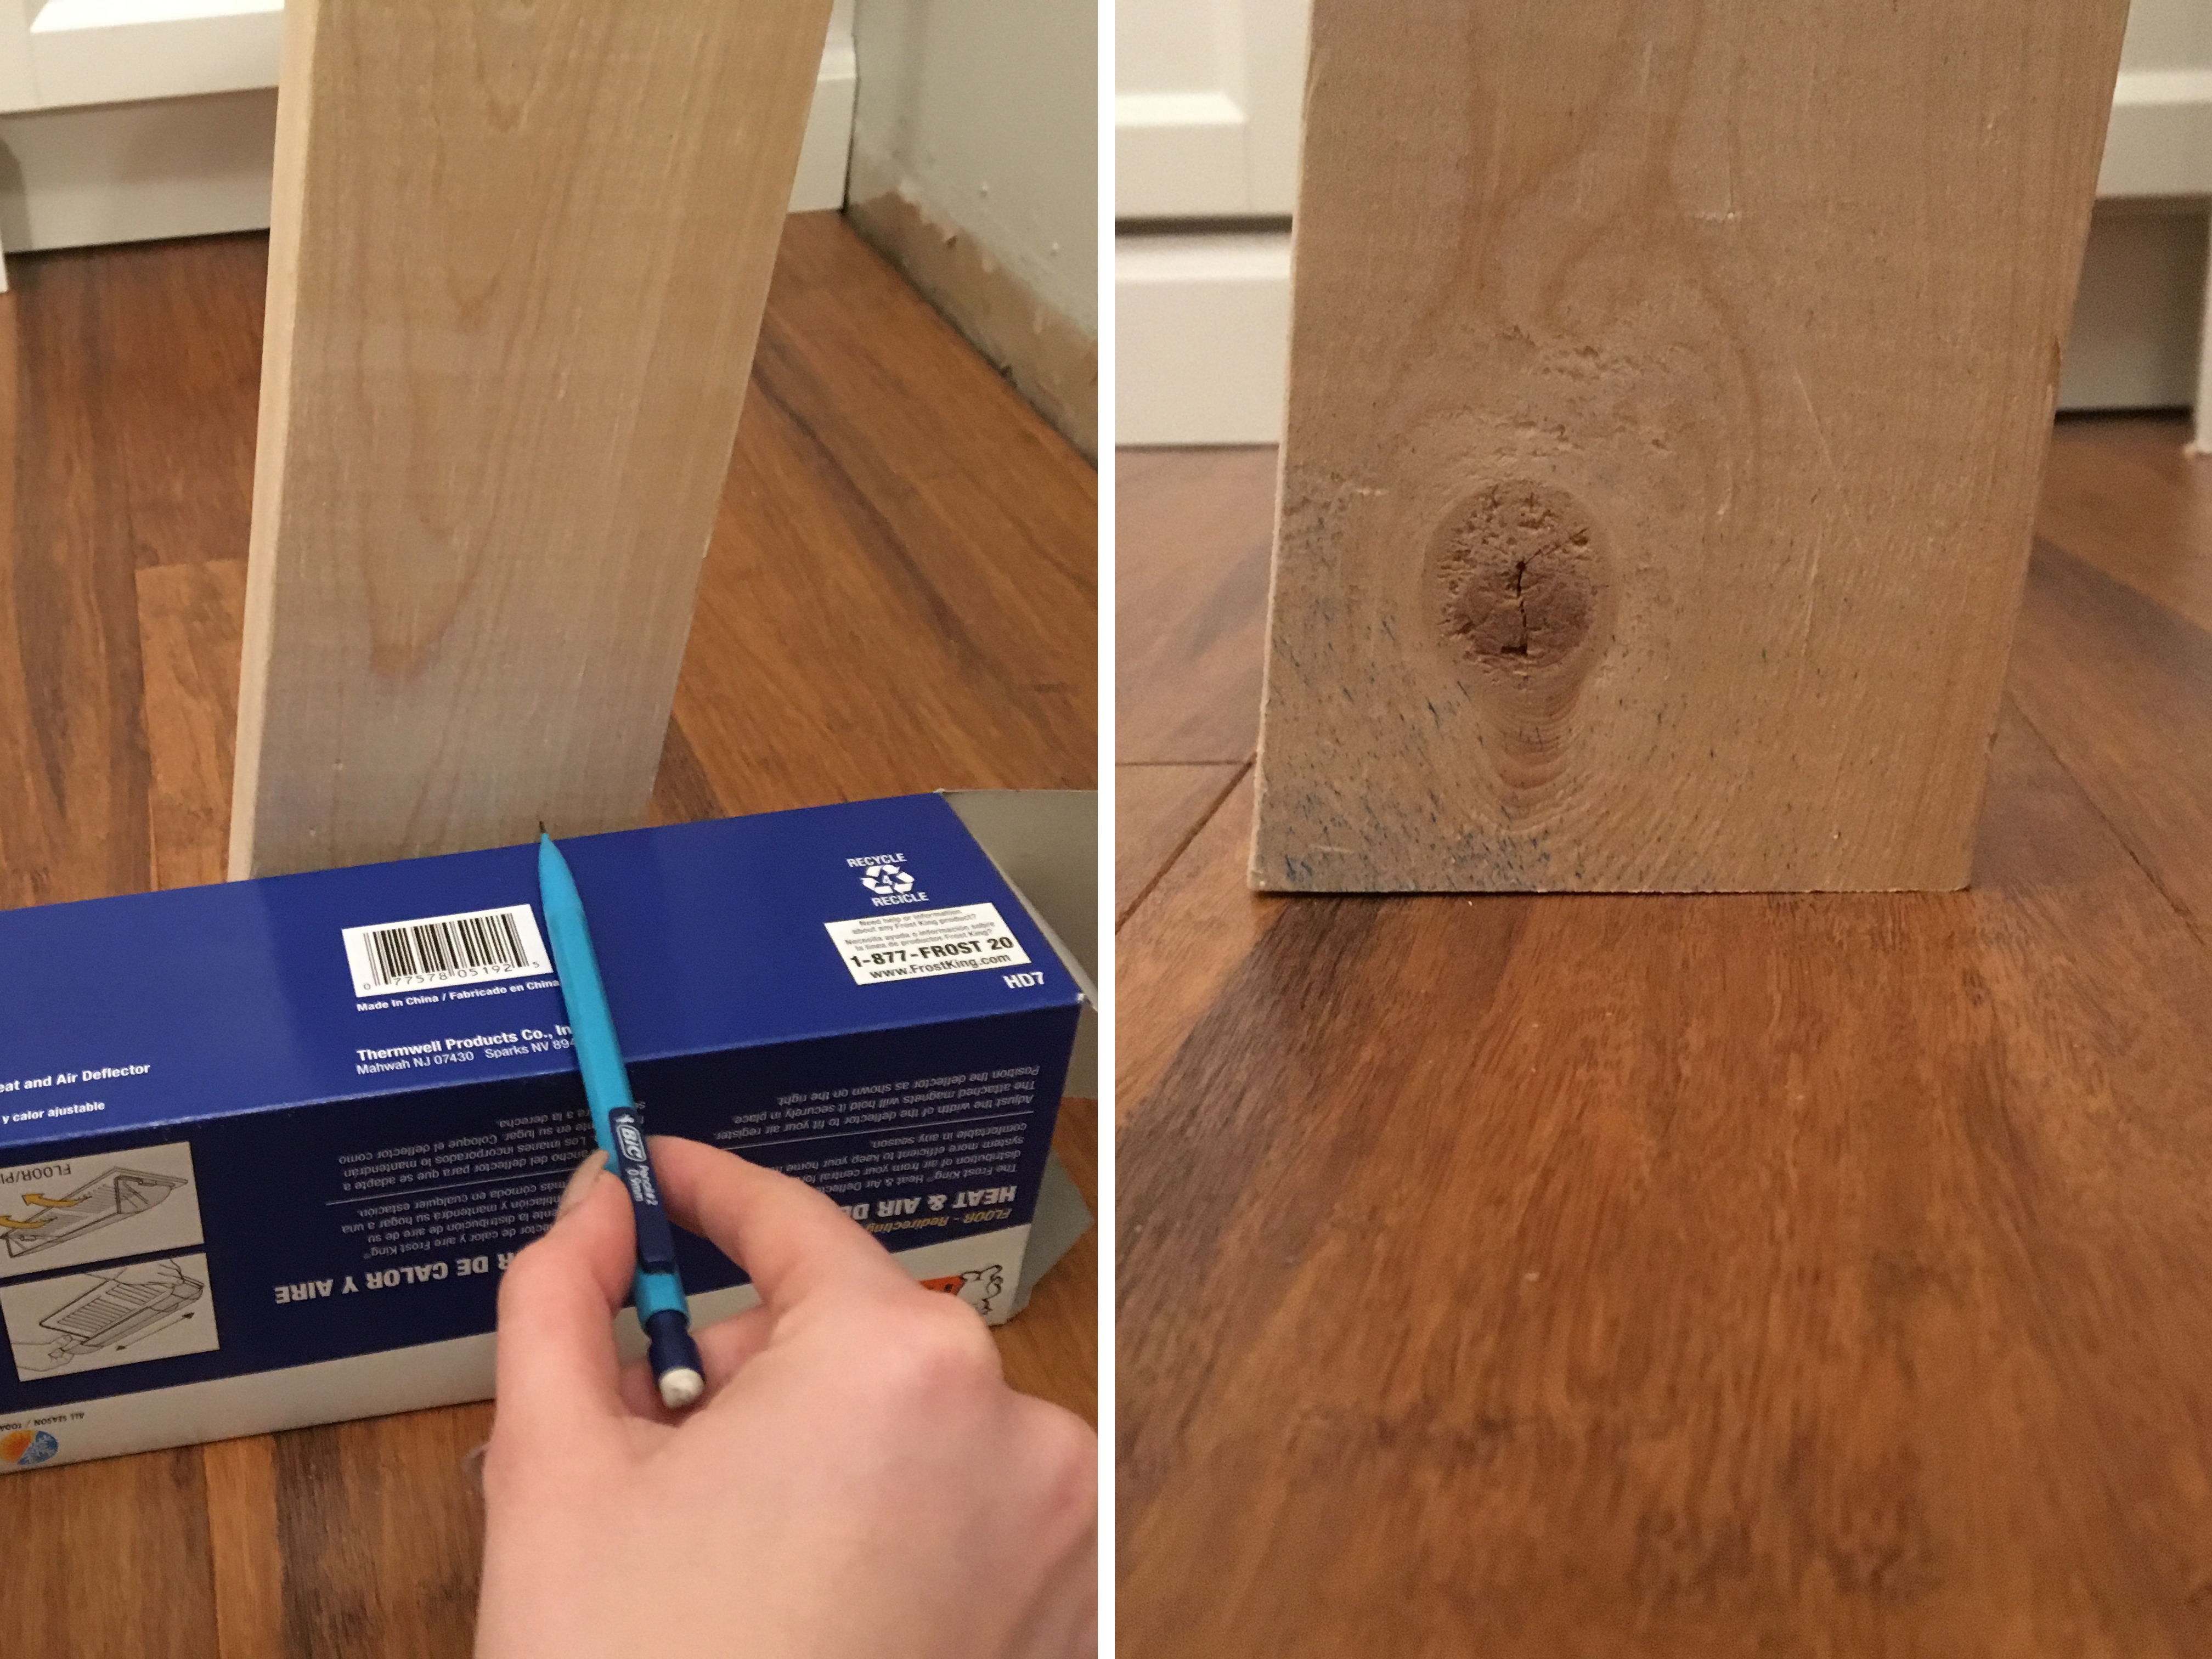
Then, lean 1 of the cut 2×4’s up against the wall to your angle preference.
Then slide a thin book/box or tape measure up against the bottom of the 2×4 and draw a parallel line to the floor.
This will be your cutting line for the bottom of both 2×4’s, so your ladder sits level. Go ahead and cut the first 2×4 you drew the mark on and then use that one as your guide for the next…
STEP 2 – Cut ladder rungs
I cut the 1×4’s into (5) 16 inch pieces. (You can cut the lengths to your preference if you want the ladder to be wider or skinnier.)
–side note-
You will have some spare wood leftover if you use my measurements. No biggie. We can always use the wood pieces for another project!

(^^^^ Can you see why I need a blanket ladder??…..as my blanket sits on the ground in a ball…)
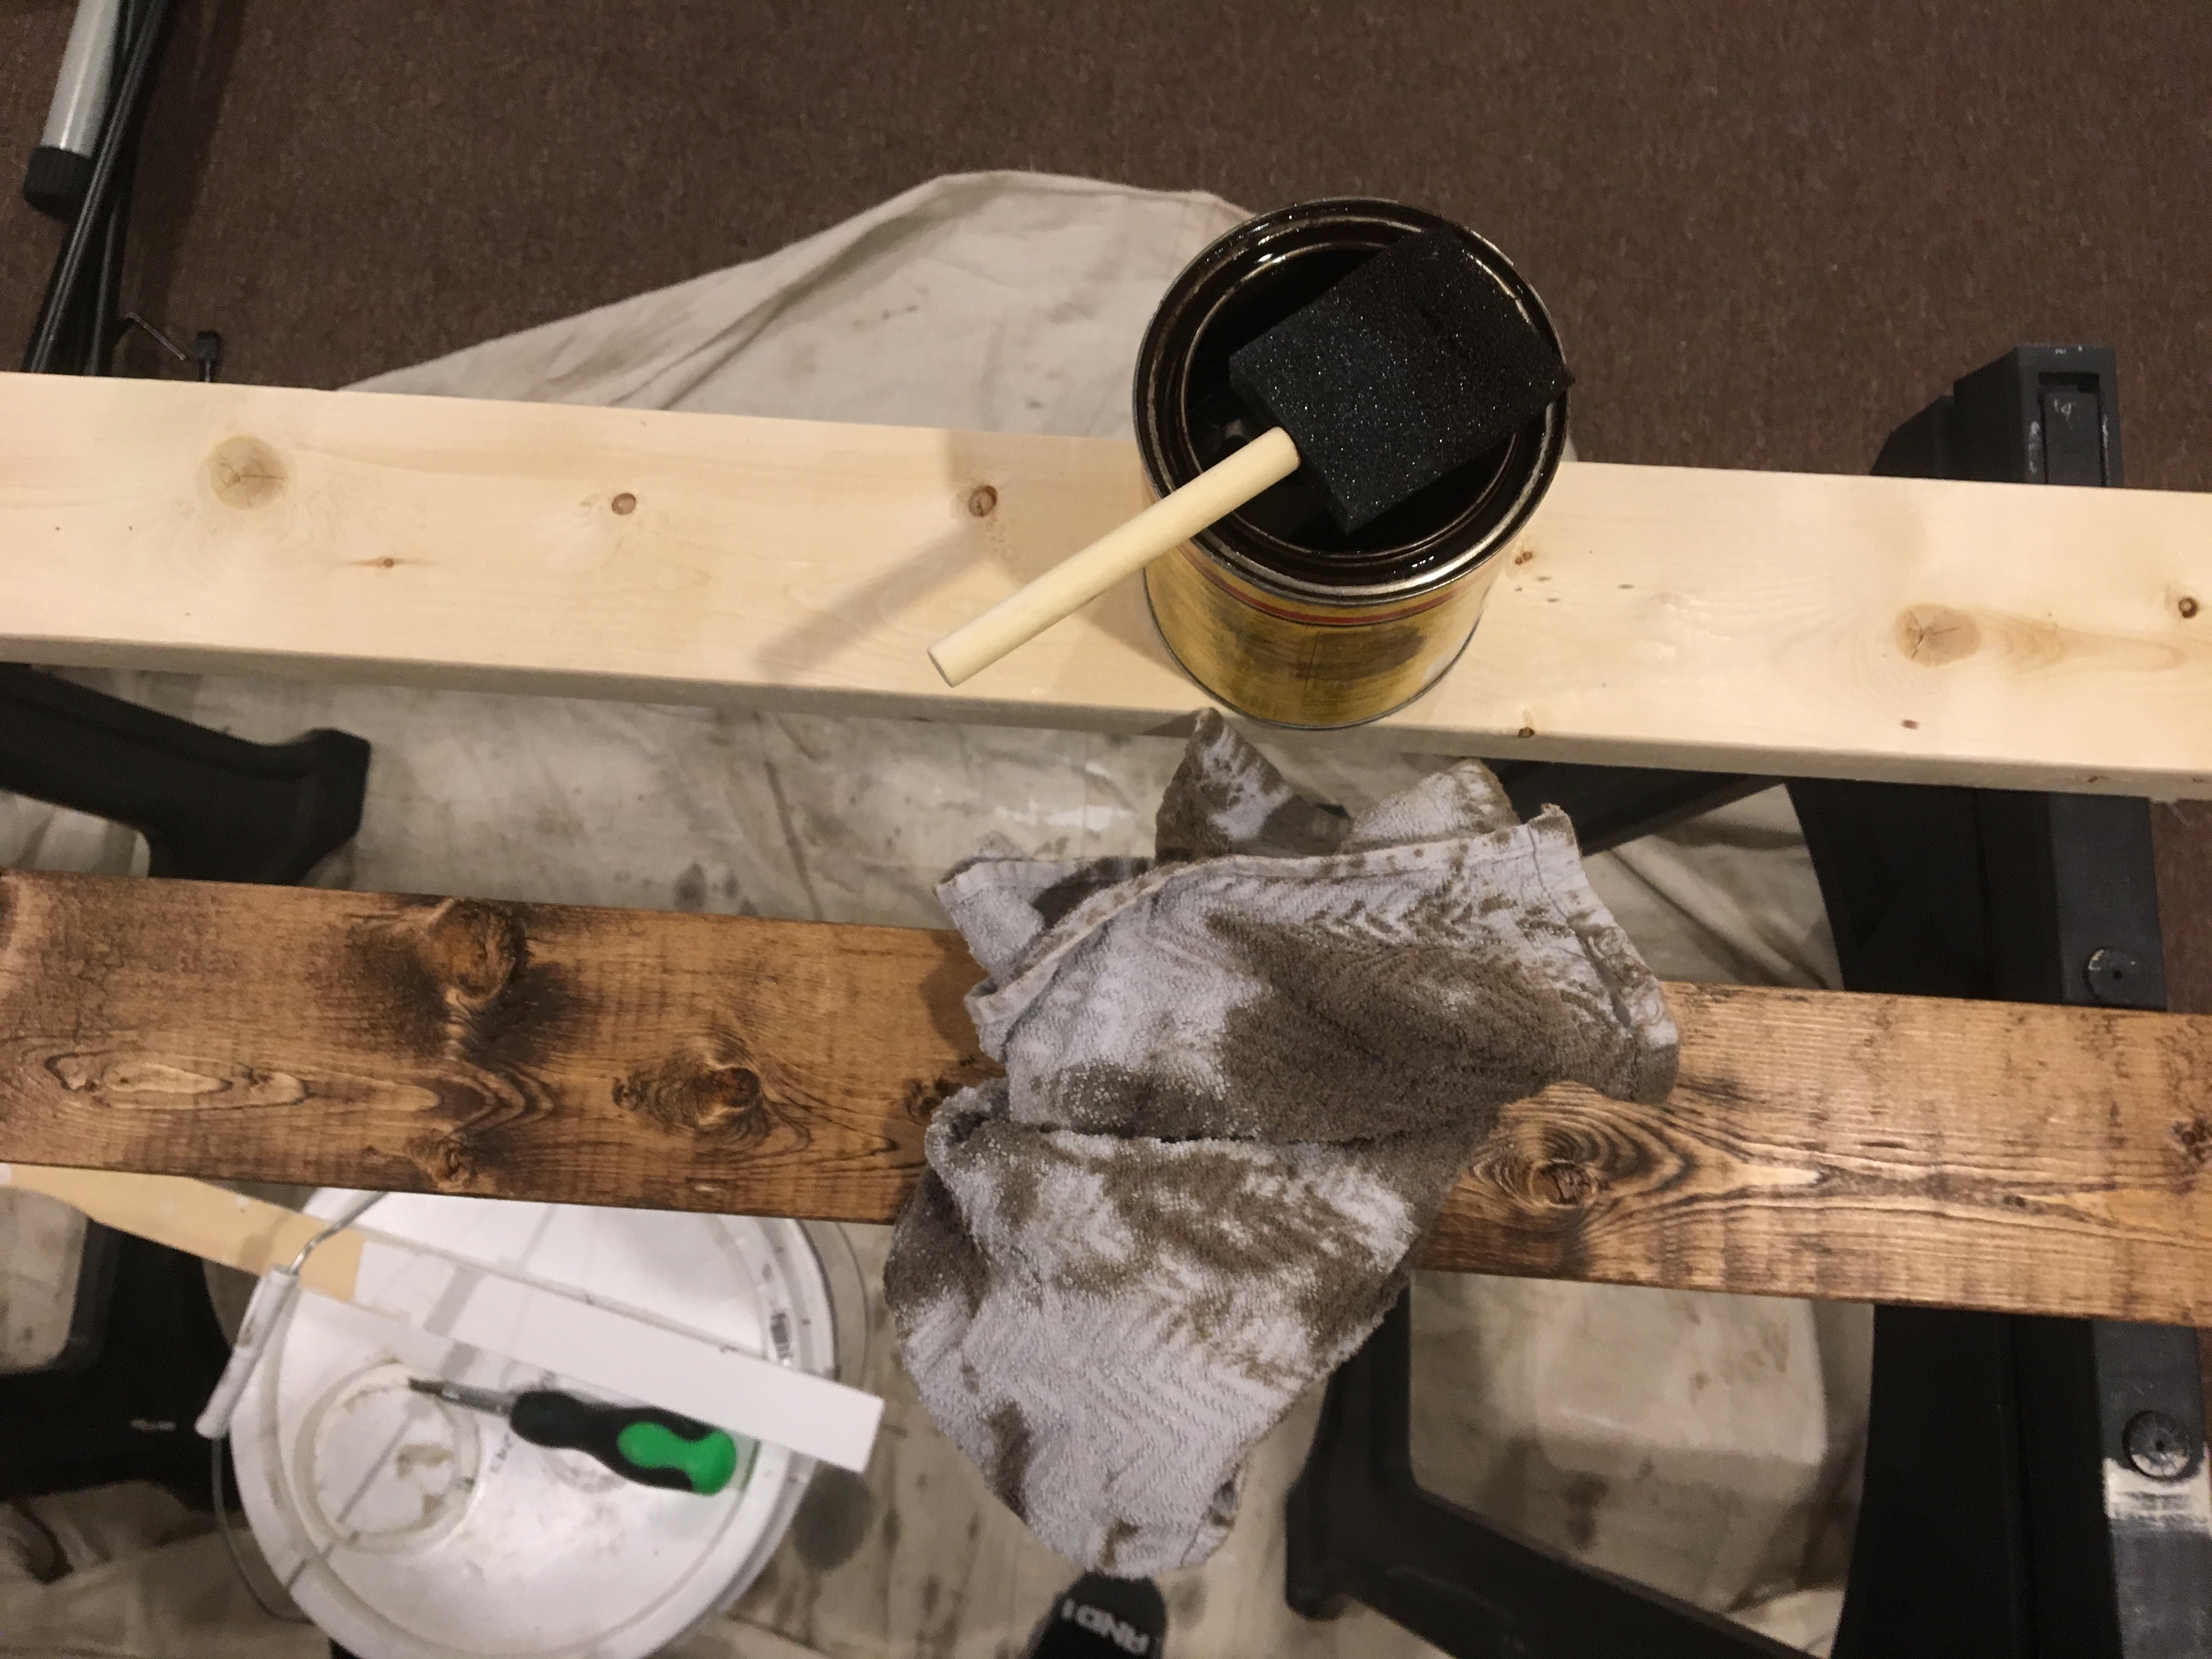
STEP 3 – Stain, Stain, Stain!
You can either stain the wood before it’s put together or after. I always choose before, that way I don’t have to worry about staining at a weird angle.
I used a foam brush to apply the Minwax Special Walnut stain. Depending on how dark you want the wood to look, you can either let the stain sit for a little while or wipe it off immediately.
– tip –
Let your stain fully dry for a couple days before you put it together. You could put a protective coat on it, but I was lazy and didn’t want to nor have time to!
STEP 4 – Put it together and BAM!
To attach the rungs, we drilled from the outside of the 2×4’s with the wood rungs at a 45 degree angle. You can use 3 – 3 1/2 inch screws.
The reason I wanted them at a 45 degree angle was so the blankets would sit and get tucked under nicely. Also, so that my nephews couldn’t easily start climbing up the ladder. (I know smart thinking. LOL!)
The first rung is 6 inches from the top and then from that first rung, they are about 12 inches apart the rest of the way down. This gave more room at the bottom, so a blanket could hang on the last rung without dragging on the ground.
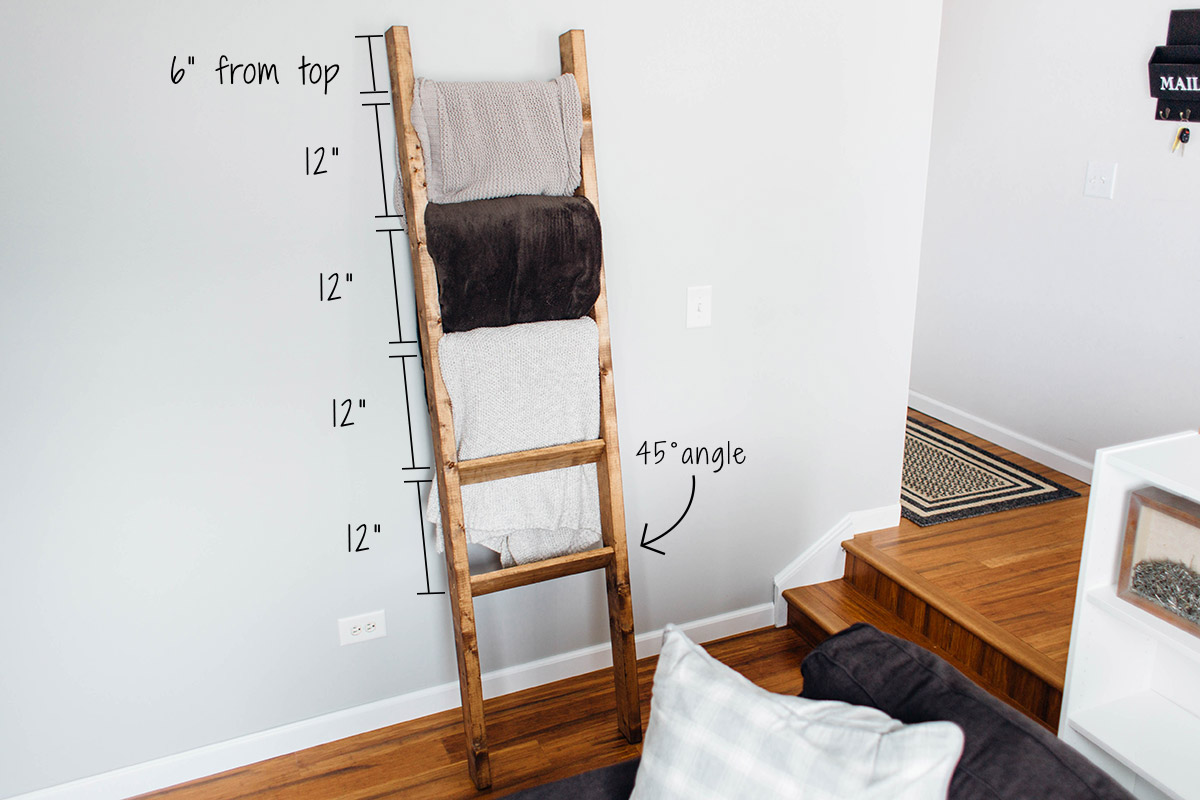
Now, it’s all done and you can hang all your blankets! Hope you guys enjoyed this DIY tutorial! Stay tuned for our next project.


That’s awesome. I love all of your tips!! Thank you.
This looks great! Did you rip your 2×4’s? They look really squared and nice. Just wondering if you ripped them
Hi Stacey! We did not rip the 2x4s. When picking our boards for projects, we always try to look for the best pieces!!
Did you guys use pilot holes before drilling the rungs, or did you drill them as is? Thanks for the great pictures and instructions, can’t wait to build this for my wife!
Hey Bryan!
Yes, we did drill pilot holes! I’m sure your wife will love it!
What kind of wood did you guys use? Spruce or pine? Love this look!
Hi!
It’s pine! 🙂