
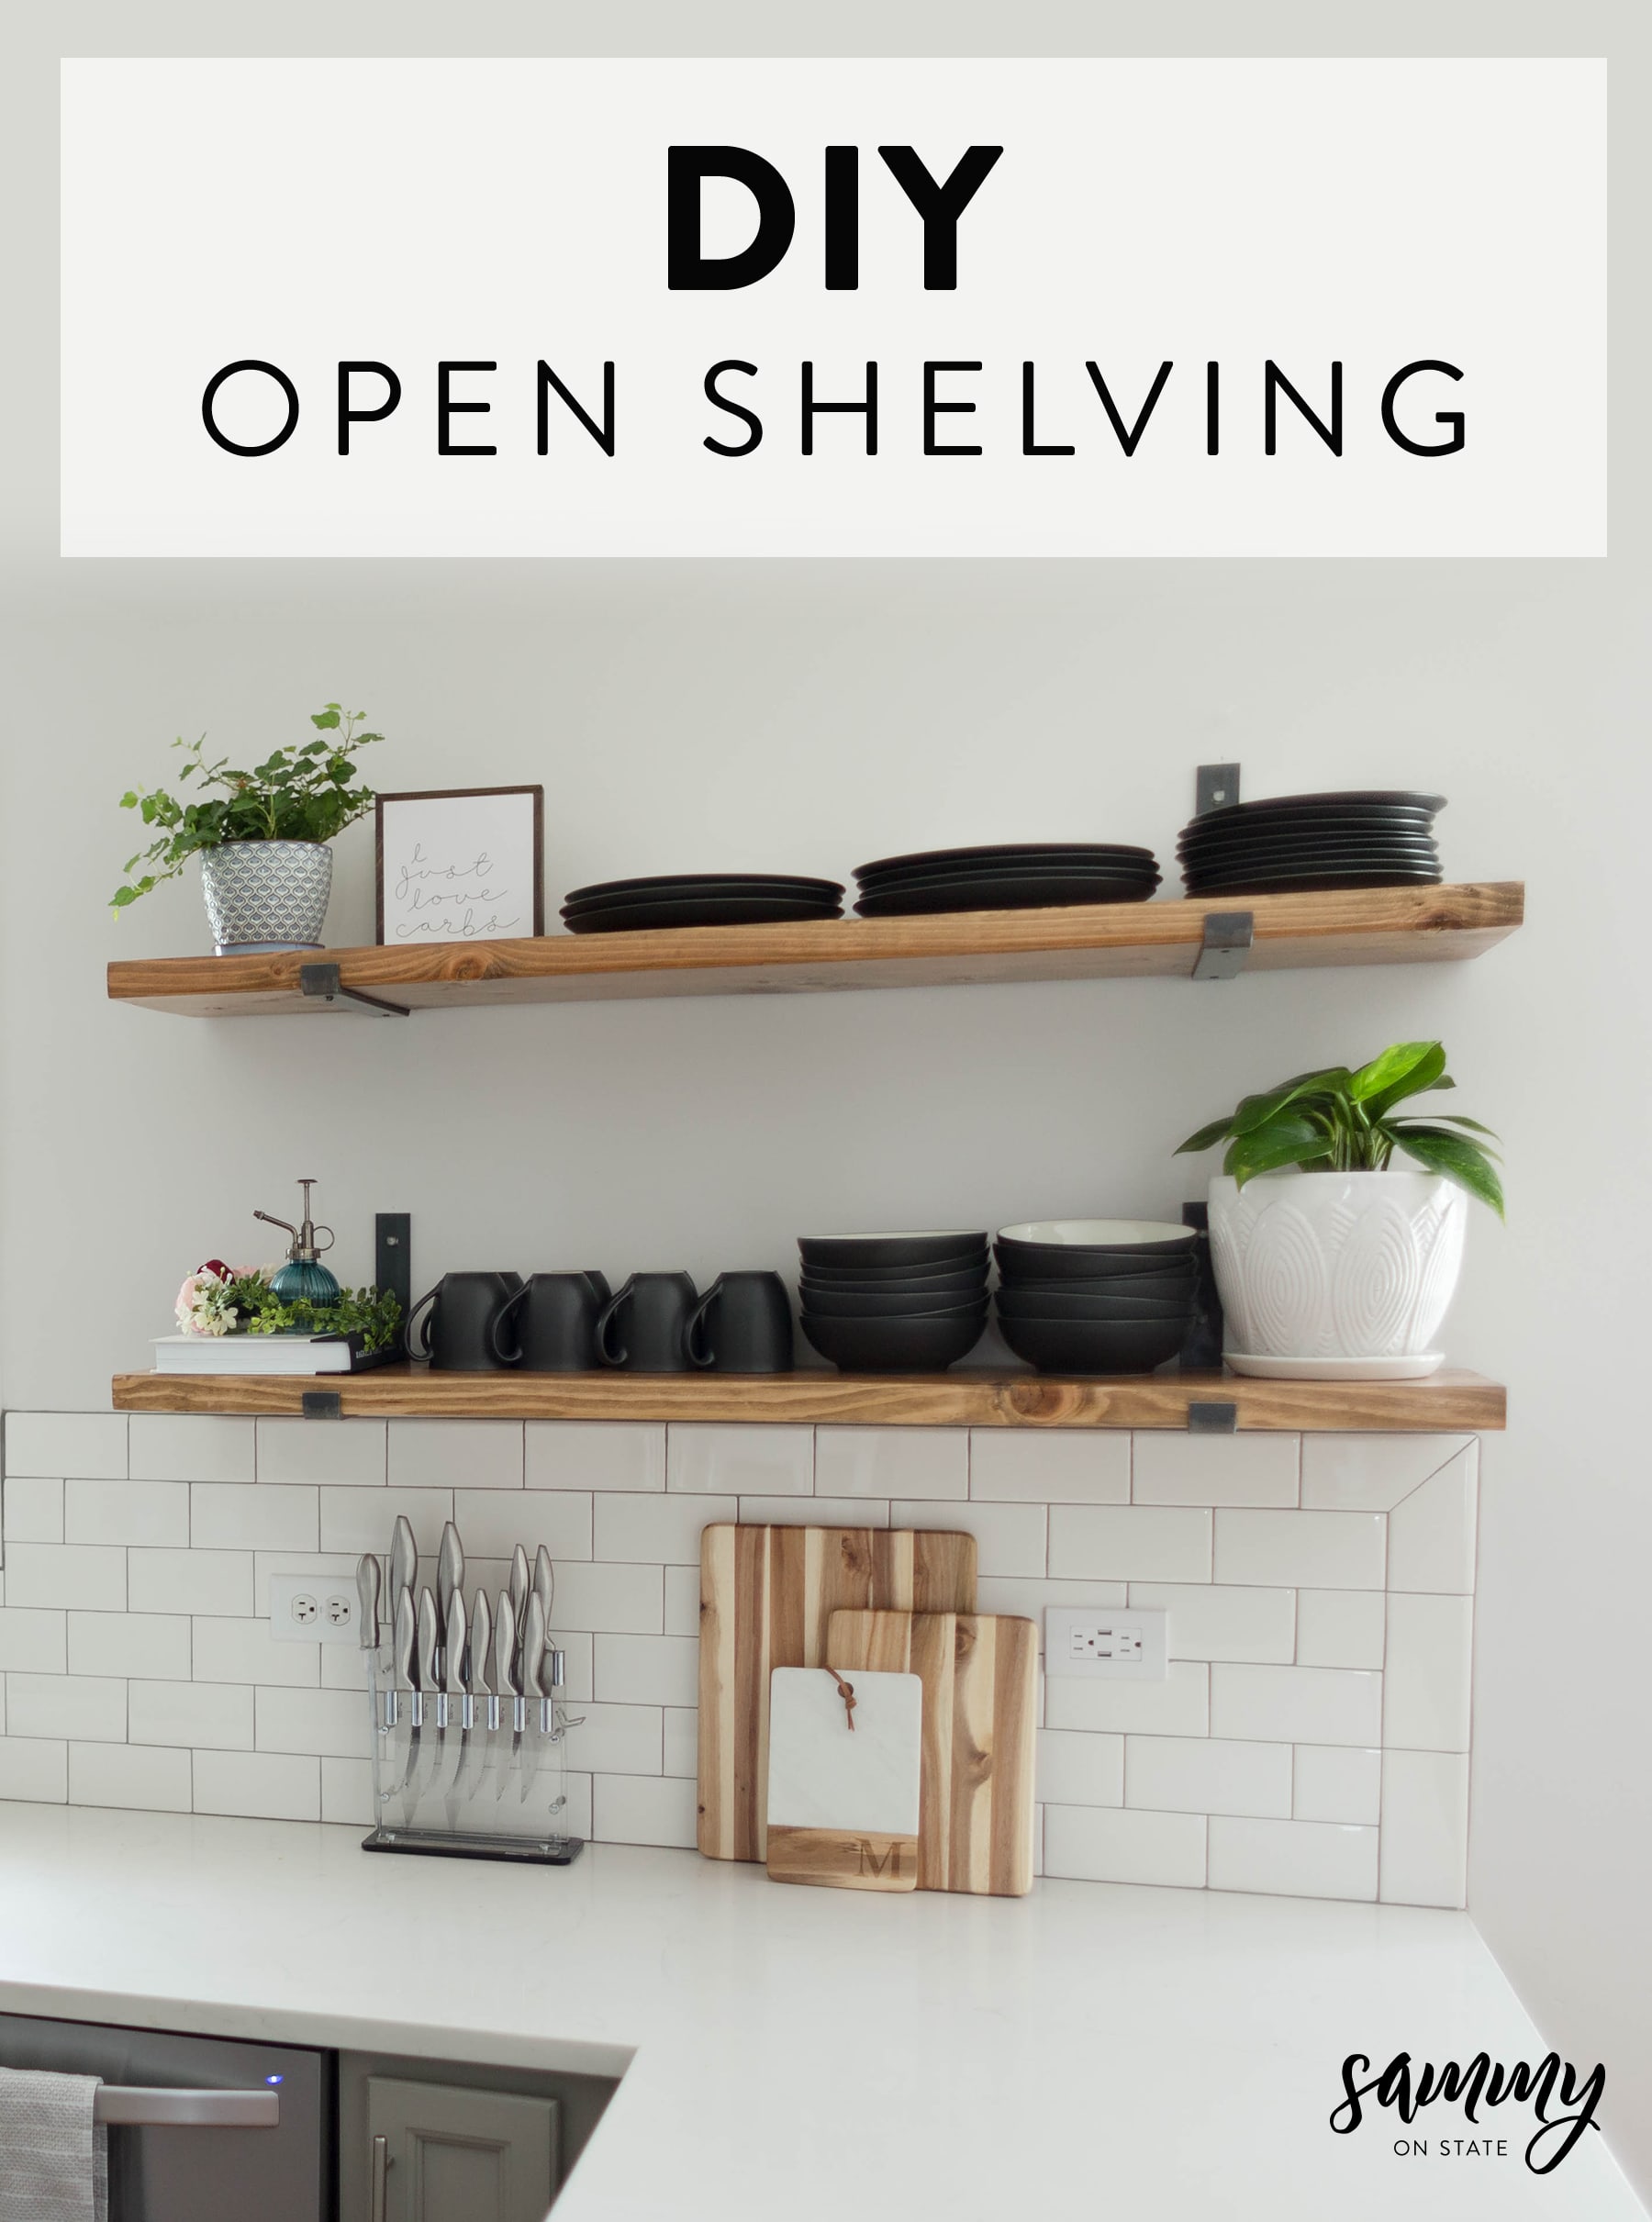
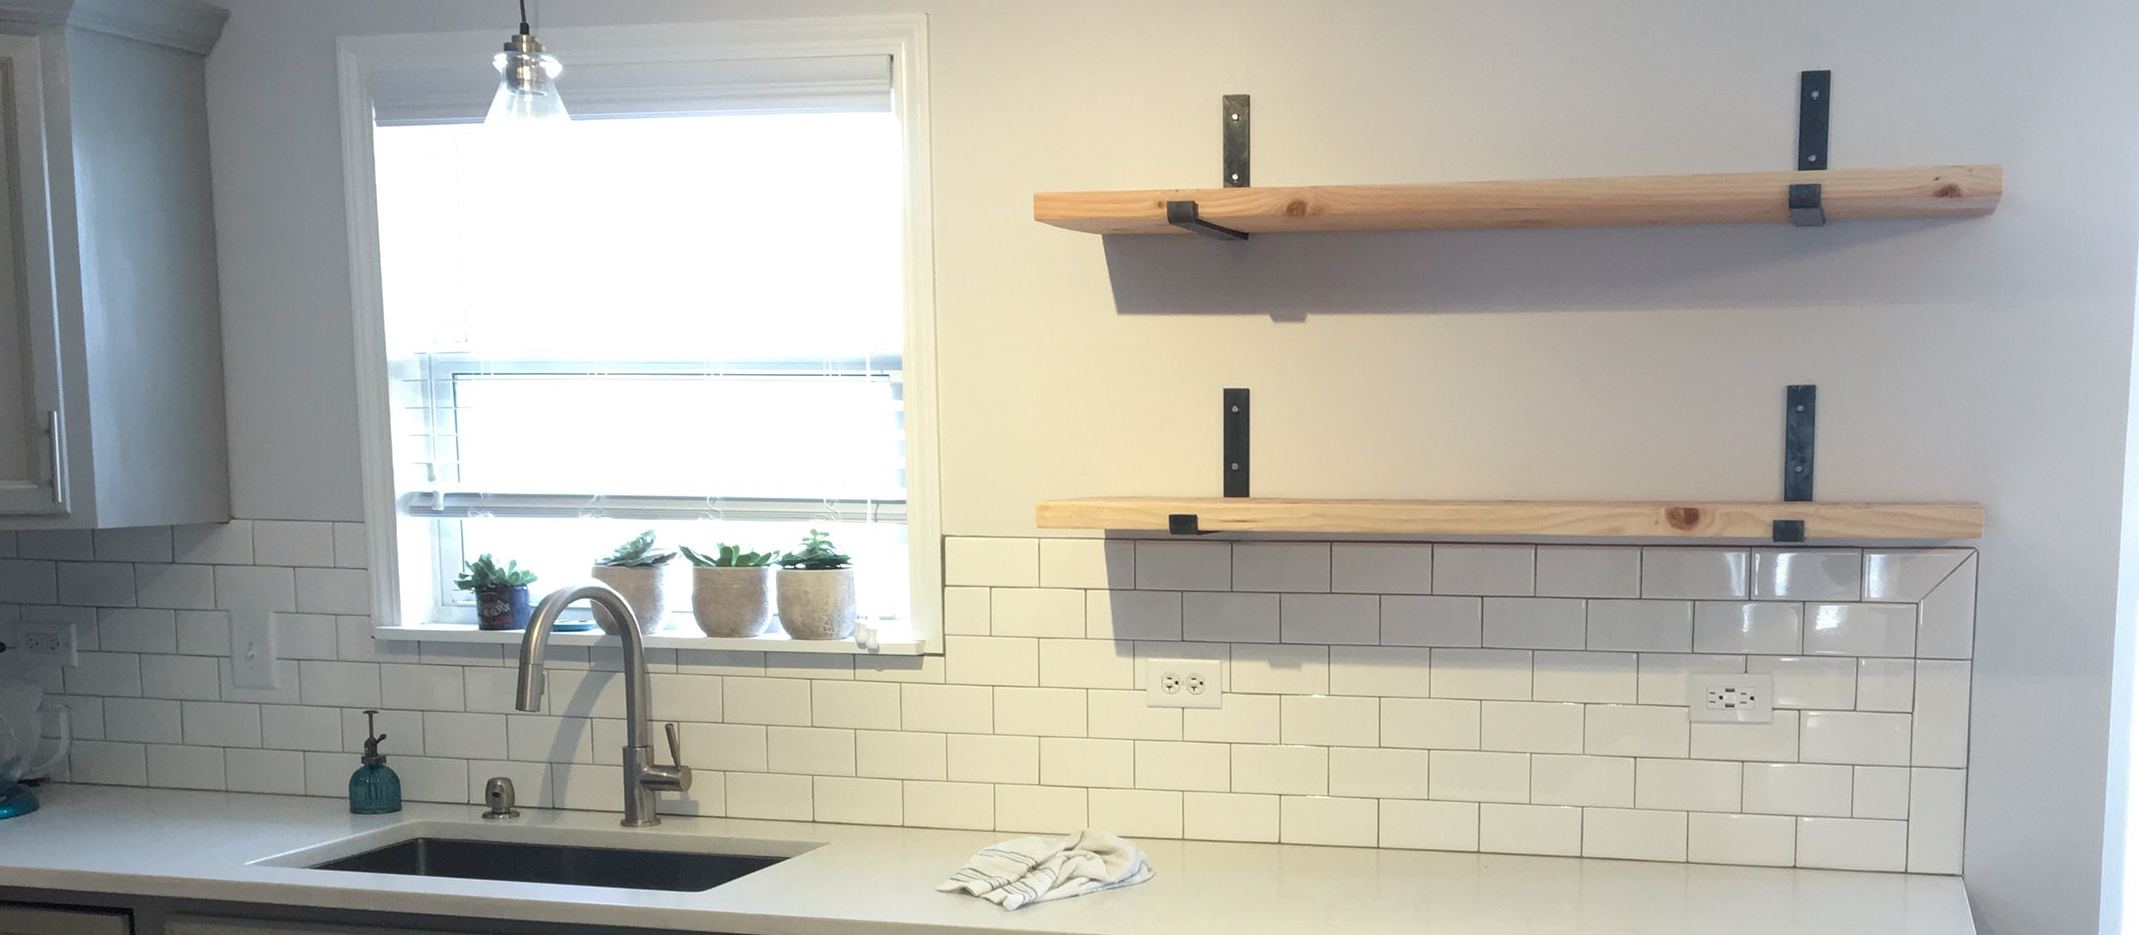
If any of you follow us on Instagram (@sammyonstate), you would know that we have FINALLY completed our open shelving in our newly renovated kitchen! I just thought to myself, “Sarah, you go ahead and take your time on this..” (3 months later…) LOL Oops! Well, folks, they are done now, and we couldn’t be happier with the outcome! We originally had a big bulky cabinet in this spot that looked very lonely, so my idea was to replace it with open shelving to open up the space and still keep it functional.
They were surprisingly super easy to make. We made sure to document the process, so once we got around to actually finishing them….. we could share it with all of you!
This post may contain affiliate links where we earn a small commission on your purchases at no additional cost to you.
THE SUPPLIES
- Shelf Brackets (We got ours from an Etsy shop called Modern Urban Metals.)
- Douglas Fir Wood / (2) 2in x 12inx 8ft from Home Depot
- Stain (We used Varathane Golden Oak)
- Varnish (We used Polycrylic Clear Semi-Gloss)
- Lint-Free Rags or Foam Brush (to apply stain)
THE TOOLS
- Stud Finder
- Drill
- Miter Saw
- Table Saw (Depending on the depth of the shelves you want)
- Orbital Sander
- Tape Measure
- Pencil
Step 1 – Plan of Attack for Open Shelving
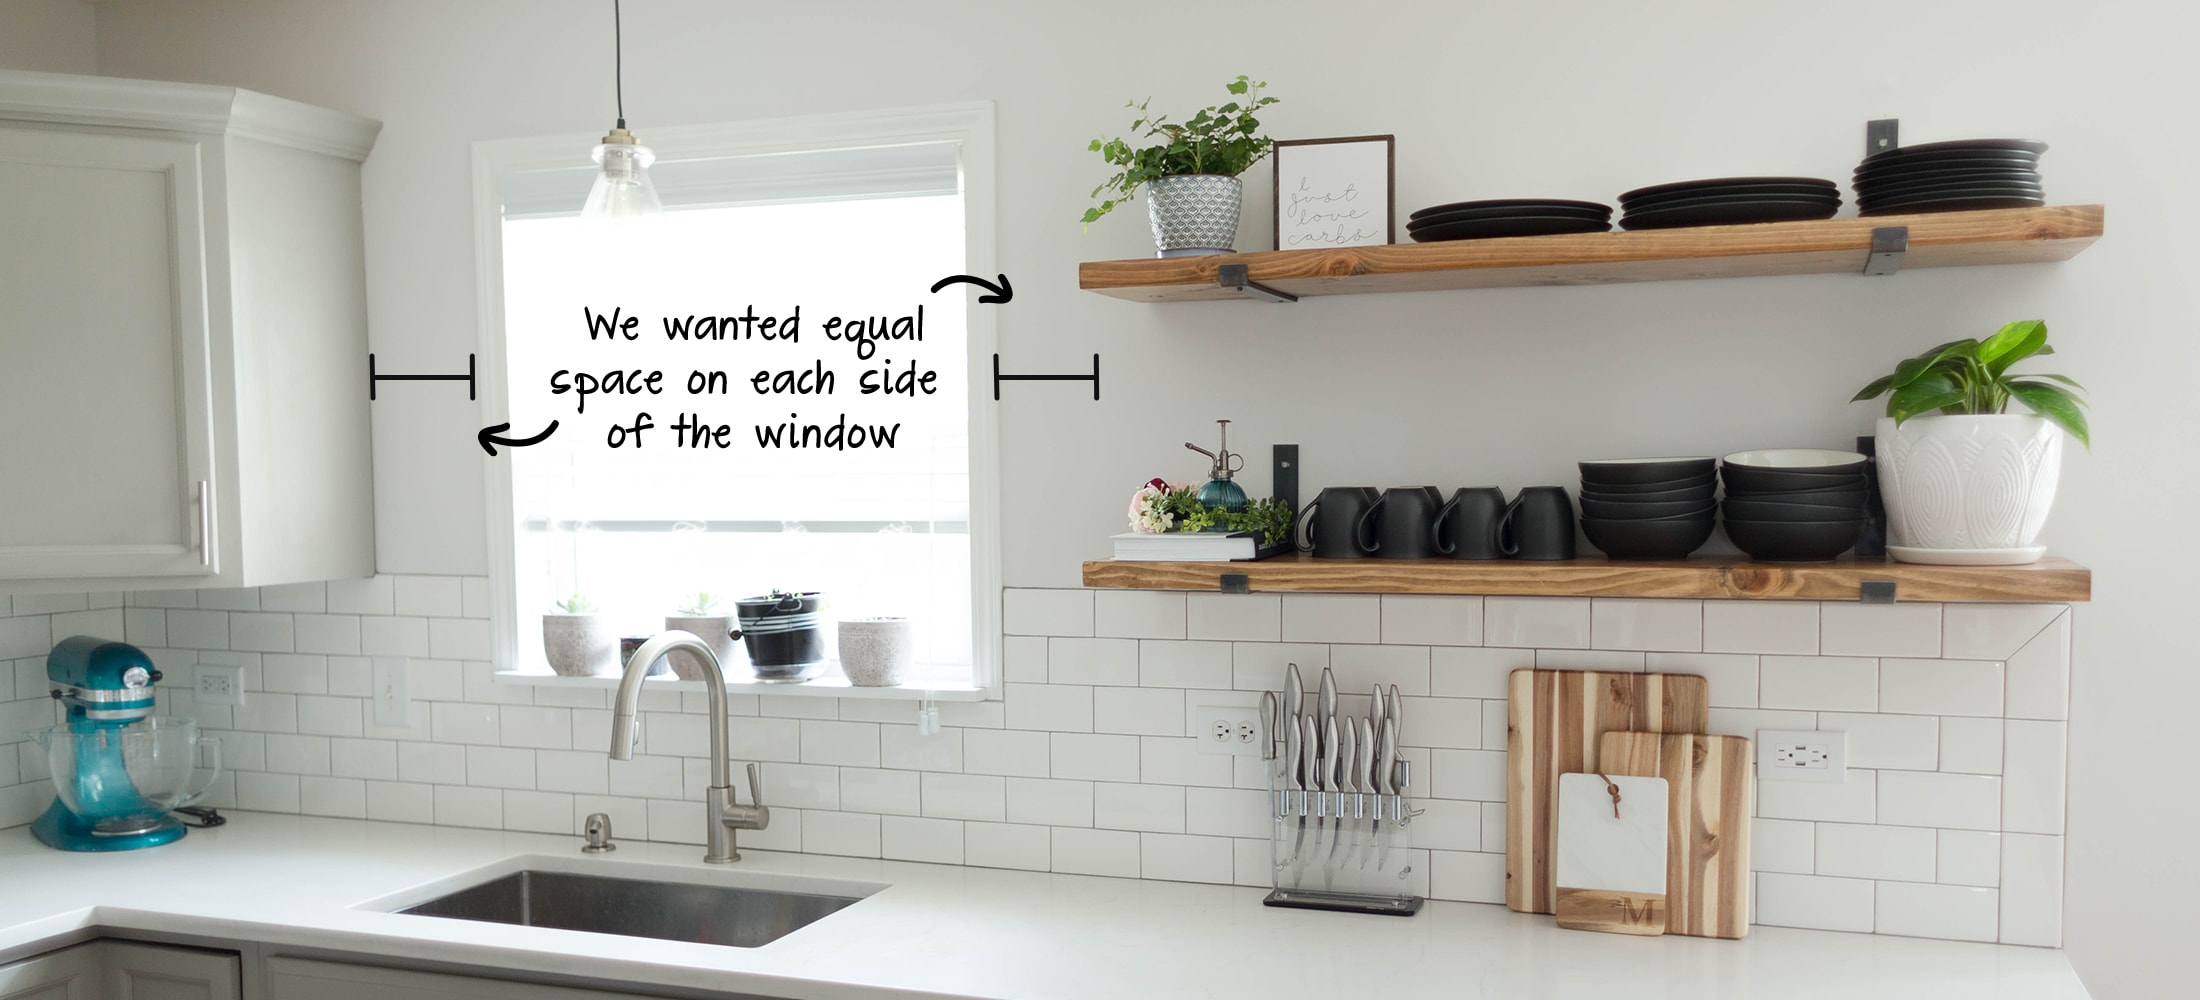
The first thing you’re going to want to do is to plan out how long you want the open shelving to be.
For our kitchen, we wanted to keep the gap that’s on the left side of the window the same as the right. So, we measured the left side and then marked the same length on the right side. Then, from that marked point on the right side, we measured the length all the way to the end of the backsplash. That was our shelf length, which was 50 inches long. 🙂
Step 2 – Find Studs & Hang Brackets
Now, since we knew the general spot of where our open shelving was going to hang, we had to find studs within that area.
-side note-
These shelf brackets have to be mounted to studs. I REPEAT, MOUNT. BRACKETS. TO. STUDS. IN. WALL …Can’t say we didn’t warn you. If there is no stud where you want to mount the bracket, make sure to use drywall anchors.
Once we marked our studs with a pencil, we had to drill pilot holes because the brackets came with bolts and not screws. Unlike screws, bolts don’t have a tip to start the hole.
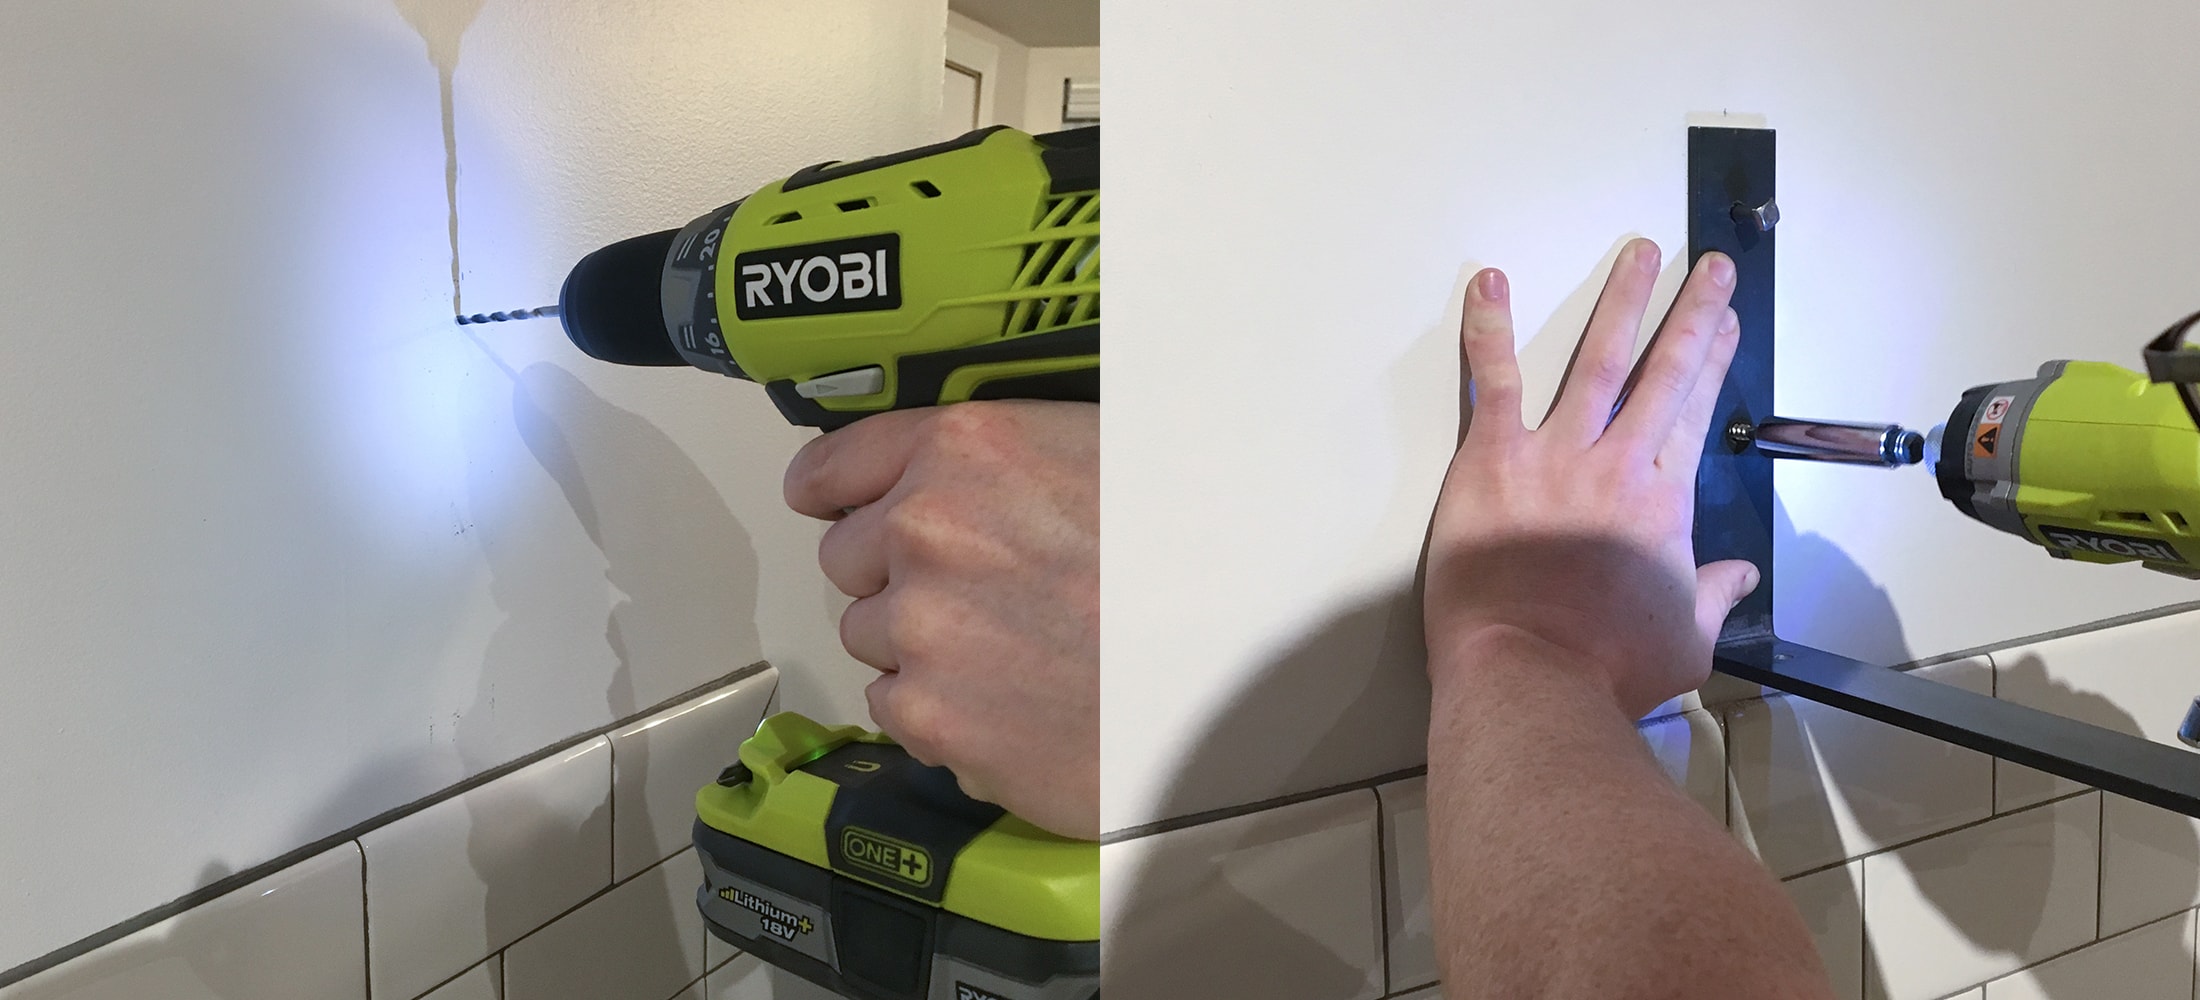
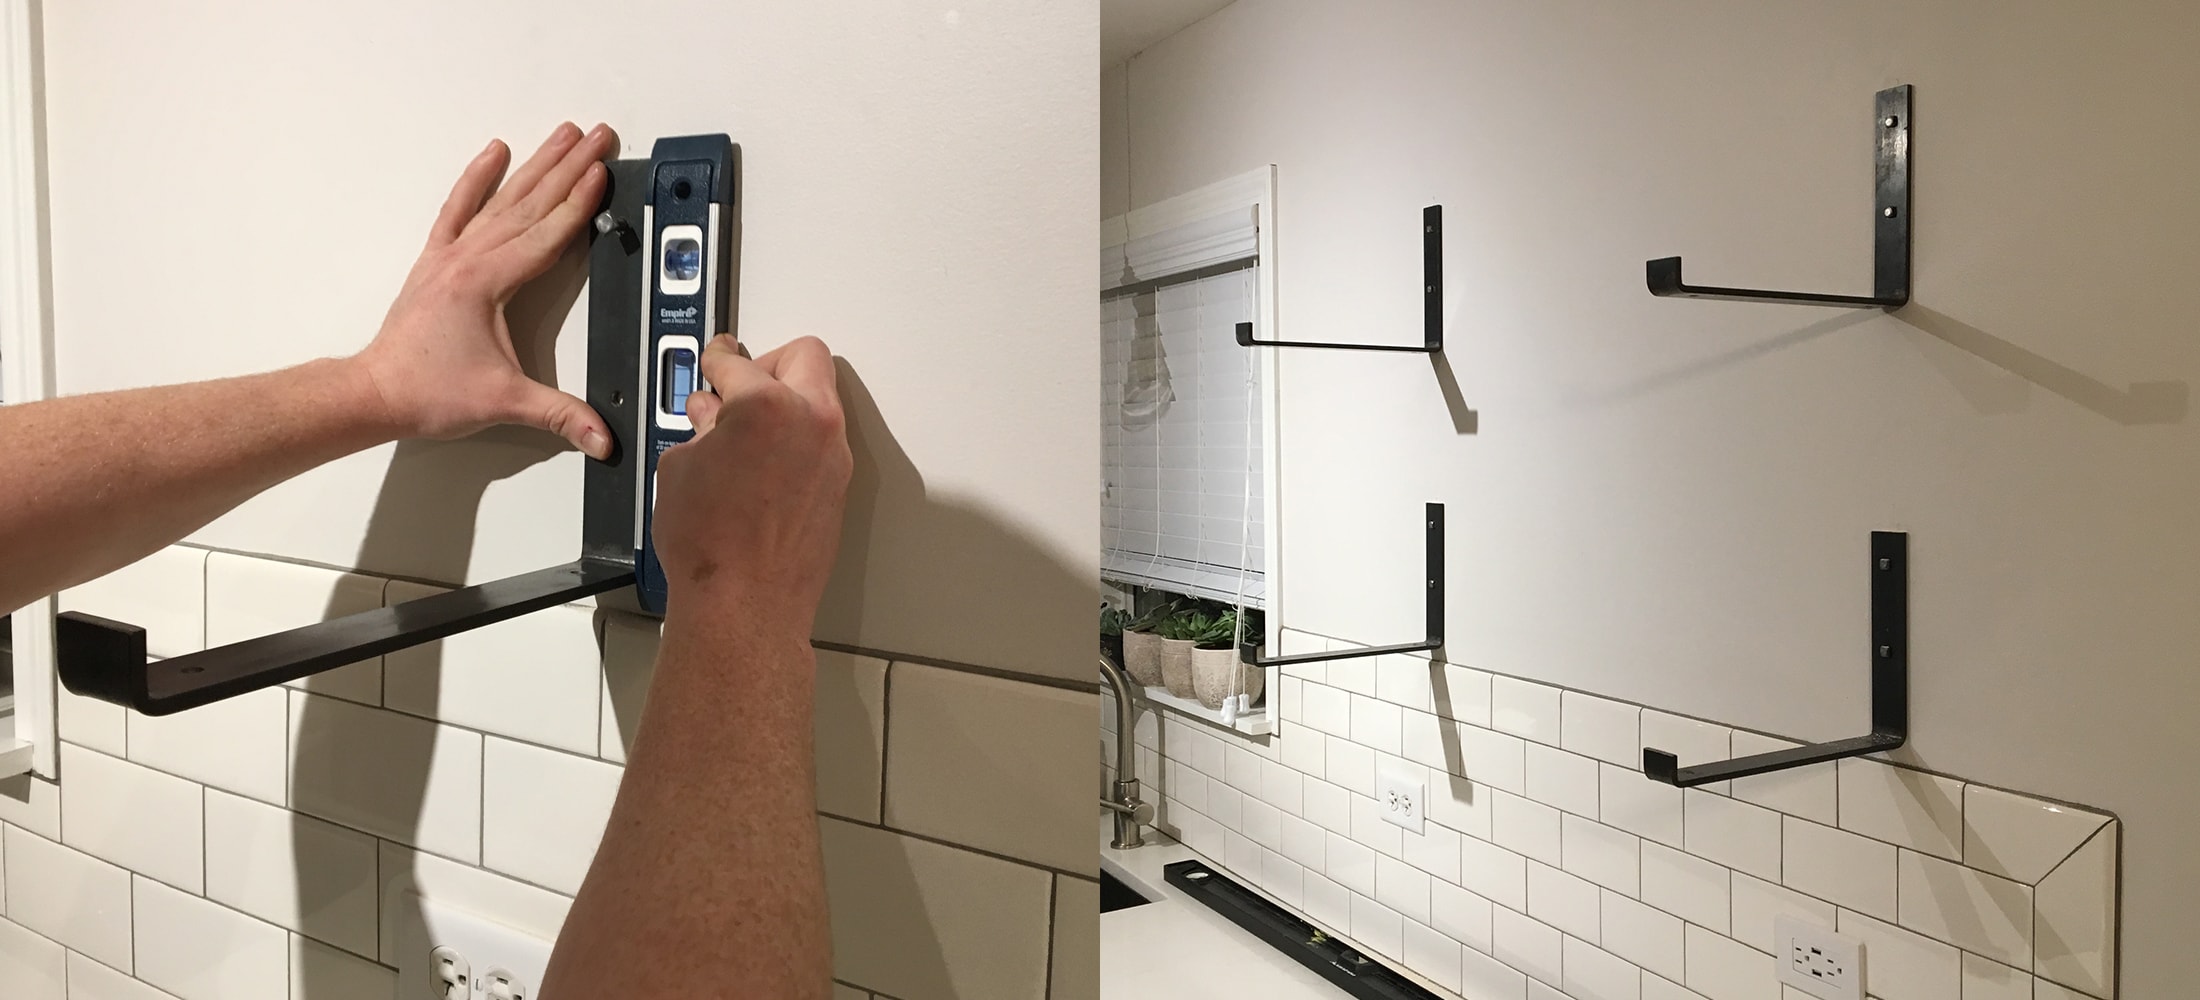
Once the pilot holes were all drilled, we drilled in the bolts while holding up the level to keep the bracket straight. If the bracket is level, then the shelves will be level…
Step 3 – Cut & Sand Wood
The next thing we did was measure and cut our wood to 50″ in length. (Remember, from our original planning session in the beginning.) If we planned it all right, we would be done with cutting…
Since, I found the brackets before I found the wood, we actually had to take a little off the depth of the shelf so it would fit in the brackets. I originally purchased the brackets to be made for an 11″ depth…. That matches the depth of our other closed cabinets shelving.
But, the wood we ended up using later was like 11.5″ in depth. So, because my fiance says I’m a pain in the ass, naturally we had to get the table saw out and rip the wood shelf by like half an inch so it would fit in the bracket…. LOL oops.
I could have easily just got the bracket to be made for the 11.5″ depth and there would have been no table saw needed. But… lol that’s life. 🙂 Hey, it still turned out great!
Anyways….after all the cutting, we did some light sanding with our orbital sander to smooth down the wood and prep it for some stain.
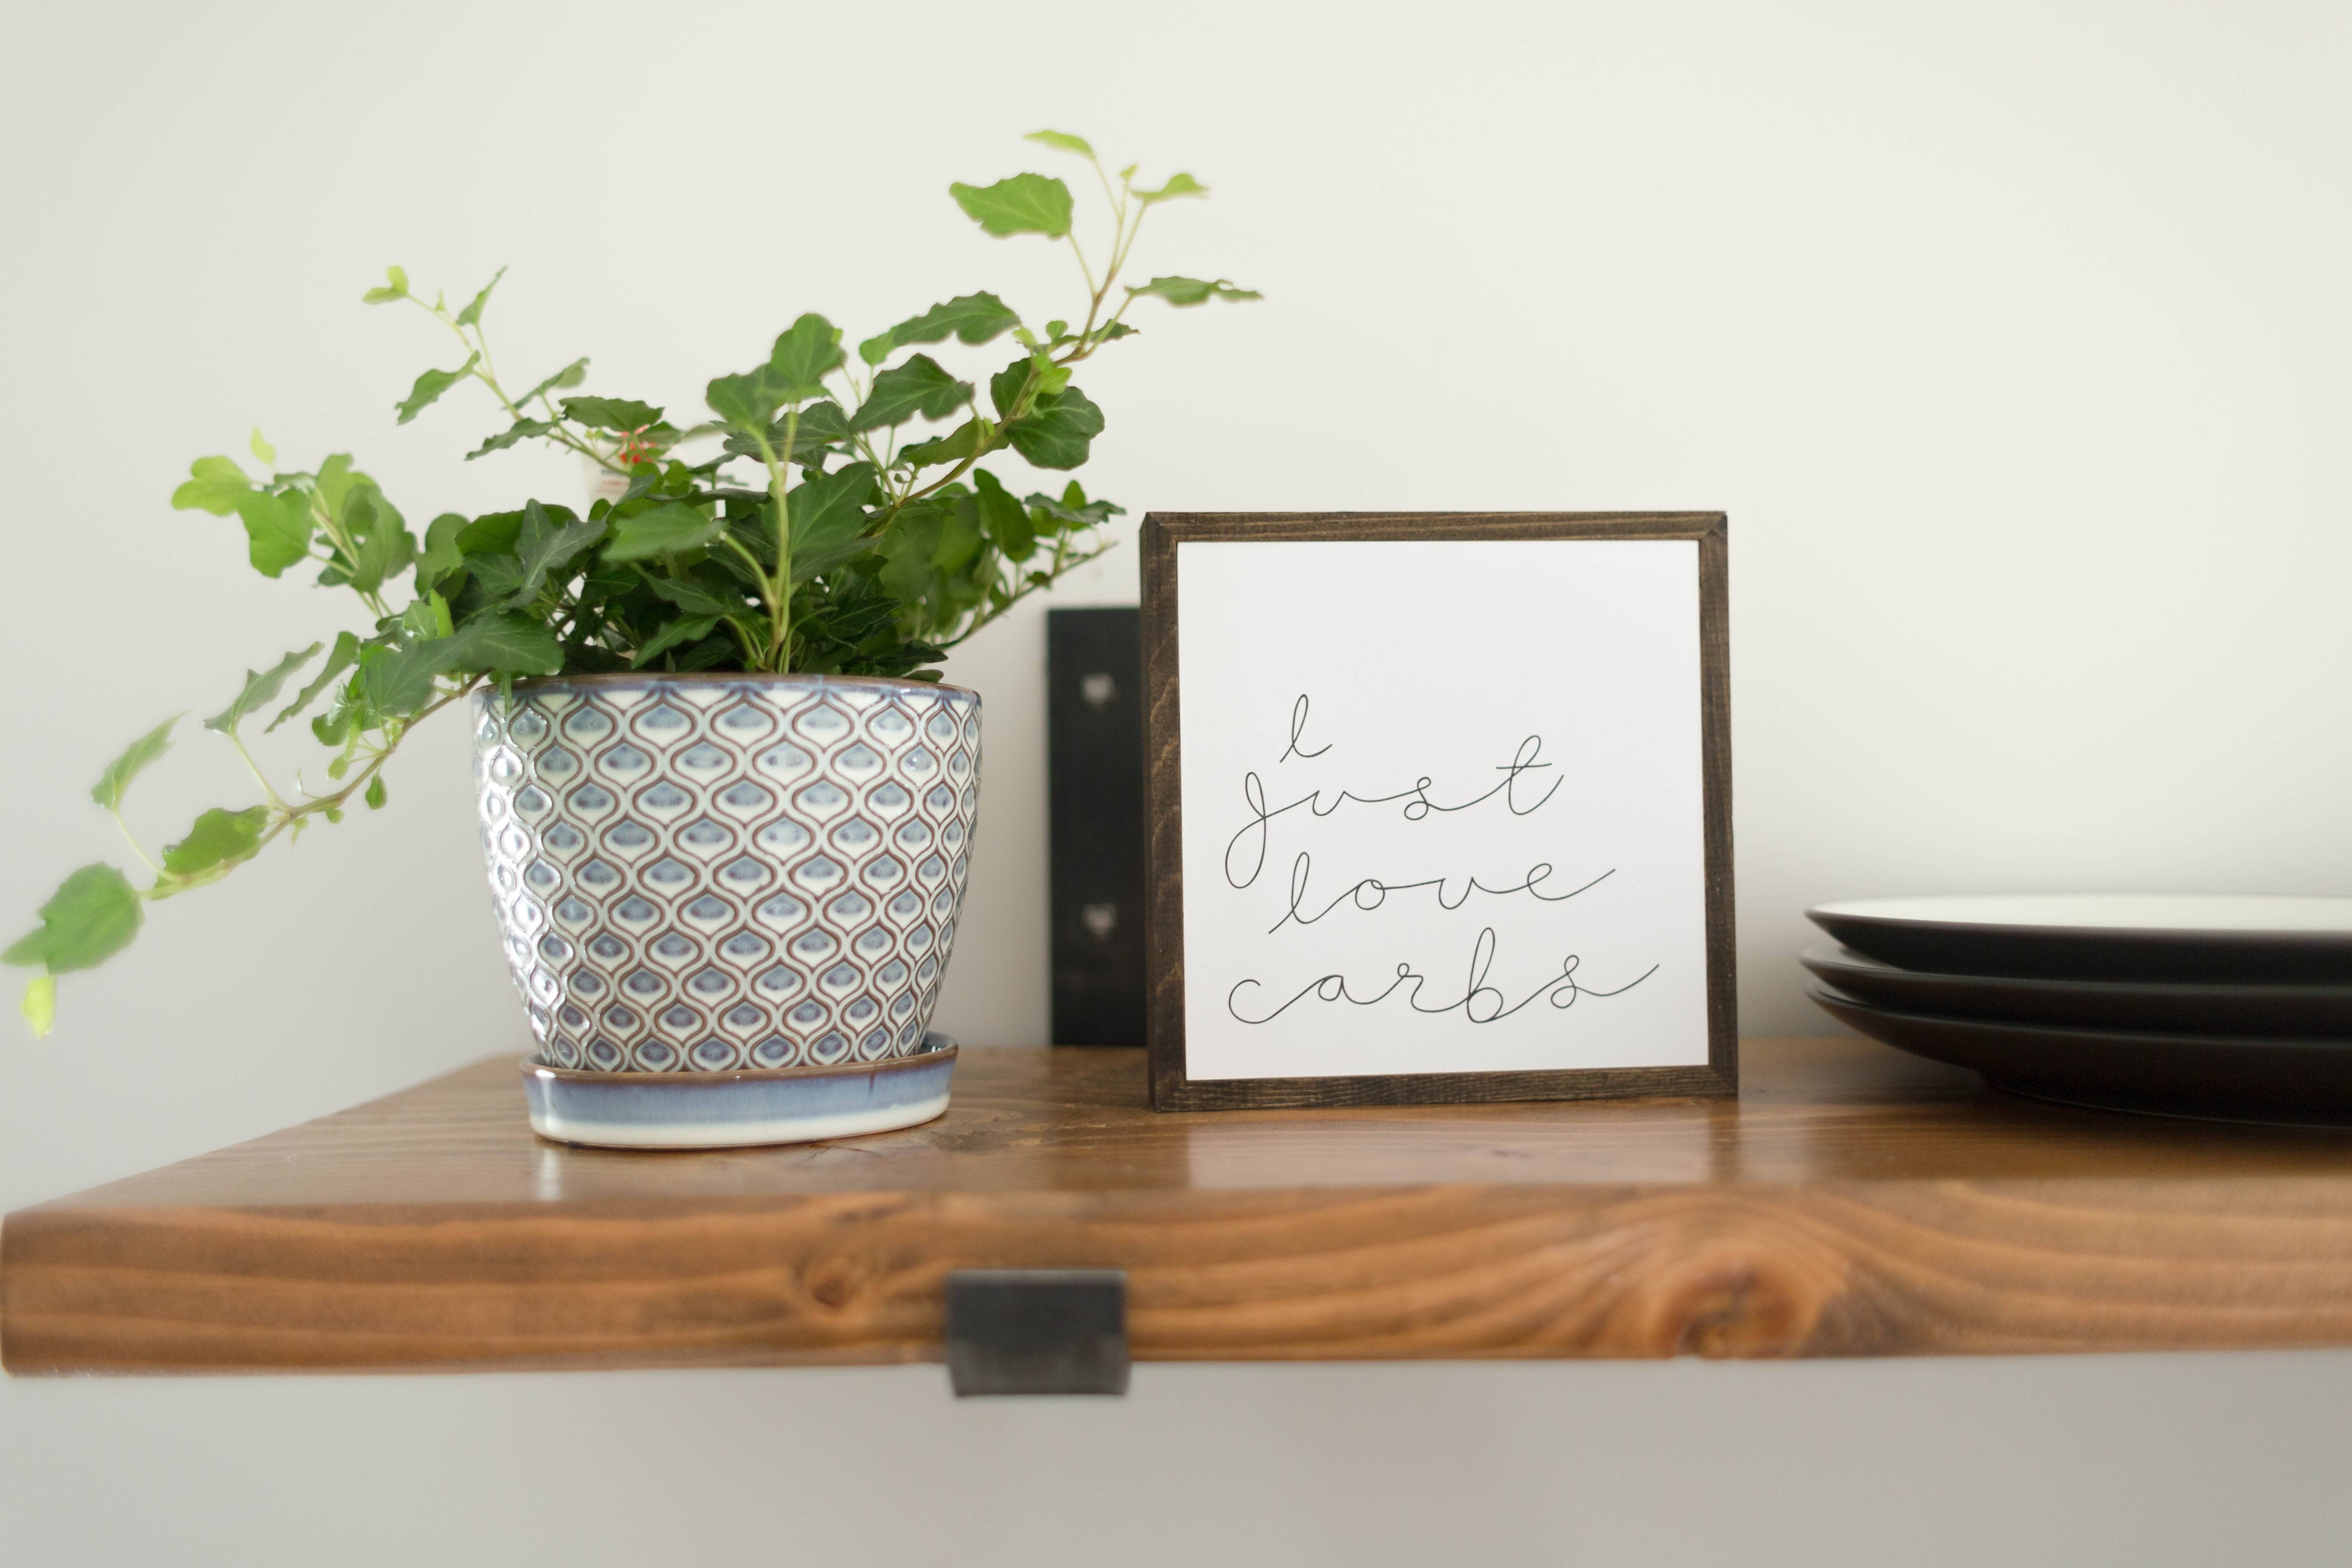
Step 4 – Stain & Seal
We used the extra wood we cut off to test different stain colors. It took me about 2 weeks decide on the stain for these shelves. Possibly 3… I don’t even remember… I used different brands of stains, I mixed stains, everything. I just didn’t know which one to go with.
Well, we landed on Varathane Golden Oak. What my fiance, Ryan, said from the beginning. 😀 LOL. You know, a girl has gotta be sure! Oh well…
Finally, we stained our shelves. We used a foam brush to put the stain on the wood and wiped it off with a lint-free rag. After the stain dried, we used another foam brush to wipe on the varnish. We did three coats of a Polycrylic Clear Semi-Gloss varnish because these shelves are in the kitchen. We need them to withstand to some crazy cooking splatters, water, you name it!
-side note-
Between each coat of varnish, we did a light sanding with a sanding block and then wiped it clean for the next coat. This made the finish nice and smooth.
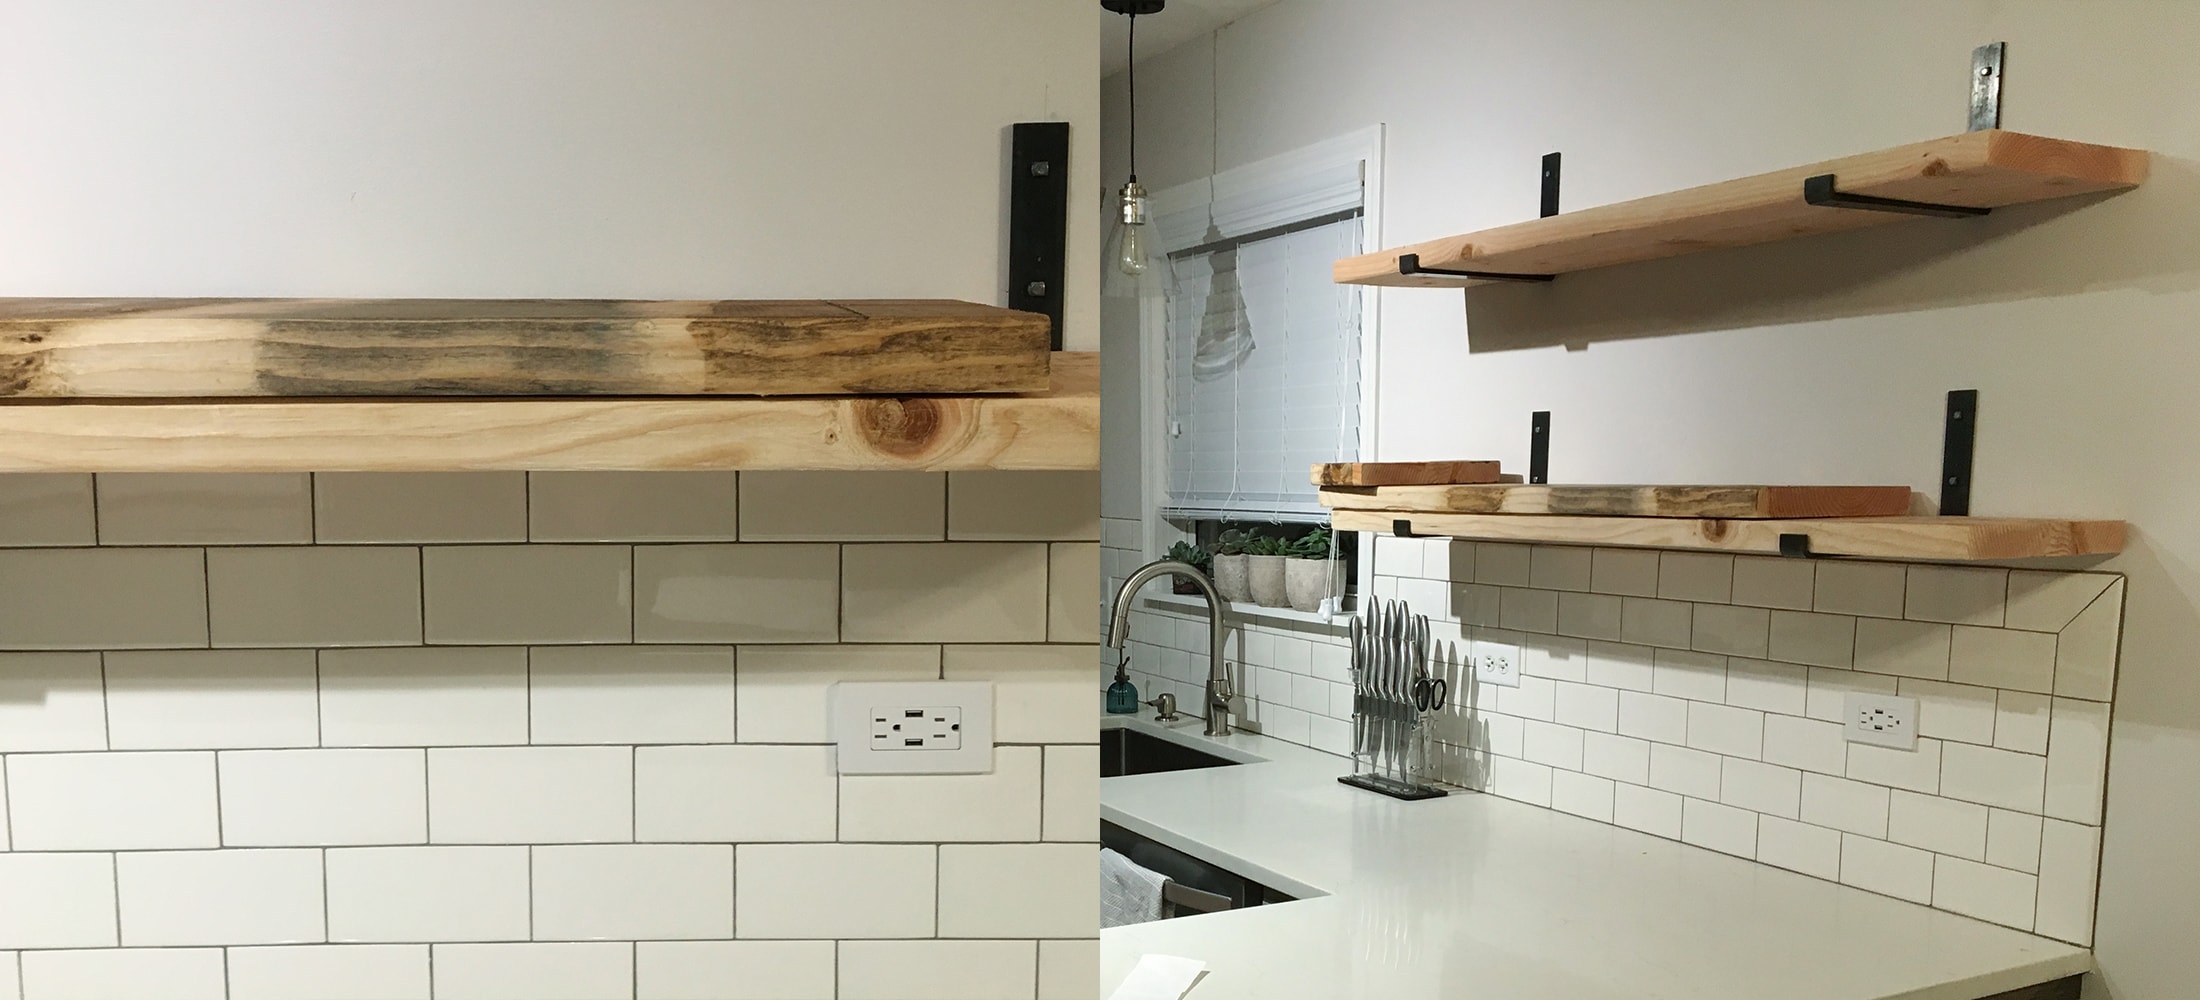
Step 5 – Mount Shelves
FINALLY, the last step was mounting the shelves to the brackets!
The brackets we bought also came with 4 screws to secure the wood to the bottom of the brackets. So like we did in the beginning, we marked with a pencil where the holes on the brackets line up with the wood shelf.
Then, we drilled pilot holes for the screws. Once we screwed them all in we made sure the shelves were secure… and BAM! Our finished open shelving! wooohooo!
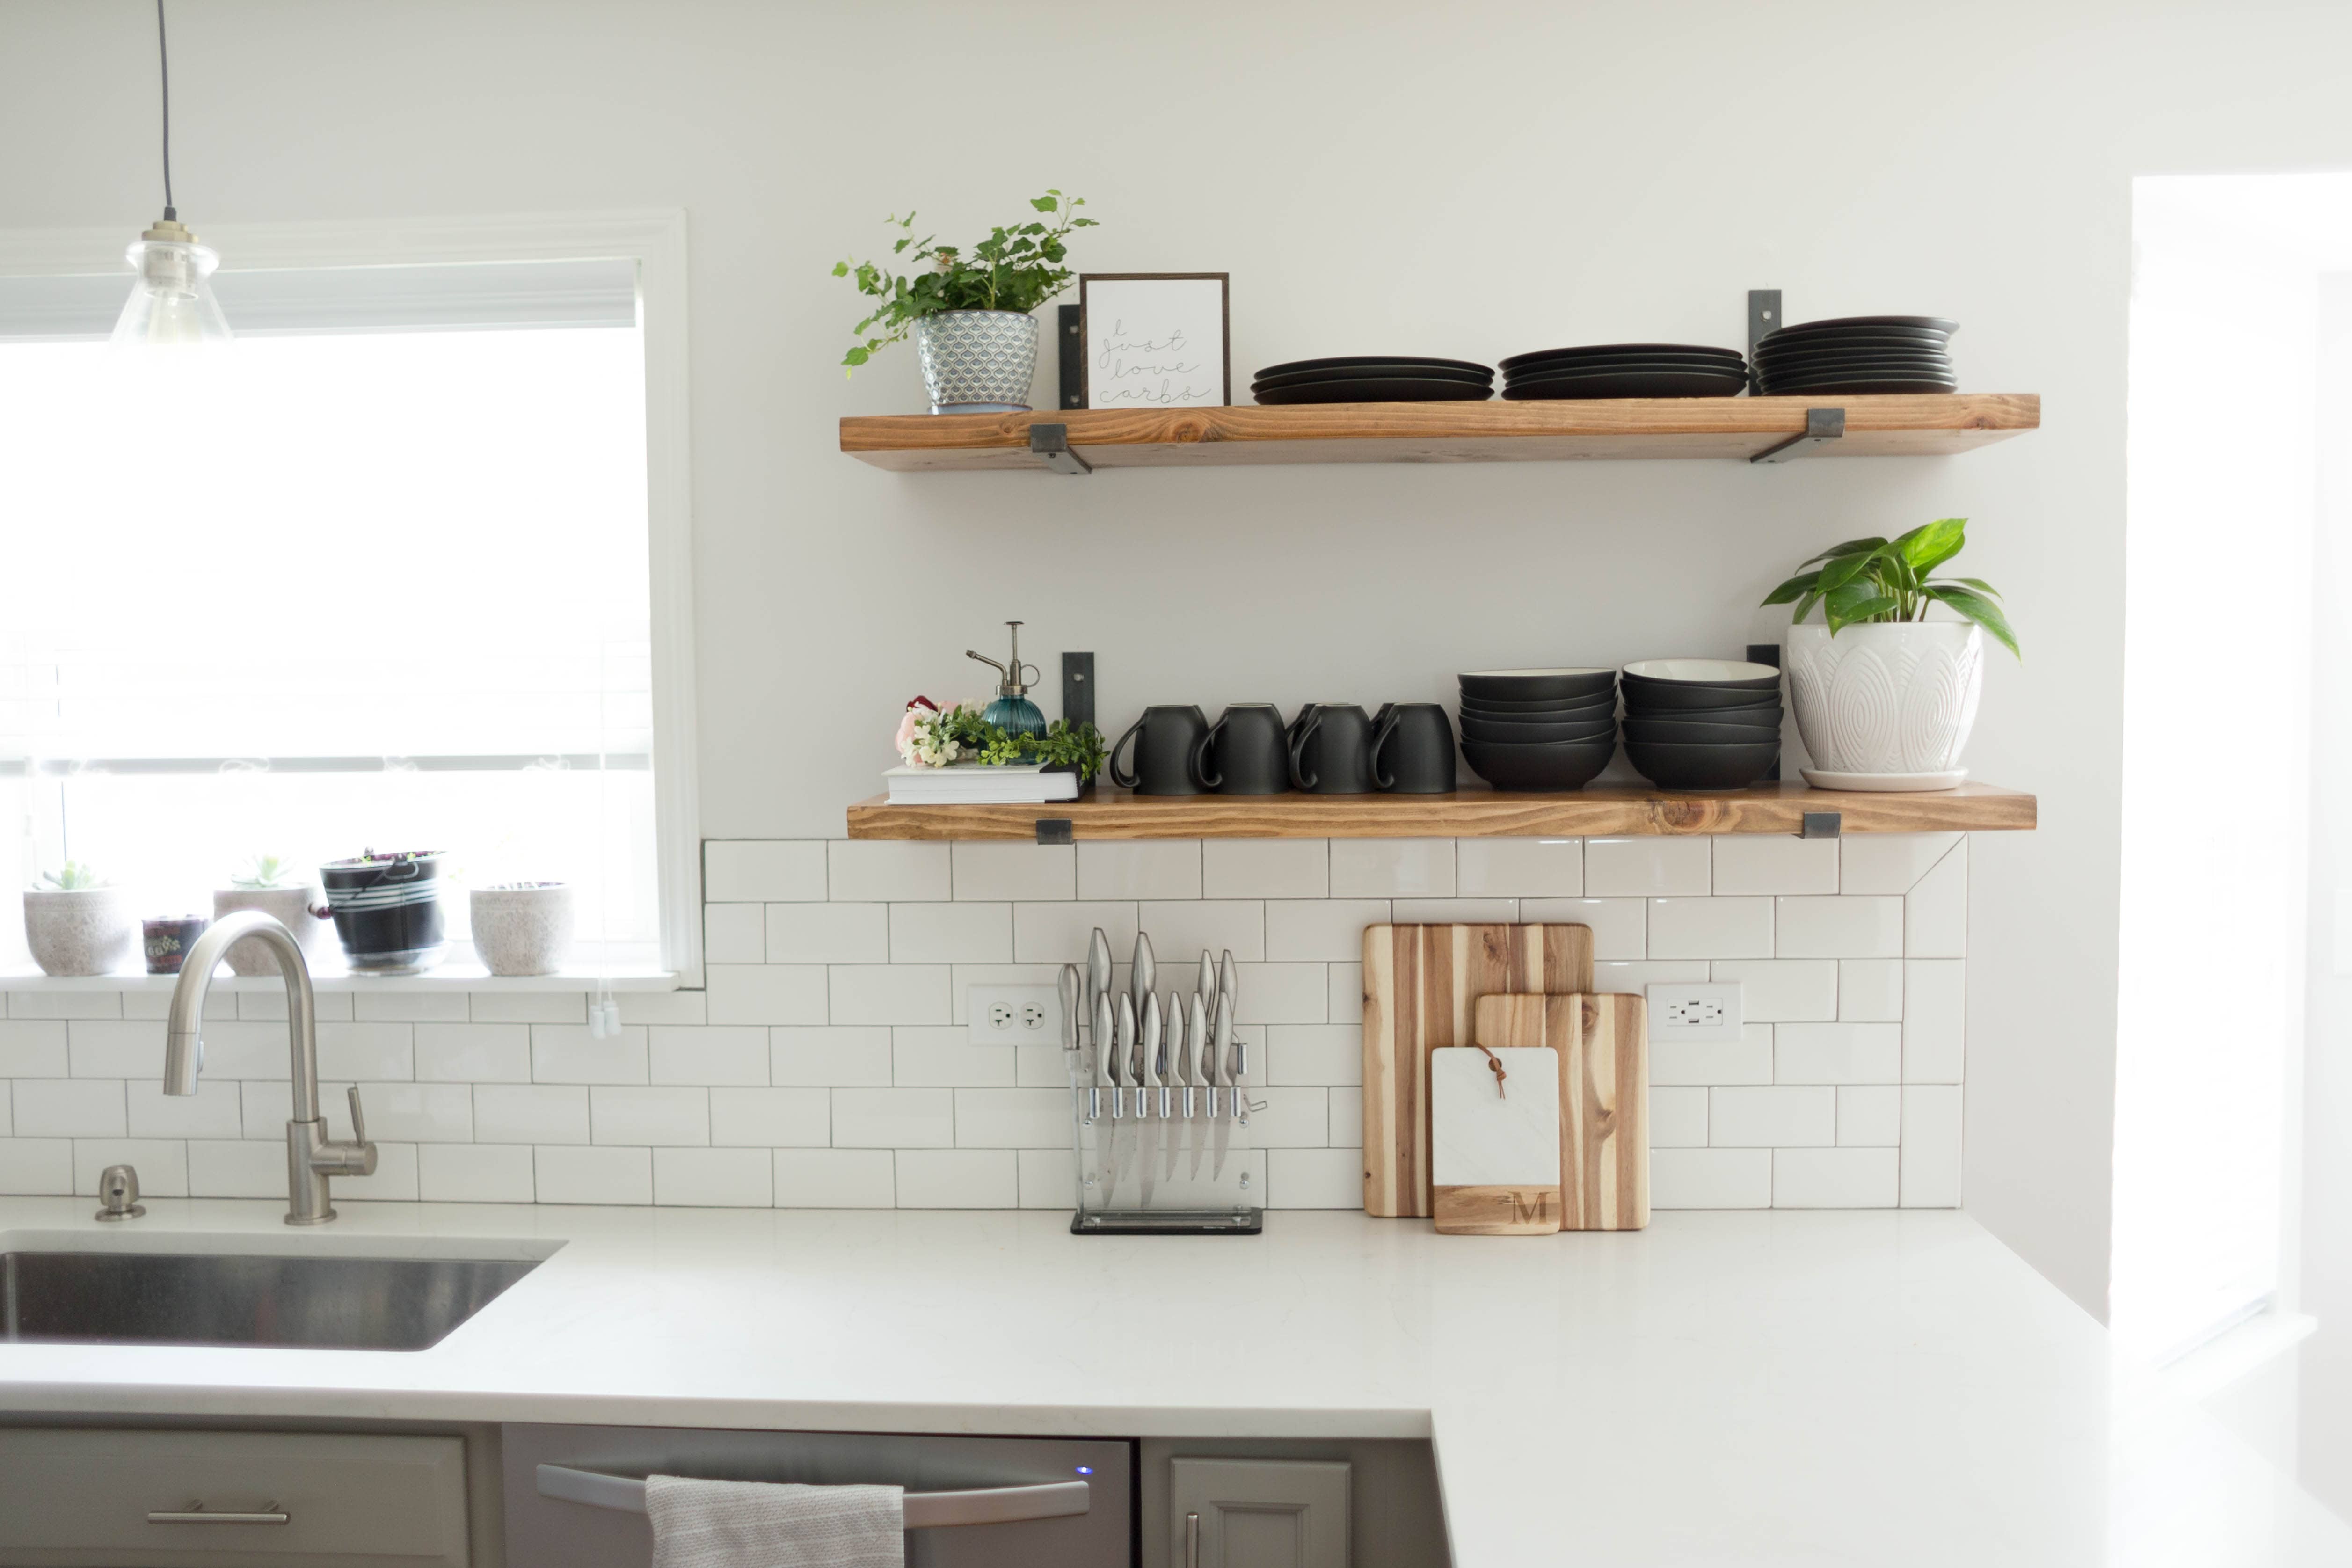
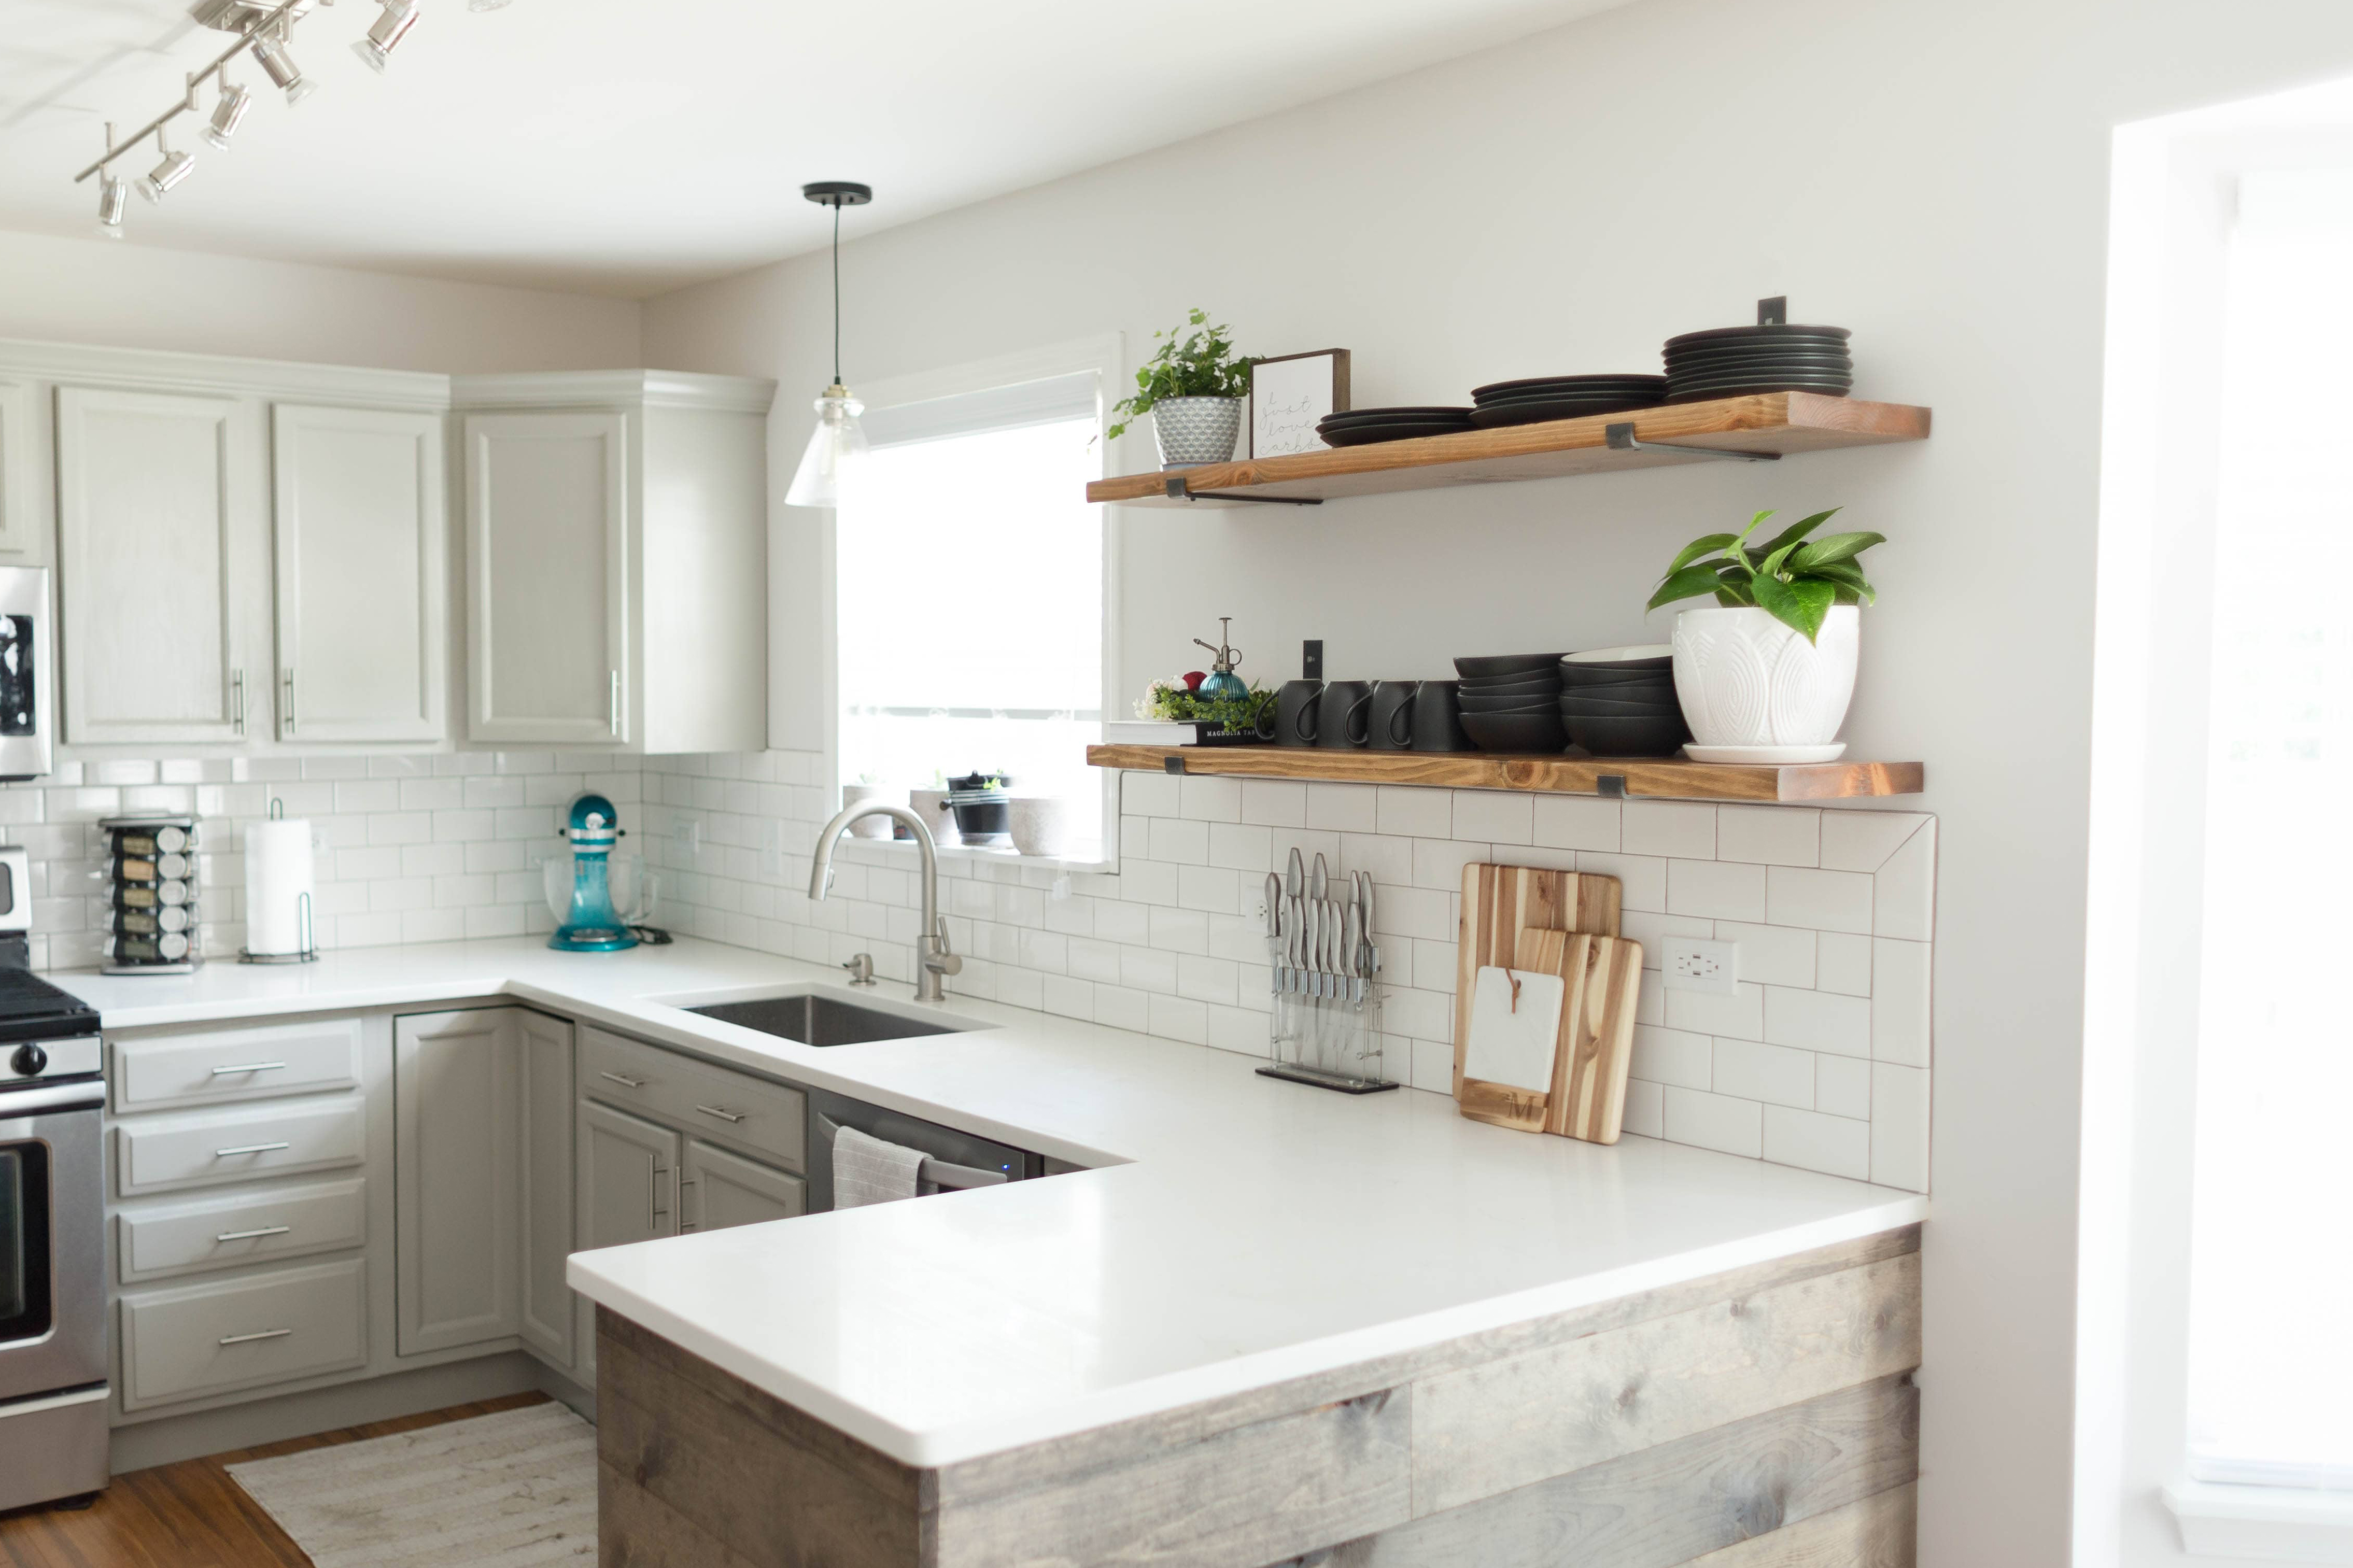
It’s HEAVENLYYYYY 😀


The shelving looks lovely!
Love, Mom
Looking for ideas for open shelving in the kitchen and I love what you’ve done!! Looks fabulous! The only question I was pondering on my side is whether you have issues with dust/debris on the plates, etc?
Hey Angie!
Thank you so much!
In regards to the dust/debris on the plates, we really don’t have a problem because we pretty much use them every day. We don’t use paper plates and always use our dishes so they are constantly on and off the shelf.
I do occasionally take the dishes off and wipe down the shelves though!
Hope this helps!
Sarah
Looks great! We will be using your guidance for our open shelving 🙂 just bought our first home in Chicago. Thank you!
Hi. Looks great.I wanted to buy the some brackets from another shop, but have read comments from other people, that this bracket bend down under just a little weight. What is your experience? Can it be that yours are made from different material?
The brackets I bought have held up great! No bending here!