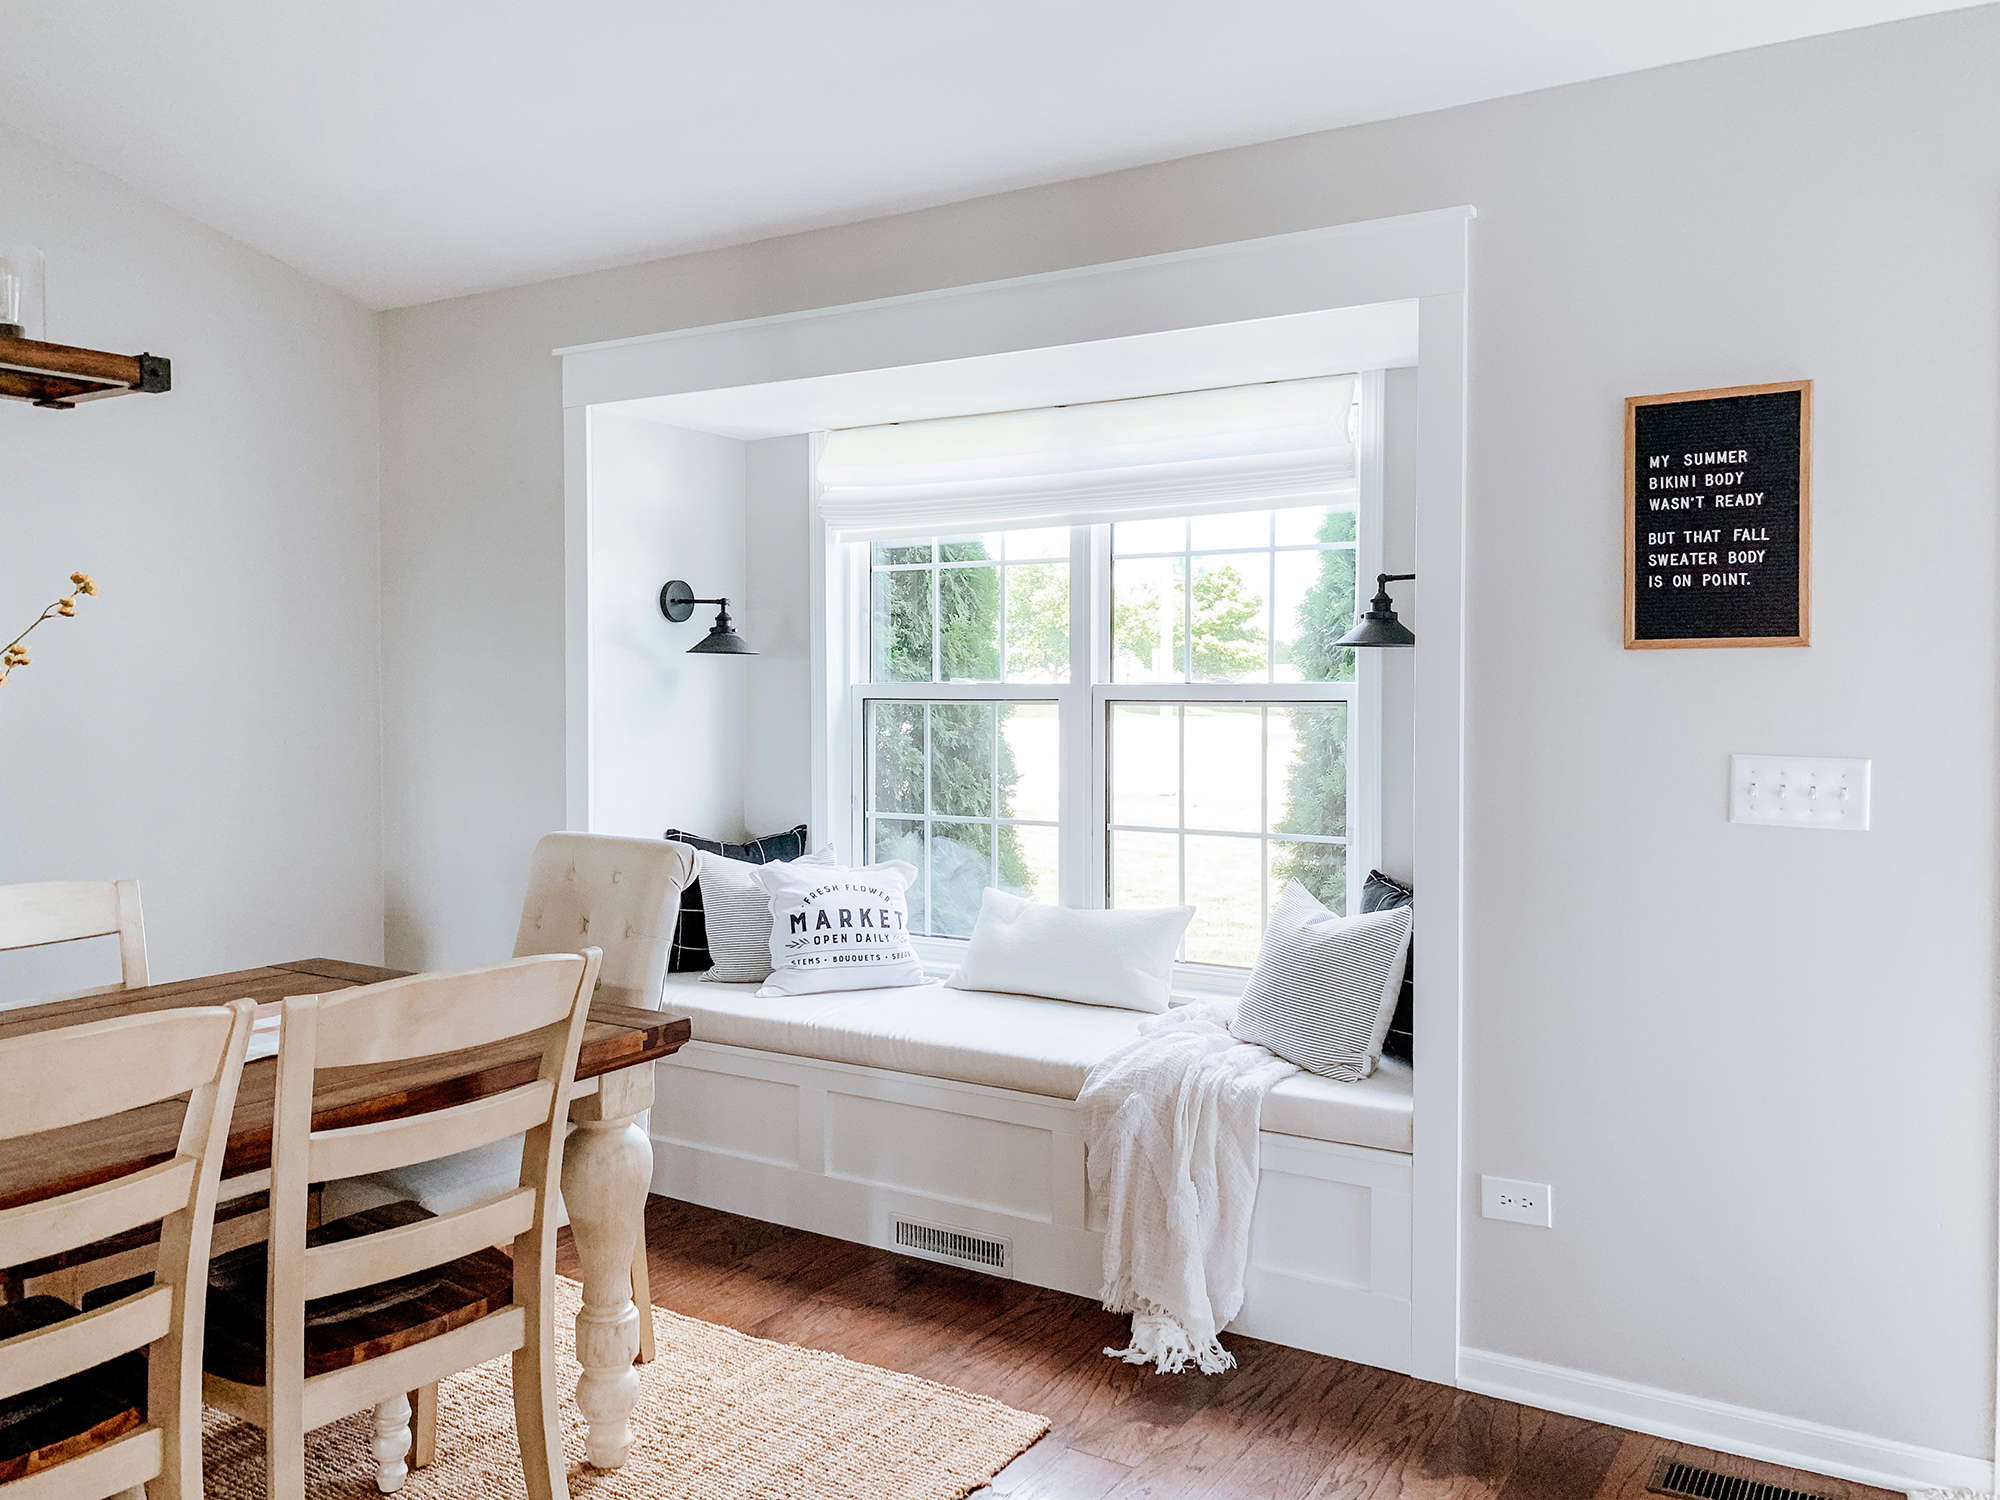
As we shared in our last blog post, we finally built our window seat! If you’re interested in how to we built it, you can read all about it here.
Now, onto the best part of any project! Adding all the finishing touches. That’s the reason we create and build things, right? To make them pretty spaces that we can look at, and enjoy daily.
I love everything to do when adding the finishing touches to a project… Except painting. ? I’m over the painting thing. Are you one of those people who love painting? Or are you with me on this?
Paint
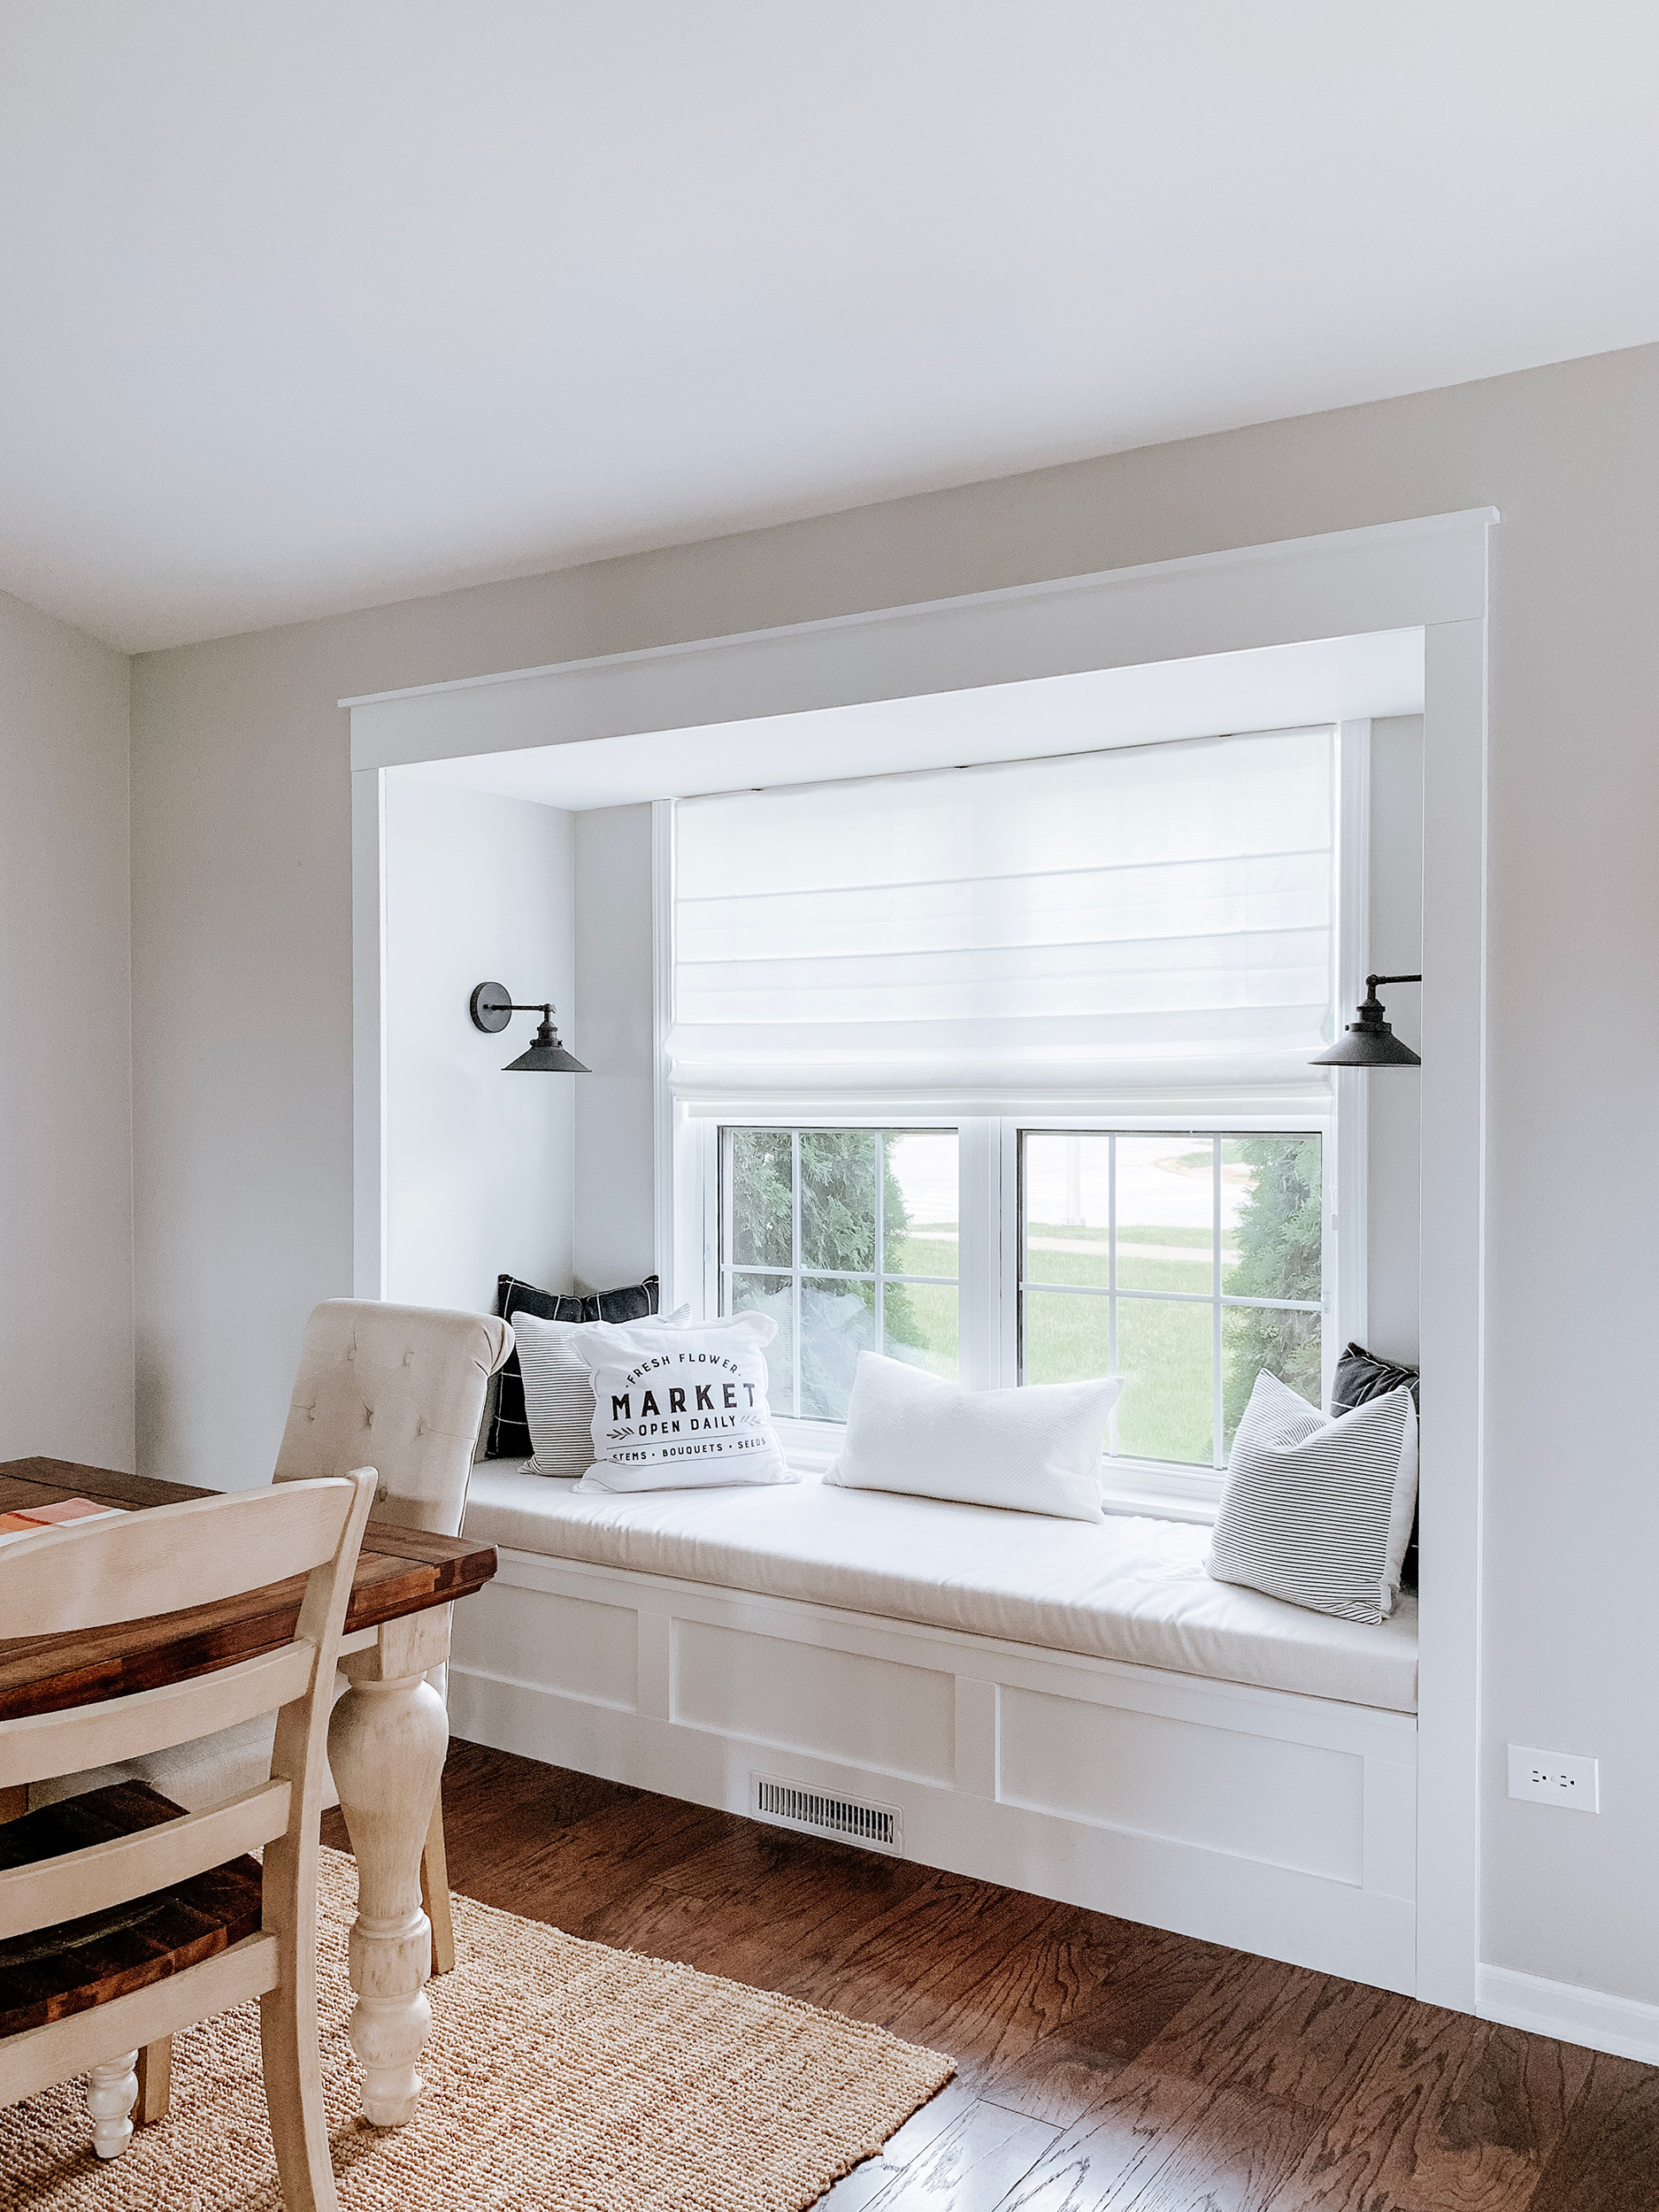
We actually painted all our doors and trim in our house when we first bought it. Our go-to paint for trim & doors is Sherwin William’s ProClassic Paint. Since all our trim is SW Extra White, we painted the window seat Extra White so it would match.
Window Treatment
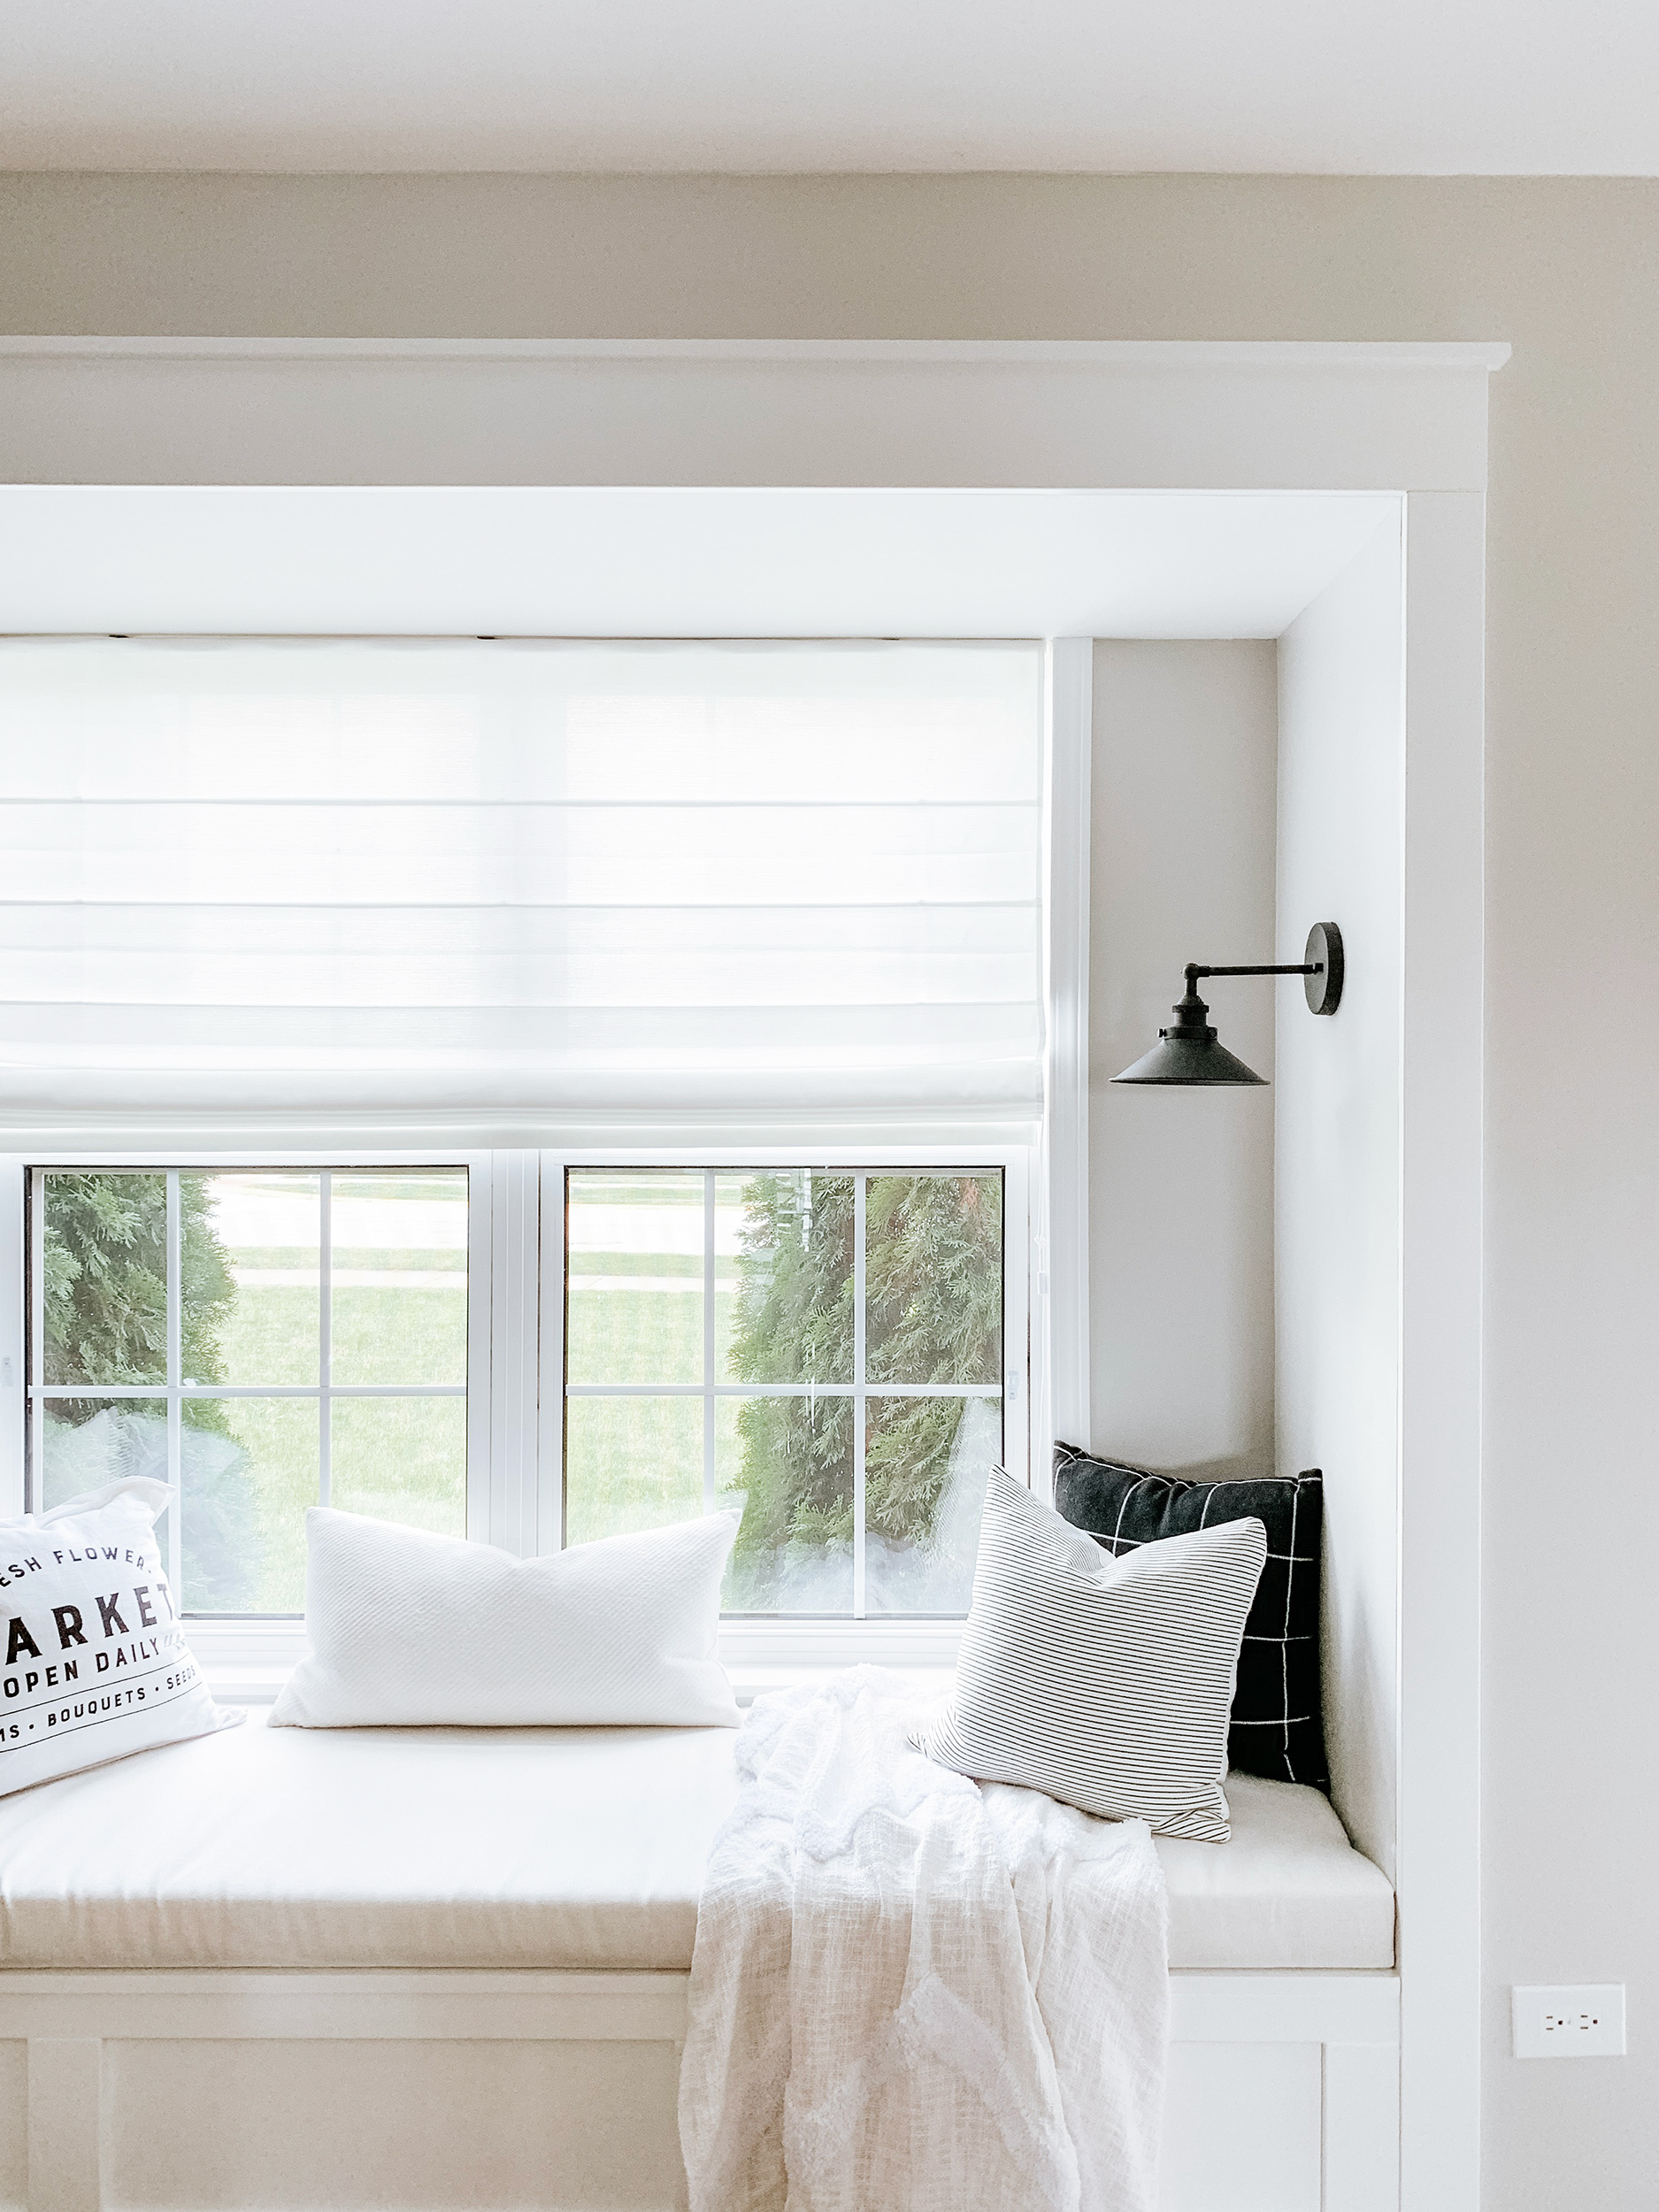
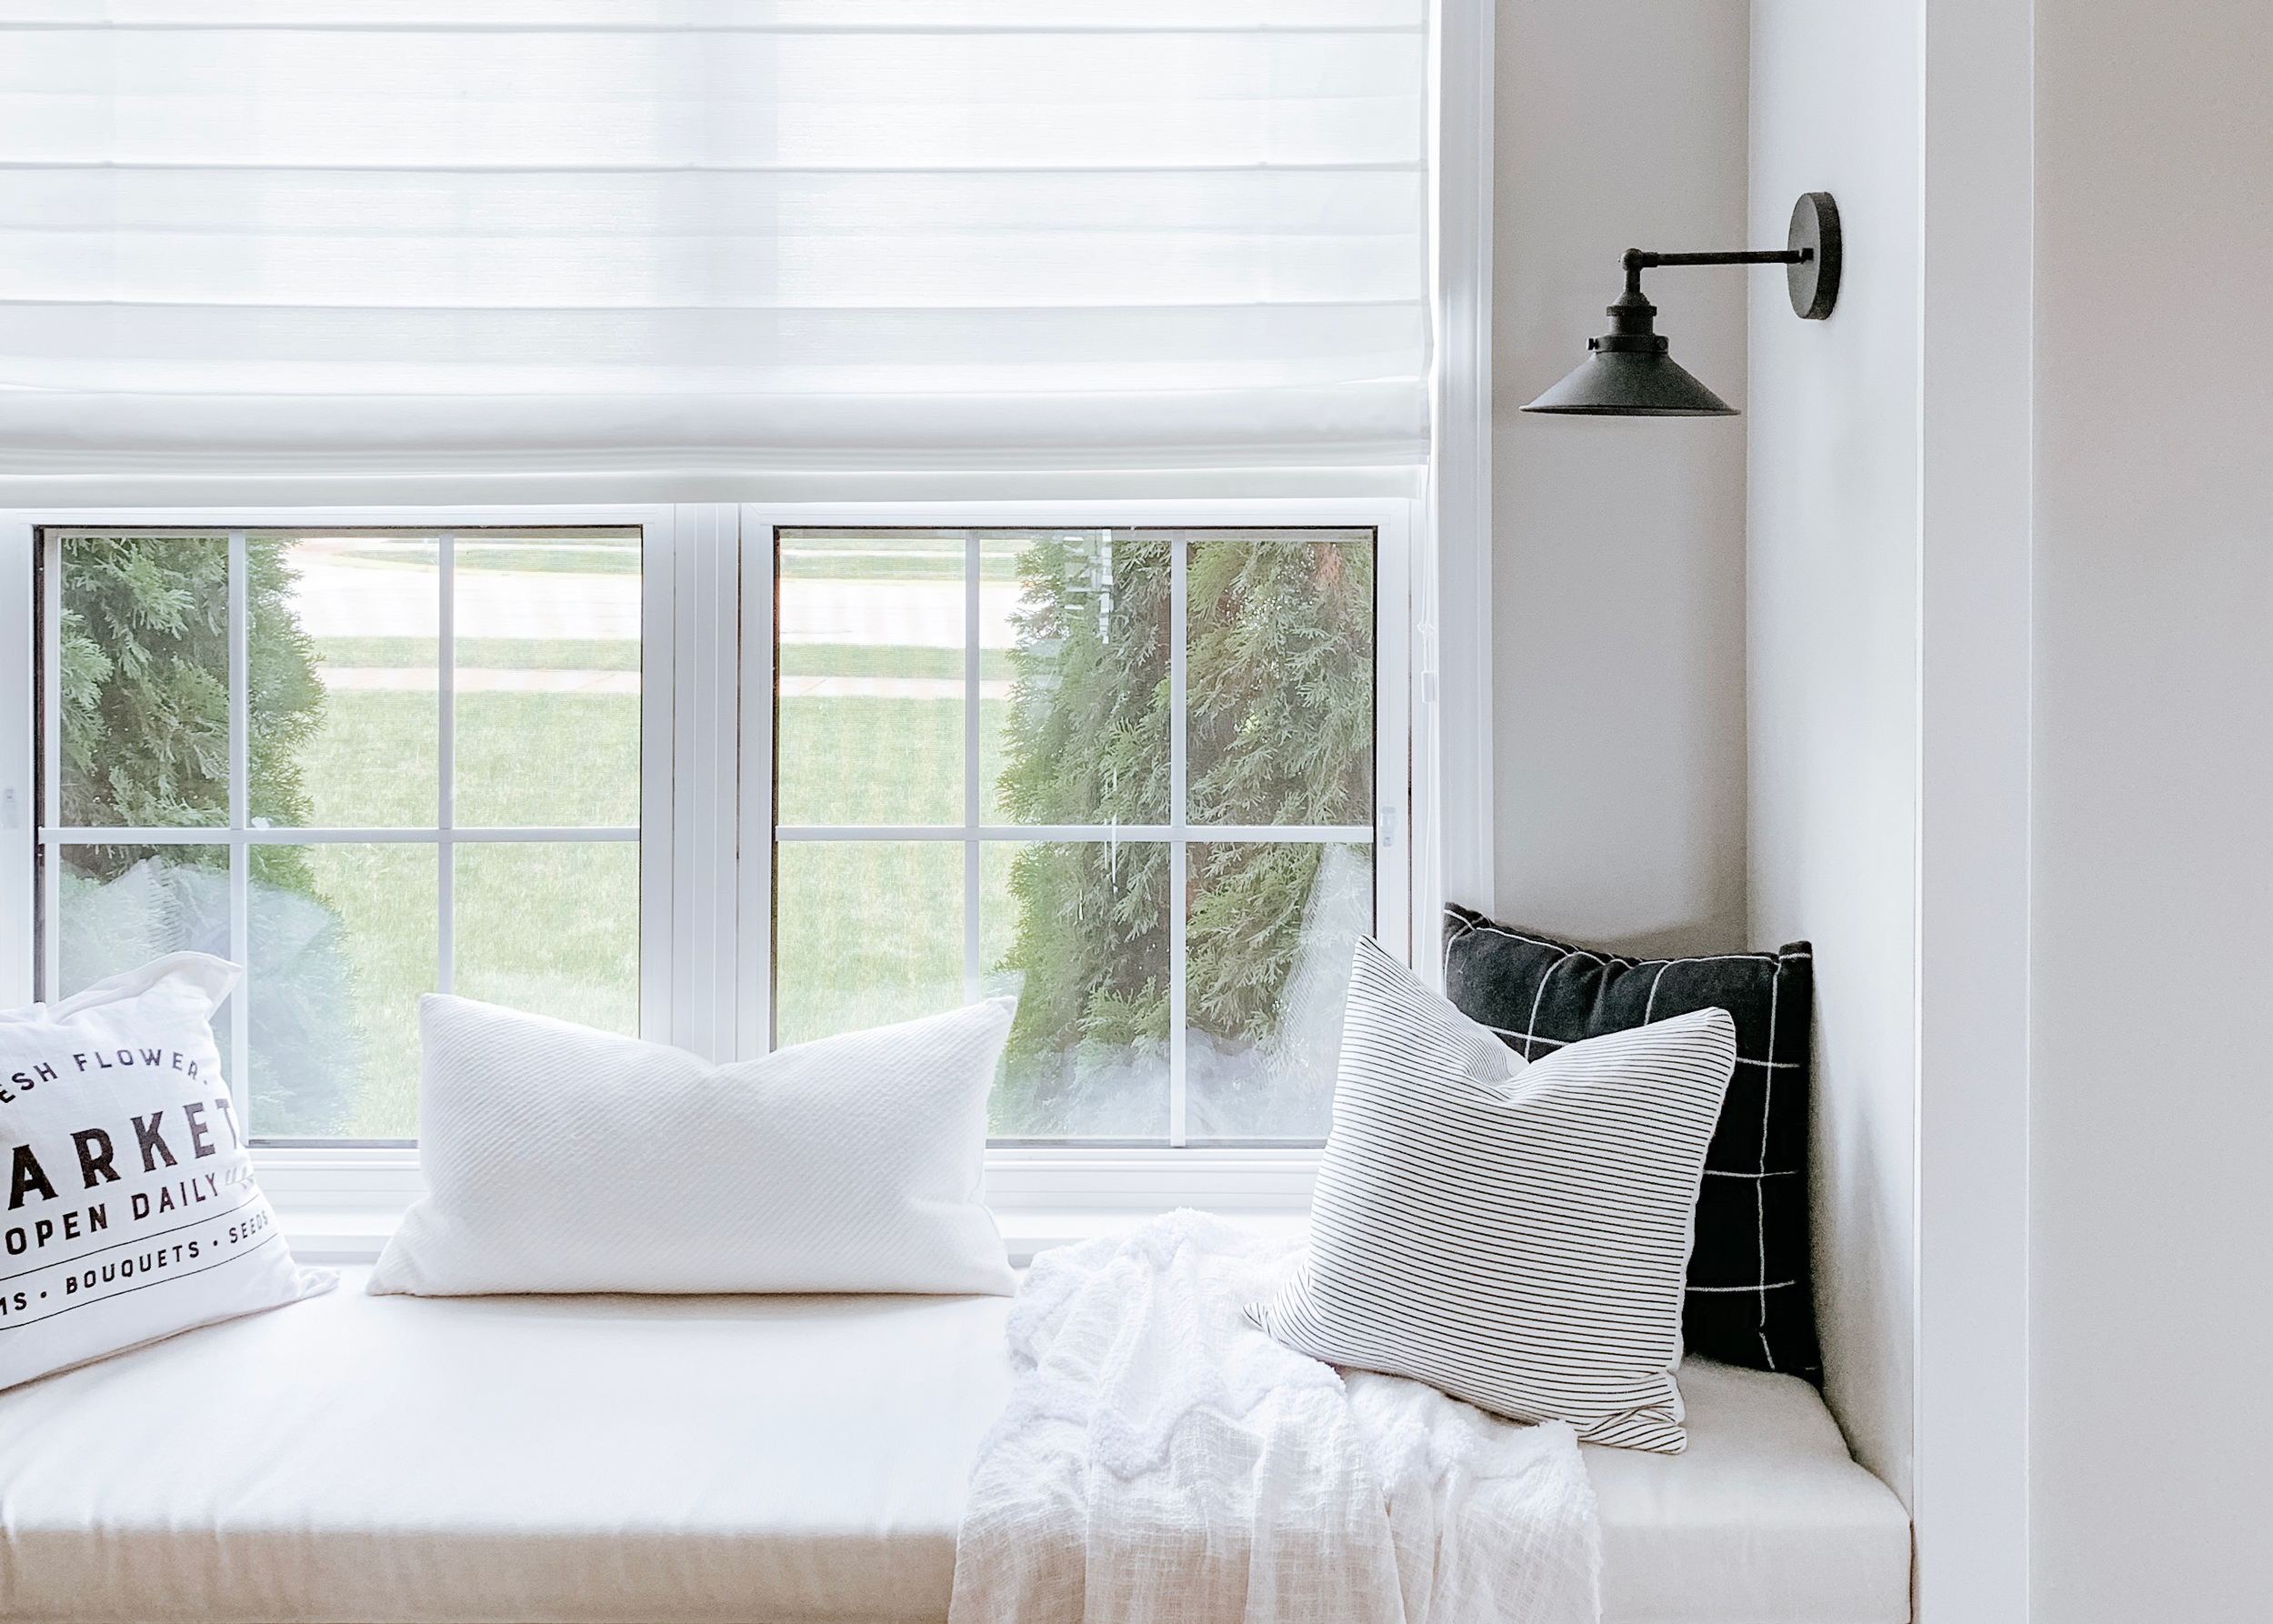
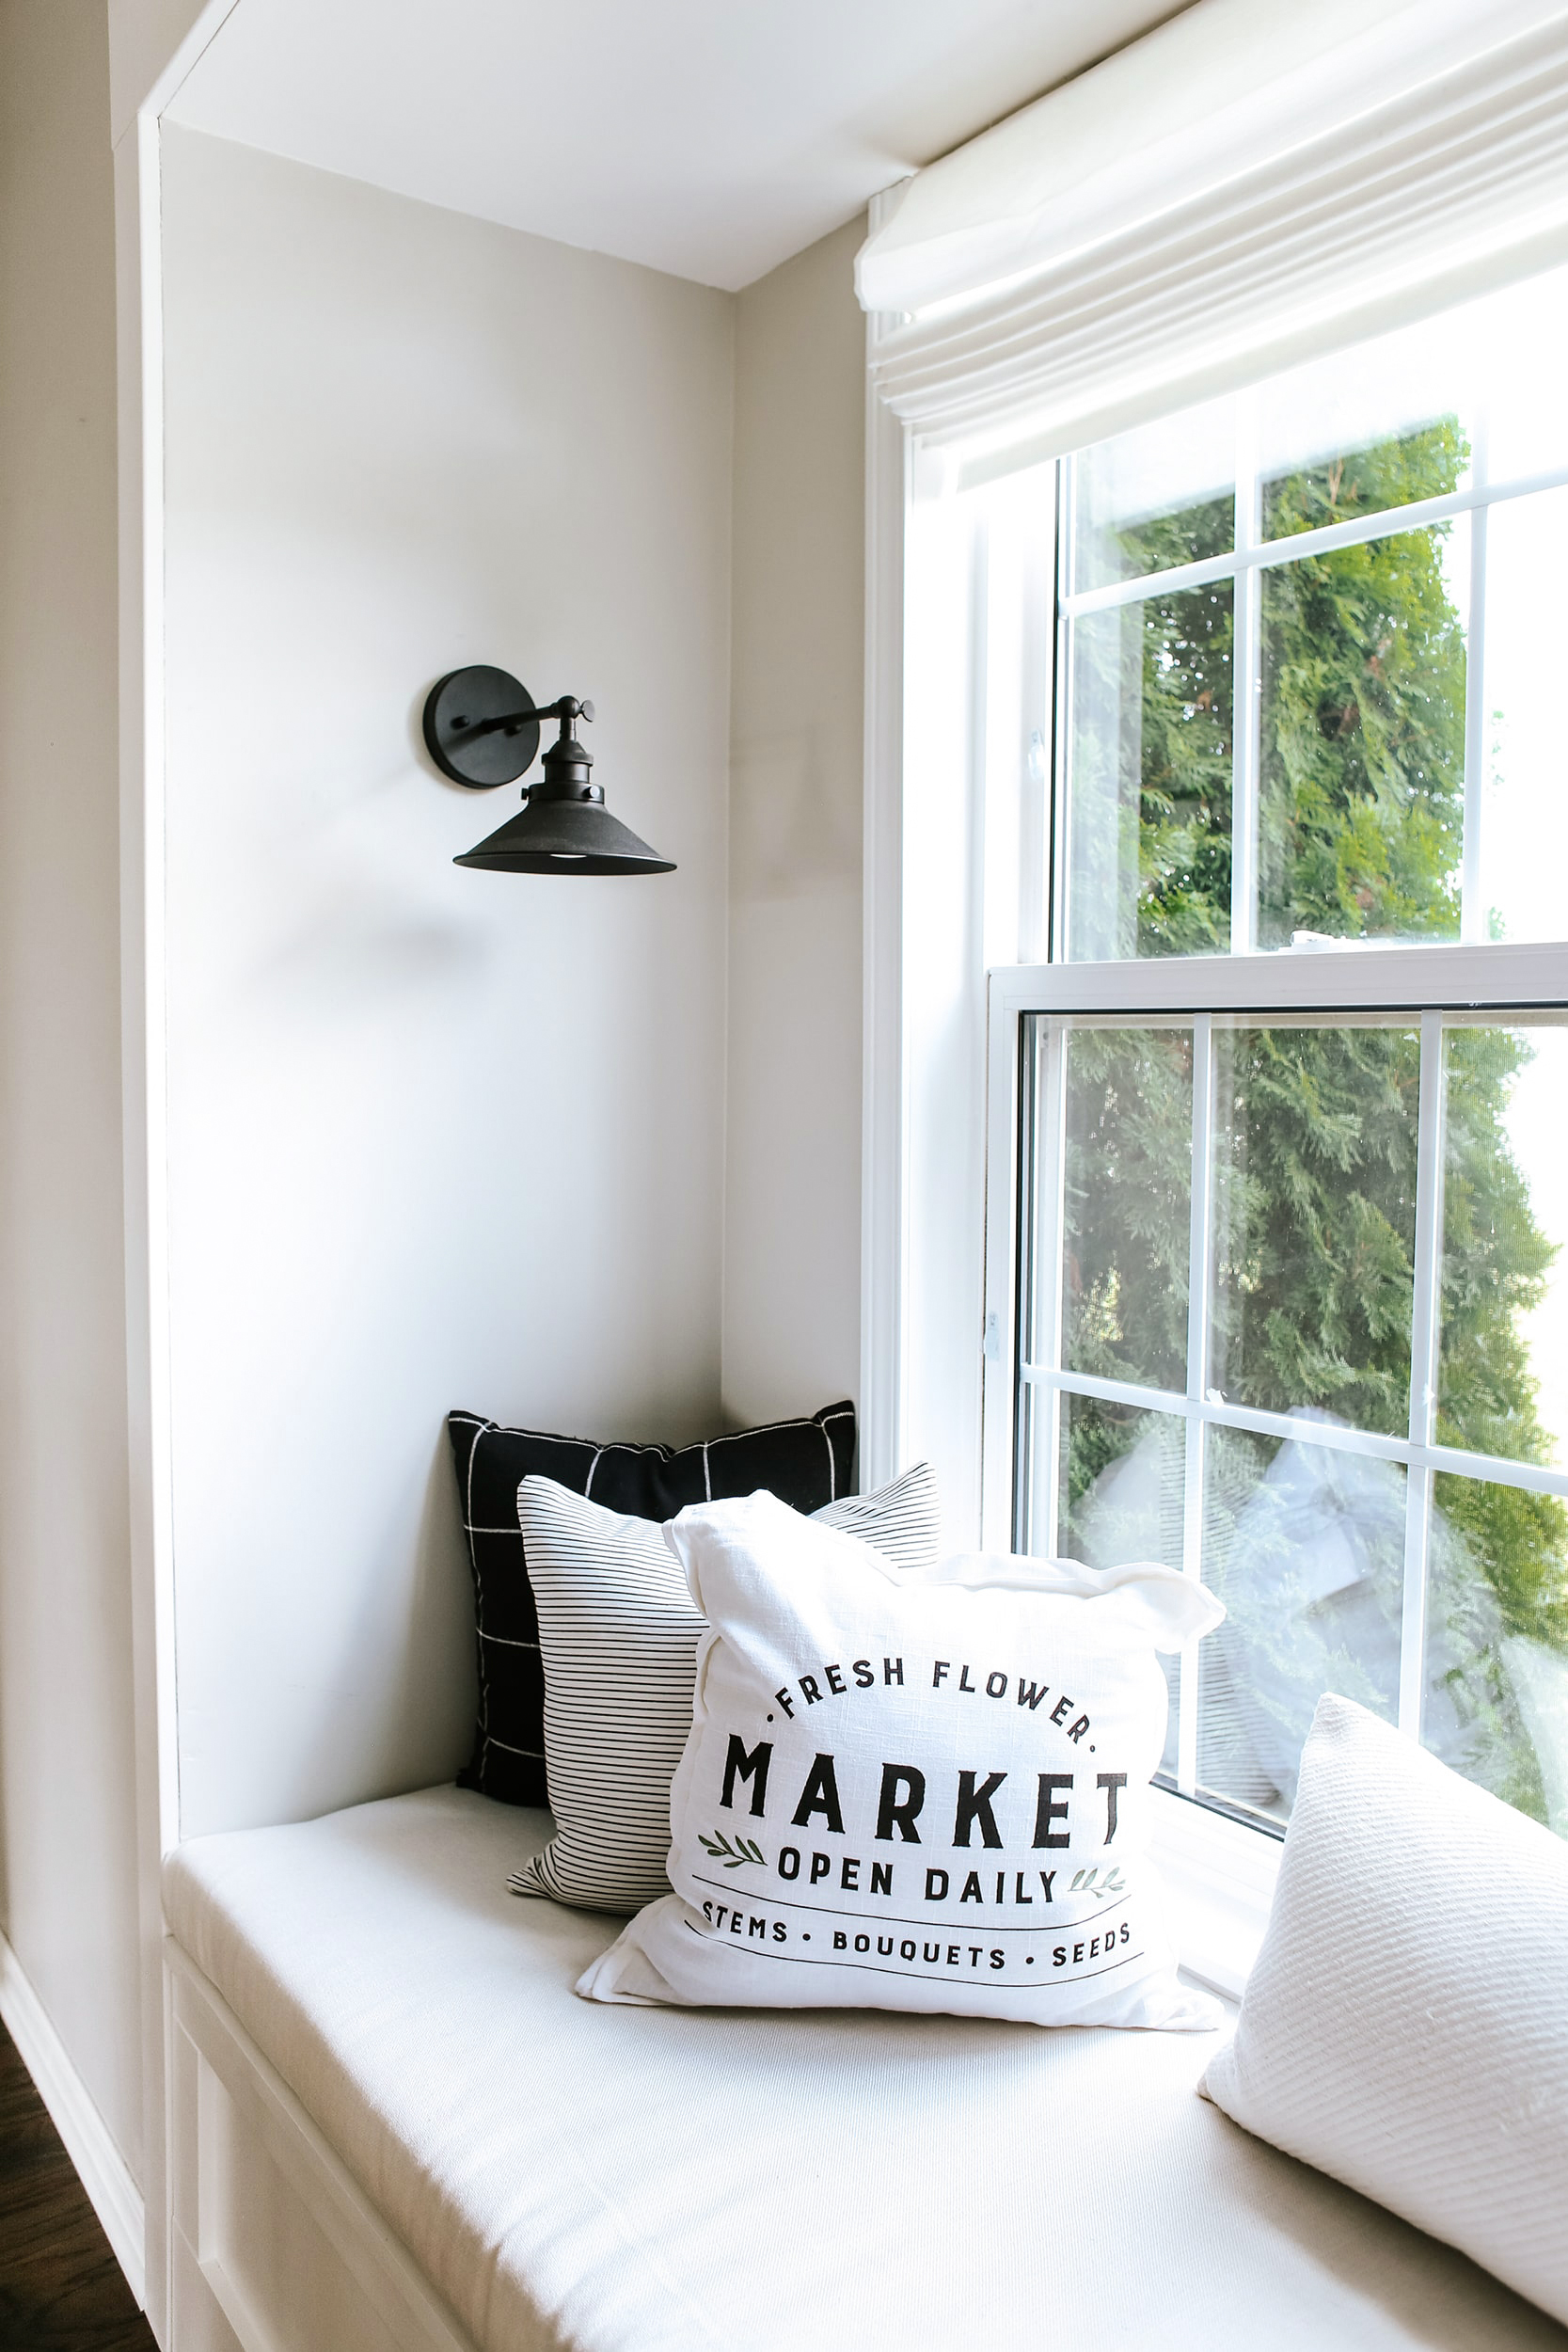
We were super excited when Select Blinds said they would partner with us for this Roman Shade! Swapping out the two basic blinds to a clean and crispy white roman shade really was the final finishing touch for this space. It brought everything together and made this window seat much cozier.
We decided to go with the Classic Roman Shade from Select Blinds. We really wanted to get rid of having two separate blinds, and just have one larger one. This is pretty much the only window in the front part of our home (our dining room and entryway space), so I like to have this window opened during the day. With our previous blinds, I had to pull both separately to open them. With this single Roman Shade, I just have to use one cord to open and close the blinds, which is perfect!

When we first looked into the fabric options, we knew we were going to need samples. Select Blinds offers free samples which came in quickly (bonus!) and really helped us narrow down what option would look best in the space.
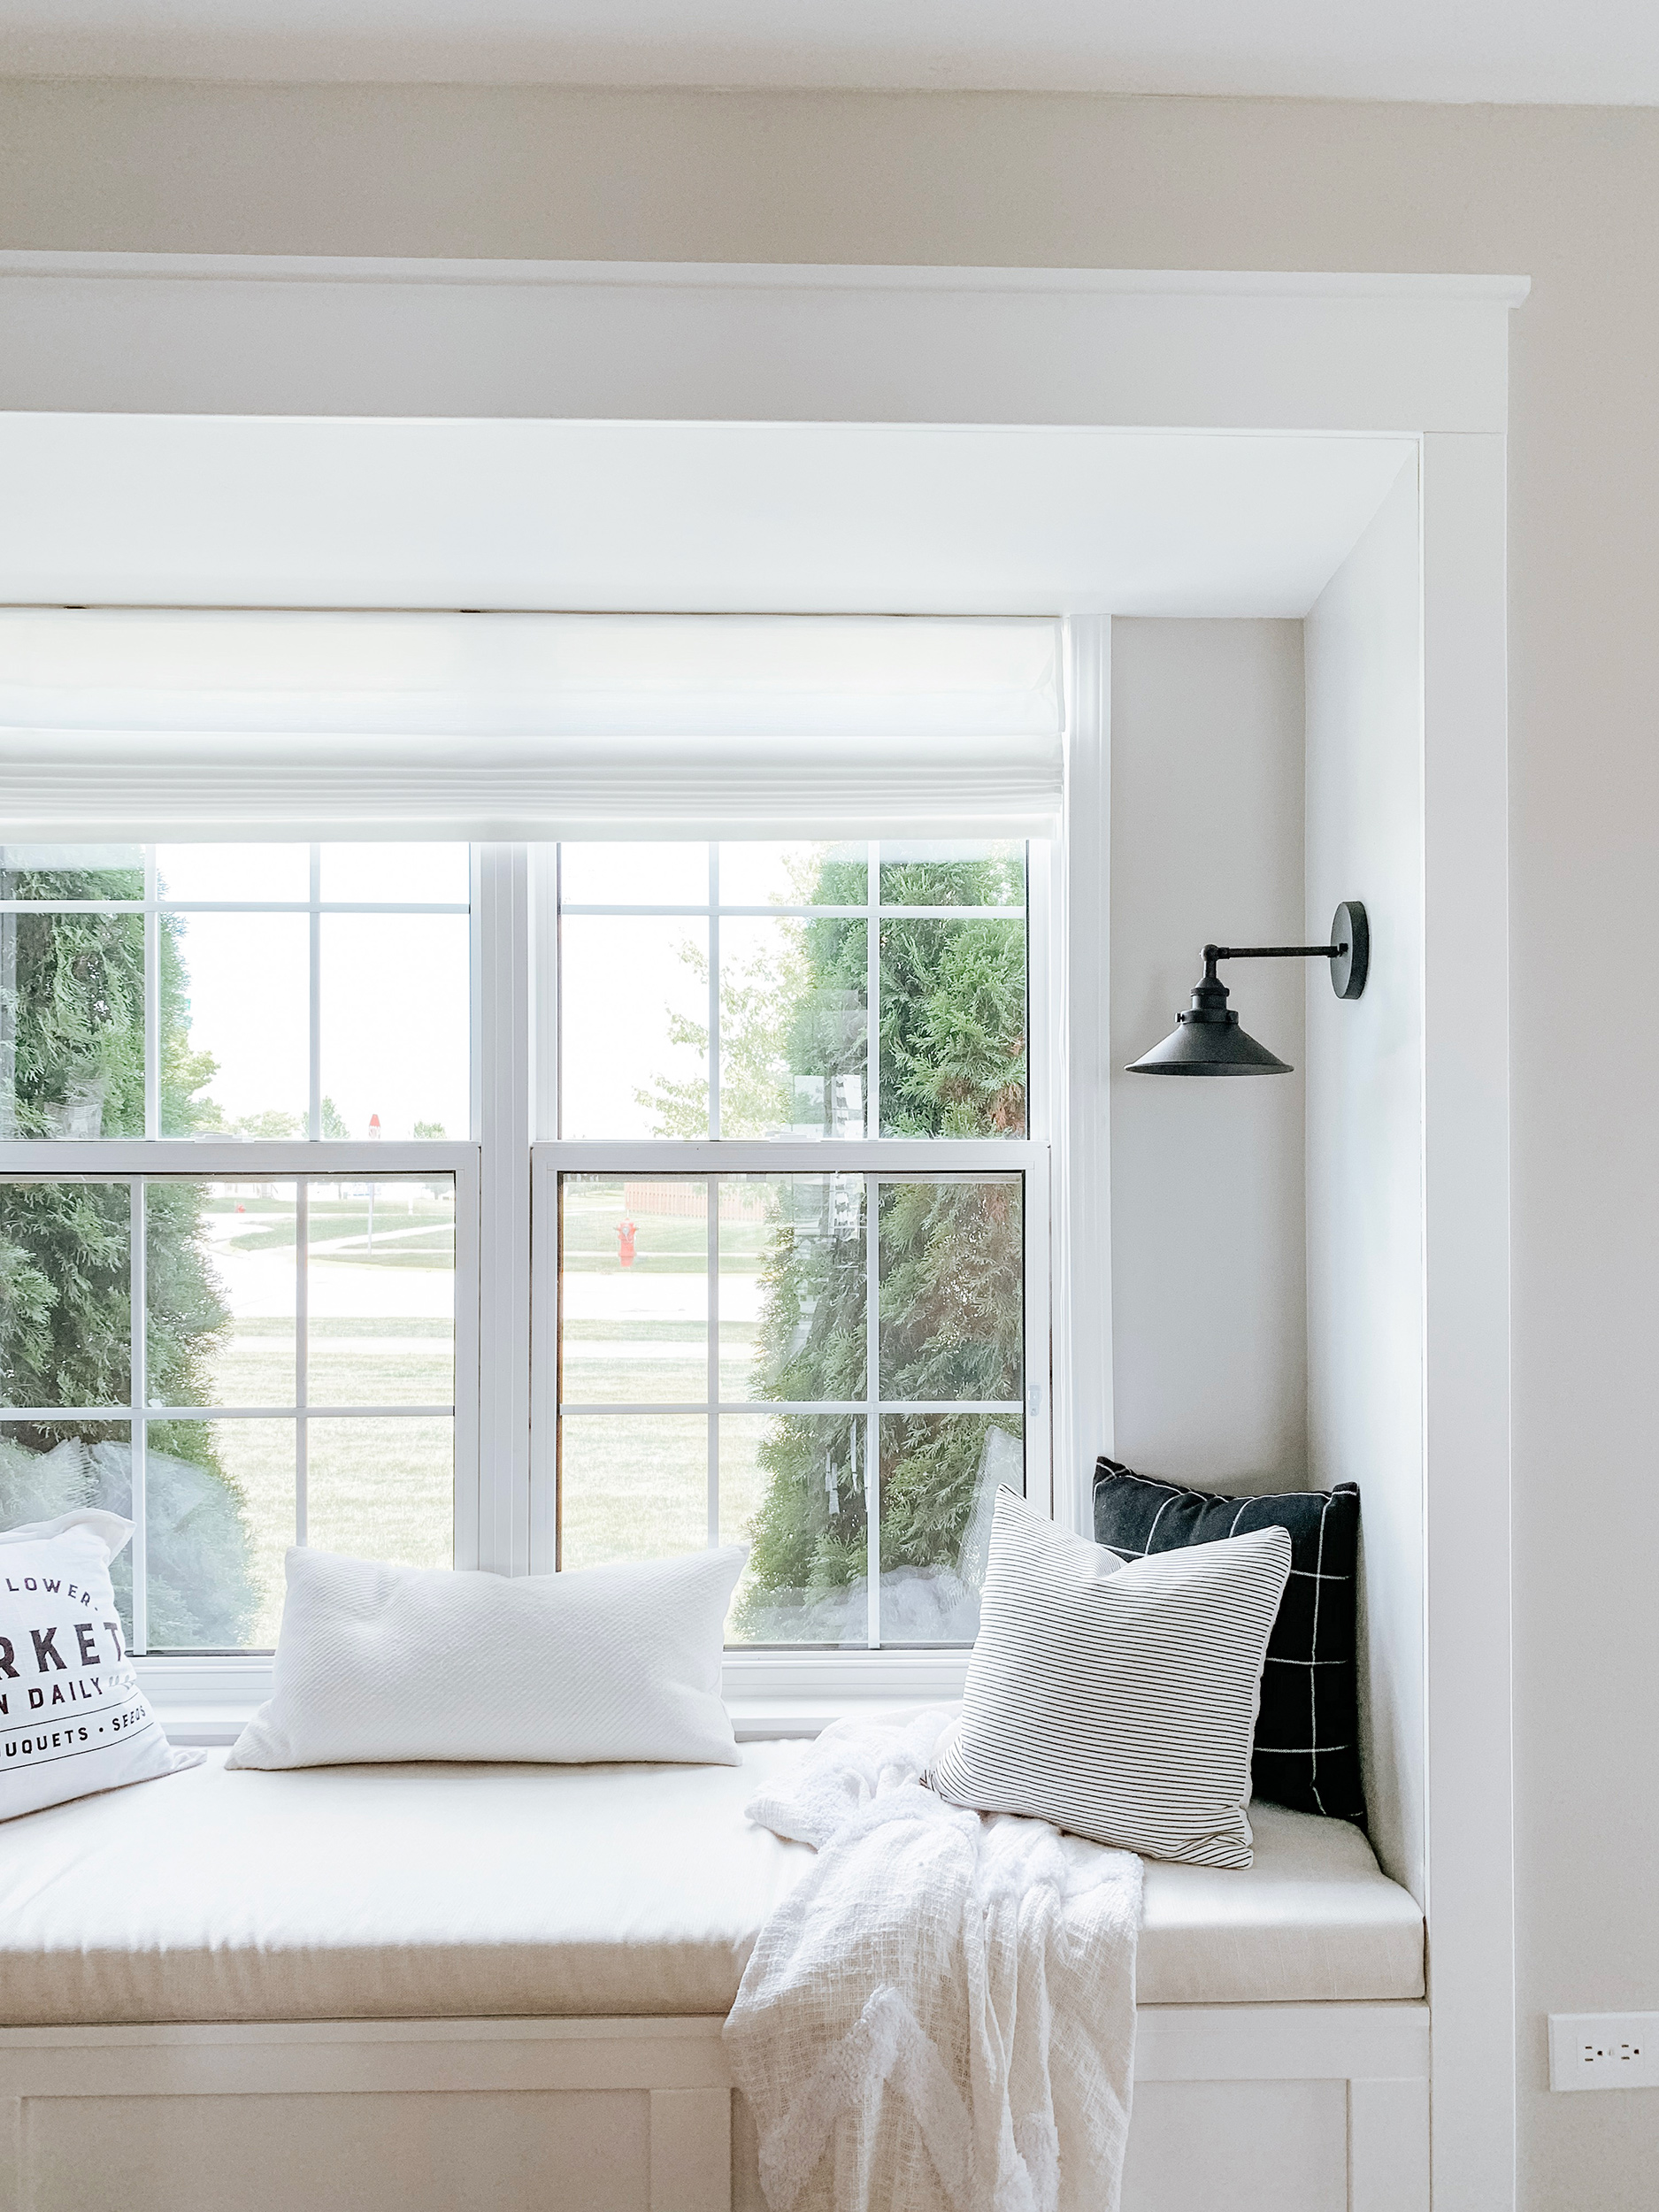
We wanted the blinds to be light in color with an airy feel – especially since this is the only window we have in this space – we wanted to let as much light in as we could. I was nervous if we did a darker or more natural color with the shade, it would have darkened the space. That being said, we went with the Simply White color and it was exactly what we were looking for!
Lighting
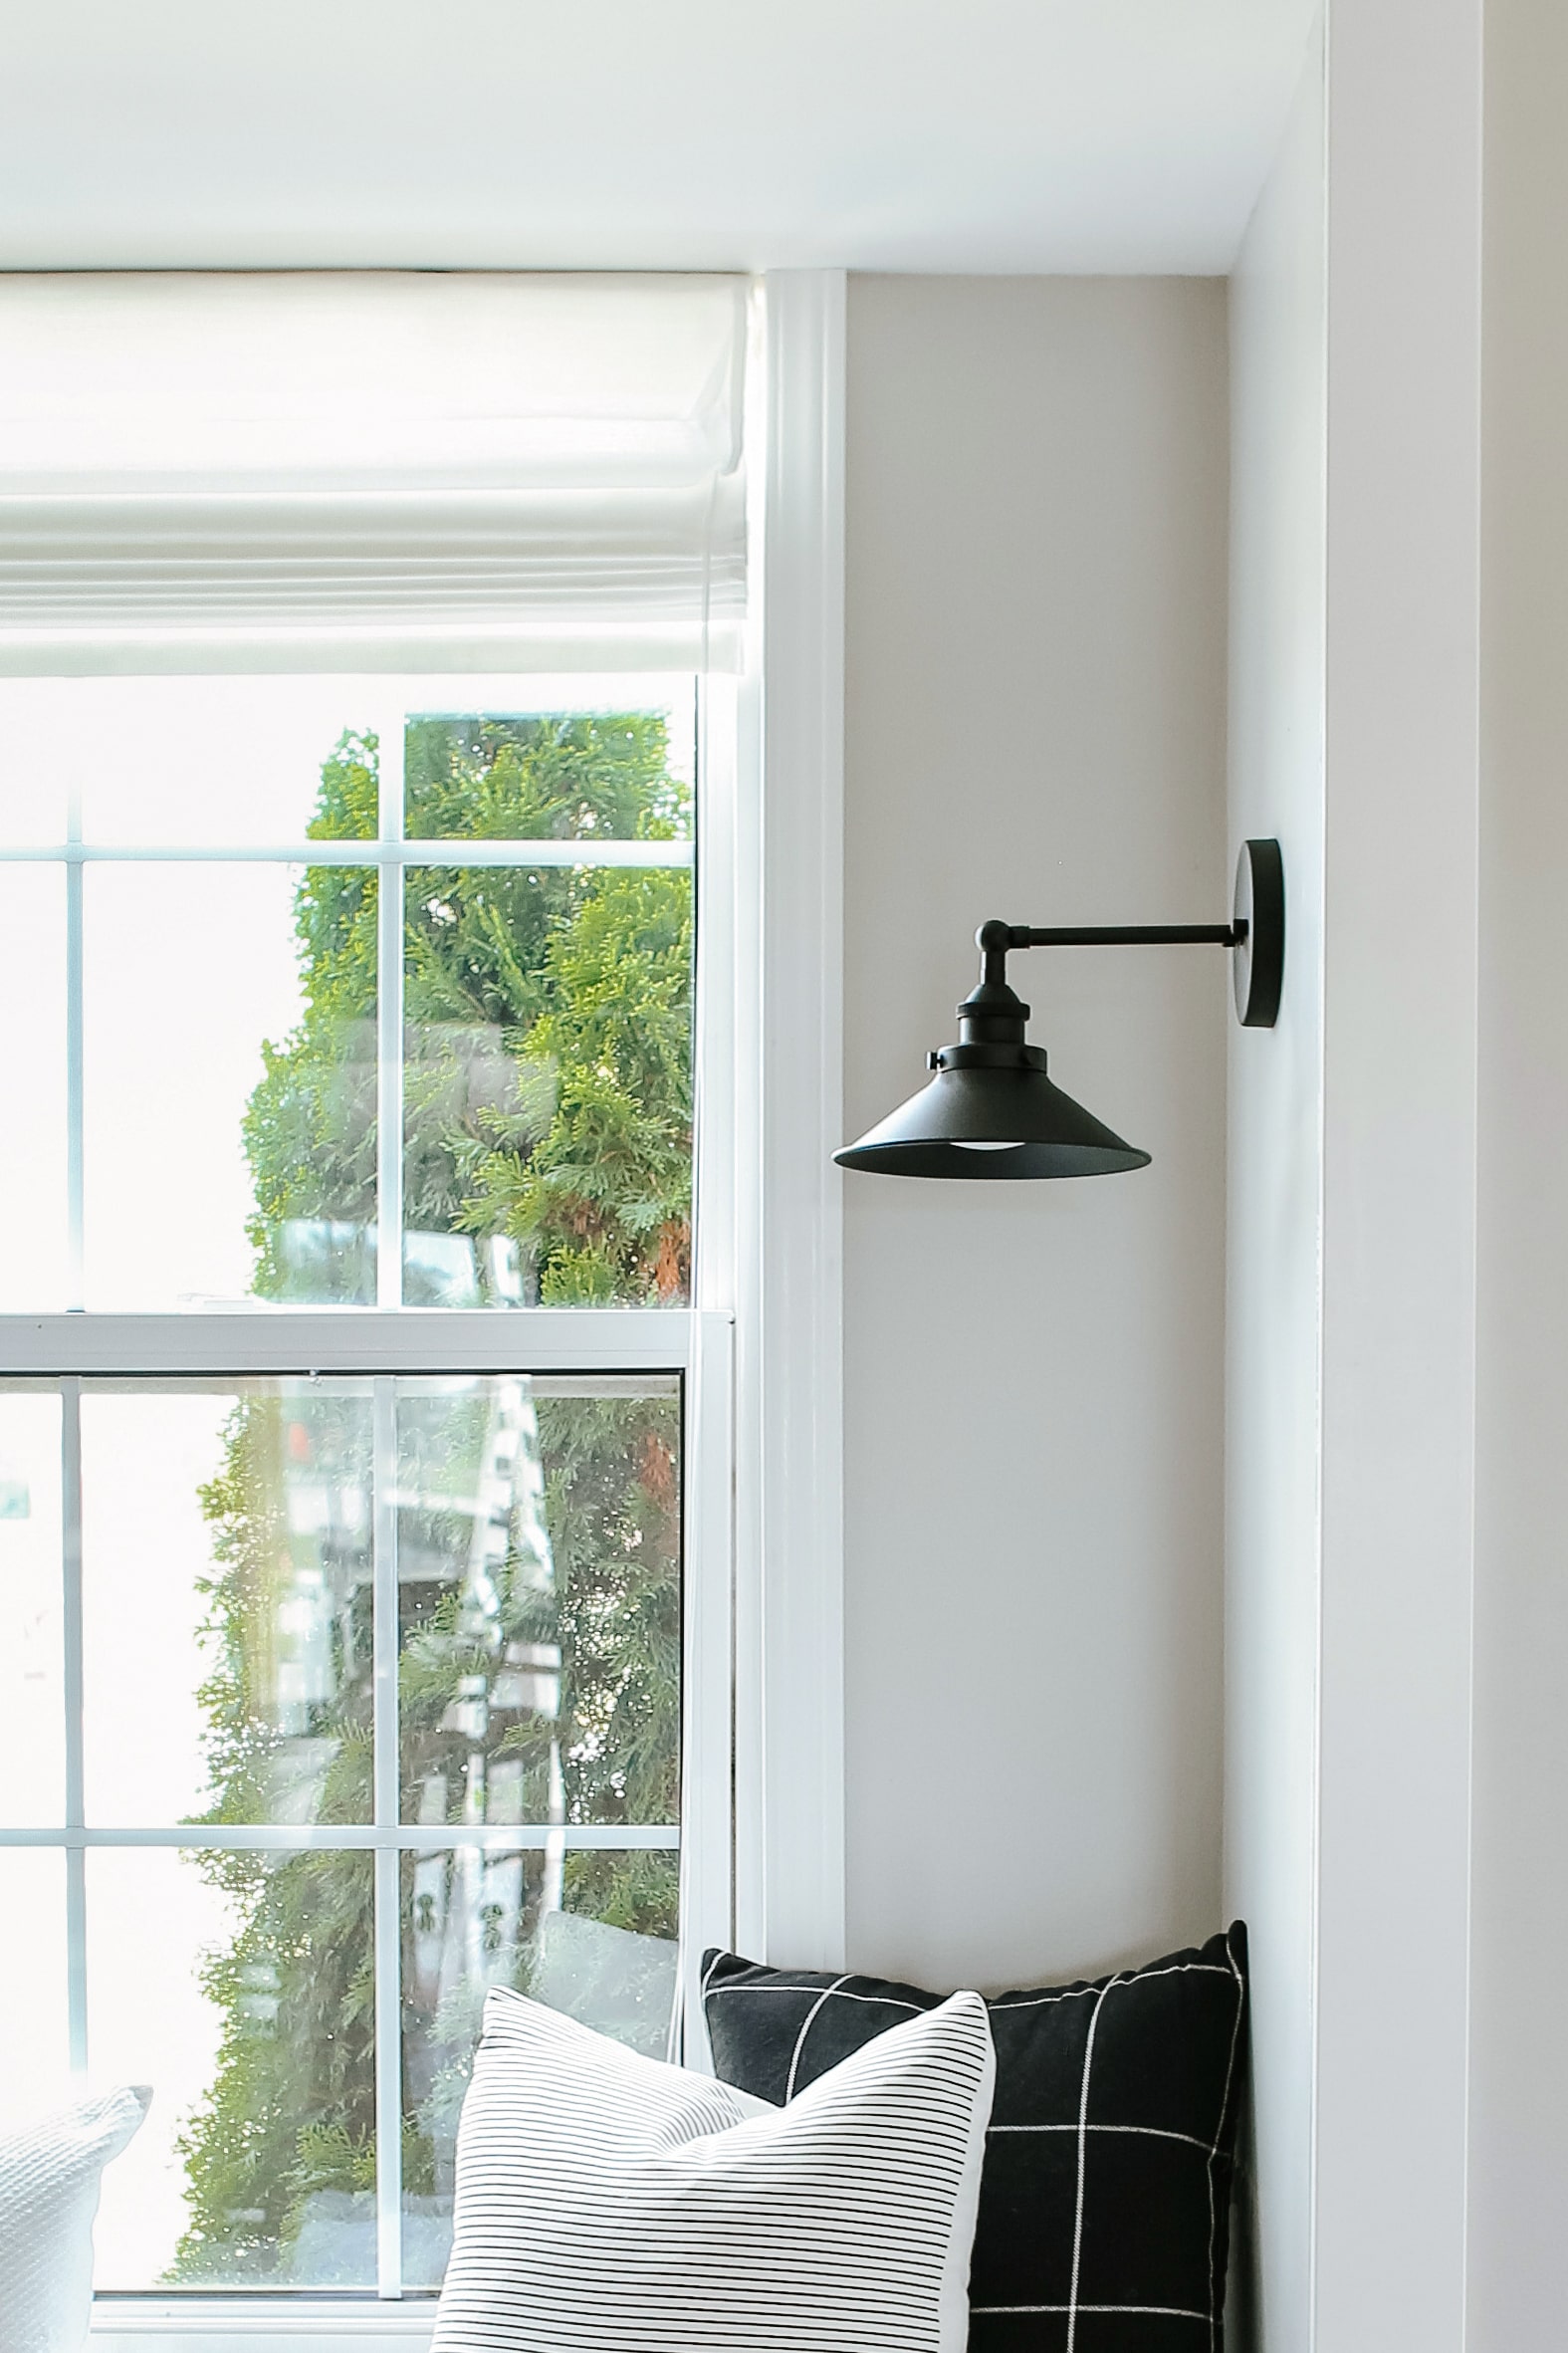
Oh man! I had THEE hardest time choosing the wall sconces for this window seat. The options were endless to choose from. I narrowed it down to 5 (LOL), took a poll on our Instagram. Then, from there, narrowed it down to two different lighting options. I bought both and then hung each up to see which one I liked best in the space.
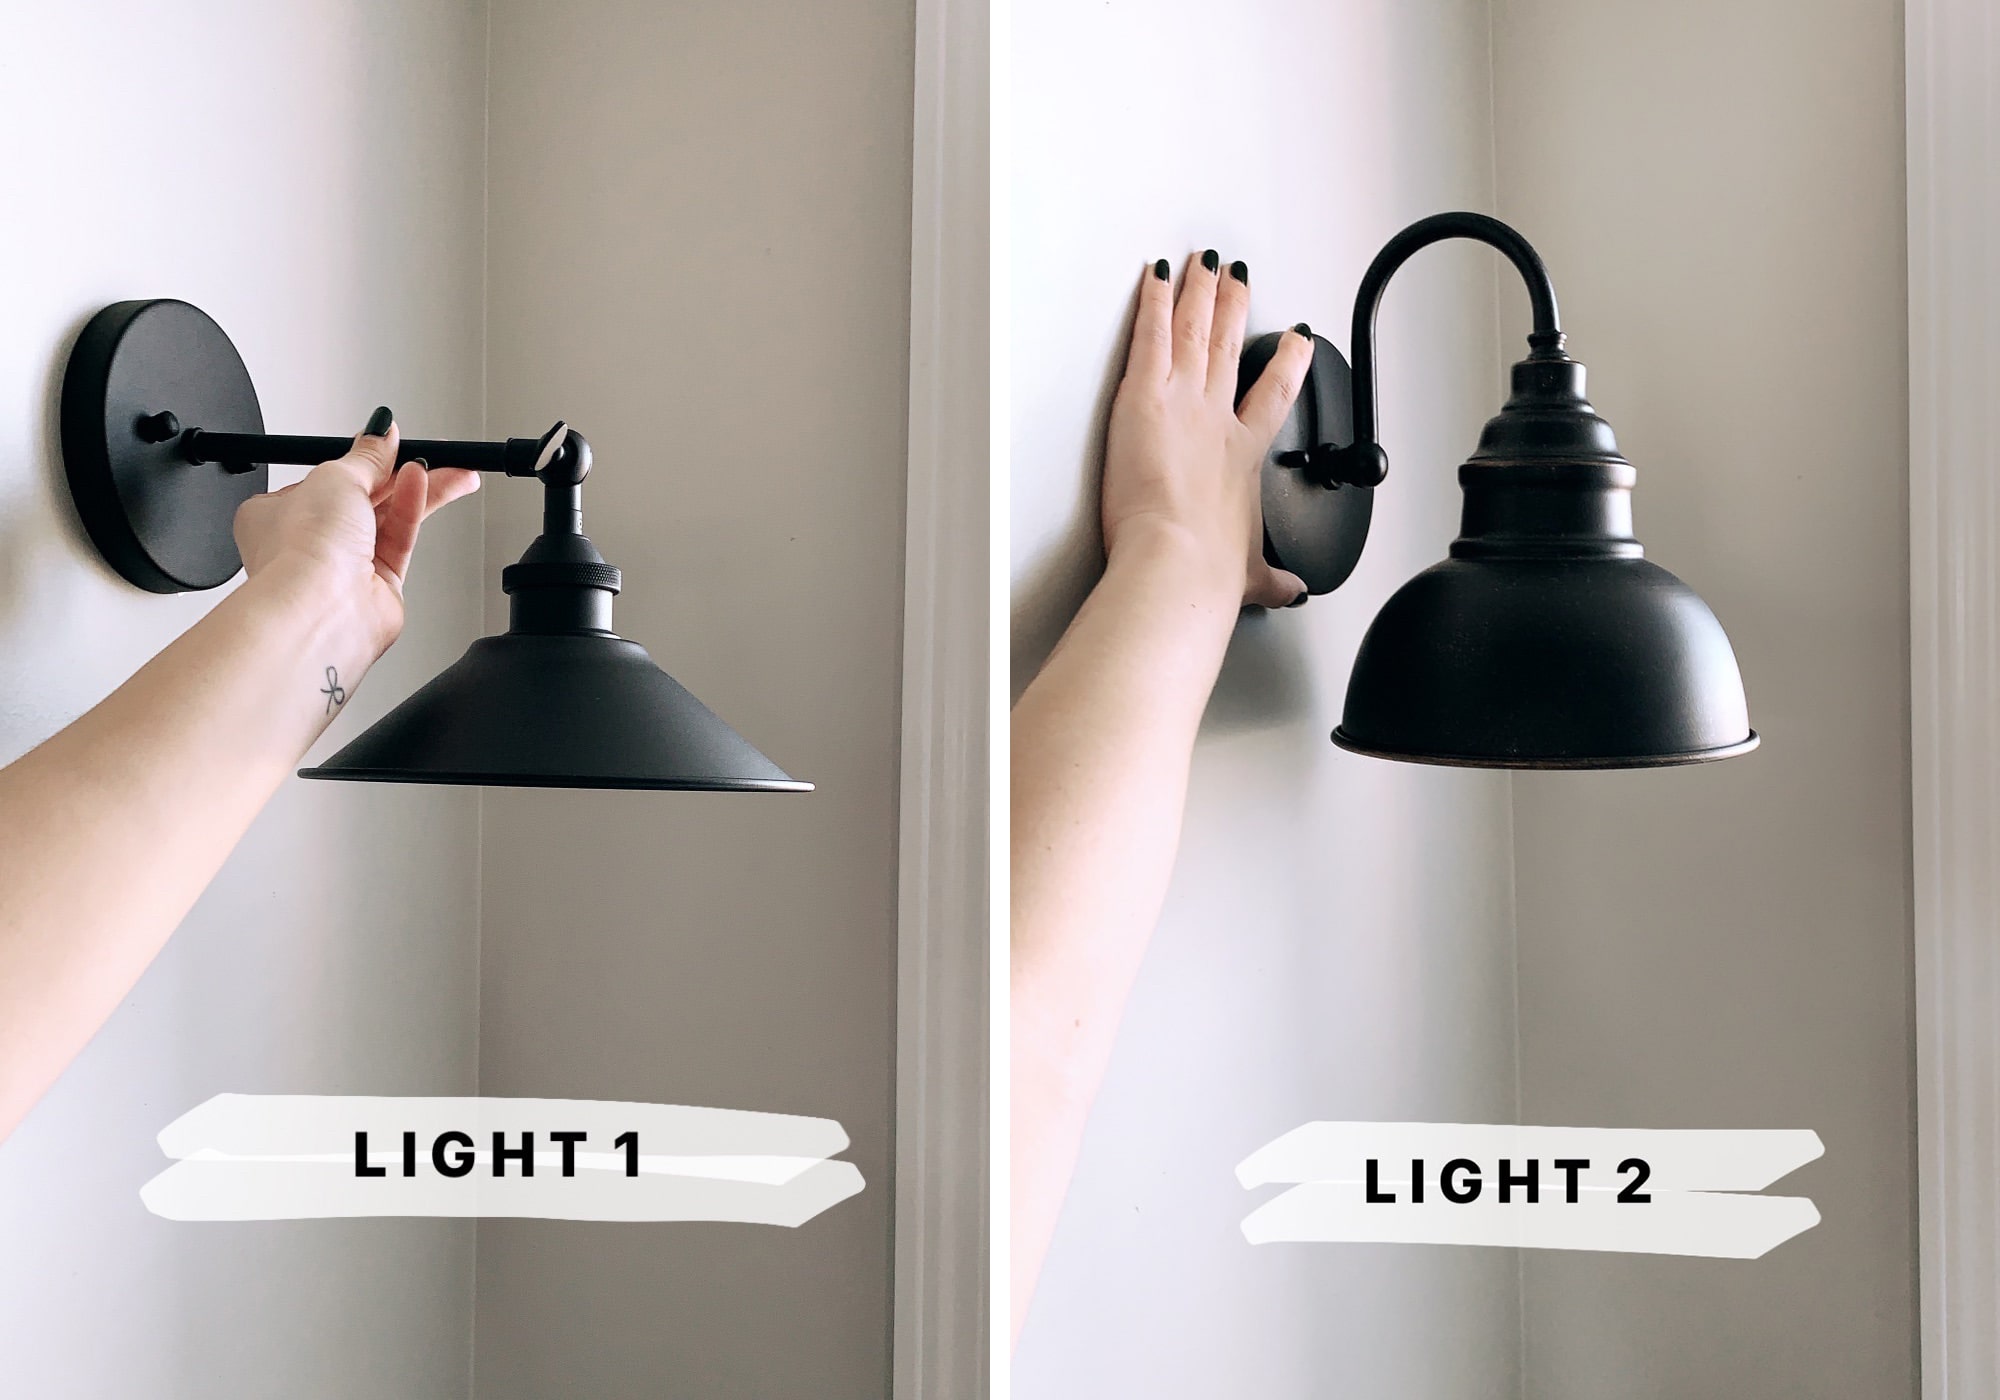
I really had a tough time deciding between the two. They both looked great in the space, but Light One just seemed more my style. So! I ended up going with light option 1.
If you know Brooke from Nesting With Grace, then you know she’s a home decor and DIY genius. I used her magic light trick for these two wall sconces and let me tell you… it. is. magical. So easy to do and they’re remote-controlled!
Are you interested in trying out the magic puck light trick? We wrote a post a while back about a ton of wall sconces that would be perfect for the magic puck light trick and for your budget. You can read more about it here.
Seat Cushion

My original plan was to have someone sew the cushion, but I decided to give it a try myself with a no-sew option! This was much more cost-effective and was actually kind of fun to put together.
I used this 3″ Foam Slab and then the fabric I found at JOANN. That itself was a whole process and I’ll write a separate blog post on how I did that with all the details. If you’re interested in learning more now, you can check out our Instagram and view the ‘window seat’ highlight. I shared some details and timelapse videos there of me putting it together 🙂
I’m actually pretty happy with how it turned out! Plus, I can easily lift up the seat cushion to access the hidden doors underneath it for storage.
Pillows
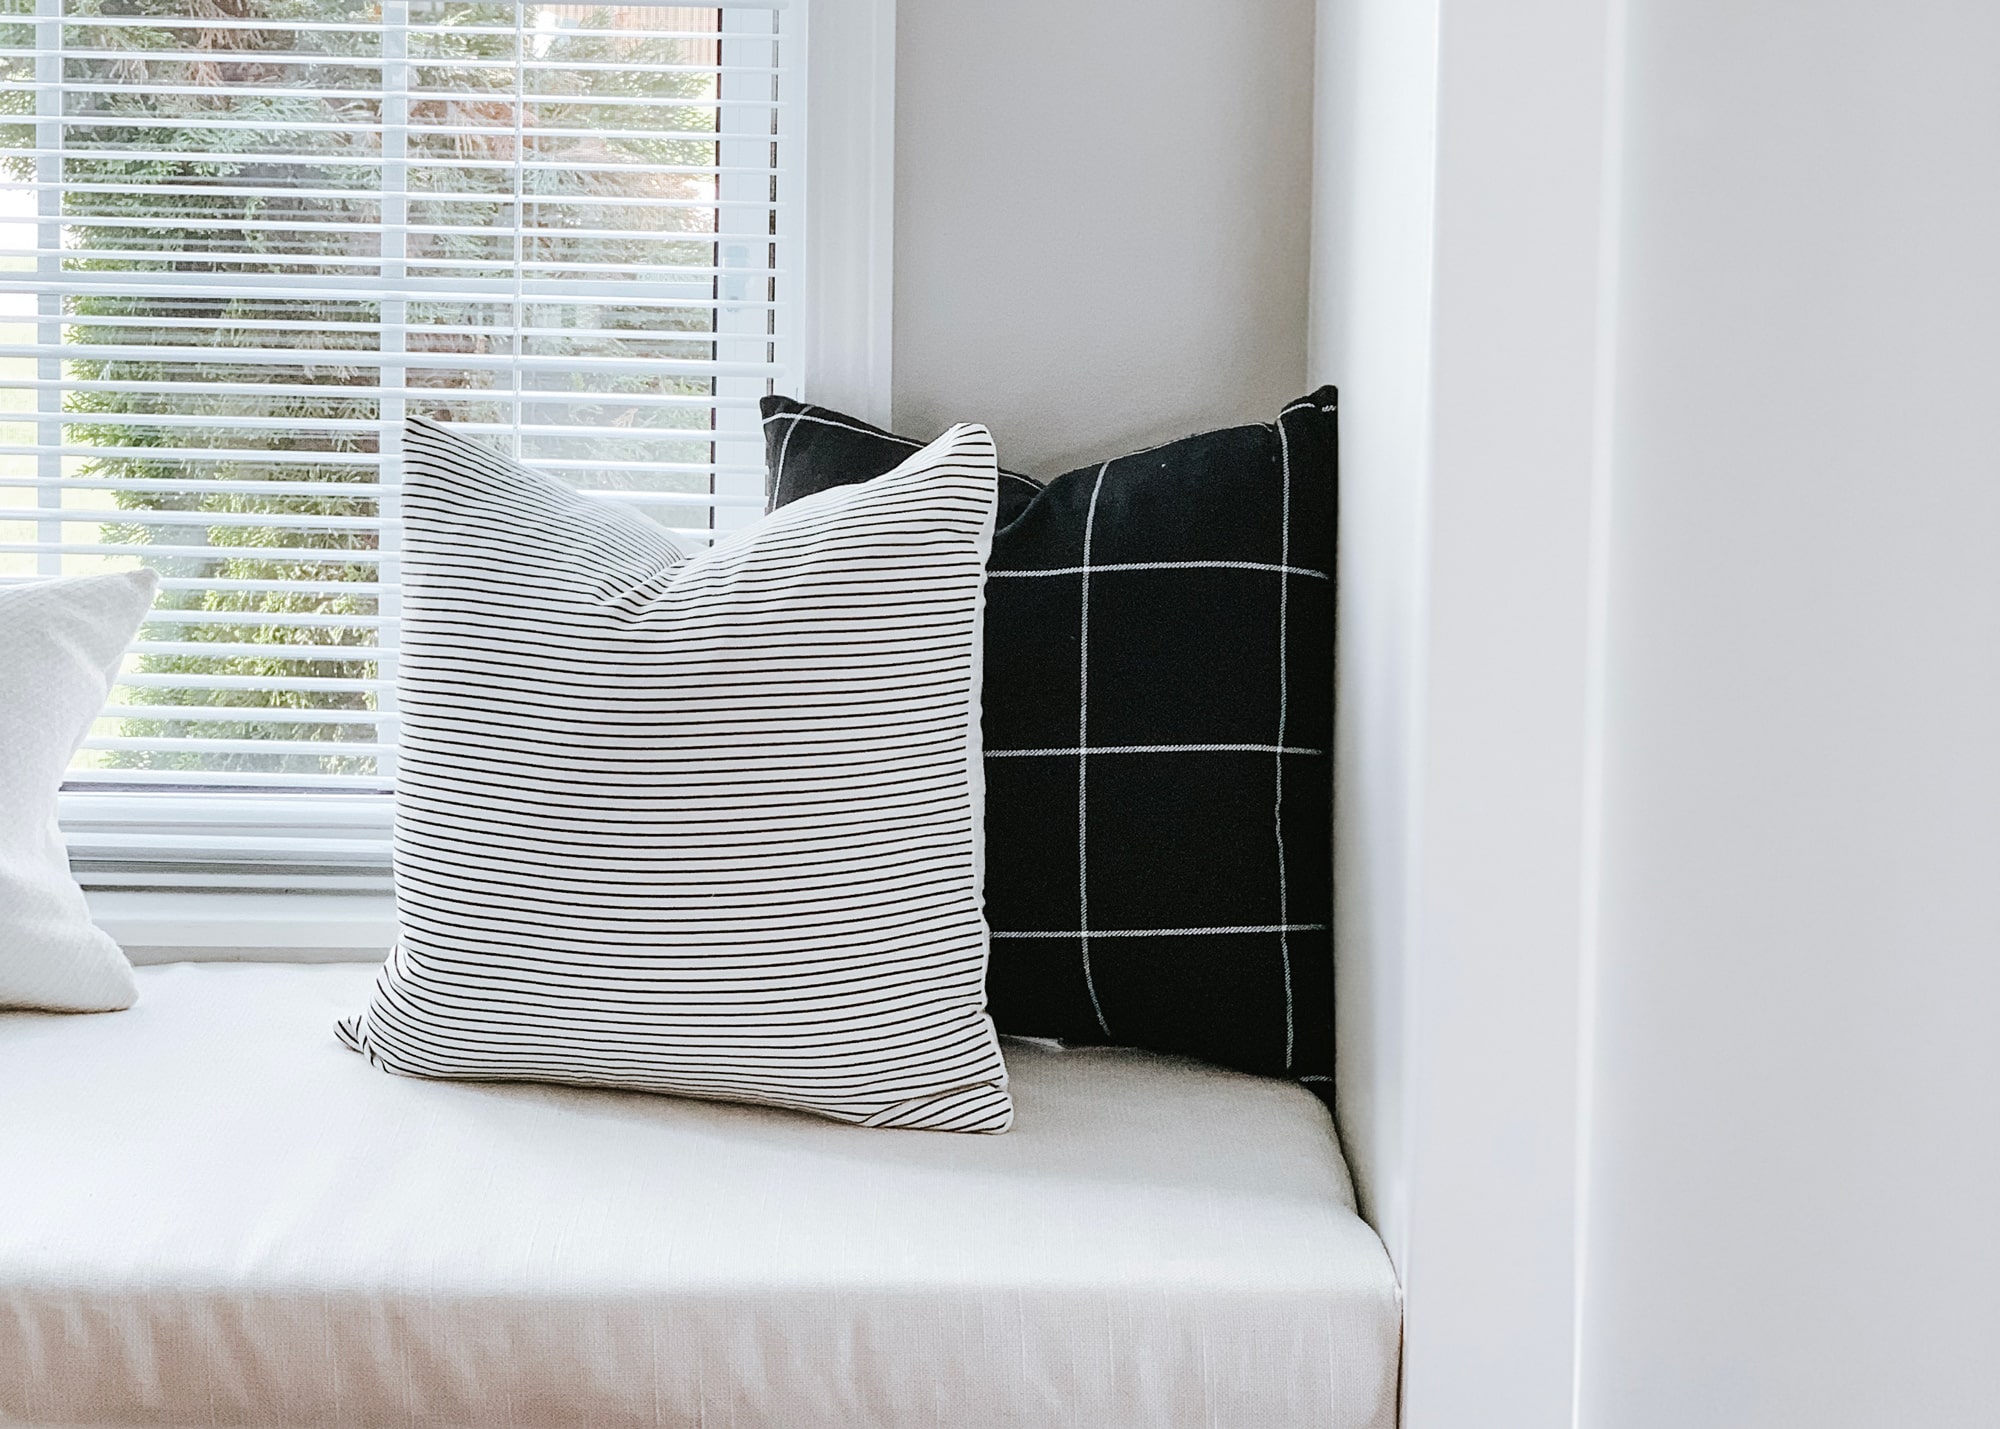
I’m really excited to change out all of these pillows for each season! Fall is basically already here, and I already have bought pillow covers to swap out! But these striped pillow covers from Woven Nook are perfect for all seasons.
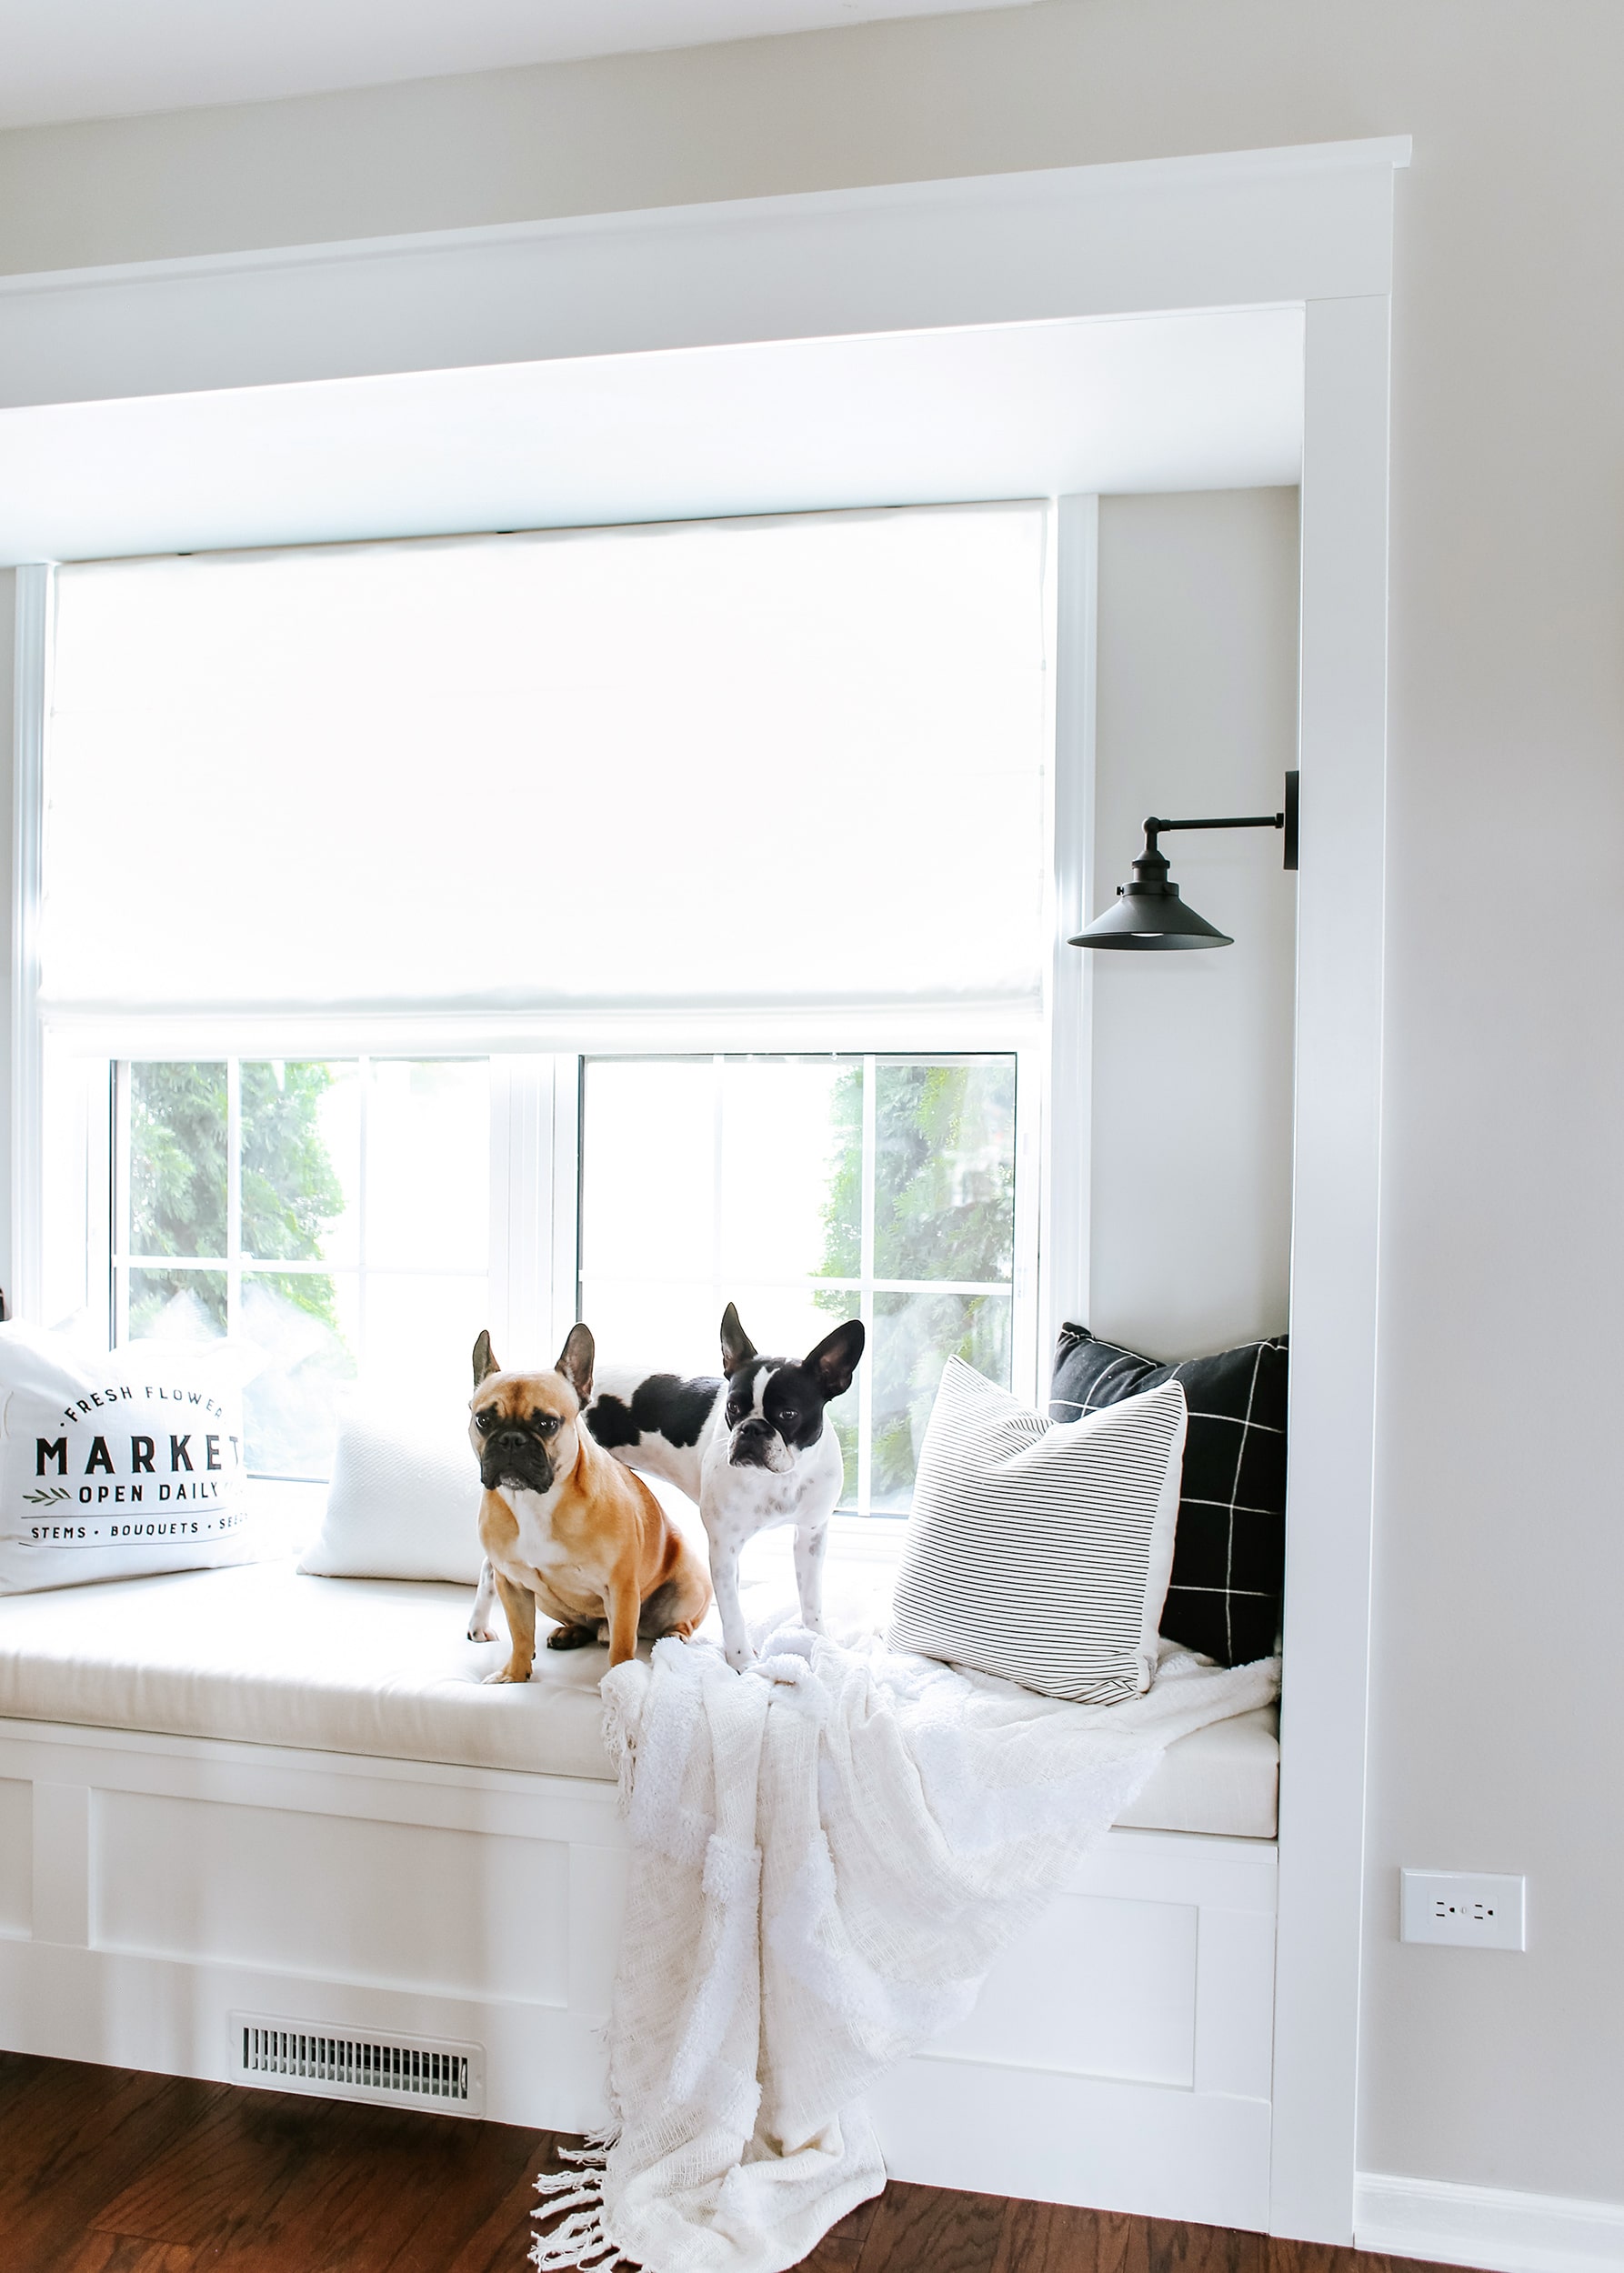
I’m honestly SO happy with how this space turned out. It’s exactly what I envisioned when we first toured this house. It’s crazy what a little imagination, paint, and wood lumber can do to space! Now… onto enjoying this window seat as much as Figgy & Frankie have so far 🙂

This post may contain affiliate links where we earn a small commission on your purchases at no additional cost to you.


Really nice. What do you call the white wrapper you put on the foam first before putting thr fabric?
Hi Bob!
Thank you! The white wrapping is called upholstery batting!
– Tammy
Did you use the light filtration liner on your roman shade or no liner?
Hi!
We didn’t use a liner!
Love the bench. We are hoping to build one in our game room area. Can you share details on how you install the piano hinges. Were they installed on the outside (top) of the bench or on the inside?
Thank you
Hi Ursuala!
We installed the piano hinge outside on top of the bench!