Hey friends!
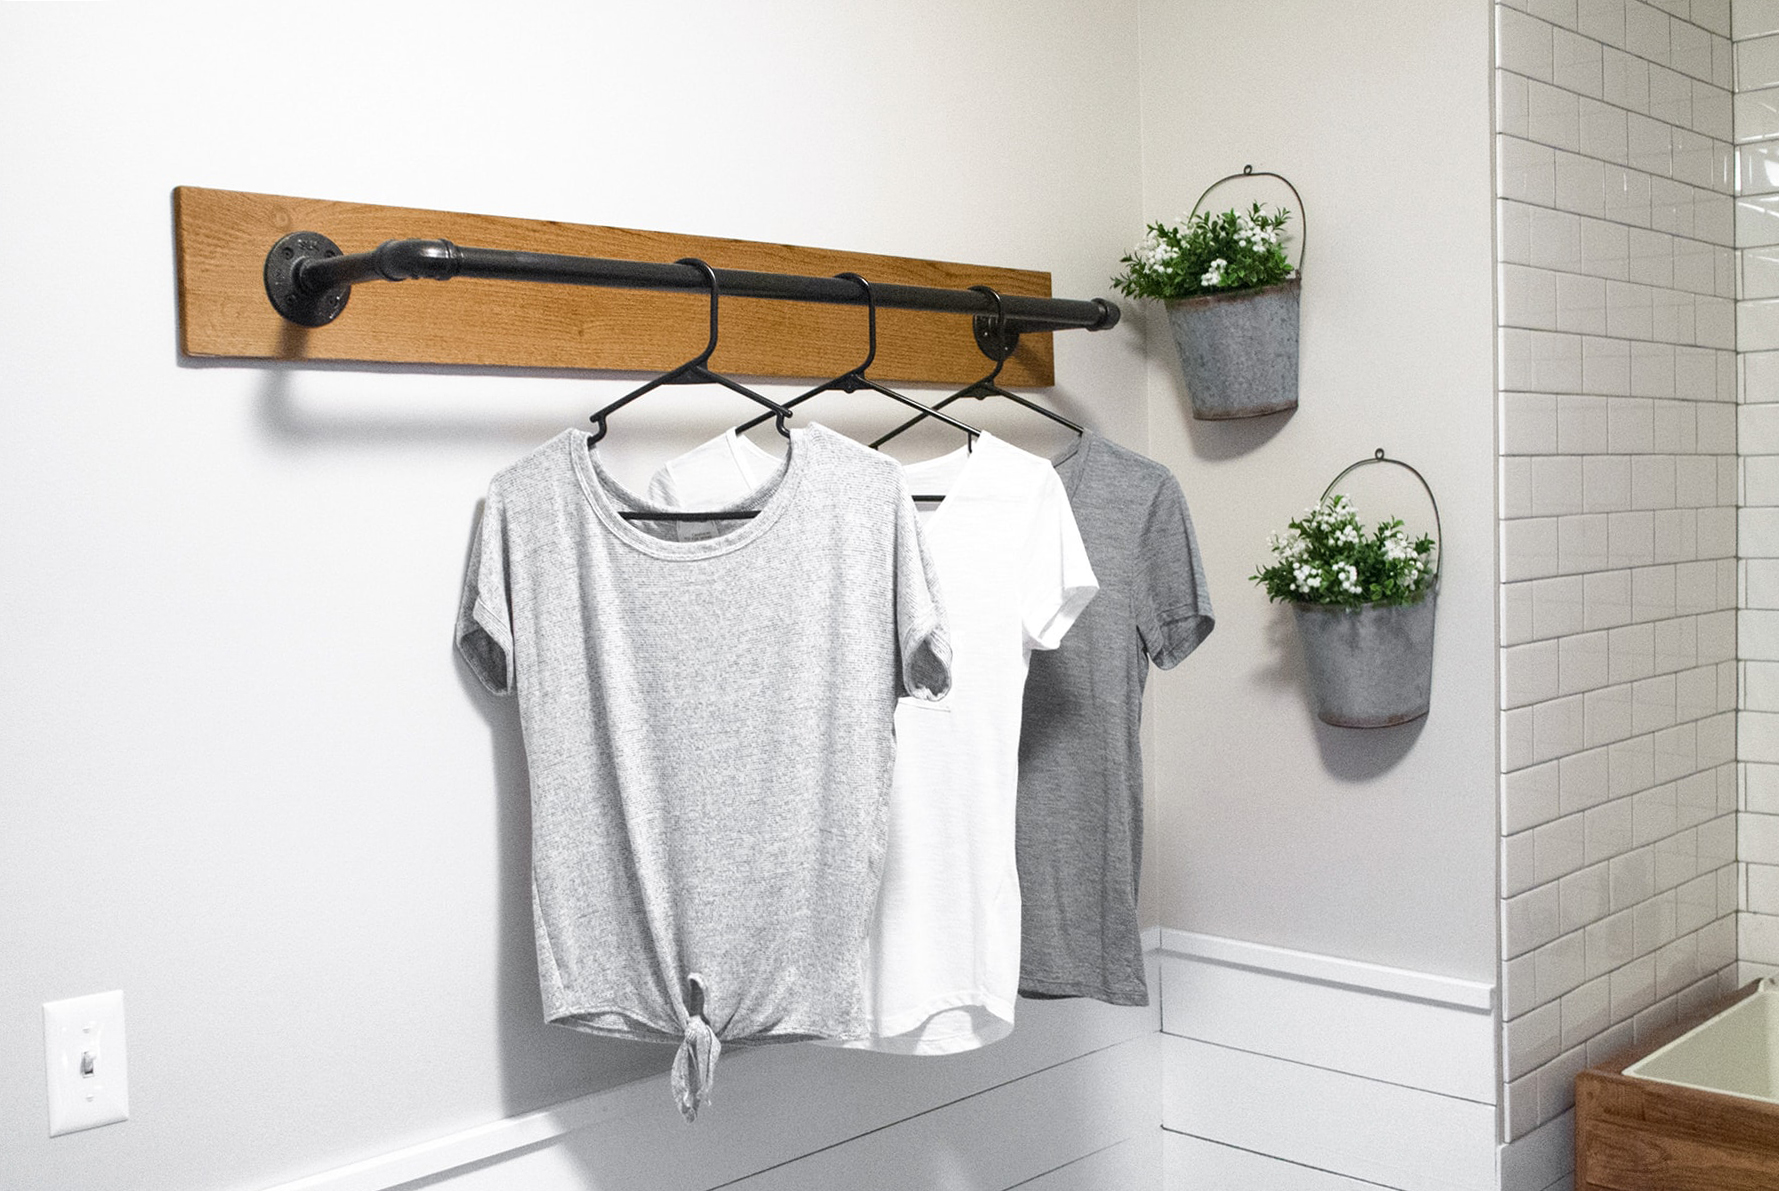
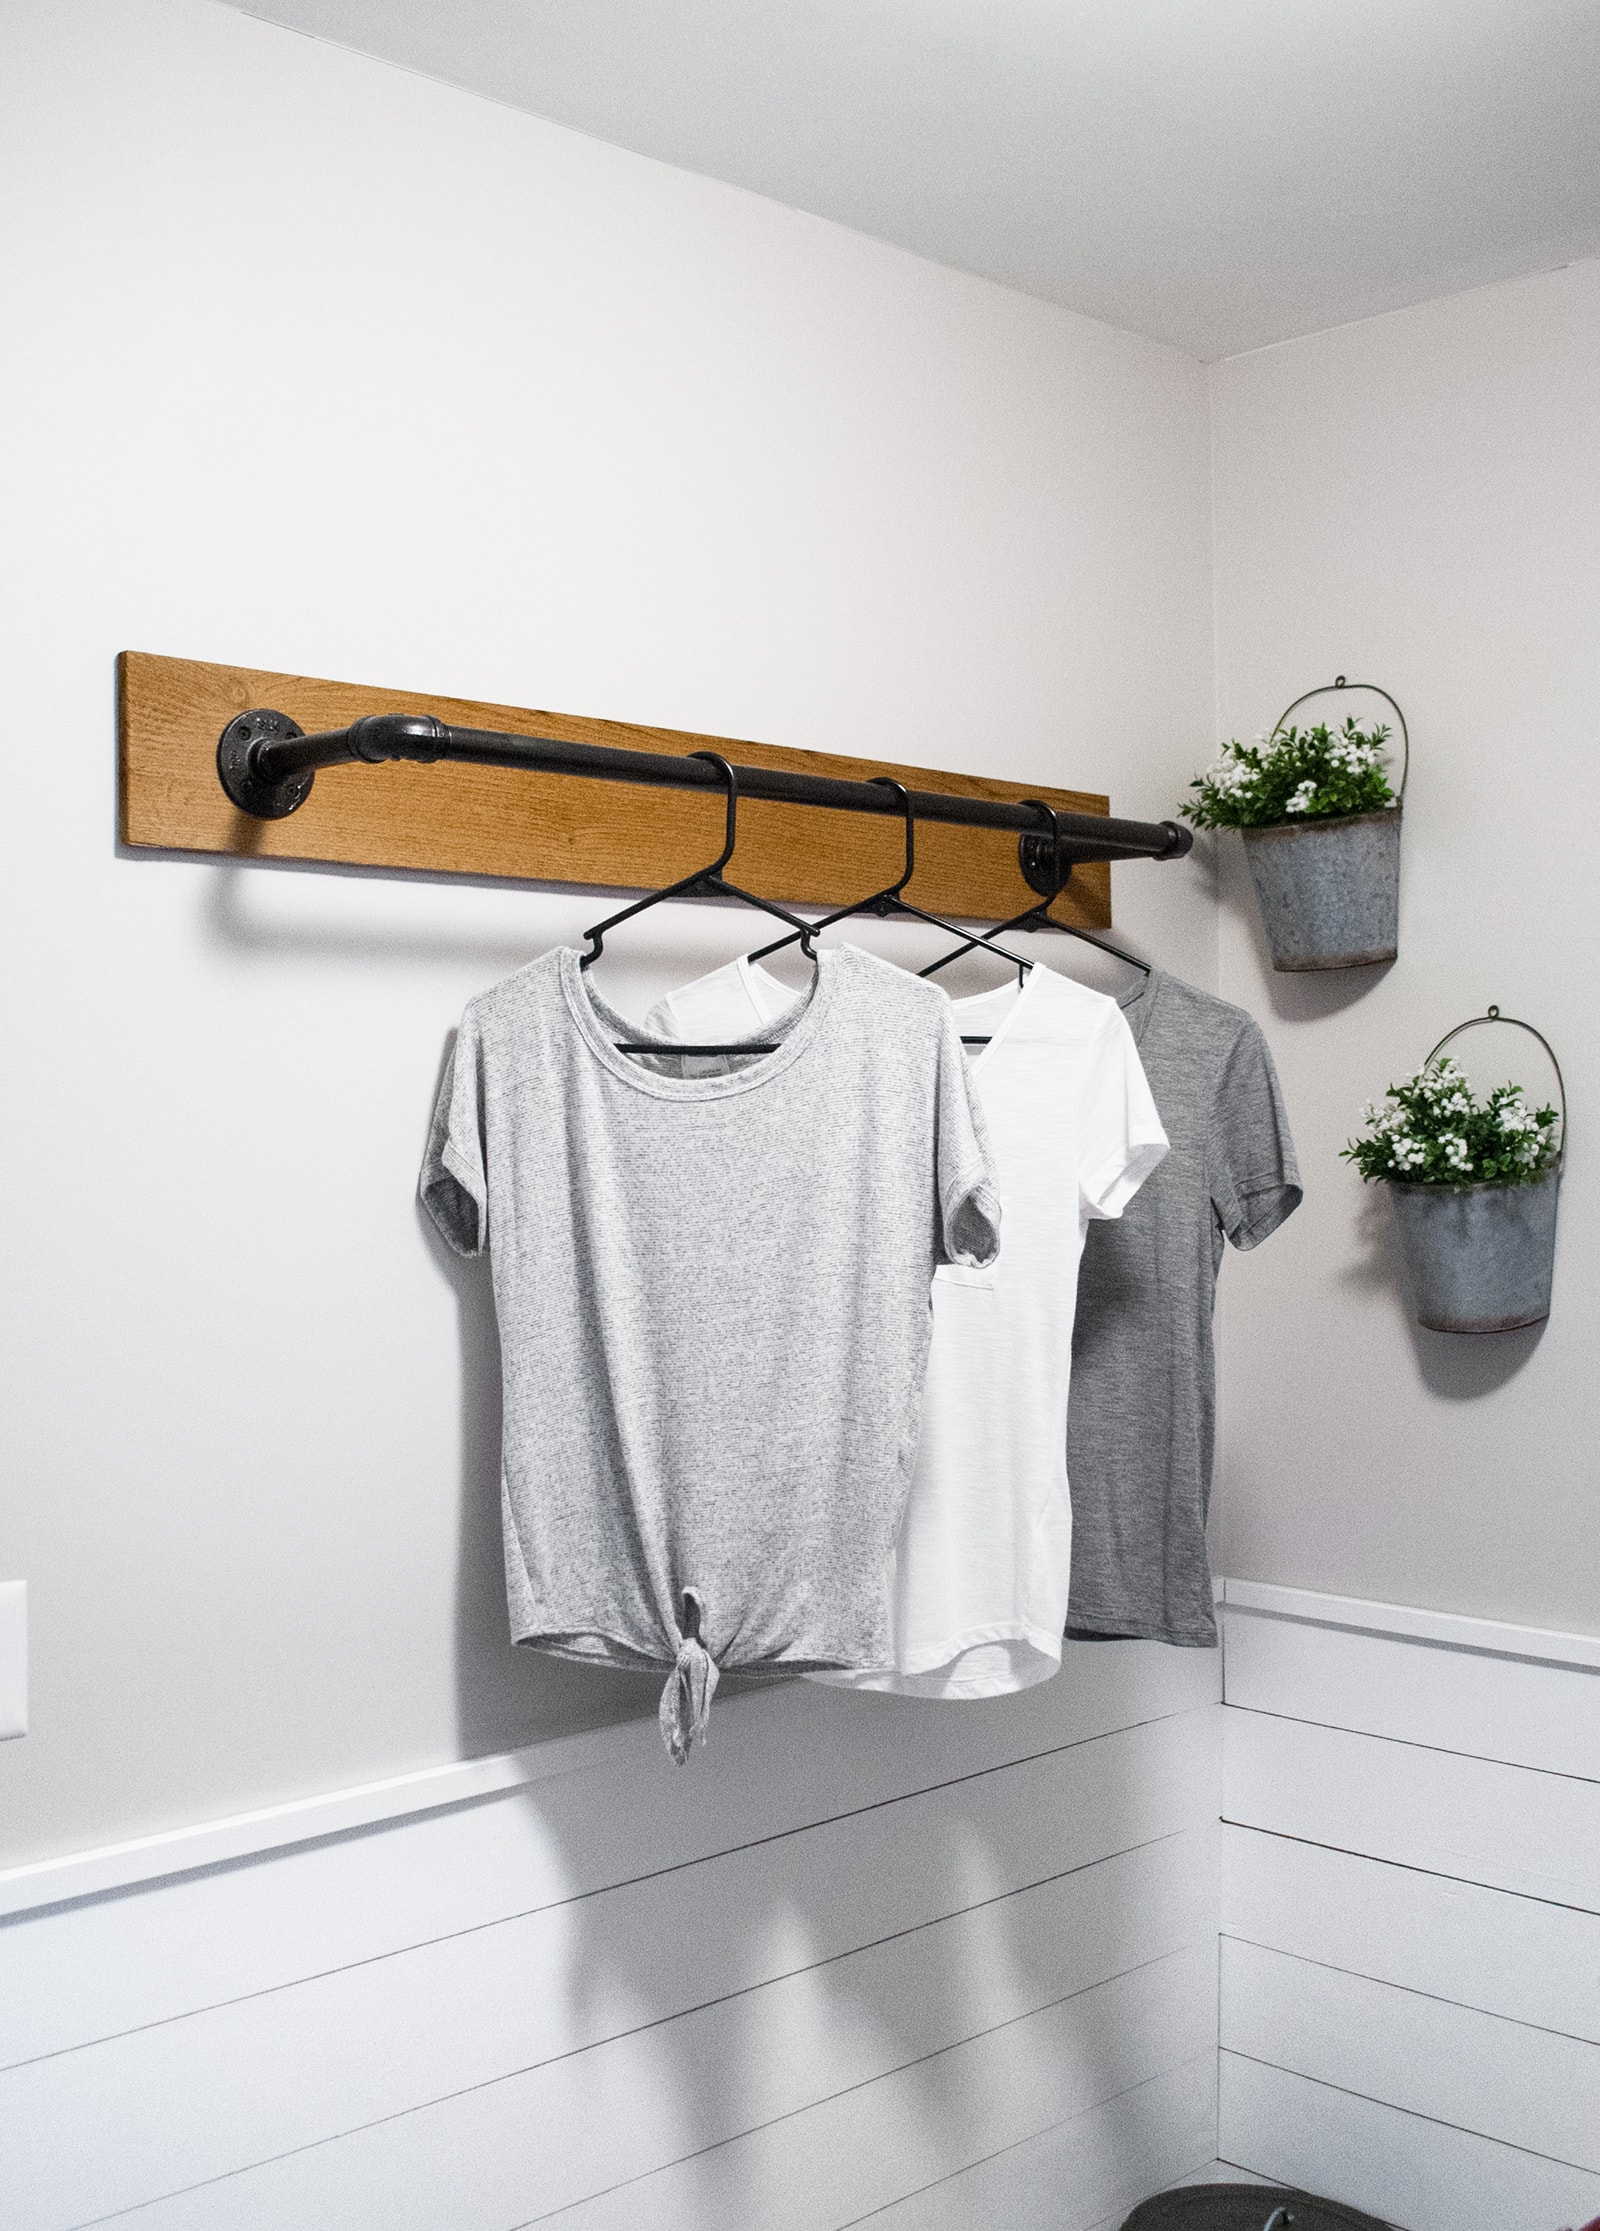
It’s Tammy here 🙂 We’ve recently gotten a few people asking about the clothing rack that’s in my laundry room (check out the full reveal here). Today I thought we’d share on how to make this simple, DIY industrial pipe clothing rack!
I’m one of those people who likes to hang-dry most of my clothes, rather than drying them in the dryer. Ya know… I like my shirts to fit 😉 Before we re-did our laundry room, I had one of those cheap plastic rolling cart thingys that you could hang clothes to dry… I hated it. I felt like it was always in the way, took up too much room and it had a slight lean to it. Not impressed. I knew even before we put our list of “things to have” together for the new laundry room, this was one of the top things I wanted to incorporate.

Taking a look back at the project, I’m so happy we incorporated this! I love that it’s a floating rack and it aesthetically looks 10x’s better than any other clothing rack you can buy at the store. The project itself was very simple to put together. The hardest part is hanging and grabbing all the pipes at the store… you might need 2 extra hands to help for both!
The total cost was about $30 – without the spray paint or stain (we had some leftover). To me, that didn’t seem too bad. Especially since the cheap, store-bought ones end up being very wobbly. Using this industrial piping makes it so much sturdier too!
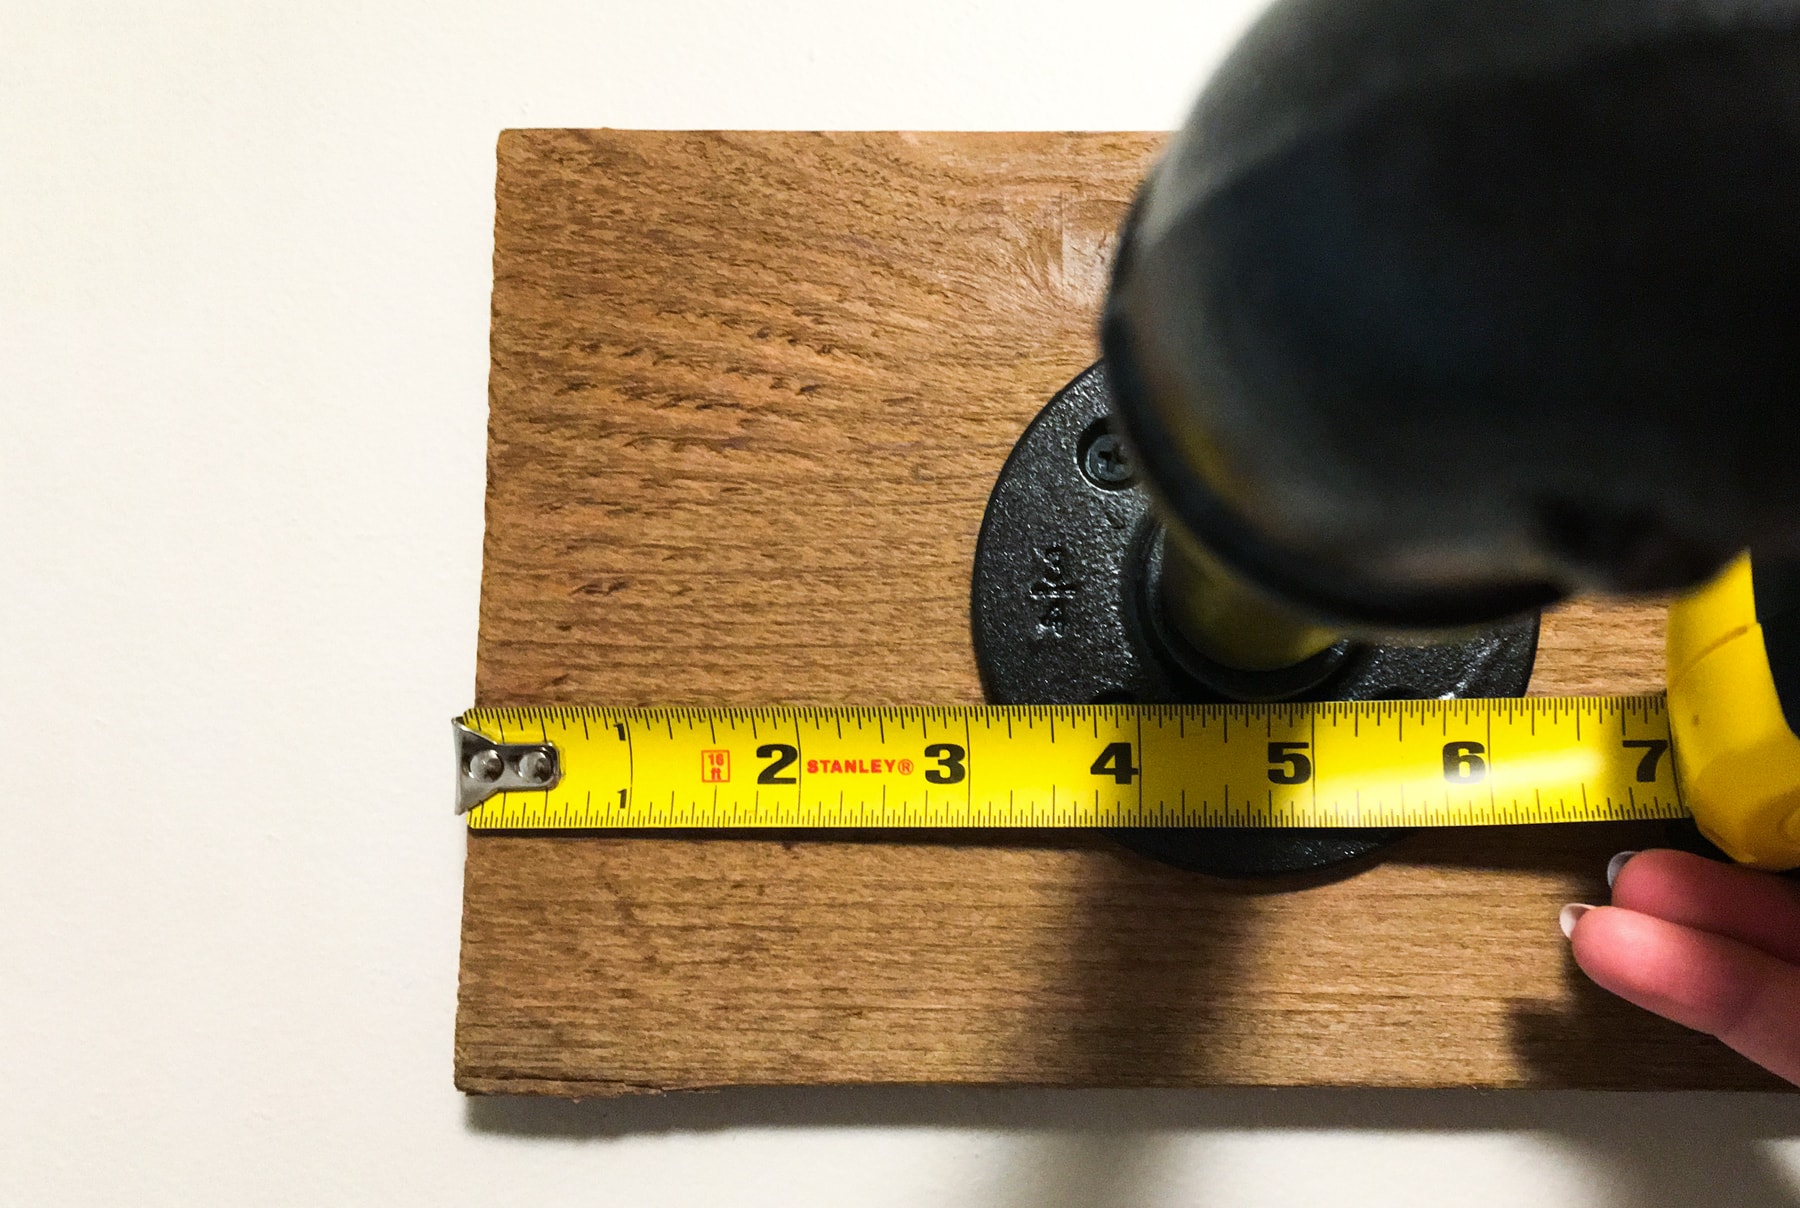
This DIY pipe clothing rack was made using a 3ft long, 1” pipe. The pipe used for the depth of the rack was 6” long. This could be longer, depending on how large your space is. Our laundry room is pretty tight, so I didn’t want the rack to extend too far out. The standard plastic clothing hangers almost hang straight out. So, if you have room and you’d like to have the hangers hang straight on the rack, than I suggest using 8” length pipe.
Let’s get started!
This post may contain affiliate links where we earn a small commission on your purchases at no additional cost to you.
THE SUPPLIES
- (2) 1″ Galvanized Pipe 90 Degree Elbow
- (2) 1″ Galvanized Pipe Floor Flange
- (2) 1″ x 6″ Galvanized Pipe Nipple – could be longer as mentioned above
- (1) 1″ x 3′ Threaded Galvanized Pipe – this could be a longer piece too. (If you have a Menard’s located near you, go there for the piping since its cheaper. This pipe is not available on their online store.)
- (1) 6ft Fence Picket – 6″ wide (you can use a 1×6 as well, but it’s a bit little thicker than the fence picket. Plus, you don’t get that rough finish look with a 1×6)
- Minwax Golden Oak
- Oil Rubbed Bronze Spray Paint (optional)
- Long Screws (to fit the pipe flanges and long enough to go into wall)
THE TOOLS
- Pencil
- Tape Measure
- Level
- Stud Finder
- Drill
- Saw
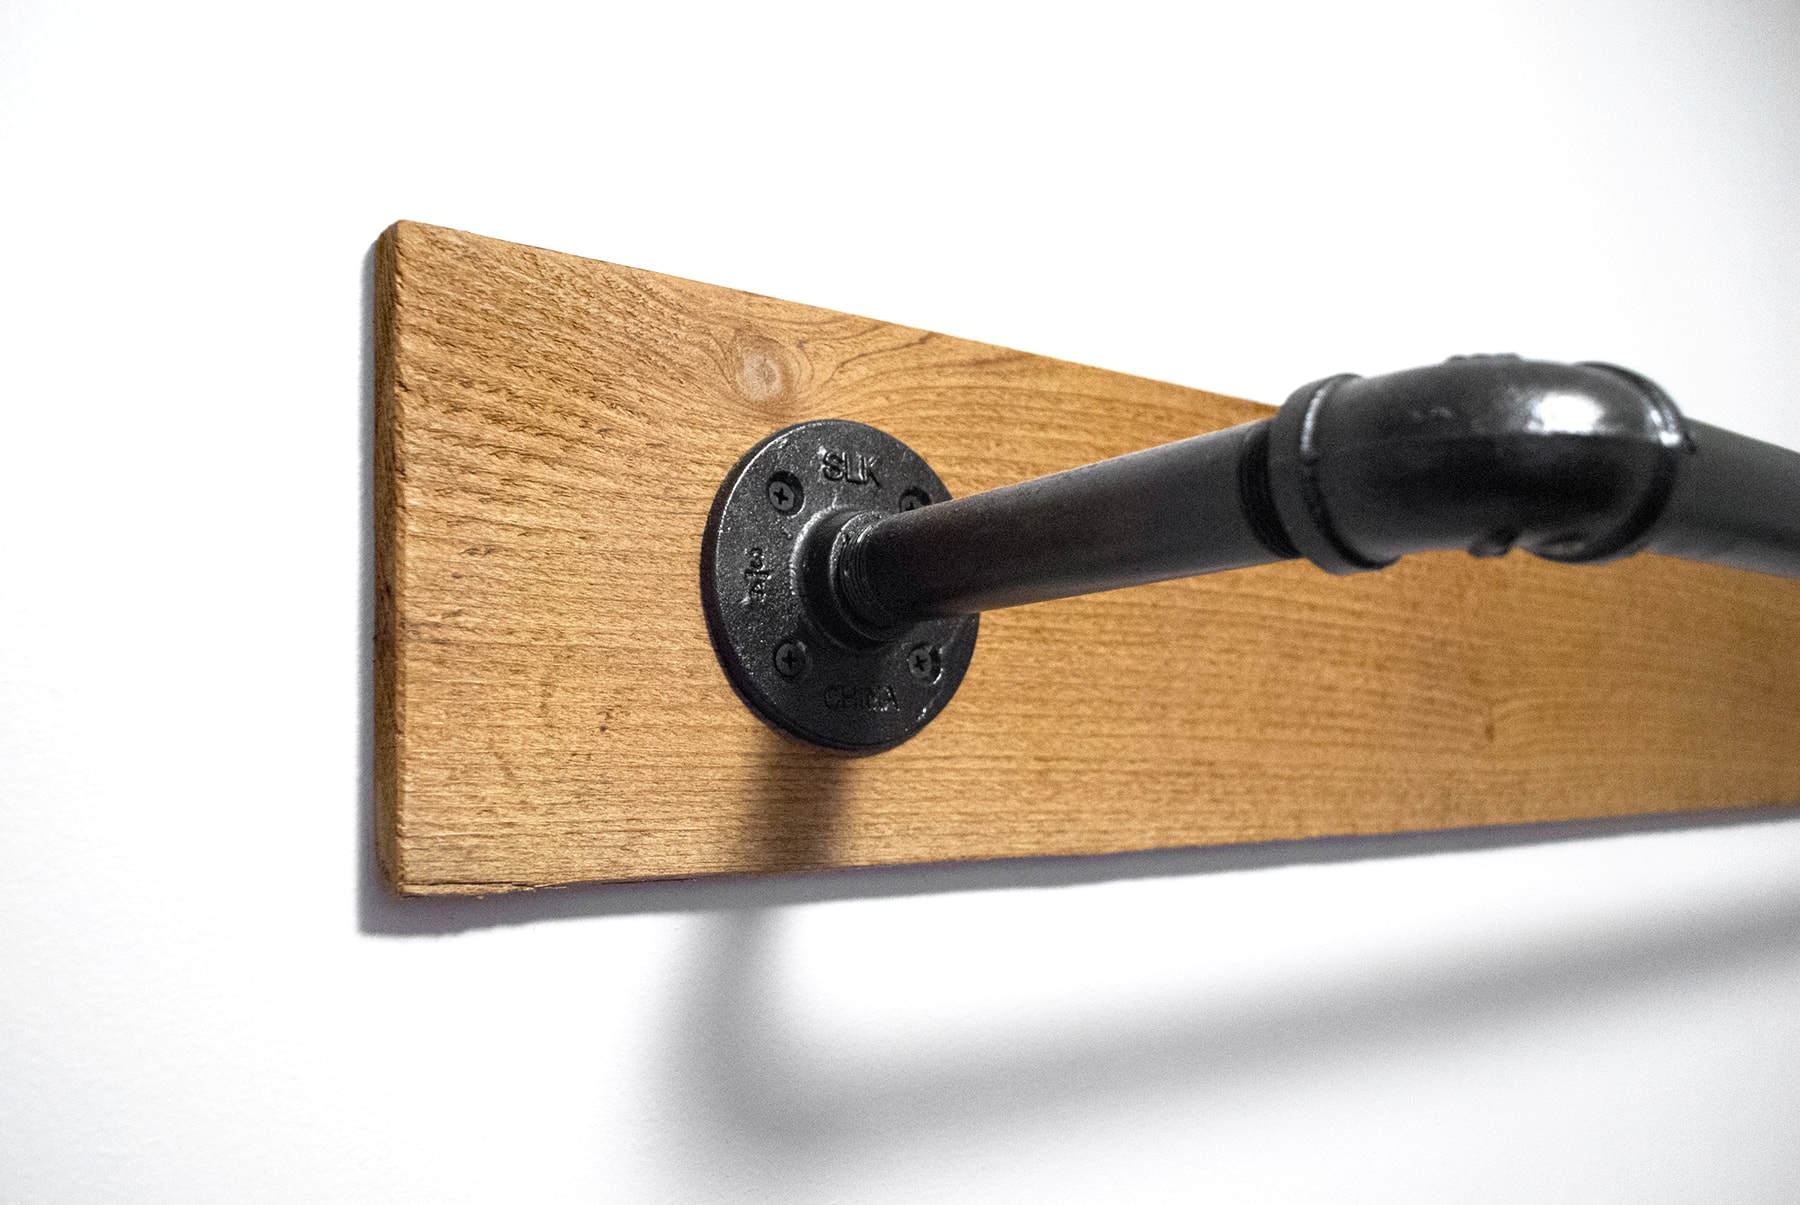
STEP 1 – Assemble Pipe

To make things easier while spray painting, assemble all the pieces together first. The only part that will be tough to spray then, is the backside of the main pipe. I didn’t worry too much about this, since its facing the wall, you won’t be able to see it. Just gotta be careful and do your best when spray painting.
STEP 2 – Spray Paint (optional)
If you decided to go with the galvanized metal look, than you can skip this step 🙂
If you do want the dark pipe look, I used Rust-Oleum Oil Rubbed Bronze Metallic Spray Paint. This spray paint is pretty much what I use on all our projects – LOL. The best part is that it’s a paint and primer combo!

If you can – you’ll want to spray paint outside or in a well ventilated area (garage?). Make sure to lay down some cardboard / plastic, so you don’t get overspray everywhere.
Let it dry.
STEP 3 – Cut Wood Backing
I had some extra wood fence pickets left over from another project and decided to use it for this project. The rough textured look was just what I was looking for!
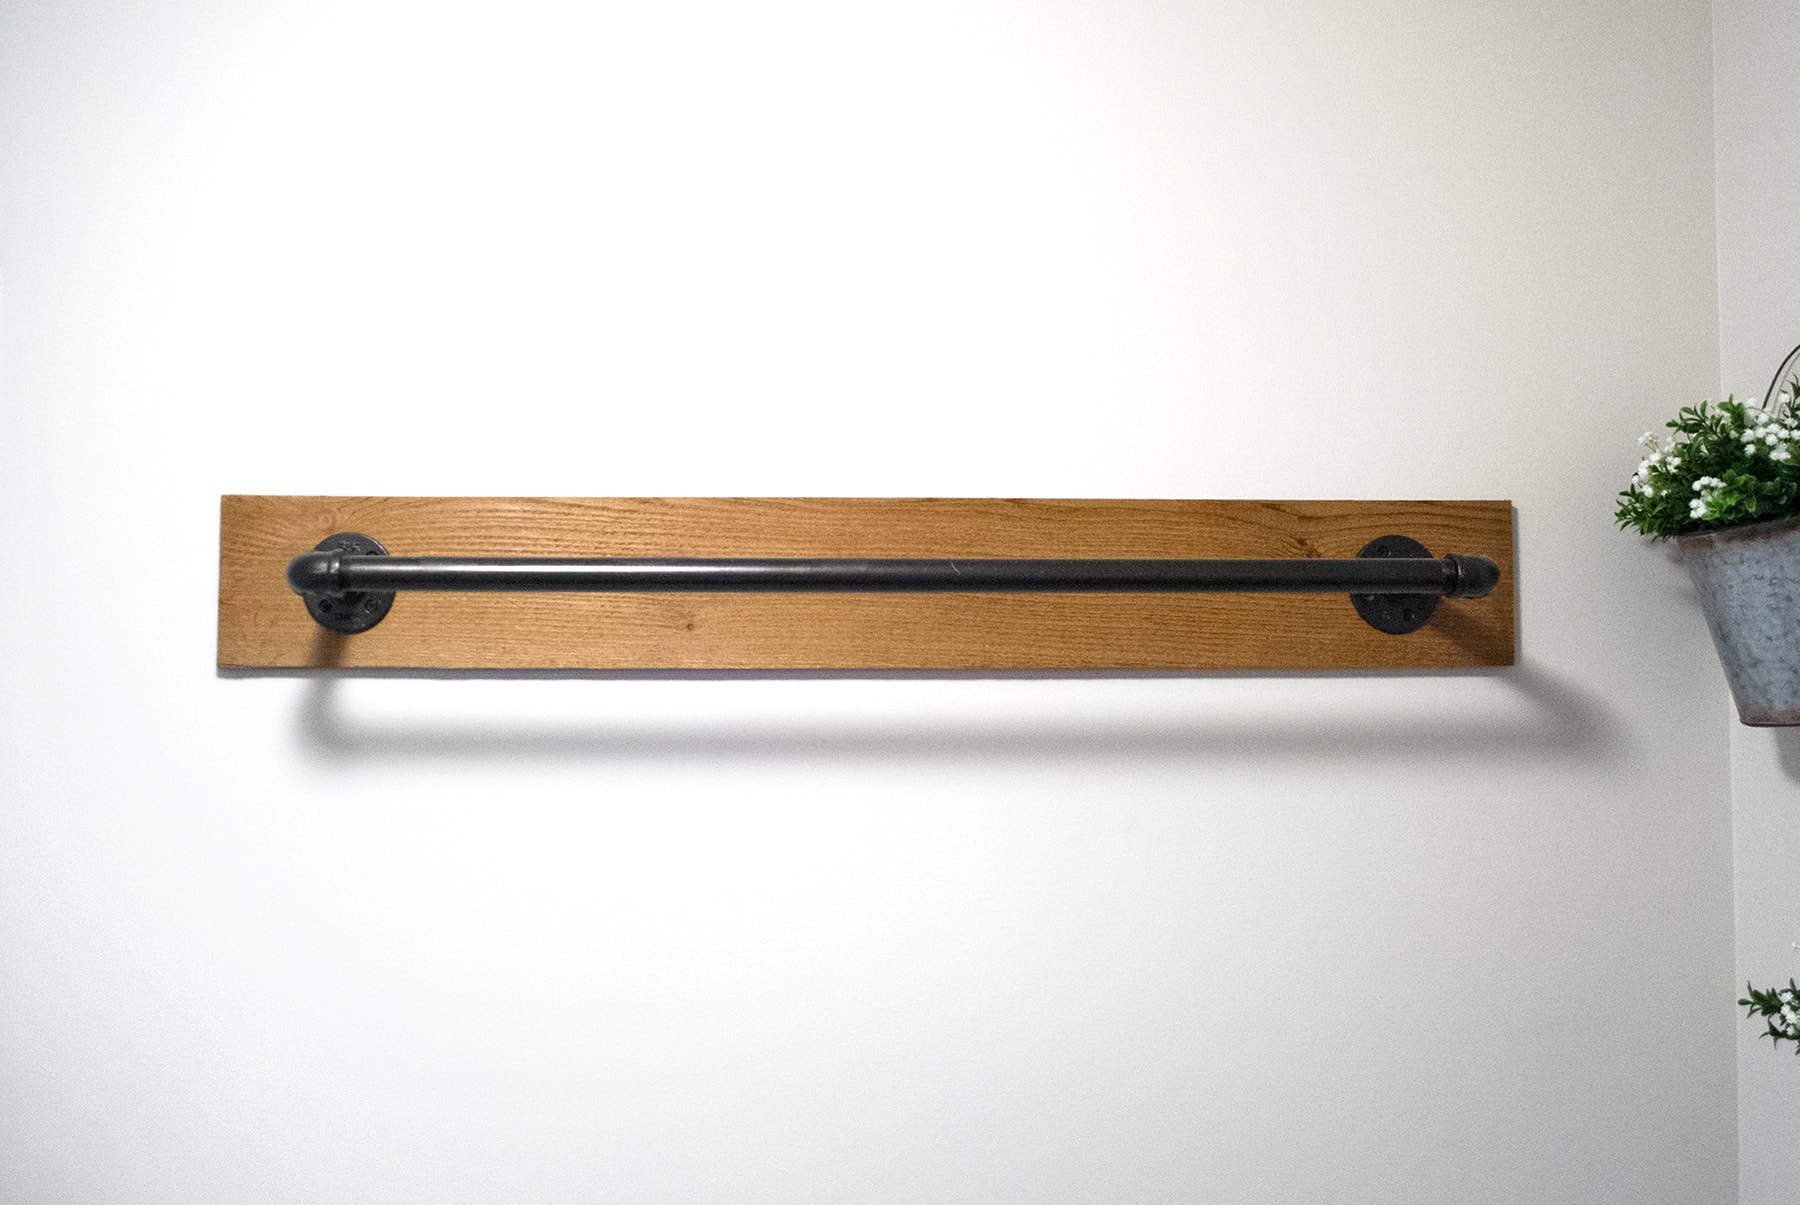
Your wood backing should be a little bit longer than your pipe length. I added 4.75” on both the left and right sides (measured from the middle of the pipe/flange). Since I used a 3′ pipe, I ended up cutting down the wood backing to 46.75”.
– tip – If you decided to use a fence picket, you’ll want to cut off the end with the dog ear edge. This way, you’re only making 1 cut.
STEP 4 – Stain Wood Backing
If you decided to buy the Fence Picket – The Western Red Cedar – you’ll notice the wood has a red hue to it. As I mentioned earlier, I used our fence picket from a previous project with the same stain color. Well, during that project, the amount of stains I tried to get color I was looking for was unbelievable. After trying and trying and trying, I finally found the stain that worked best! Surprisingly, Minwax Golden Oak was it. I would have never of thought, I myself would ever choose a golden oak stain for a project!
So, if you choose to go with the red cedar fence panel, and like the stain color I used, than go with Minwax Golden Oak for the stain. Really, you can stain it whatever color you like! I just found this stain to my liking 🙂
STEP 5 – Hang!
Hanging is really the most difficult part. An extra set of hands will definitely make things easier.
To begin, measure out the placement on the wall you want to hang your clothing rack.
Depending on your wall type, you want to make sure you properly secure your rack to the wall using appropriate screws and/or wall anchors. If possible (and you pretty much have all the stars aligned), you want to drill into a stud.
If where you want to hang the rack does not land on a stud, you will need to use drywall anchors. Since you are going to be hanging clothing (heavy too, if wet), you really want to make sure you use those or to drill into a stud.
Don’t forget to make sure it’s level too!
Once you figure out your placement on the wall – you are going to want to make your drill marks on the wood backing. Lay the wood backing on the ground, and place the assembled pipe on top of it. Make sure it’s placed in the center of the wood backing (equal spacing on the top/bottom and left/right sides). Then, take your pencil and mark dots / circles inside each of the 4 holes on both of the pipe flanges.
To make things easier, we pre-drilled holes into the wood backing for us to see where it would all line up when hanging on the wall.
After you make your markings on the wood backing, pick both pieces up together and drill into wall (this is where an extra set of hands makes it easier!)
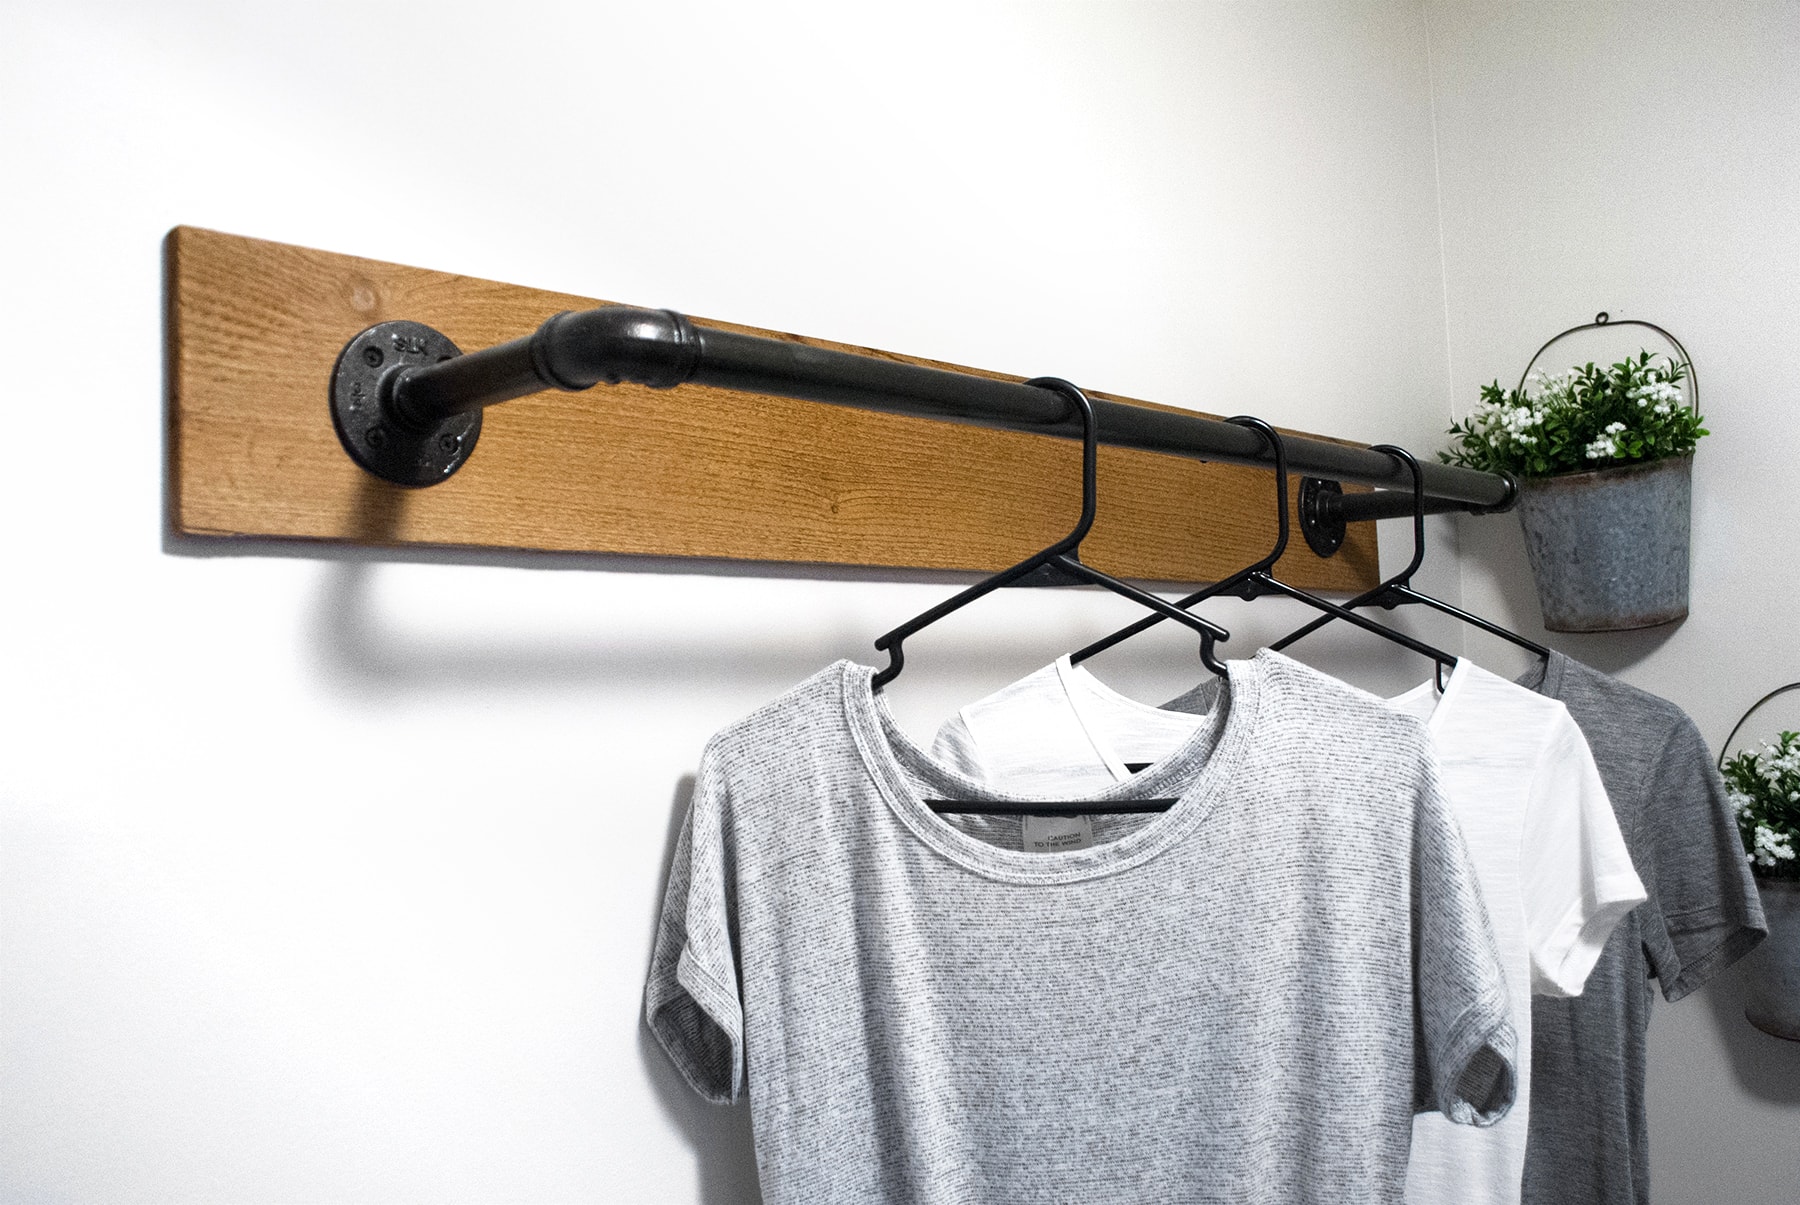
The Final Look!
There you have it! Pretty easy right!?
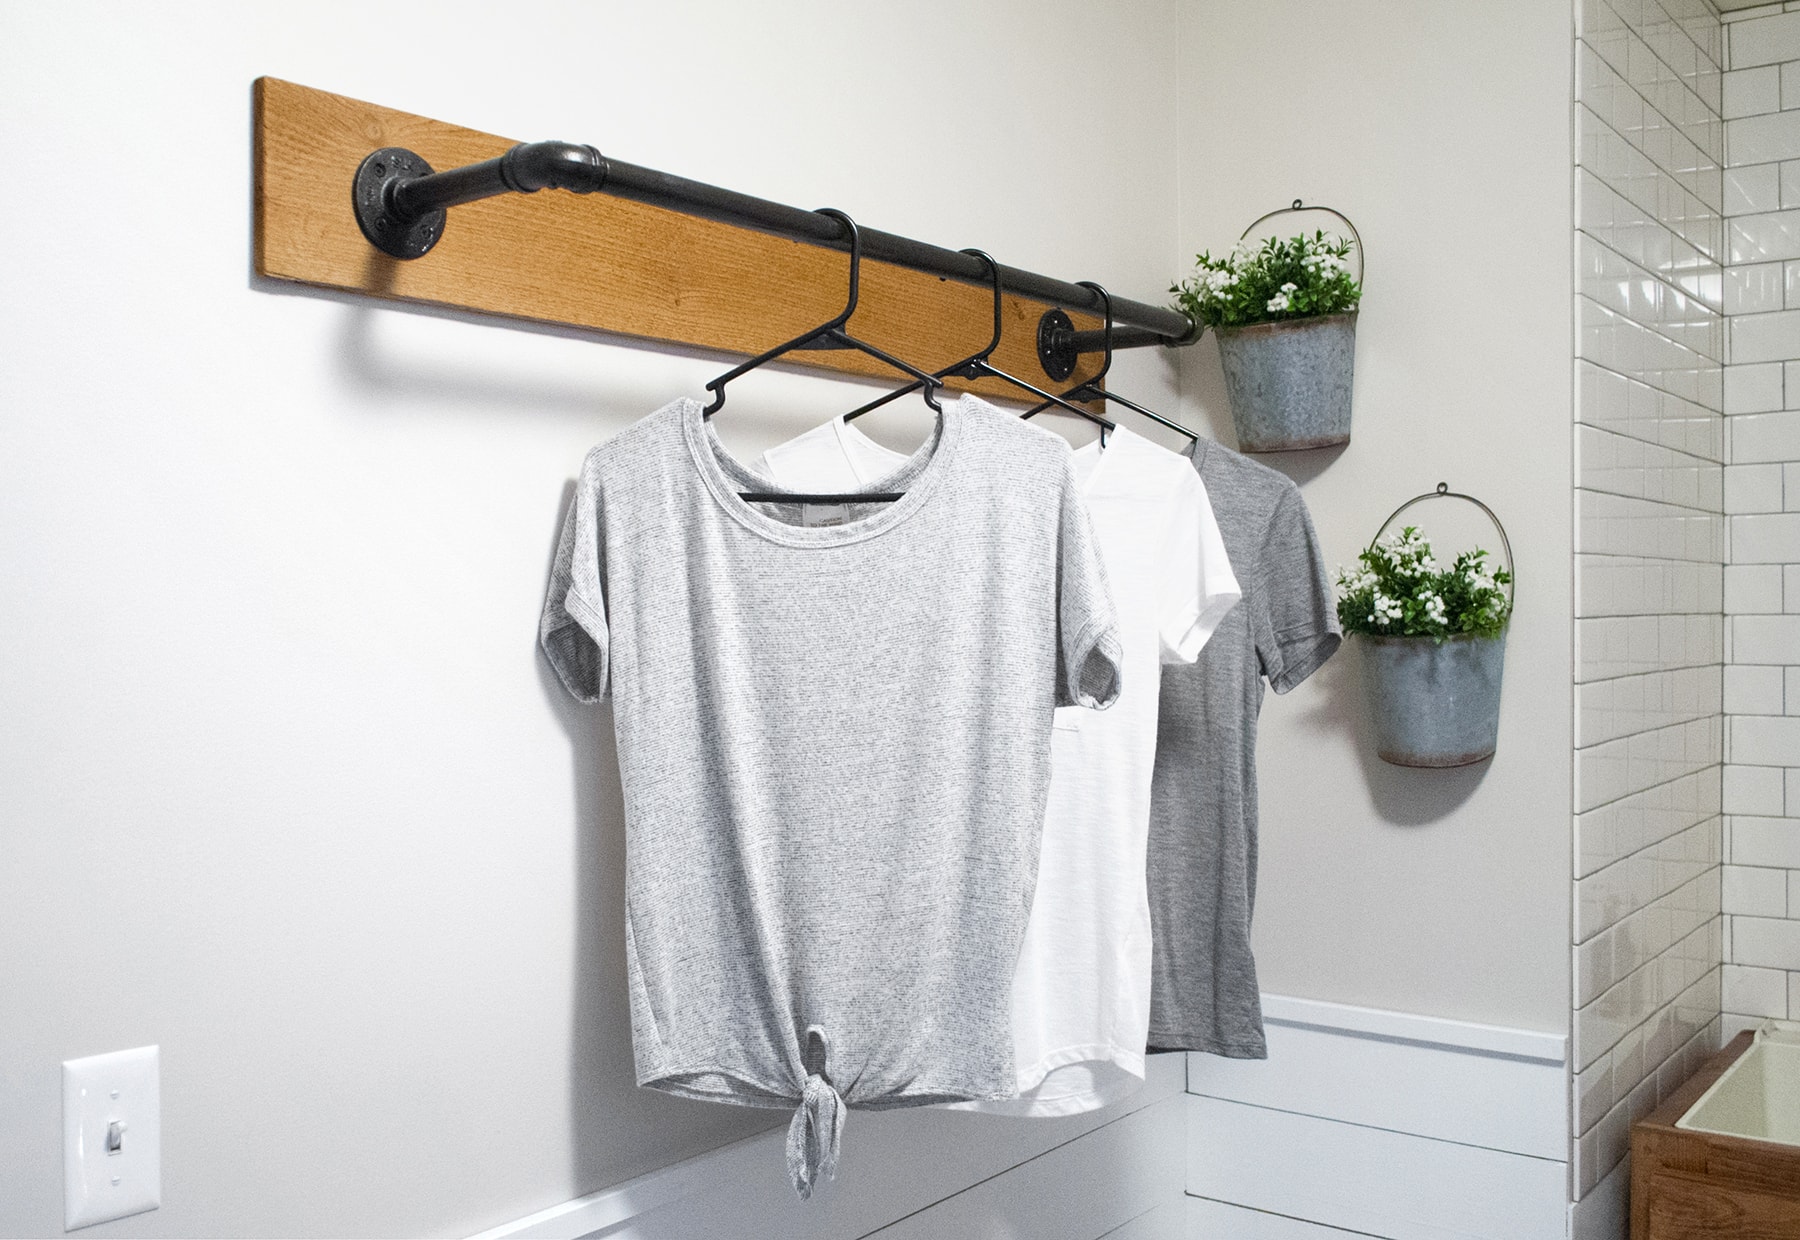
Really, one of those final touches that brings everything together in the space. I’m so happy we made the decision to incorporate one of these in our laundry room!
( Well, it’s really just me – we know my husband doesn’t have the need for this 😉 )
We hope this tutorial saves you some space AND some money. Let us know if you have any questions below!


This is such an original idea, I love it. Your post made me imagine decorating my future house
This is just the right rack I’m looking for my laundry room, I’m tired of bringing the wet clothes upstairs and hang them on chairs/doors, lol !!
Thank you!
Super clear and great DIY, just what I needed!
What length screws did you use for this? Love this idea!
Hey Lauren!
Thank you!! I believe we used 3″ length screws for this when we drilled into the studs. I know we had to use a combo of drywall anchors too and for those, we used the screws that came with the anchors – we made sure to buy heavy duty anchors.
Hope this helps! 🙂
Love this project. We duplicated everything except for the 6″ pipe pieces, substituting 8″ instead. We have a huge laundry room with high slanted ceilings so I thought it would be fine and it is! I used the same Minwax Golden Oak for the stain and applied three coats, loving the look. Also used the bronze spray paint which gave it a good dark coat on the pipe section. We were able to locate two studs so used longer nails to anchor the project and also used wall anchors for additional strength. All in all, it was an easy project and the results are amazing! It looks perfect in our lake house laundry room and will function exactly as planned! Thank you!!
Hi Annette!
Thank you SO much for your sweet comment!! We’re so happy to hear that your hanging rack turned out awesome and that it was such an easy project! Enjoy 🙂
Thanks for sharing just what we have been looking for!
Thanks Kelly! Happy DIY-ing 🙂
Thank you! Looks great! Any suggestions on how to put a shelf on top.
Hi Paulette!
If you’re thinking of adding a shelf to it, it might be better if you attach the shelf to the wall using ‘L’ brackets and then attach the pipe to the bottom of the shelf and have it hang from there, rather than the wall. So same set up, but instead of attaching the flanges and everything pipe to the wall, you’d attach it to the bottom of the shelf. 🙂
– Tammy
Easy instructions, great photos and illustrations, thank you! How did the paint hold up after use?
I have all the parts, but I’m confused about the orange caps on the 3’ pipe. Does that come off?
Hi Rhonda,
Sorry for the late reply, but yes! The caps are supposed to come off the pipes! Under those caps are the pipe threads.
How much will this hold? I am looking to hang a few ballistic vests (which are heavier than regular clothing) and do not want them to rip this out of the wall.
Hey Kyle!
A few ballistic vests shouldn’t be an issue, as long as you’re drilling into studs! Each pipe bracket has 4 screws that go into the wall. If you can’t hit a stud, we recommend using wall anchors that are made to hold a lot of weight.
– Tammy
Yay! I never thought that creating our very own attire rack could be extremely simple after all! My daughter’s apartment bedroom seems kind of messy at the moment since she doesn’t have time to get herself a proper place to store her clothes. I’ll show her this tip so she’ll have better storage for her stuffs.