Hey Everyone, Tammy here!
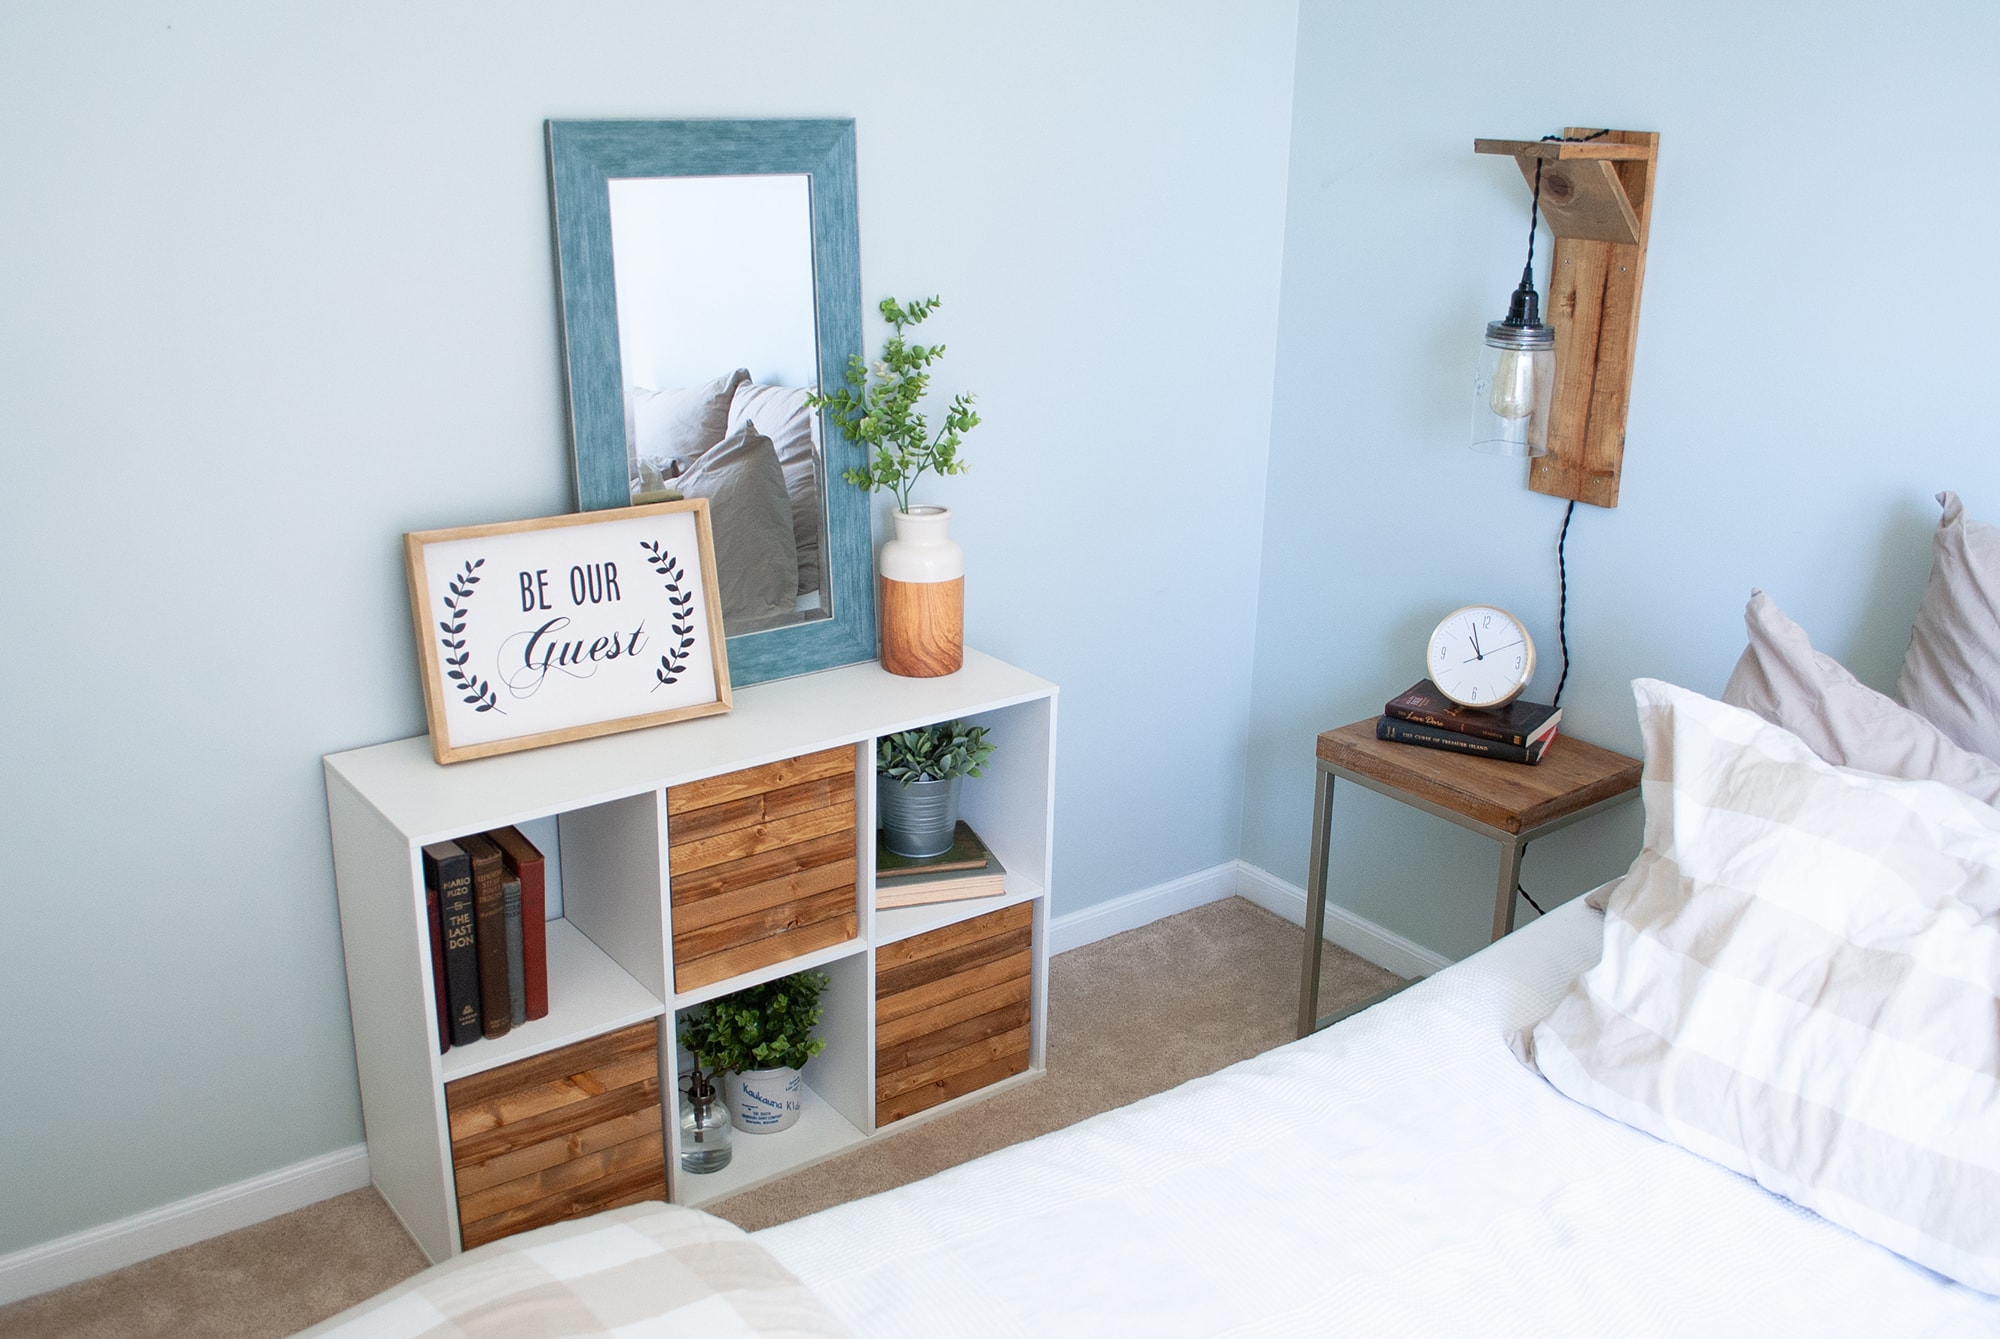
It seems like an eternity since we last shared a blog post. Both Sarah and I have been busy, busy! With so many home projects we are trying to finish up, sometimes, the days just get away from us. Let’s not forget about work… that has been hectic, to say the least. To top it off, we both recently celebrated our birthdays! So family time is a must – we all know how important that is 🙂 Anyways, I just wanted to share this cheap and easy project I just completed for my guest bedroom cube storage shelf. I took those basic fabric storage bins, and gave them a little facelift! Check out the details below!
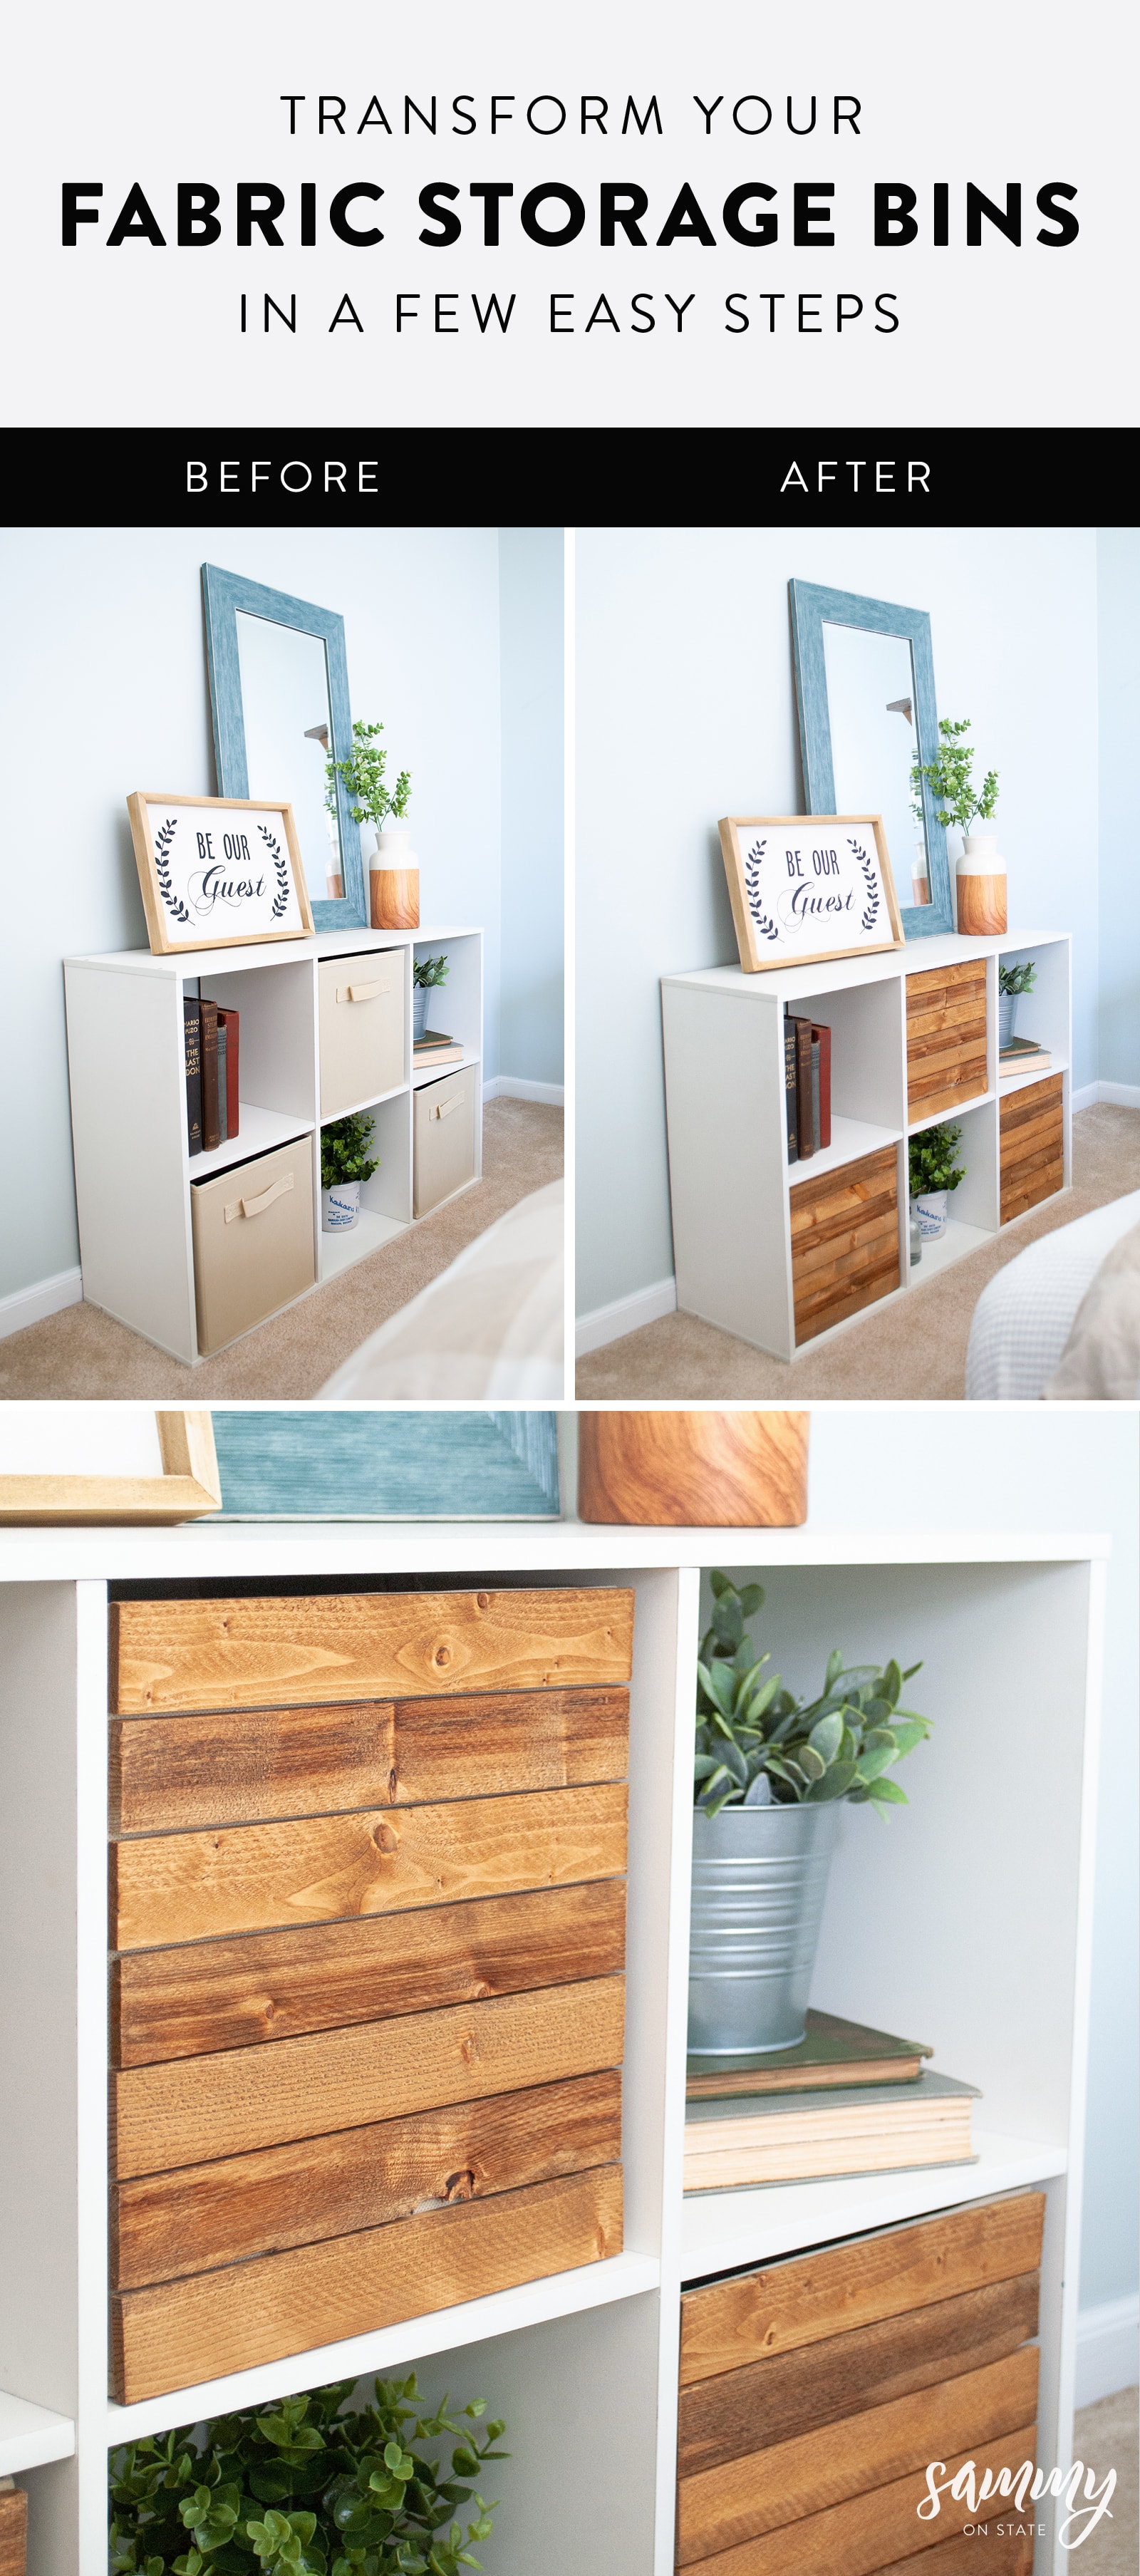
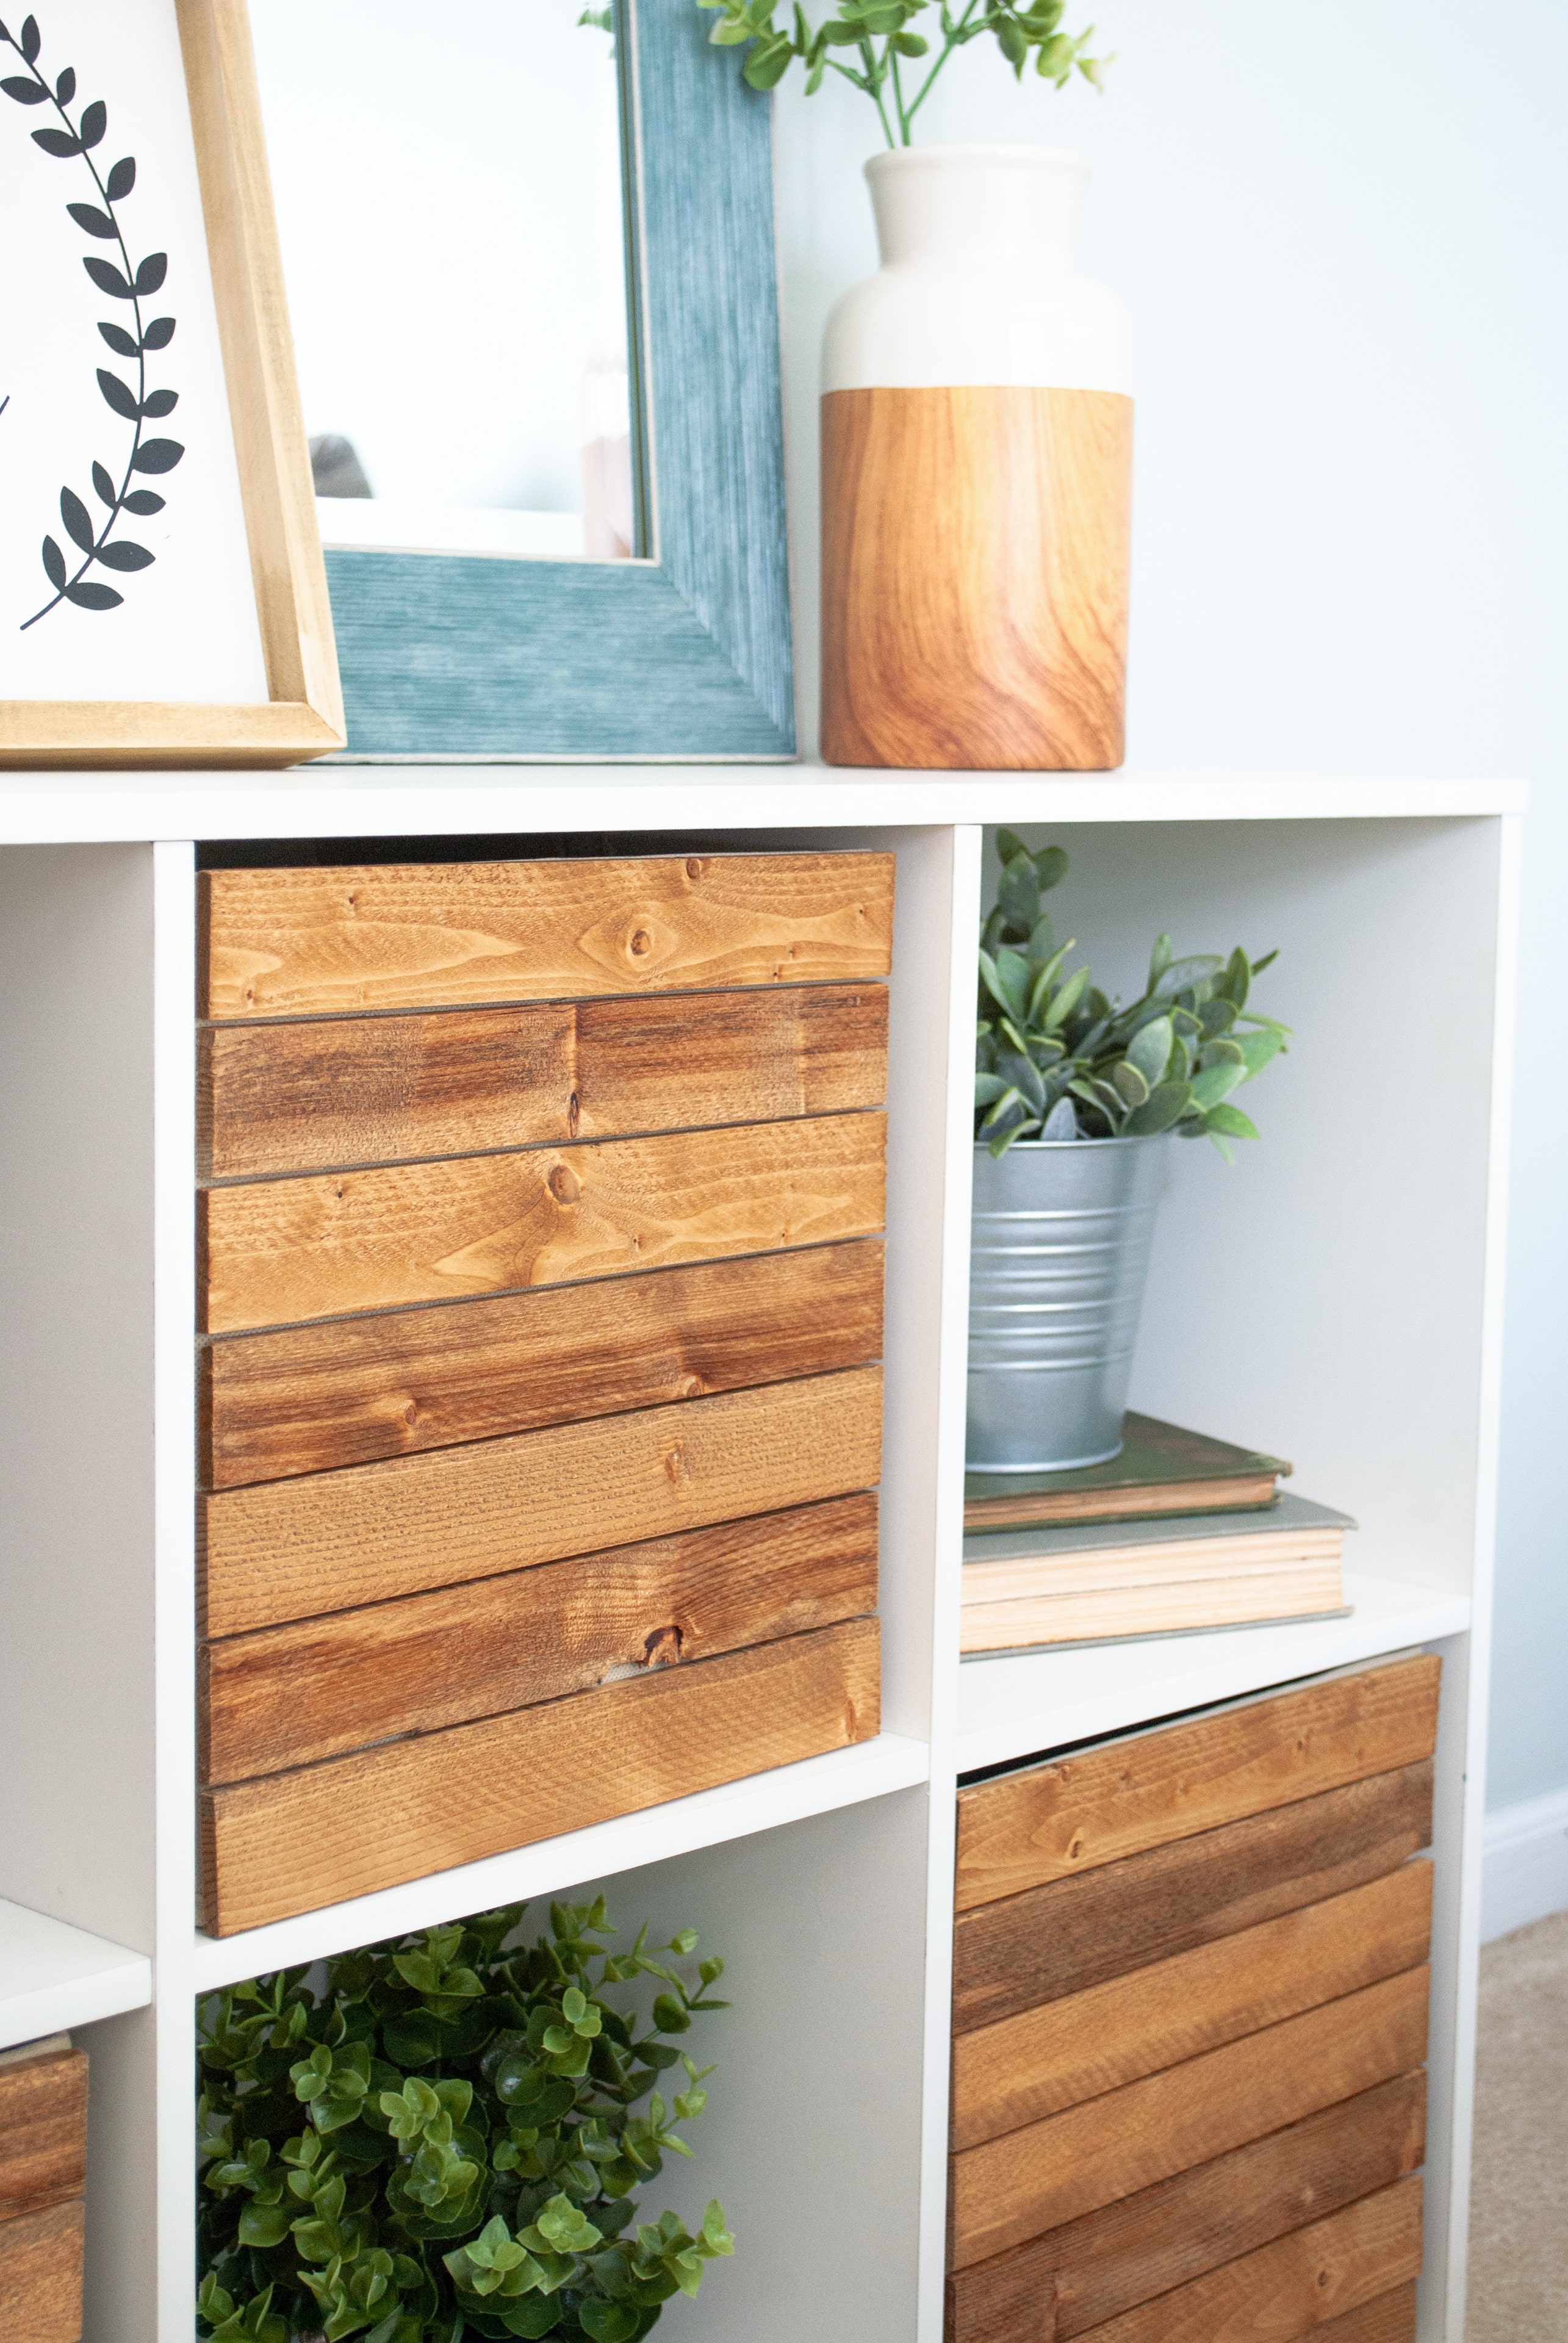
To me, I feel like many people all have these cube storage shelves somewhere in their house. And… they’re just so boring! The fabric storage bins came out just the way I had envisioned and added some great texture to the room. SO much better than the fabric look! I’m telling you, this project was so quick and easy to complete.
I’ve been wanting to upgrade these fabric storage bins for some time now, but I never knew where I could find thin strips of wood. Typically when I’m at any home improvement store, I always do a quick scan in the lumber department (usually when we were there for some other project and the hubby wants to run in and out) but never find anything. Well, Sarah and I ended up making a trip to Menards and this time, I knew I was going to actually LOOK for something that will work for this. We ended up seeing these “wood laths”. What are laths? No clue. LOL. But, they definitely look great for crafting!
The hardest part of the project was picking out the stain color (but that always seems to be the hardest part of any project for me!). However, I think these wood pieces would look just as great in their natural color – but for our guest room, we wanted to stay close to the color we used for our sconces and nightstands, so we opted to stain the wood.
This post may contain affiliate links where we earn a small commission on your purchases at no additional cost to you.
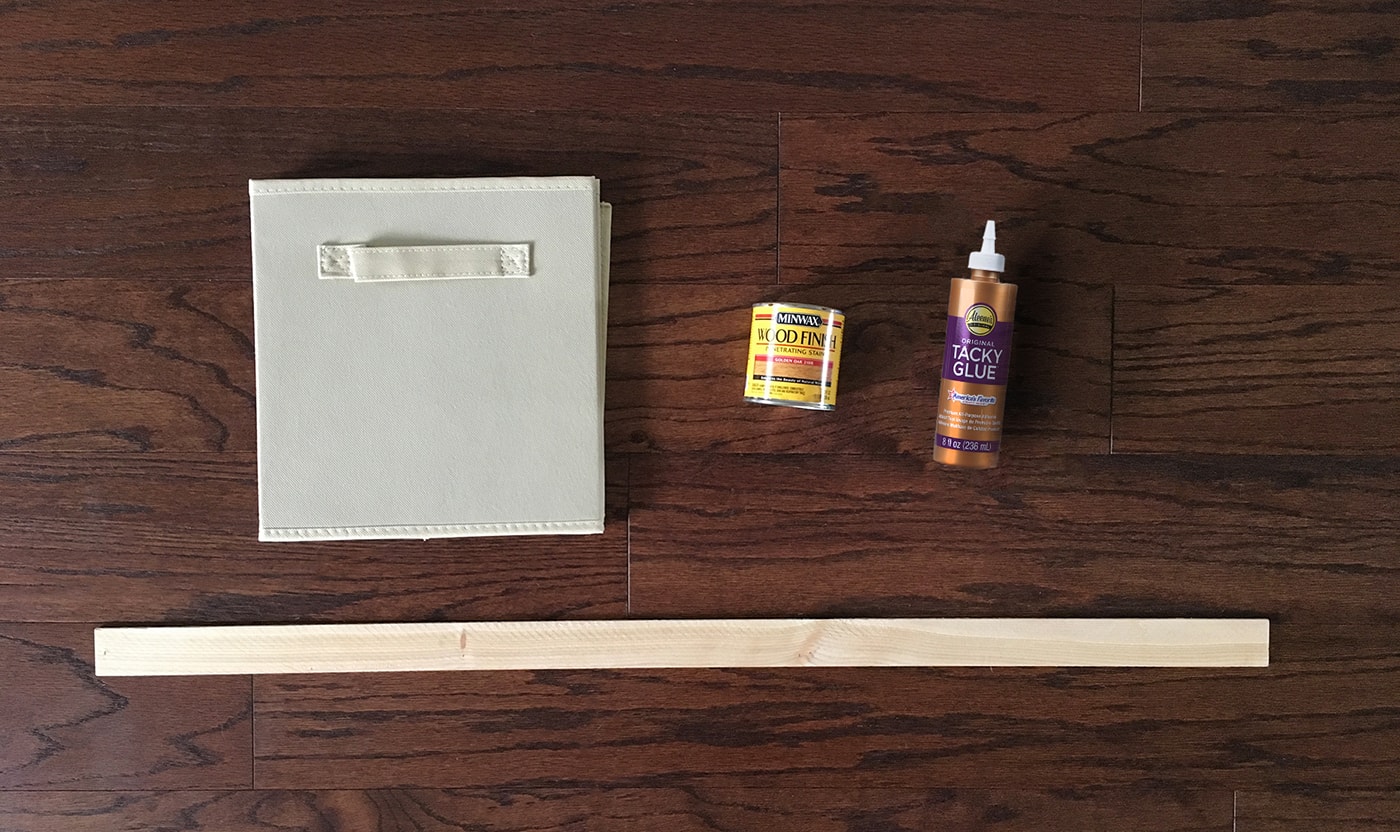
THE SUPPLIES
- Fabric Storage Bins
- Wood Lath Pieces – We bought 6 for 3 storage bins. We got ours from Menards for just 38 cents a piece! They came in a 4 1/2 foot length. You can also get the laths at Home Depot or Lowes (they’re a bit more costly though).
- Wood or Craft Glue (I did trial and error on these bad boys. Spray adhesive nor hot glue held up)
- Optional – Stain (I ended up using Minwax Golden Oak)
- Optional – Lint-Free Rags or Foam Brush (to apply stain)
THE TOOLS
- Miter Saw or Circular Saw
- Tape Measure
- Pencil
Step 1 – Measure and Make Your “Template” Piece
Take your tape measure and measure the length of your fabric bin. Once you determine the length, measure and mark that length out on one of your wood laths. Then, go ahead and cut that piece with your saw.
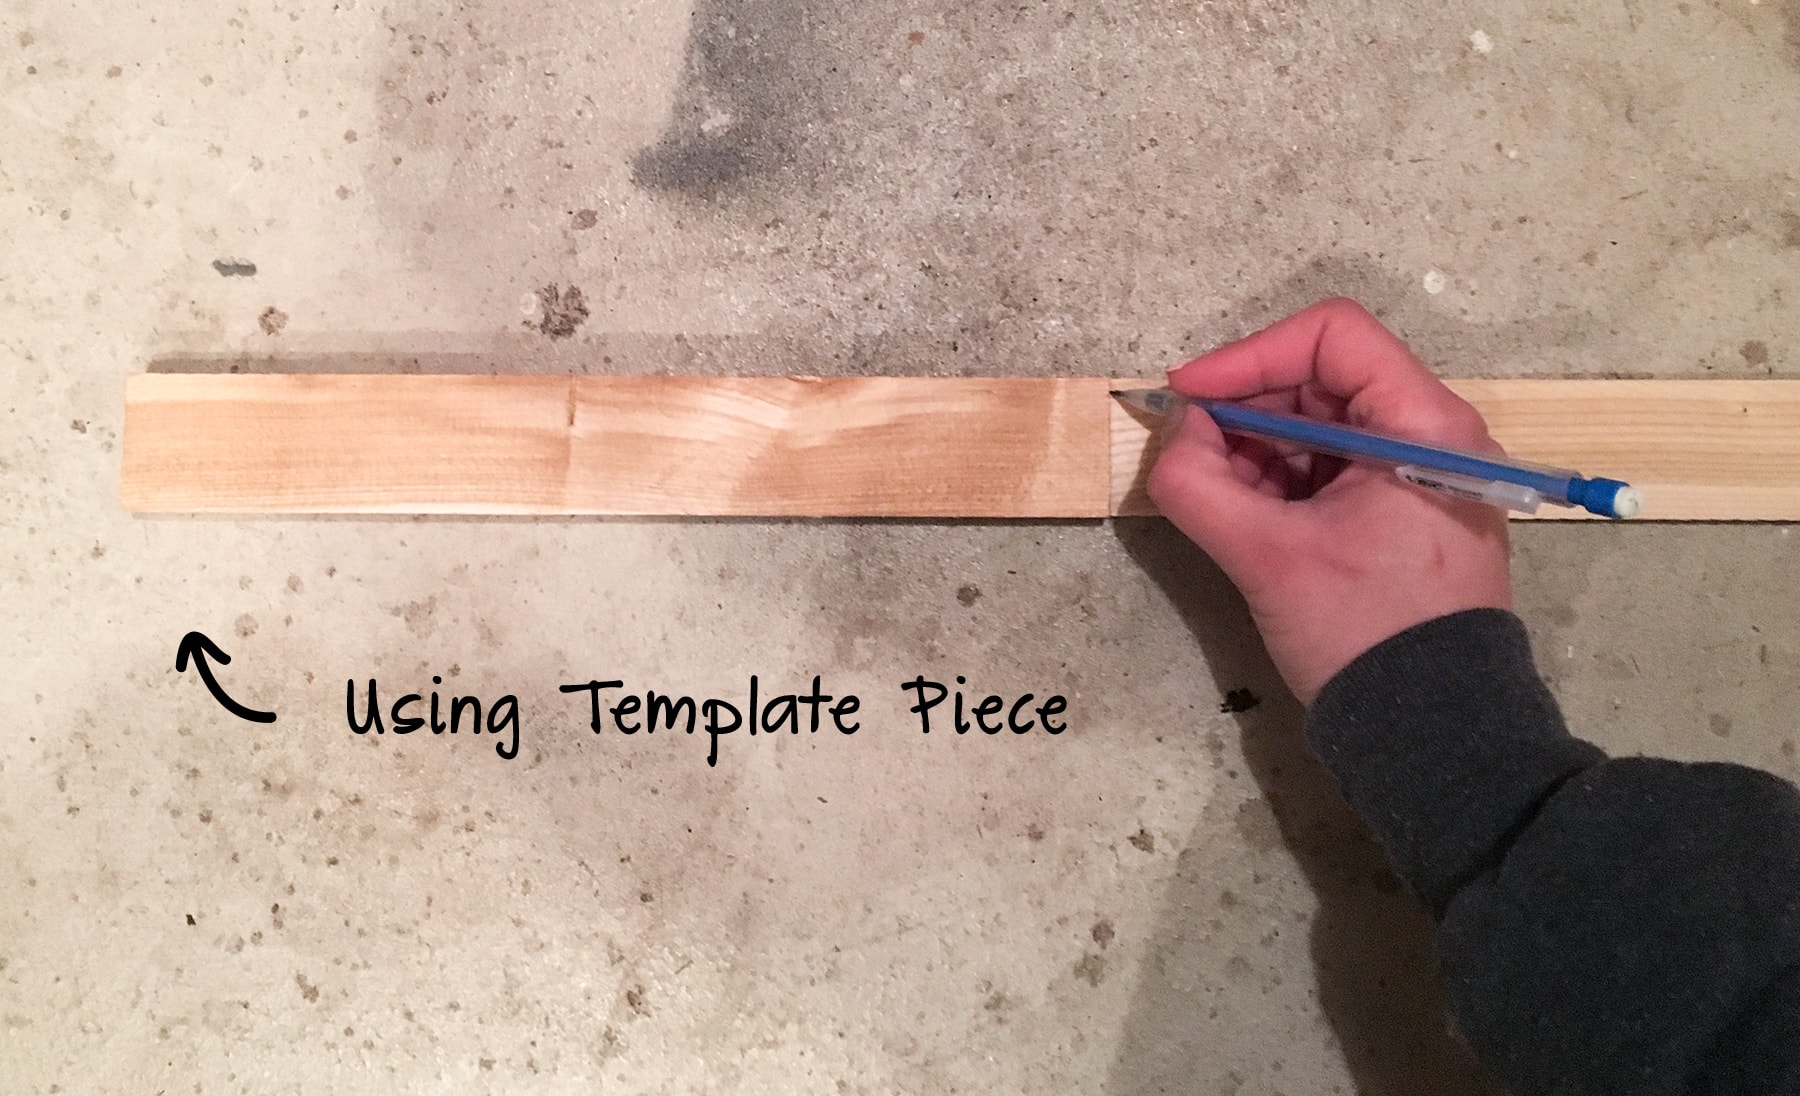
When you go to cut the rest of the wood pieces, you can use this one wood piece you just cut, as your “template”. This way, you don’t have to keep measuring out each piece with your tape measure 😉
Step 2 – Cut Wood Pieces
Time to cut! When cutting down your pieces, it’s best to cut one, then measure with your template piece, cut, measure, etc. The reason behind this is because the blade of the saw typically eats up 1/8″ of the wood. If you didn’t do this, then your wood pieces would not be the same length as what you marked out on your piece of wood lath.
Don’t forget to use your template piece to make your measurement & mark!
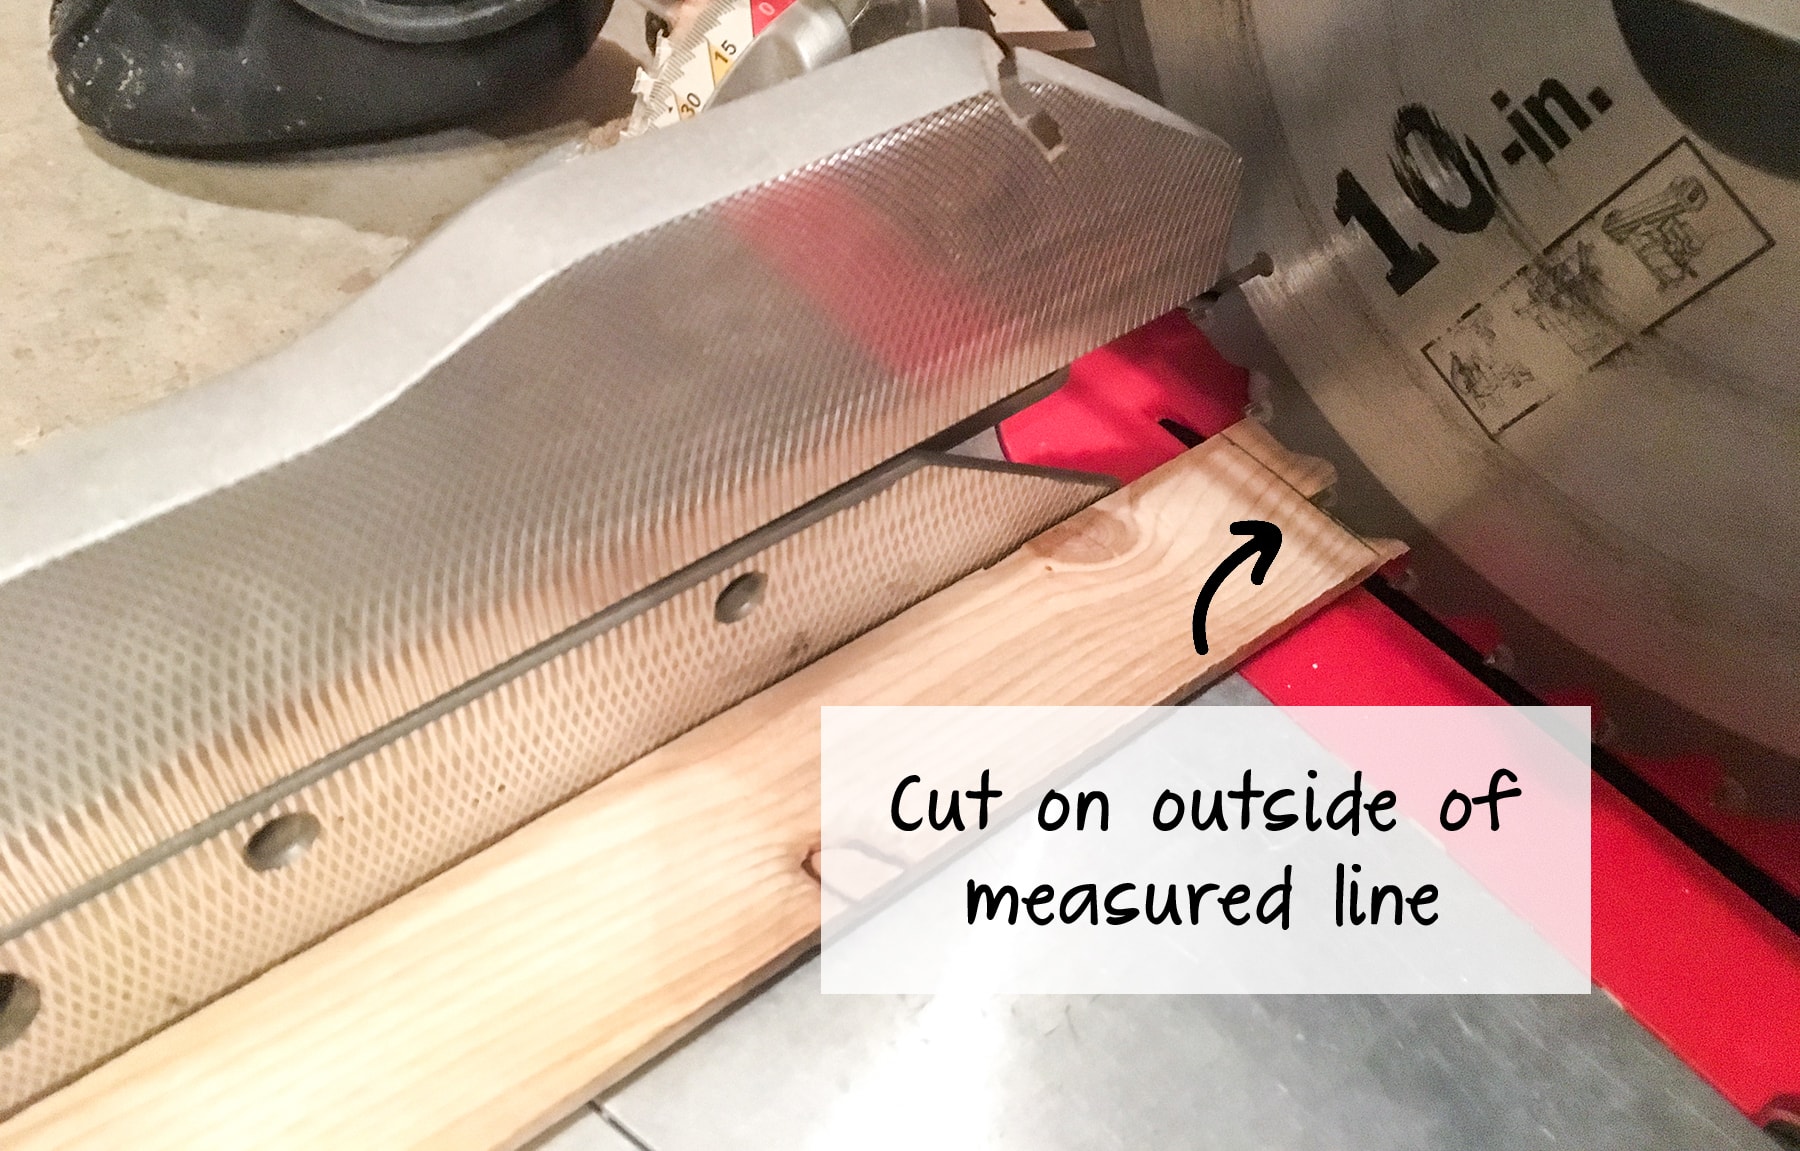
I like cutting right on the outside edge of my marked line so my length is exactly what I measured (because of the blade eating up the wood). From there, I try to be consistent with that for the rest of my cuts – this way, I have almost exactly equal lengths… Sometimes I strive to be a perfectionist. Oops.
Once I had all the pieces cut, I put them on top of the bin to see how they looked lined up.
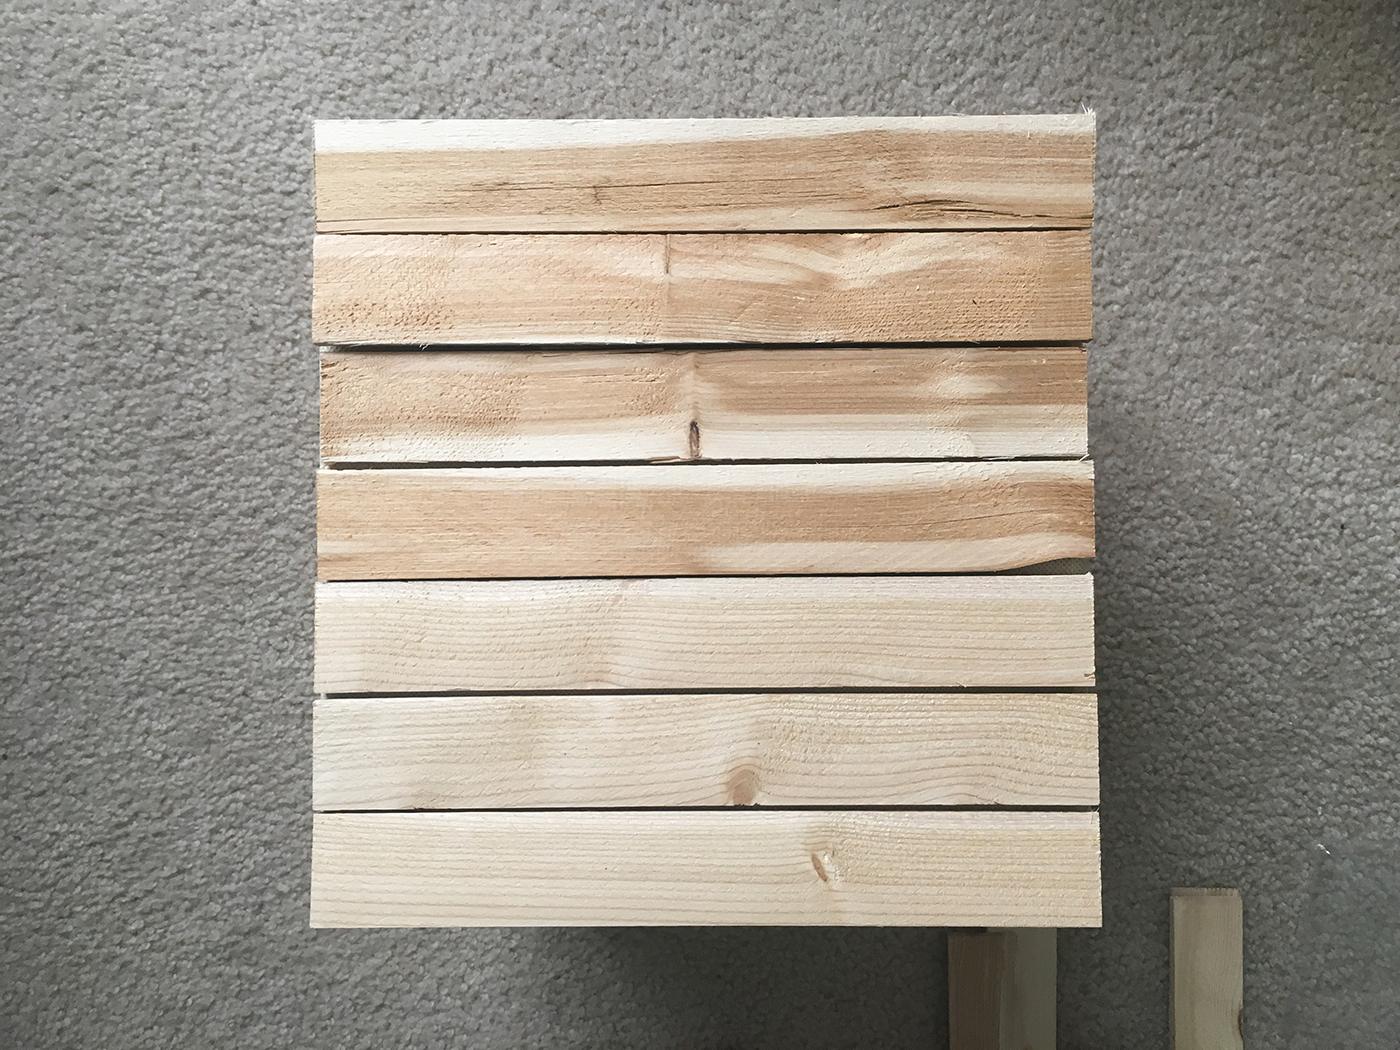
Like I mentioned earlier in this post, the wood lath’s without stain would look great by themselves!
Step 3 – Stain (Optional)
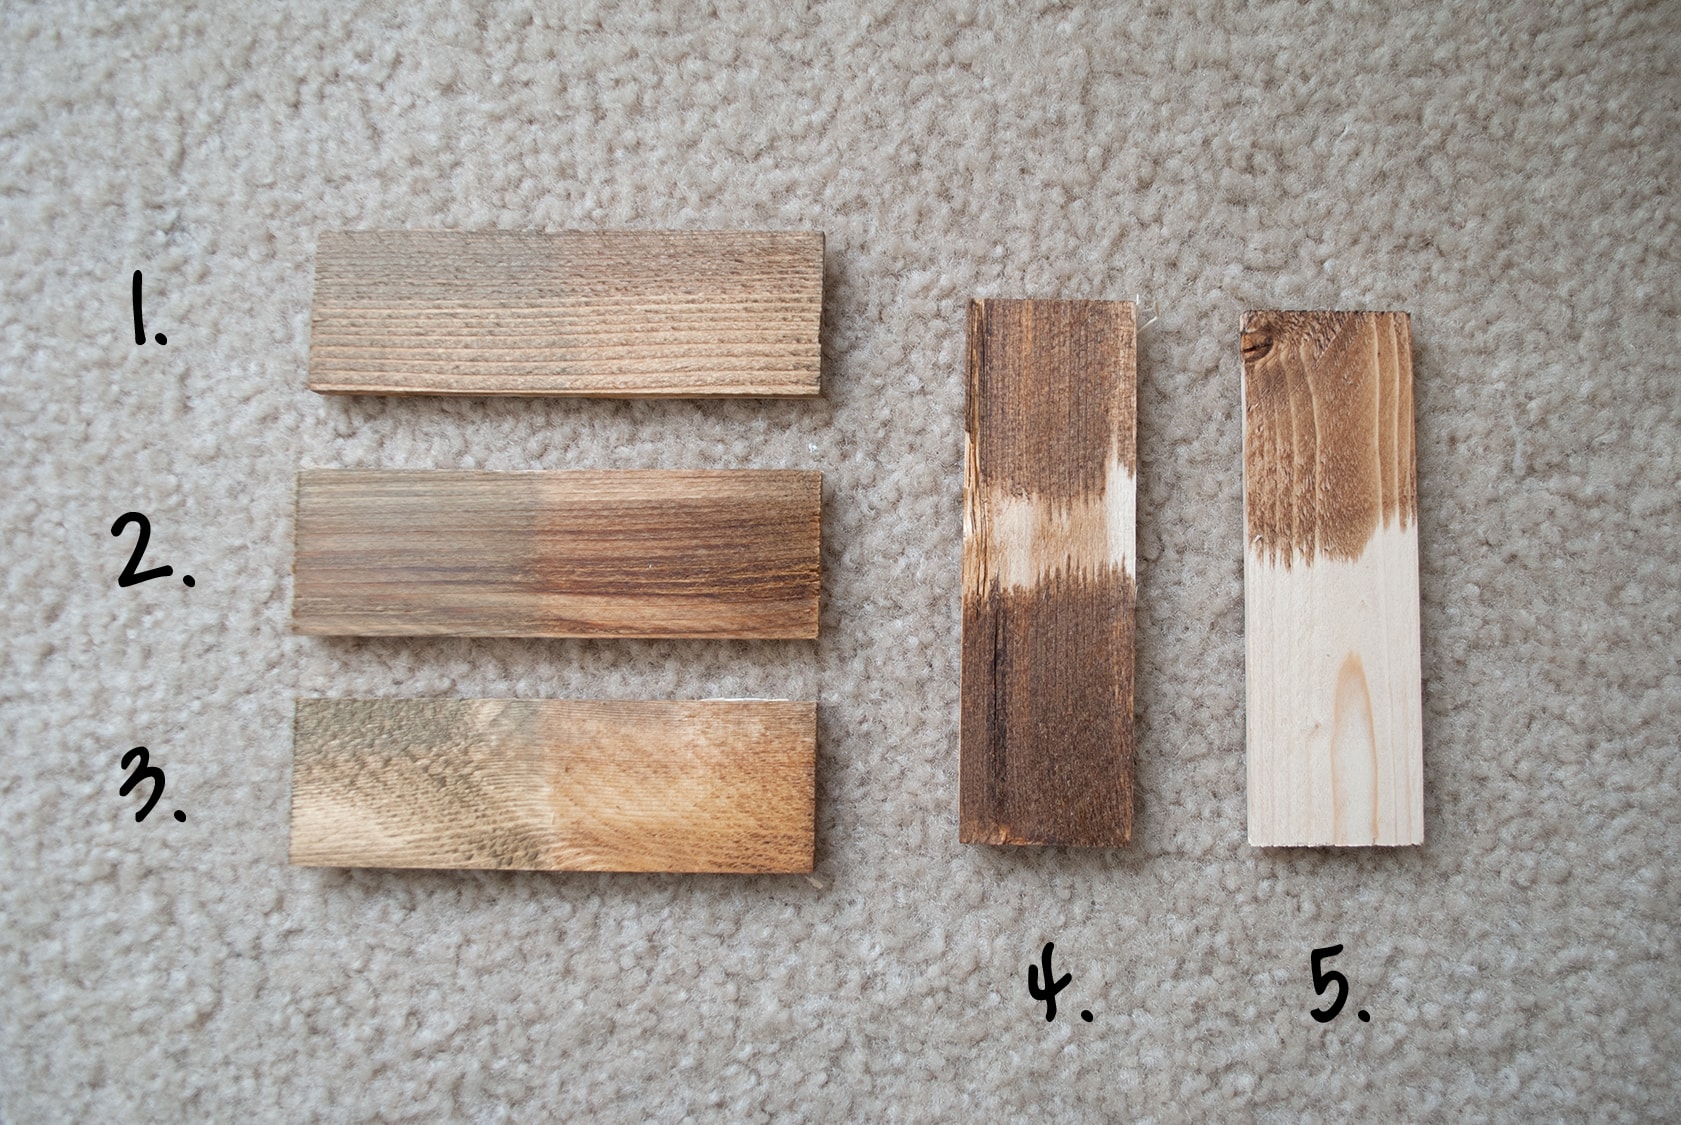
Is it just me, or is choosing the right stain color ALWAYS a struggle? Do you have this same problem? There’s just so many options! Plus, each piece of wood has a different color/look with stain because of the grain and everything. Before I made my decision, I tested a few – well, more than just a few – stain colors on some of the scrap wood lath pieces I had left over…
I’m a big fan of Minwax’s stains – that is the brand of stain I used for all these pieces.
1. Driftwood with a thin coat of Golden Oak applied on the right side.
2. Golden Oak with a thin coat of Driftwood applied on the left side.
3. Left – Driftwood | Right – Golden Oak
4. Top – Early American | Bottom – Special Walnut
5. Top – very thin coat of Early American | Bottom – no stain
Usually, I feel like my go-to stain color is Special Walnut, but that just ended up being so dark! I thought Driftwood would have been a good option, but it ended up looking too washed out. After trying all of these combos, the Golden Oak was my favorite and matched the rest of the wood accents in our guest room. Golden Oak it was!
Depending on how rich/deep of a stain color you want – depends on how long you let the stain set into the wood. When I stained all the wood pieces, I applied the stain using a foam brush and then wiped off the excess stain almost immediately after I applied it. I didn’t want it to set in too long, because I did not want the wood to end up being too dark in color.
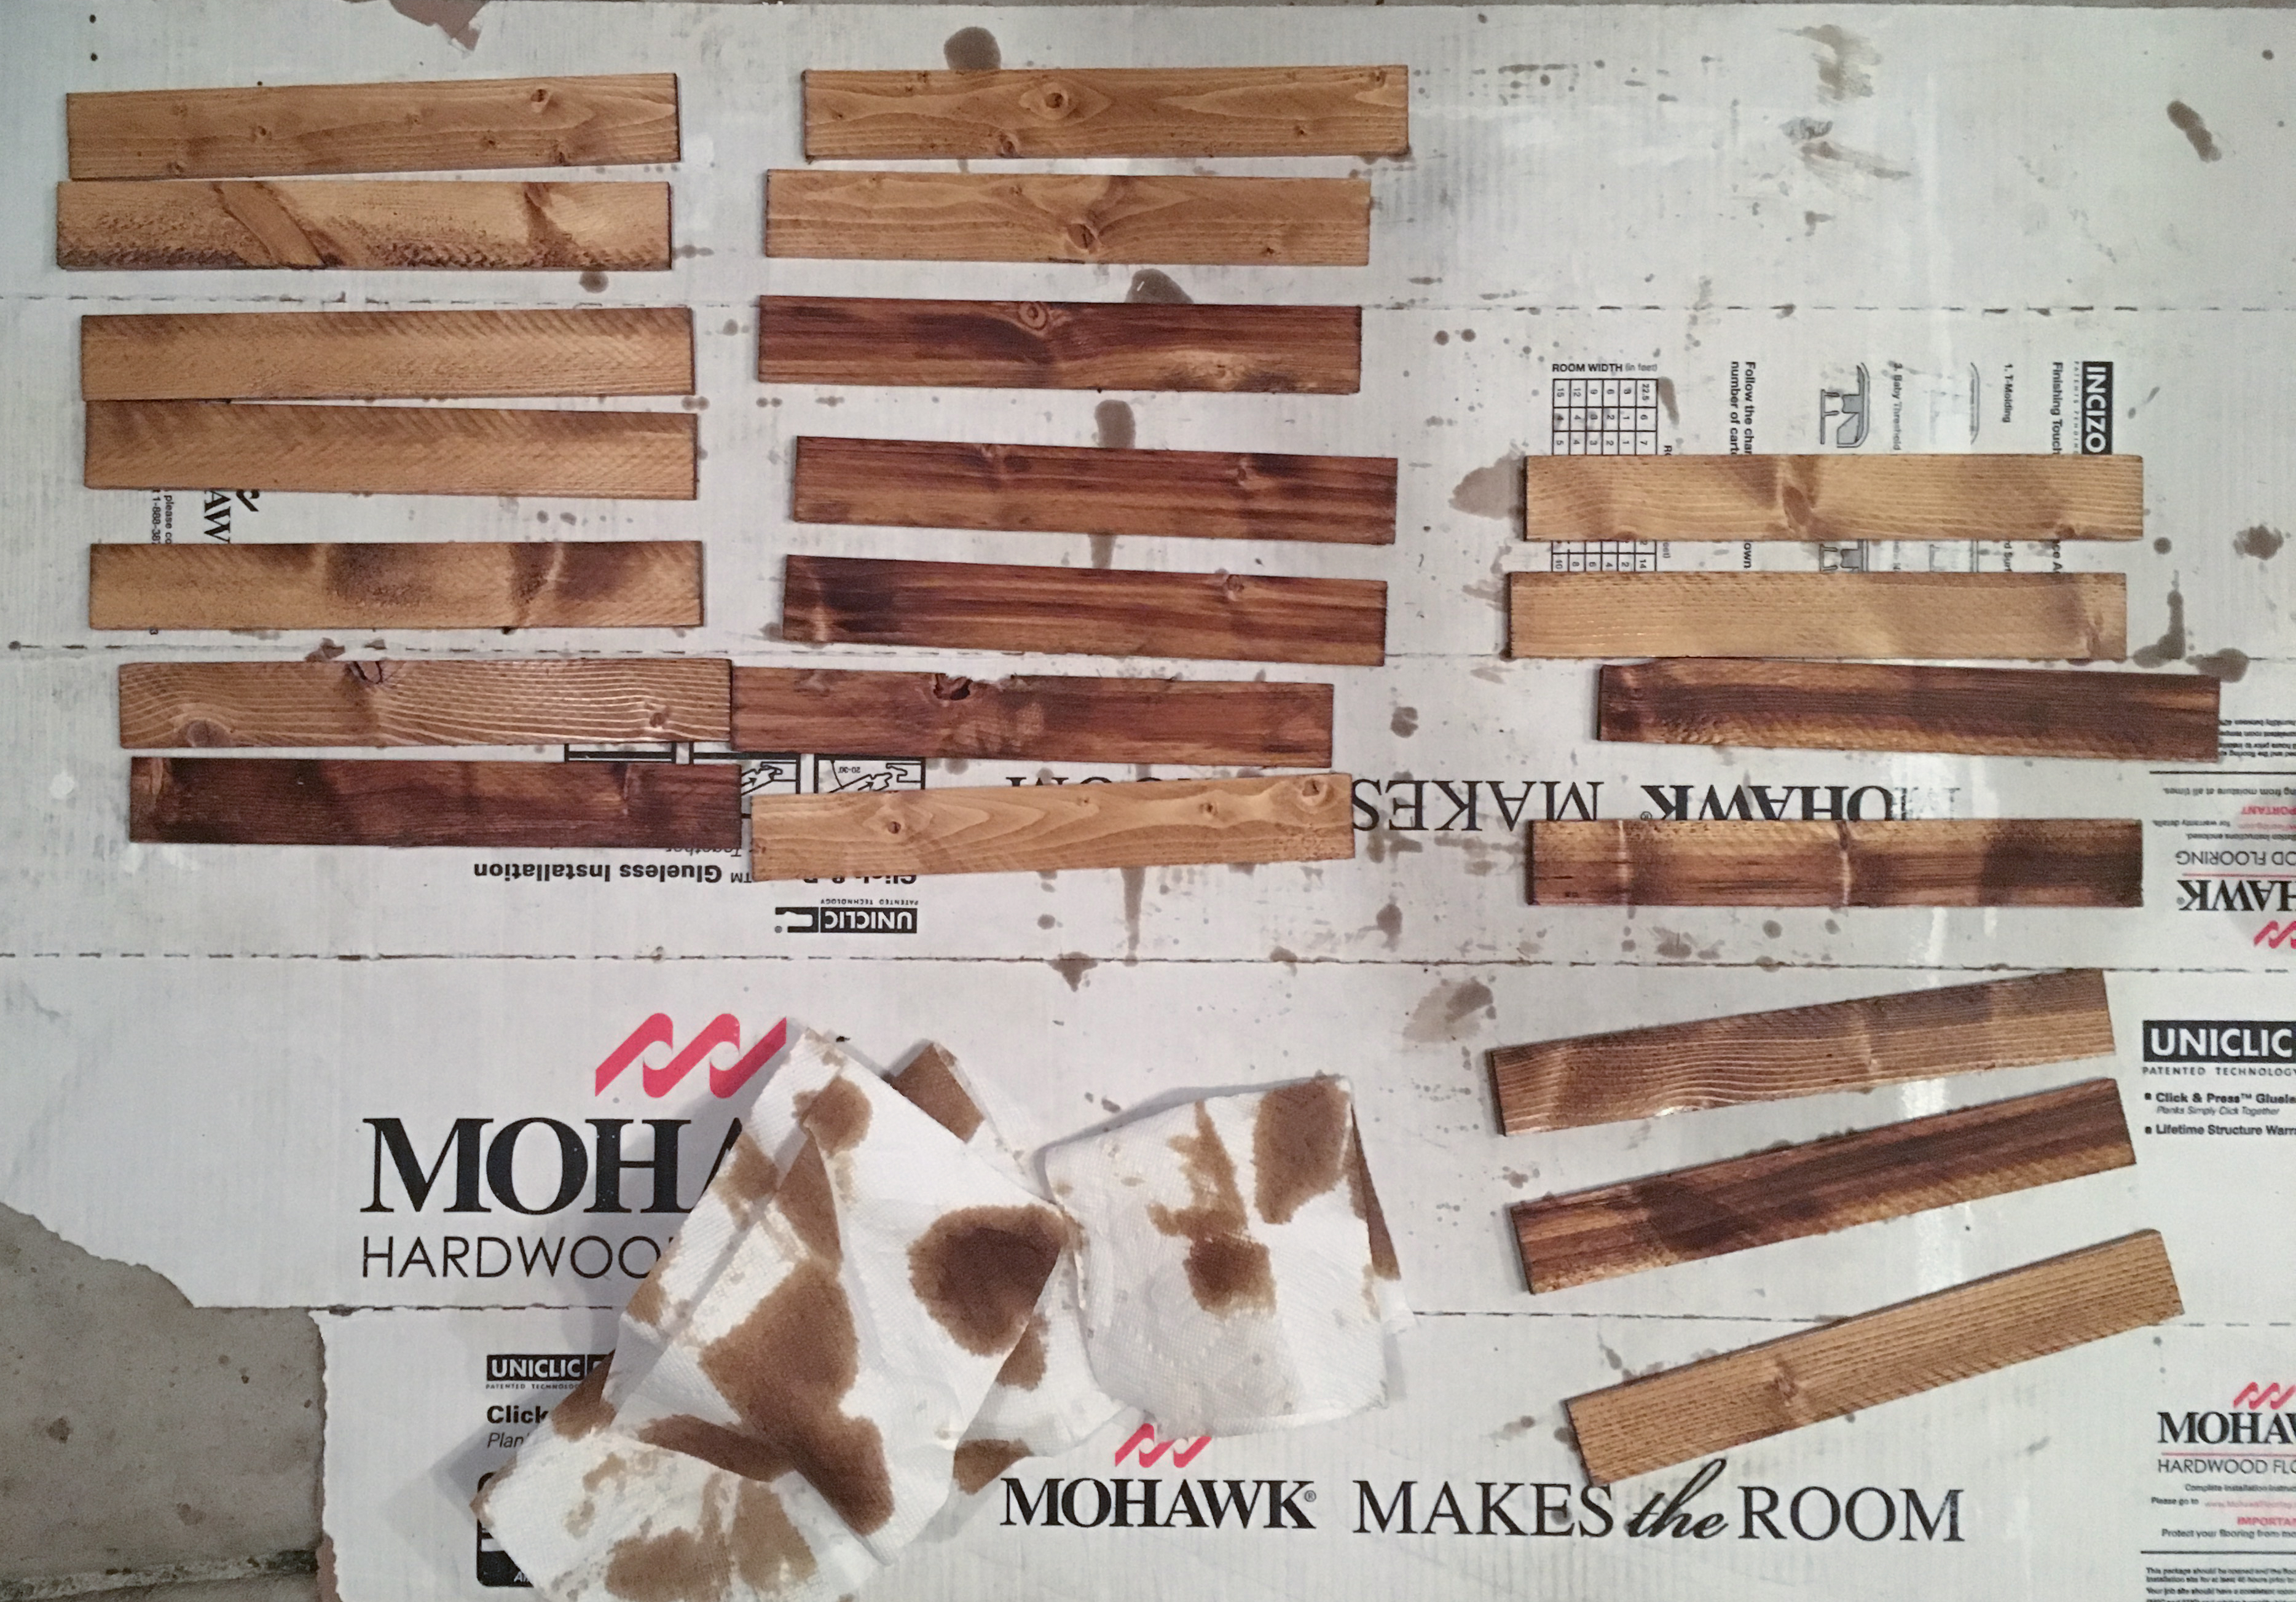
Time to let the stain dry!
Step 4 – Glue to Storage Bins
The fabric storage bins I have only have handles on one side of the bin – so I decided to add the wood pieces on the opposite side (backside) so I didn’t have to cut off the handle. I am not sure if other brand fabric storage bins have handles on both sides? But if they do, cut off the handle to make it easier to glue down the wood pieces.
Since the front of these storage bins won’t have handles, you want to make sure the wood pieces really adhere to the fabric bins since you’ll be pulling on the edges of the wood pieces to get the bins out of the slot.
I found that craft glue worked best for holding the wood to the fabric. I first started off using spray adhesive – I thought this would hold, but it didn’t. Some pieces seemed to hold, but not others. After I found out the spray adhesive won’t work, I thought, hey, hot glue will work! … yeah, it didn’t. Again, some pieces seemed to hold and others didn’t. So now, I was like okay, craft glue it is. It’s gotta work!
Aleene’s Original Tacky Glue is my go-to craft glue. I’ve never had a problem with it not holding up. I probably should have just used this in the first place, but I really thought the spray adhesive or hot glue would have held up! So, for my last bin, I ended up using the craft glue and it worked perfectly. For the pieces on the other bins that didn’t hold up from the spray adhesive and hot glue, I went back and used the glue on them. I’m sure wood glue would be a great alternative too, but I didn’t happen to have any on hand.
In order to make the wood pieces fill the entire front face of the bin, I had to add a little gap in between each wood lath piece, instead of having the pieces touch each other. I actually think I like the gapped space better!

As you can see in the photo – this was taken during the hot glue trial… lol.
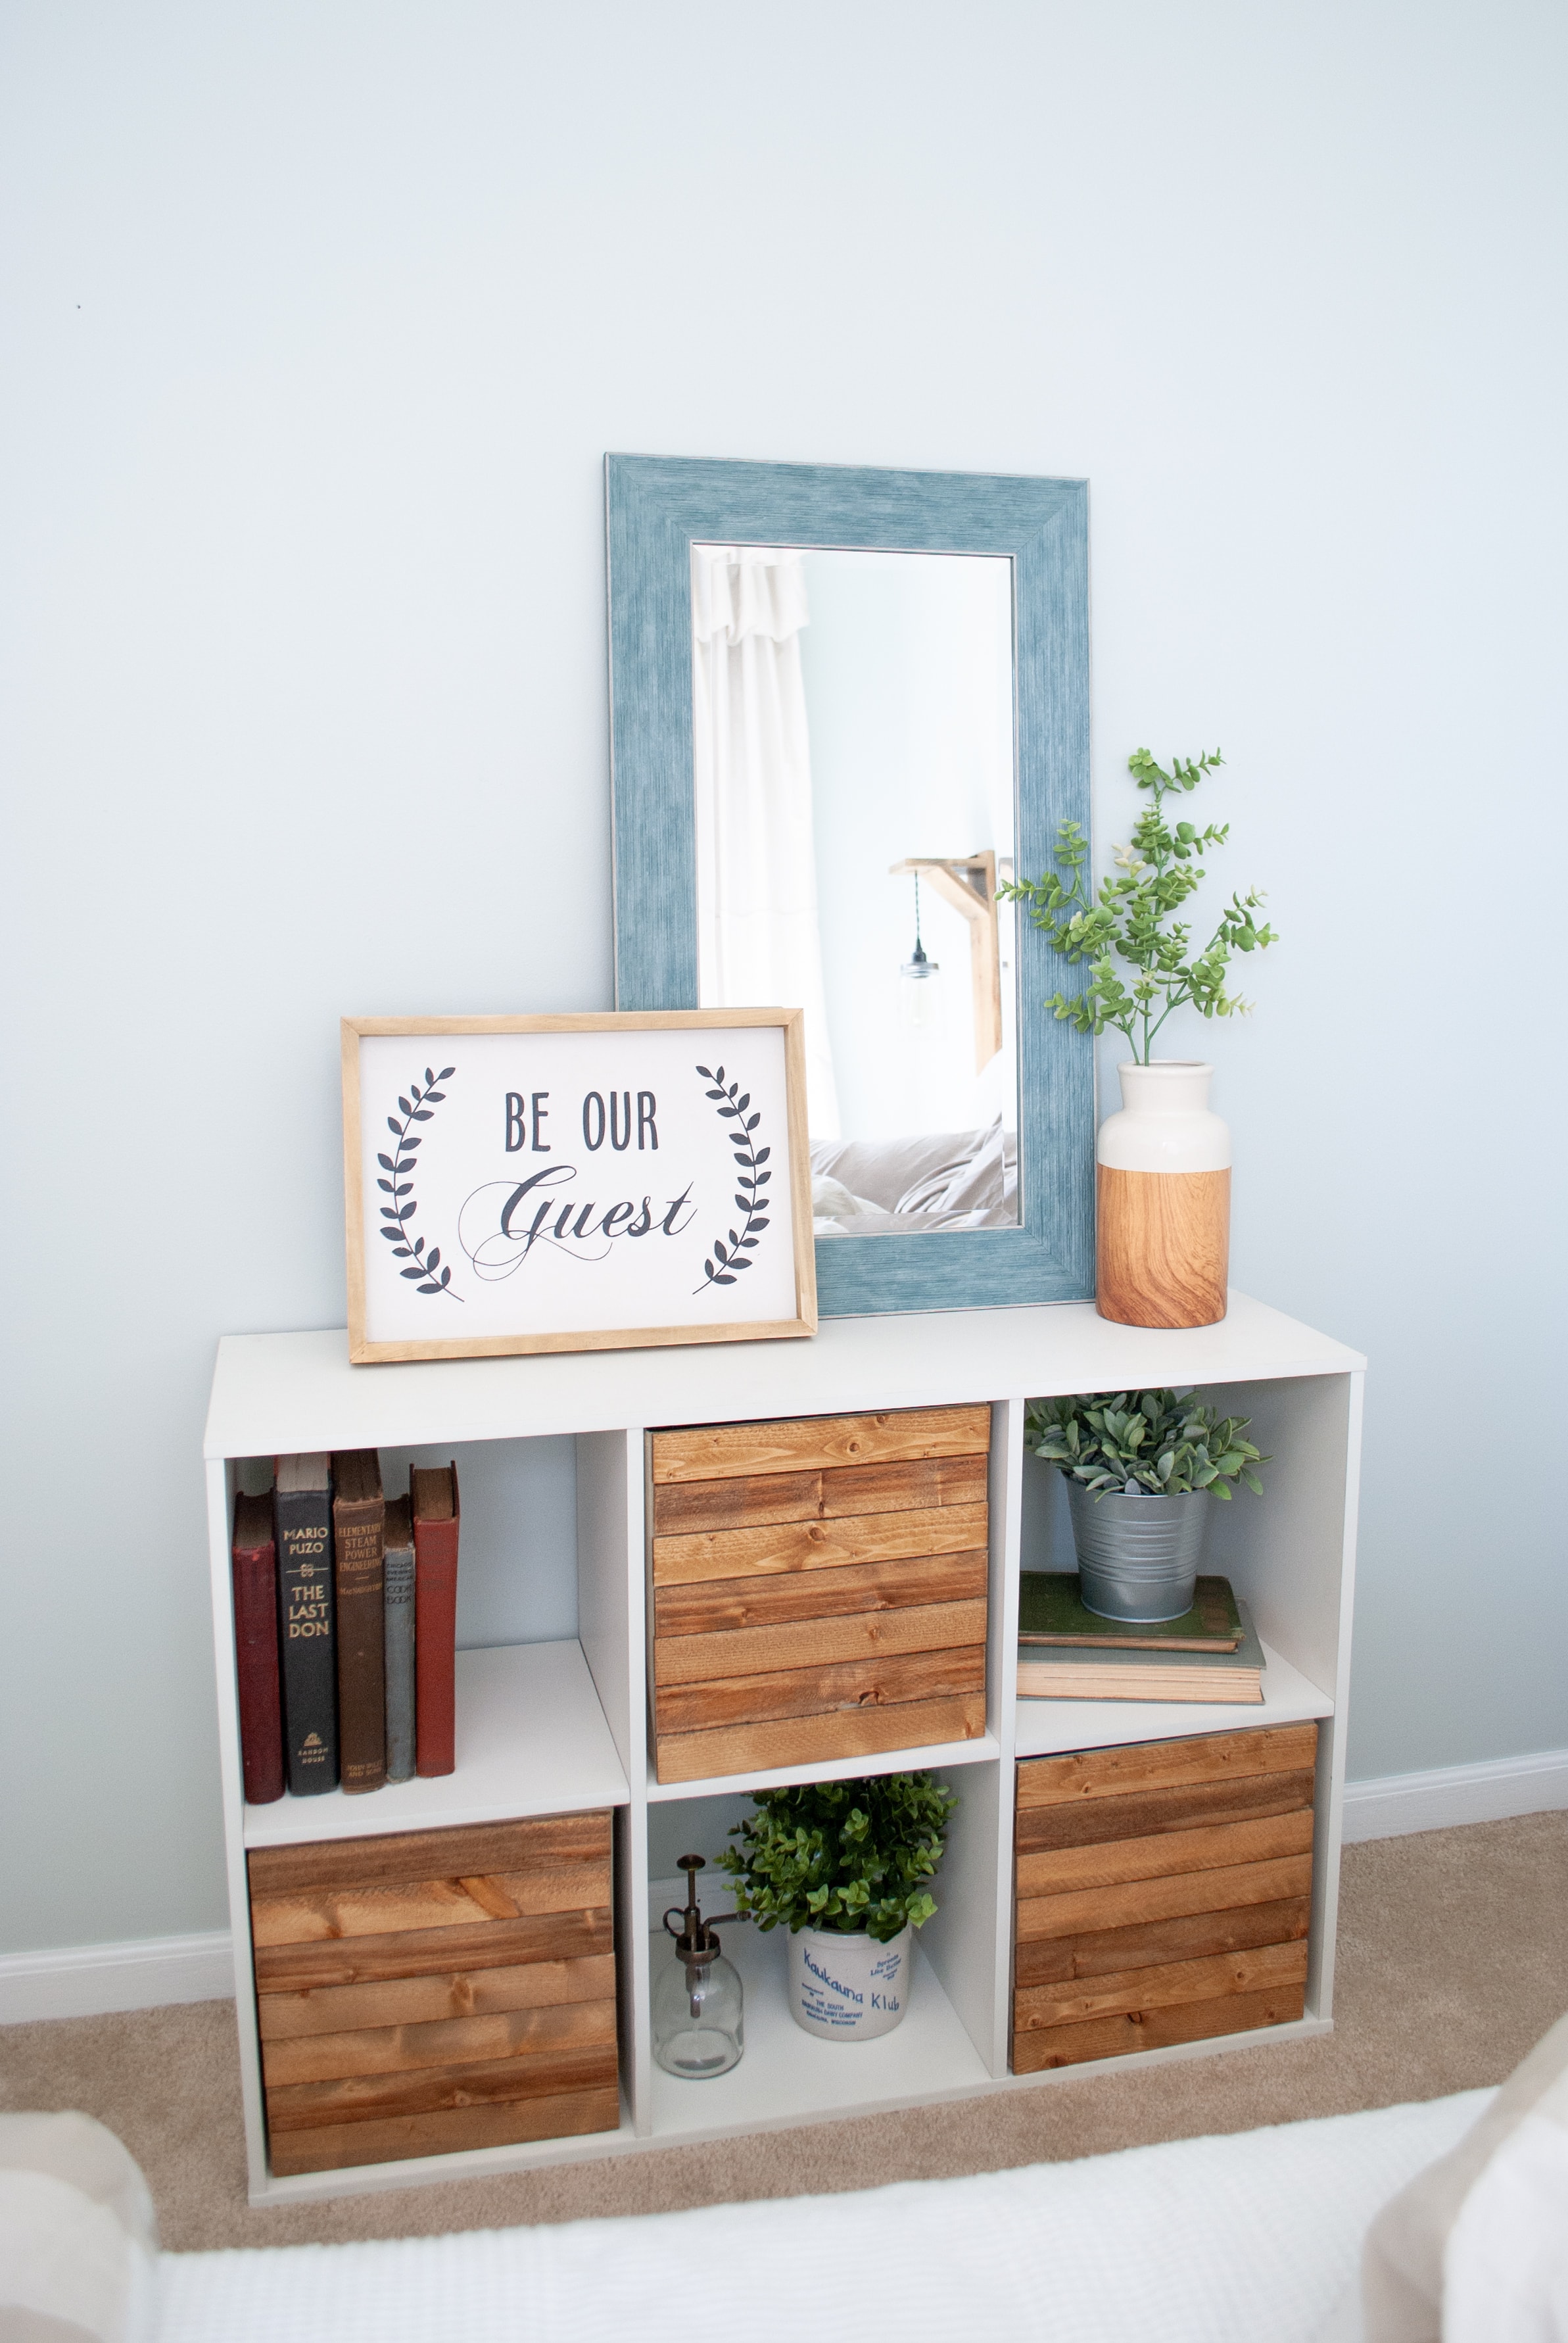
Fabric Storage Bins Transformation – Completed!
I love the way these storage bins turned out. Super easy to put together and didn’t take very long. The total cost for me was under $3 since I already had the stain and glue. If you don’t have the glue or stain on hand, you can still come in under $10 for this project!


I will say, after adding the wood fronts to these storage bins, they are a bit more difficult to pull out of the slots. So! I’m thinking about adding hardware pulls to these – to make it easier to pull out. Especially since these will be in our guest room to hold toiletries, extra bedding, etc. Maybe those vintage file drawer pulls with the cardholders?
What do you think? Comment below and let us know!


This is a very smart idea. Pulls or a knob could be added. Great job!
Thank you! Yes, we totally agree. Pulls or knobs would be nice to have. We actually did another set of these in our home, and we added pulls, super cute too!
– Tammy
Another option is a peel & stick floor tile. They may have to be trimmed but well worth the effort to me.
That’s a great alternative – awesome idea, Gwen! Thanks for sharing 🙂
– Tammy
I made this and it turned out great…with one issue. The bins aren’t super sturdy so after a few days they started to curve inward with the weight of the wood slats. If I were to do this project again I would use sturdier bins or plan on adding something to the inside of the bin to brace it.