Hi, Sarah here!
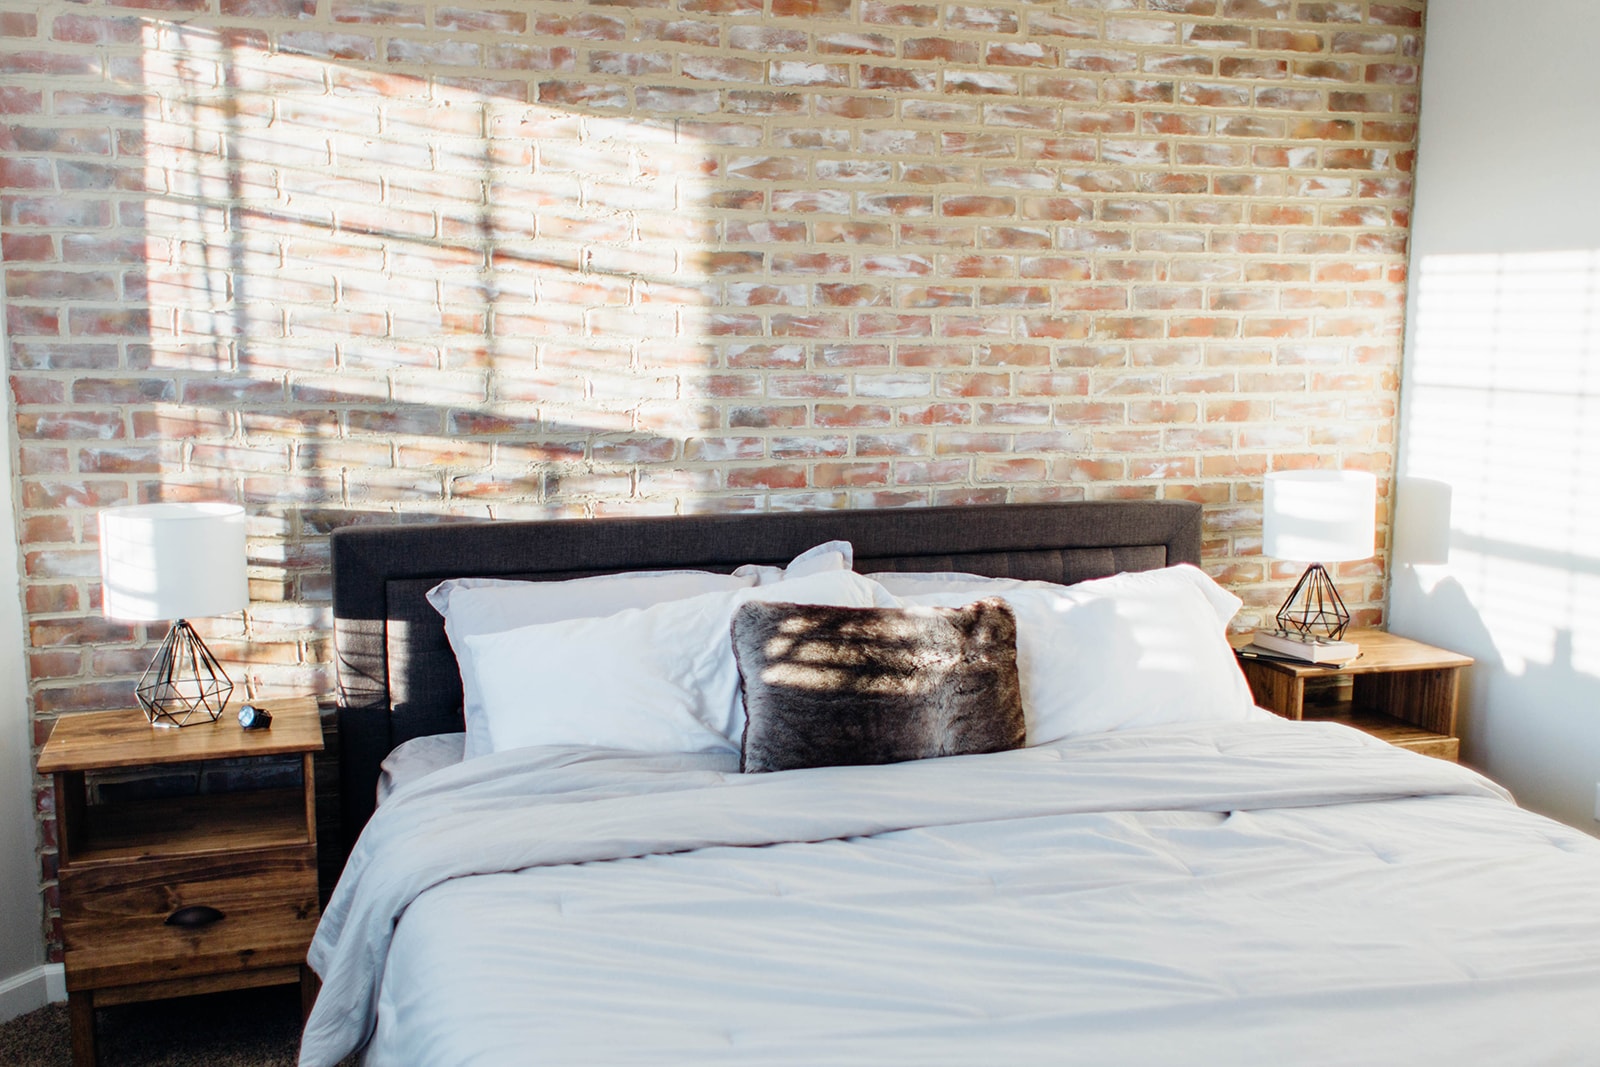
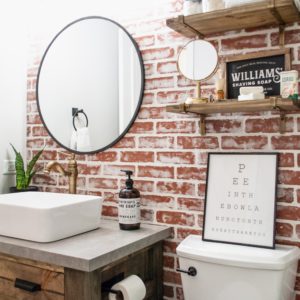
This DIY project was one of my favorites that we’ve done so far. Growing up, I always wanted to live in a loft in the city. You know, the one where it basically looks like an open warehouse, but it’s turned into someone’s apartment? Yes, THAT ONE.
Well… that loft always came with a nice, old brick wall. Here’s the step-by-step process on how I turned my ordinary master bedroom into the loft space of my dreams…
This post may contain affiliate links where we earn a small commission on your purchases at no additional cost to you.
THE SUPPLIES –
- Nails
- Liquid Nails Construction Adhesive
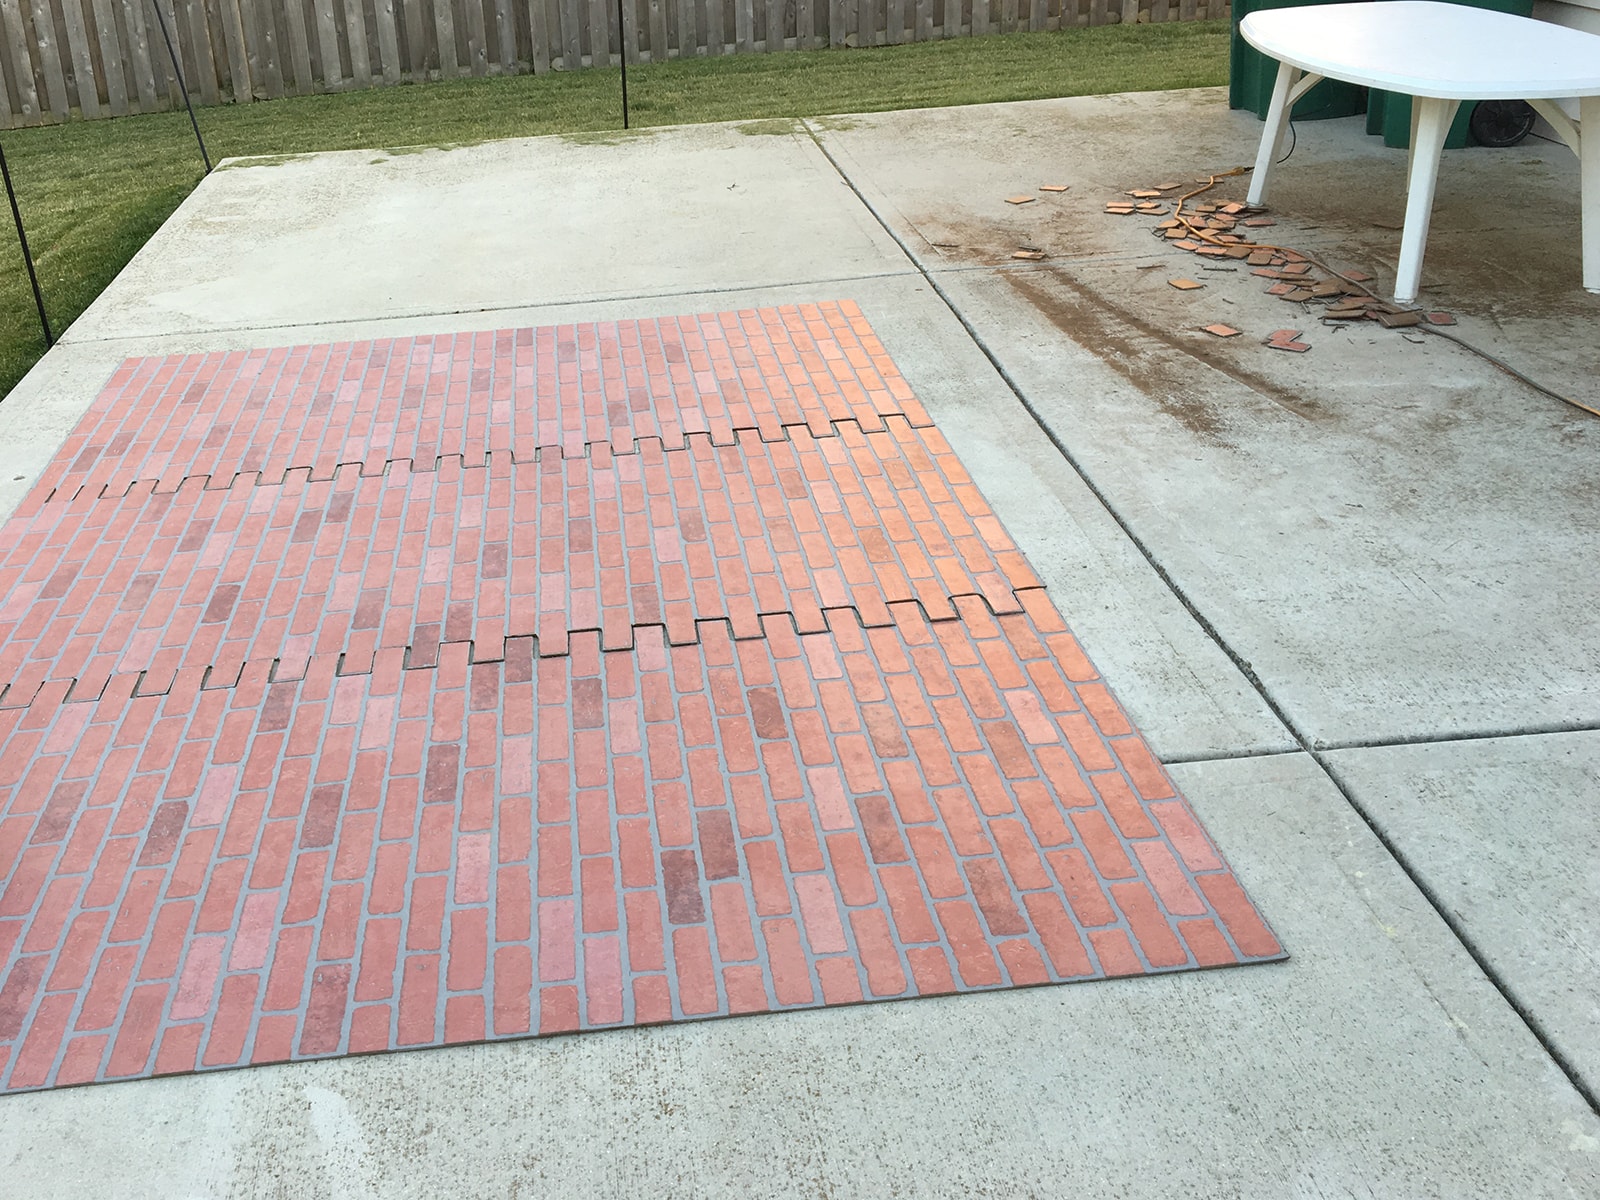
- Brick Paneling
- Paint – ( 8oz Paint Samples)
BEHR Grey Mist
BEHR Wright Brown
BEHR Canyon Dusk
BEHR Glazed Pears
BEHR Flat White - Grout Sponge
- Foil Pan
- Concrete Patching Caulk
- Latex Gloves
THE TOOLS –
- Caulk Gun
- Nail Gun / or Hammer
- Jigsaw
- Stud Finder
- Exacto Knife (optional)
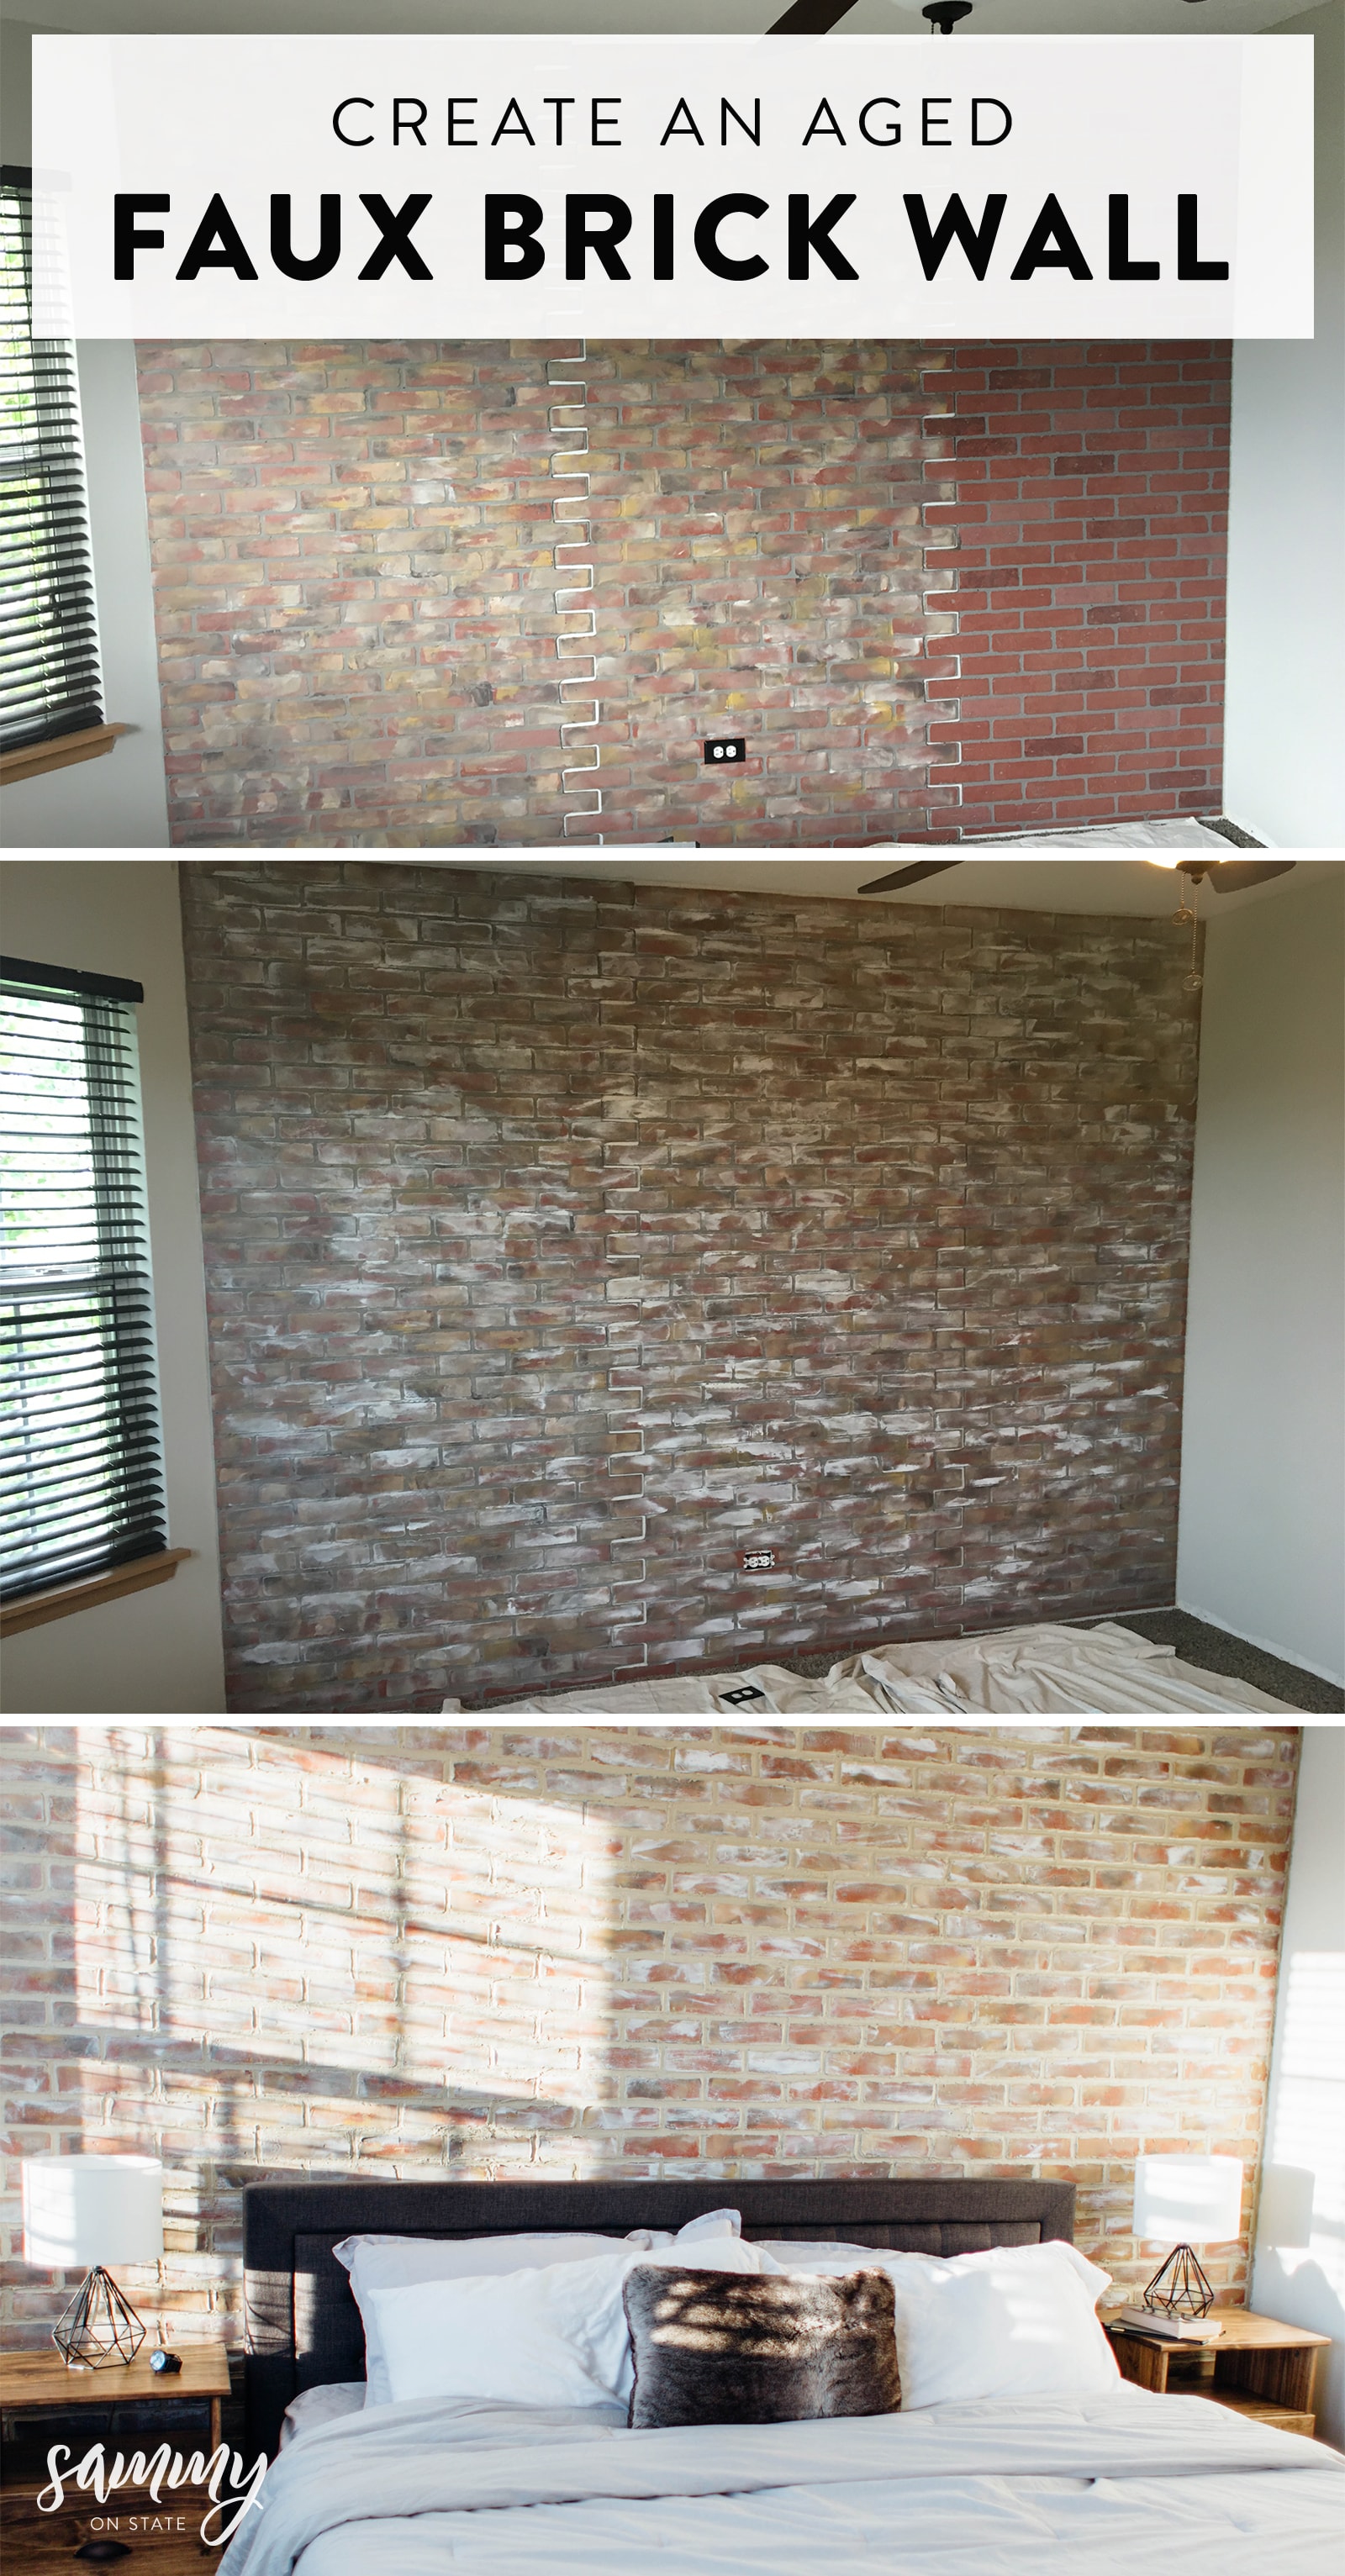
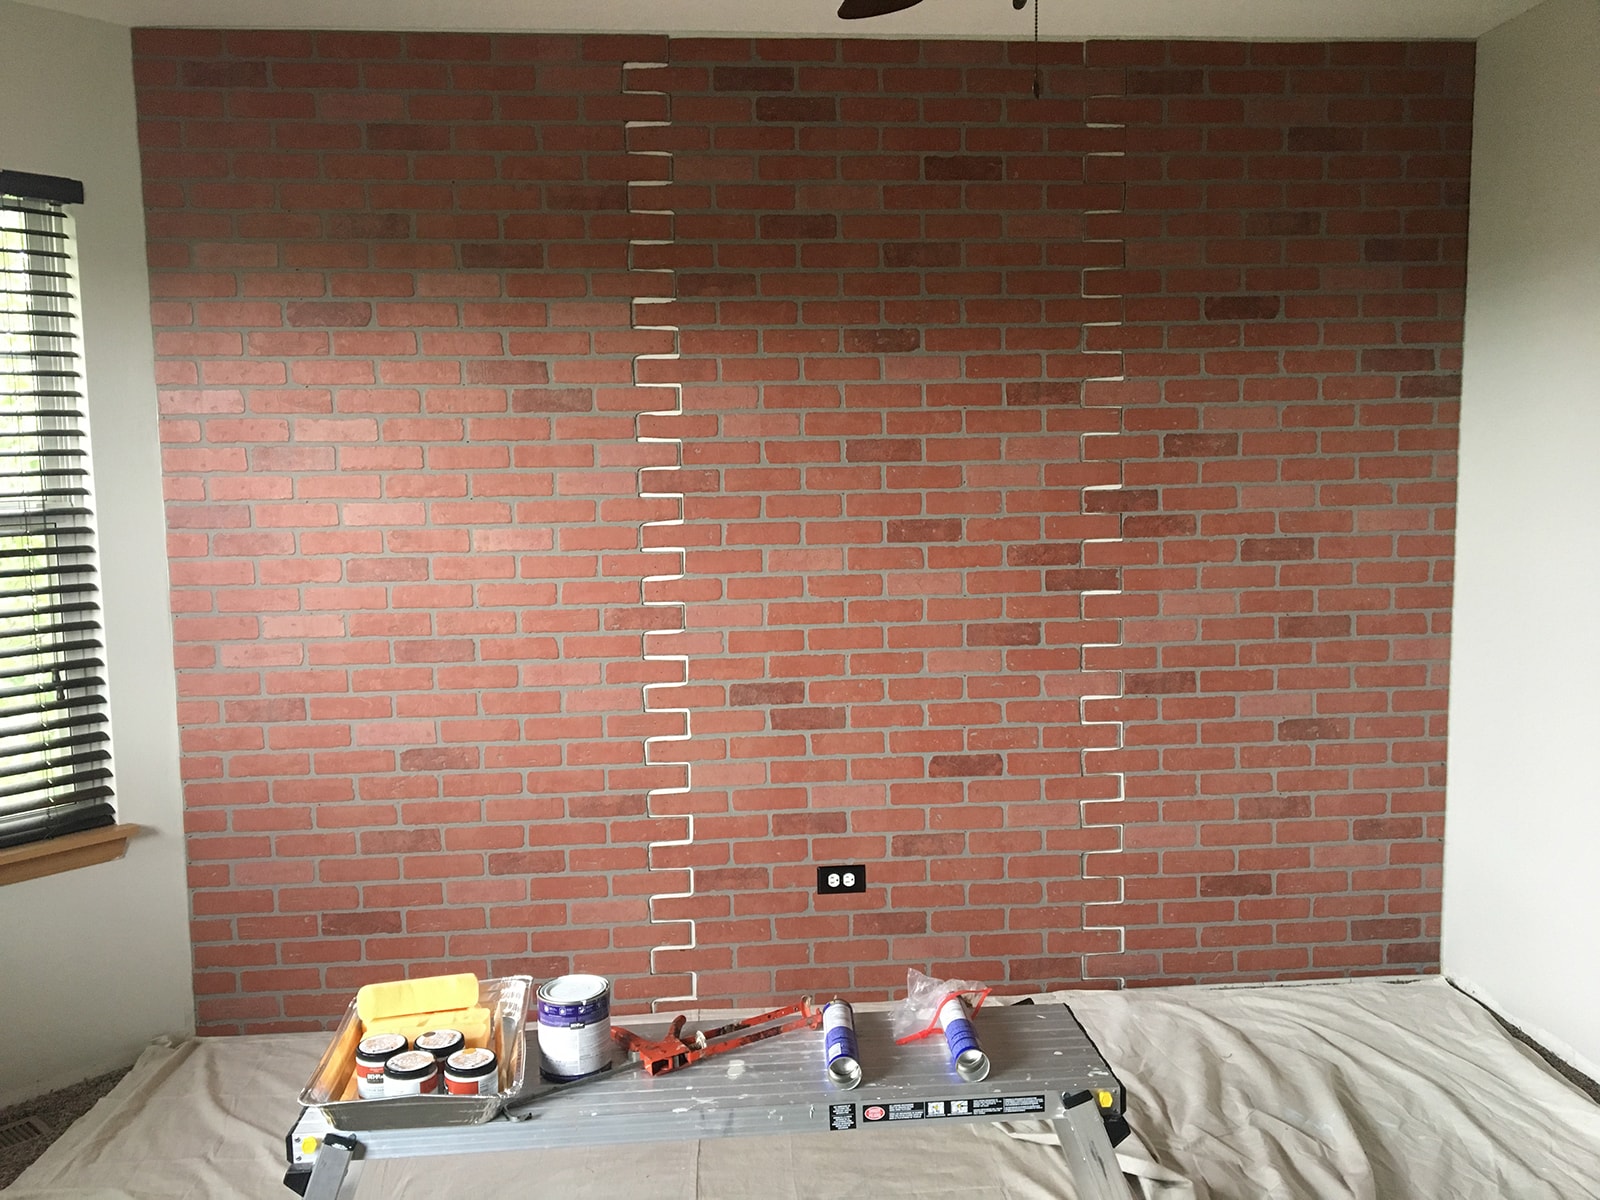
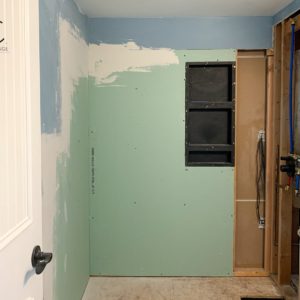
STEP 1 – Cut Panels
Measure and cut your panels to the height of your wall. We only needed to trim a couple inches off the bottom of each panel because parts of our ceiling were uneven.
-side note-
If your doing this on a wall taller than 8 ft, then your going to have to cut a second row of panels to fill the extra space.
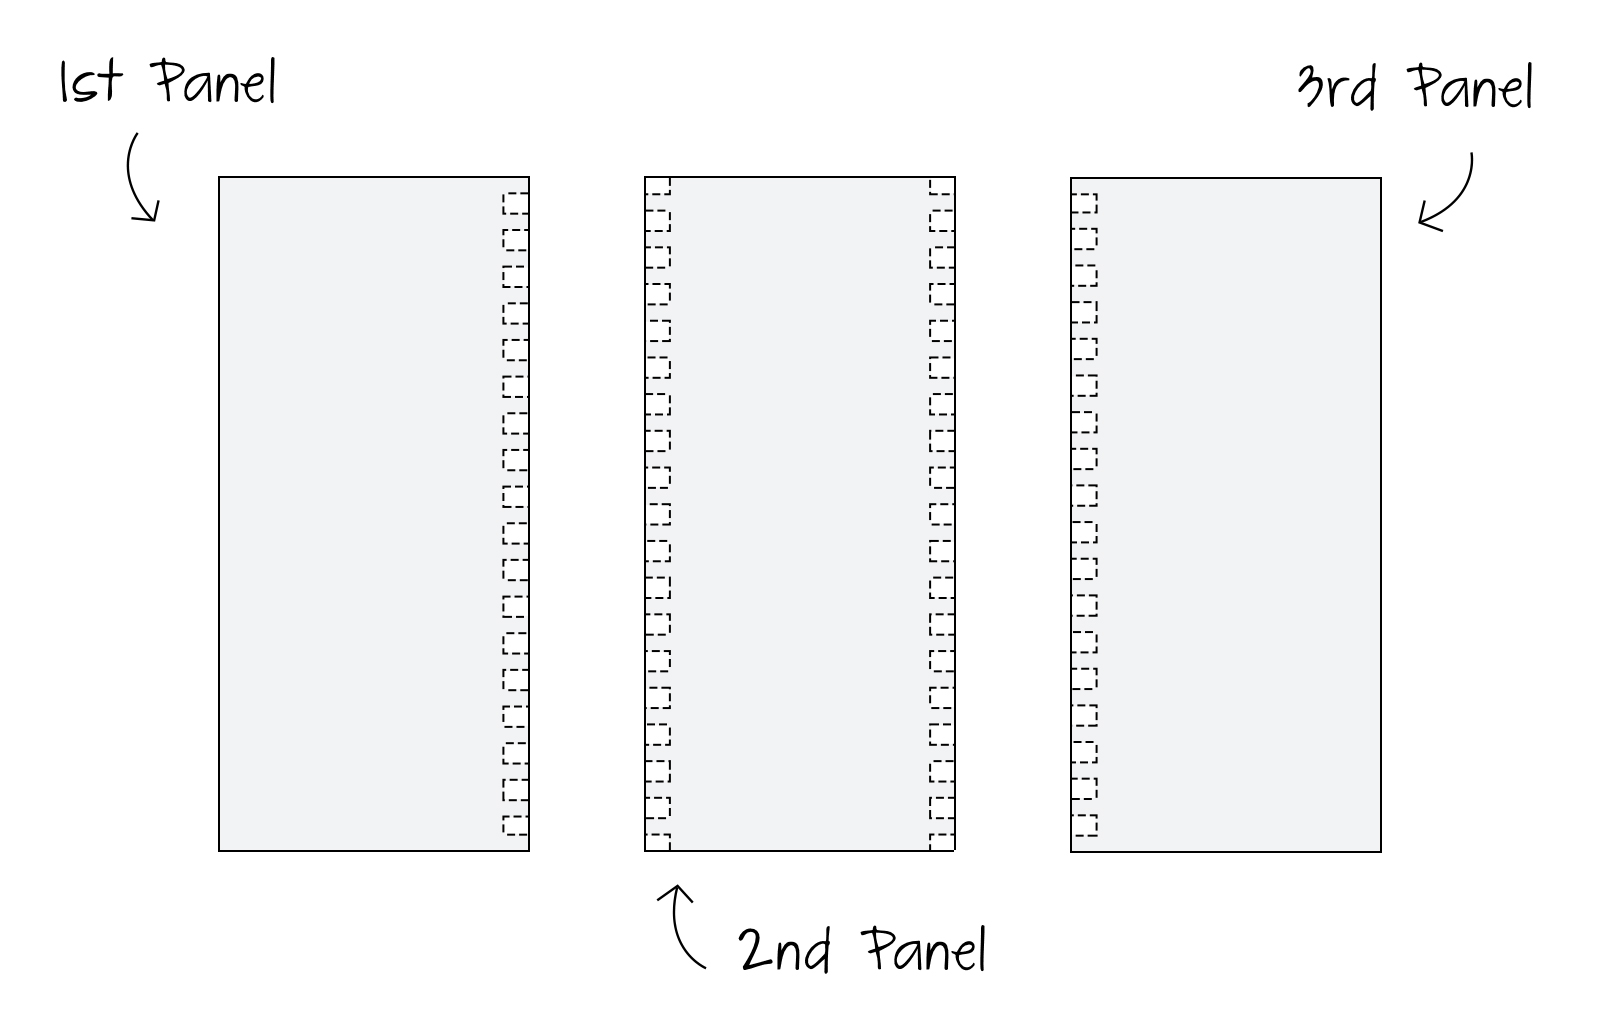
These panels are designed to be able to just slap them on the wall and your done. Well, I was still worried about seeing the seams up close down the middle of the bricks. So, we went the extra mile and cut out every other brick on each panel with a jigsaw. This way, they would perfectly seam together once placed onto the wall… Otherwise, there would be 3 lines (3 seams) going directly in the middle of the bricks… We want this to look real don’t we!? 😉
Since we had 3 panels, the middle panel needed to be cut on both sides and the 2 outside panels only on one side.
-side note-
If you have any plugs or phone jacks, be sure to measure and cut a hole for each of those. We used an Exacto knife and cut the hole slightly smaller than the outlet so the outlet cover would sit on top of the paneling.
STEP 2 – Secure Panels on Wall
Once your panels are all cut, you can nail them to the wall.
Find the studs in the wall with a stud finder and do your best to nail the panels right onto the studs. We knew we wanted to be able to hang photos and decor on the brick wall…. so we also (for extra safety precaution) used Liquid Nails Adhesive on the back of each panel as well as nailed them into studs. This way, we knew that the panels weren’t going to fall off for sure once we decide to start hanging decor.
STEP 3 – Prep & Paint
Next, take your grout sponge and cut it in half. Each half will be about the size of one brick on the paneling. This is what your going to use to paint the bricks to give them an aged look. Pour all your paint colors, besides the white, into one side of your foil pan. Don’t worry if the paints touch because your going to want them to slightly mix anyways.
-side note-
I only used about 1/2 or maybe 3/4 of each sample. I didn’t need all of it.
Paint Colors Used:
BEHR Grey Mist
BEHR Wright Brown
BEHR Canyon Dusk
BEHR Glazed Pears
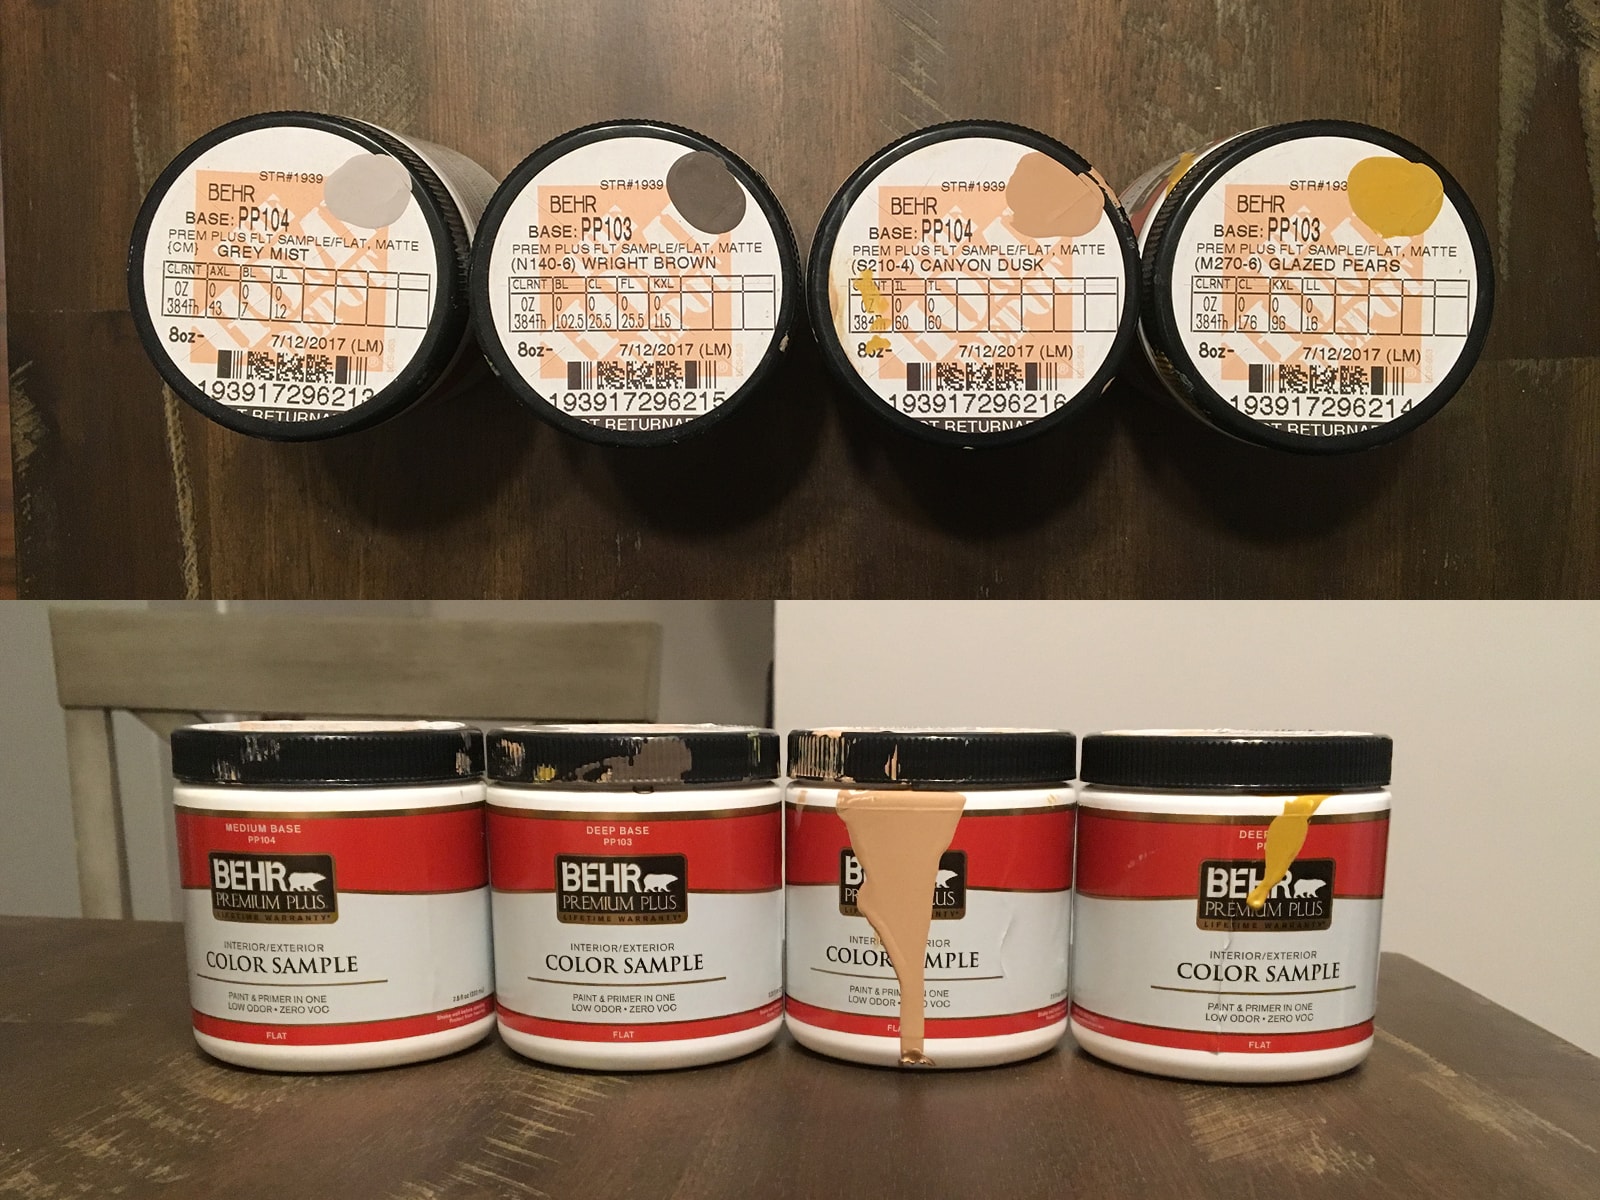
Once your paints are poured into the foil pain, take your grout sponge and on the long side, slightly dip it into the paint getting a few different colors on it. Then, dab your sponge on random bricks and lightly blot on the paint colors.
Once your sponge runs out of paint, dip your sponge again in a different direction in the paint and start dabbing it on the wall again.
-side note-
There shouldn’t be a set pattern of paint colors smudged on the wall. A wall doesn’t age the same on each brick overtime. It’s random.
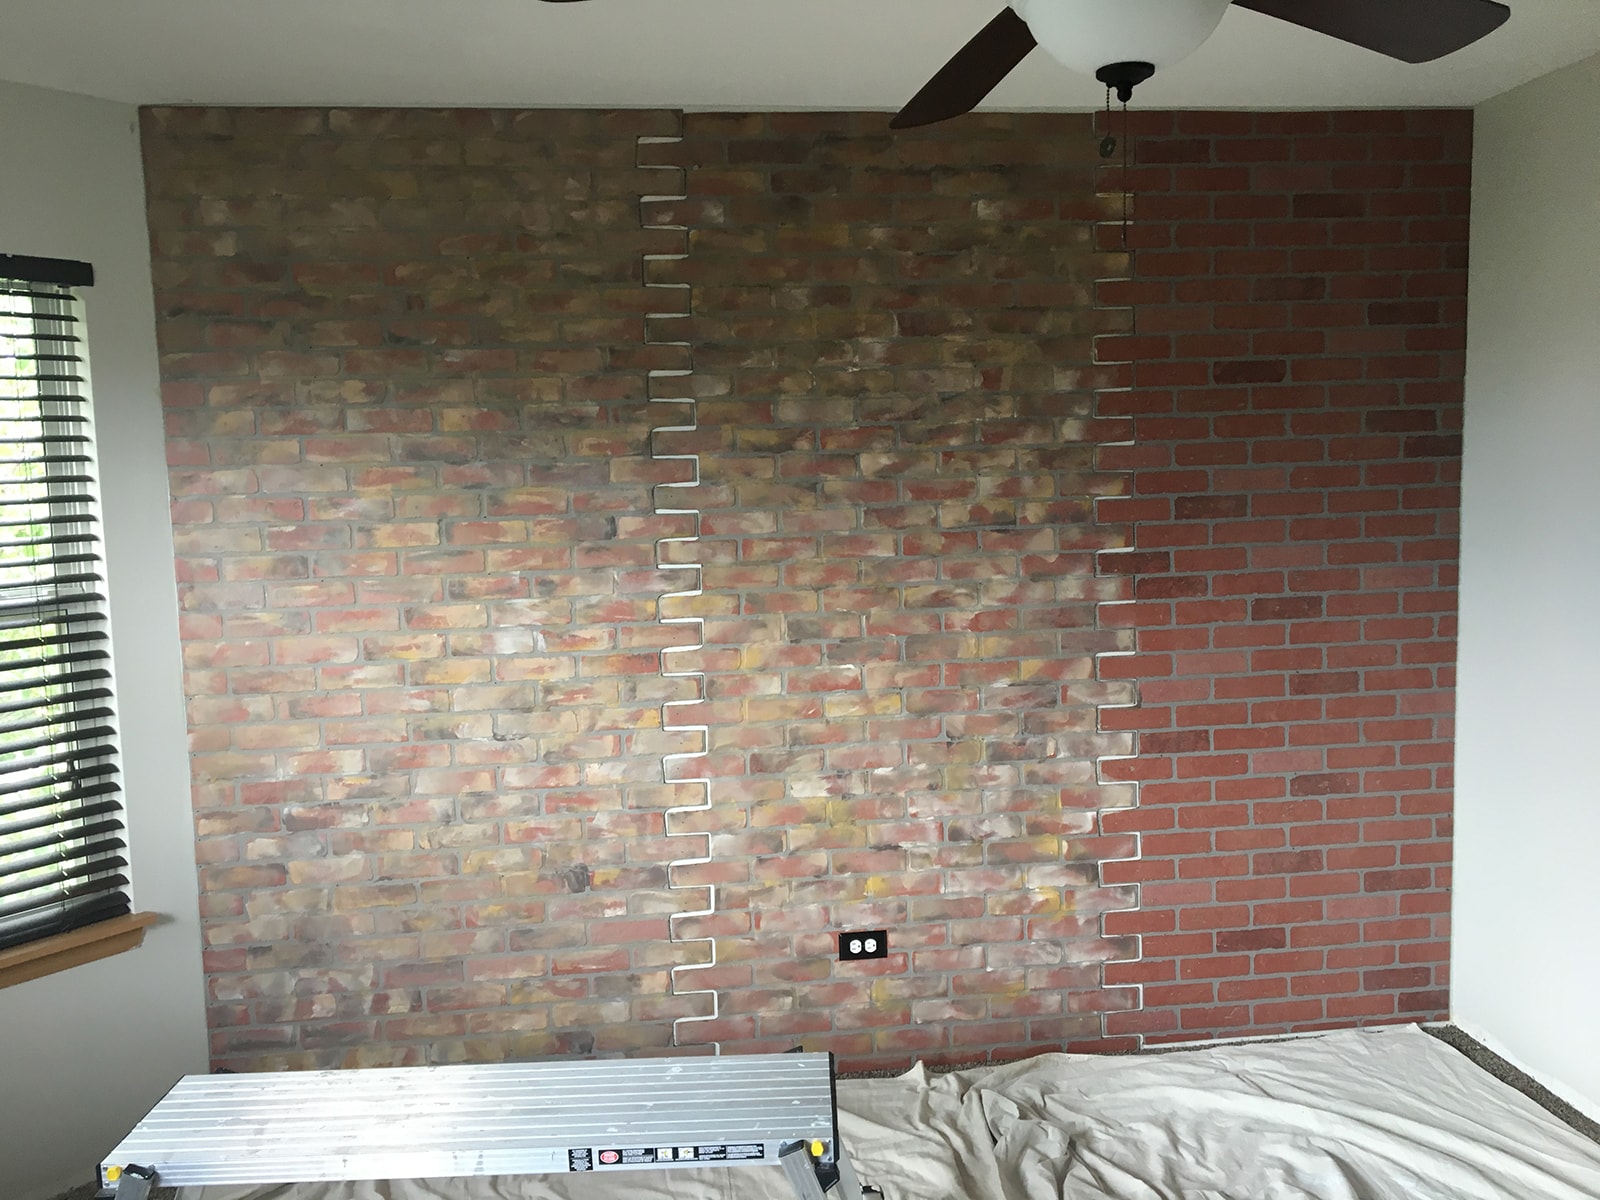
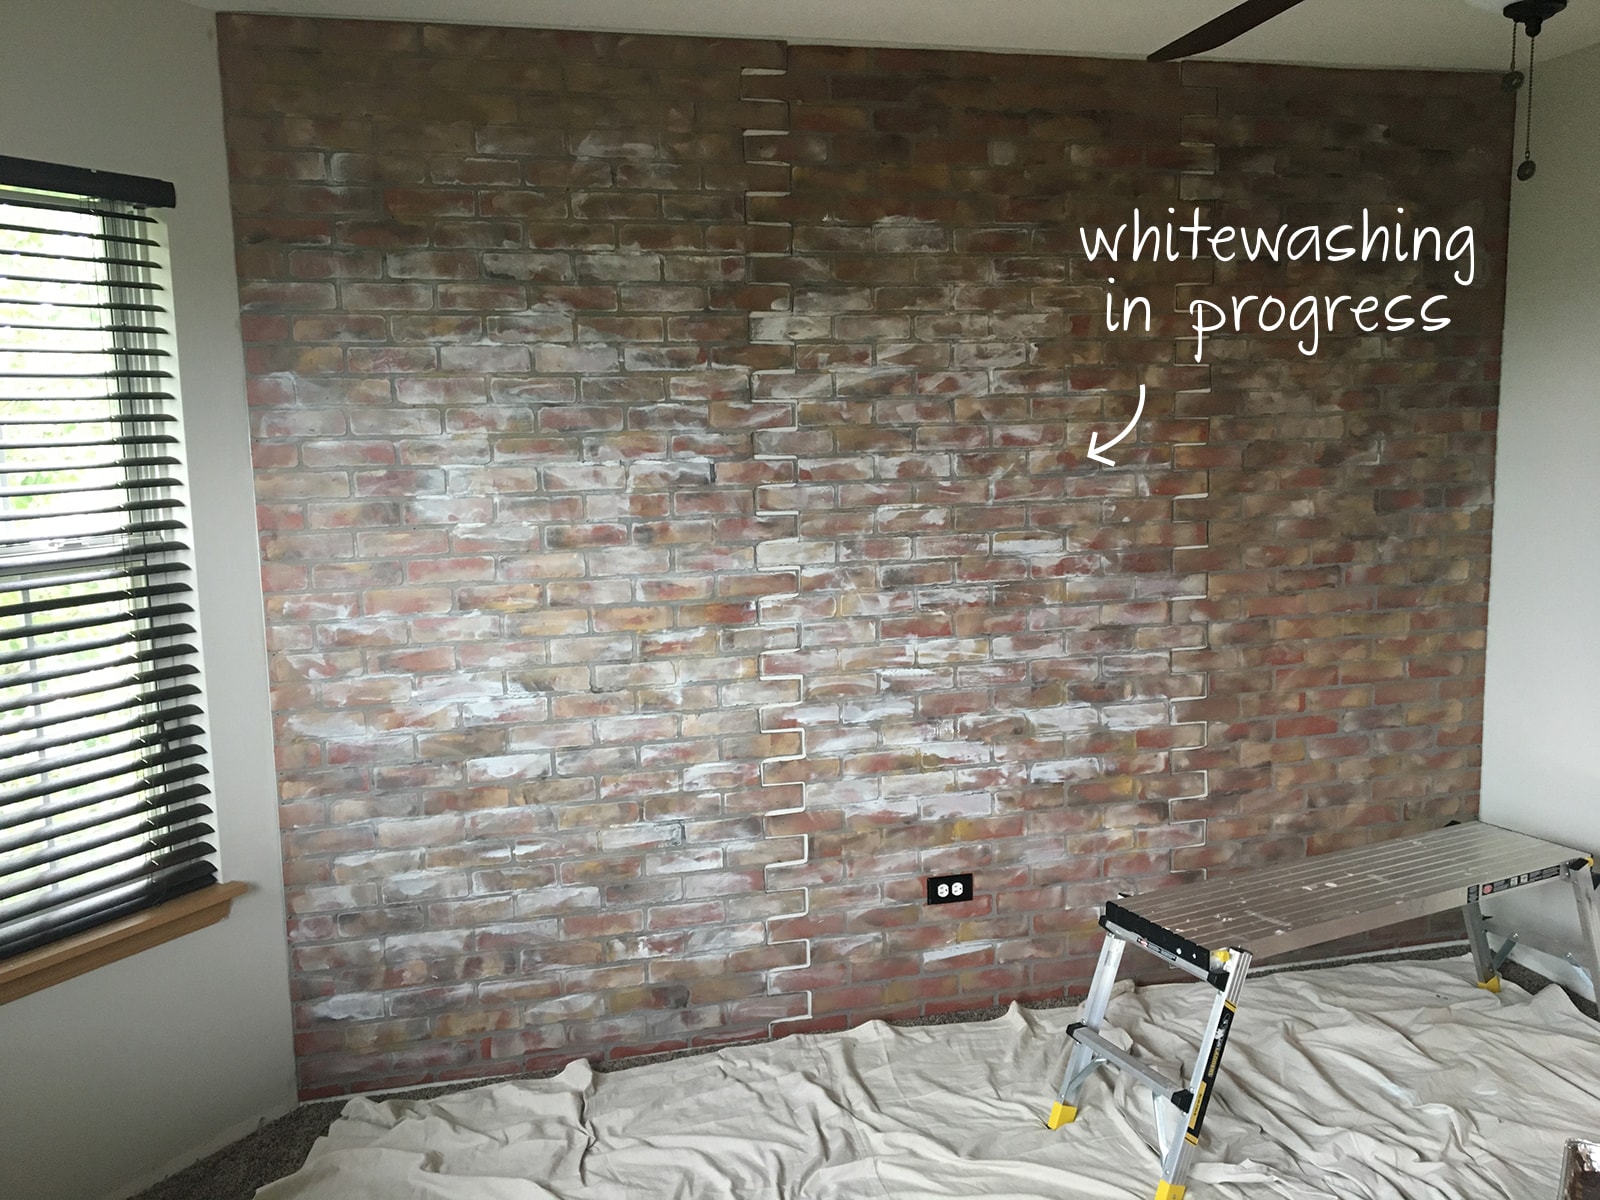
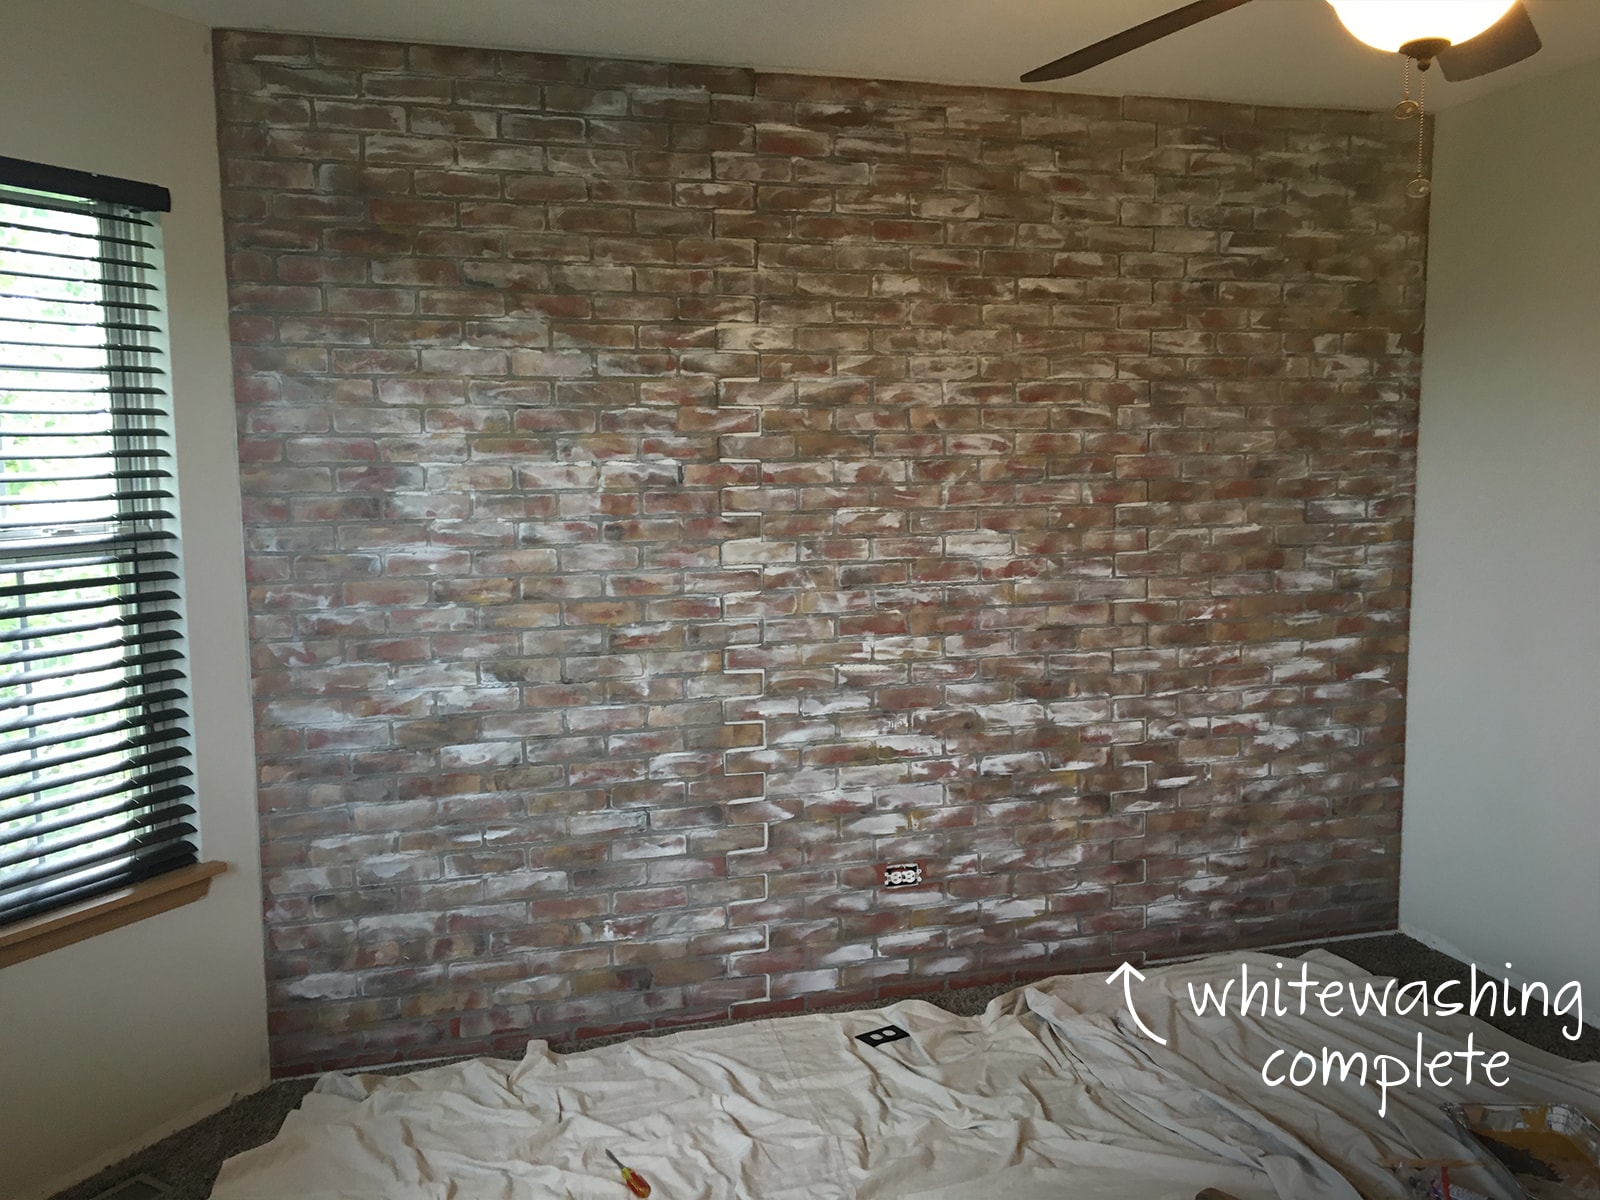
STEP 4 – Whitewash
If you ever looked at really old bricks, the bricks start to fade and turn white overtime. We’re going to try and achieve that look with white paint.
Go ahead and pour on the other side of your foil pan the white paint. Then, take the other half of the grout sponge that you haven’t used yet, and dip the edges lightly into the white paint.
Then, lightly dab and smudge the white paint on the edges of the bricks in random spots. Once again, it shouldn’t be perfect. Just, smudge.. smudge…smudge there, over there…. you get it. 😉
White Paint Color Used:
BEHR Flat White
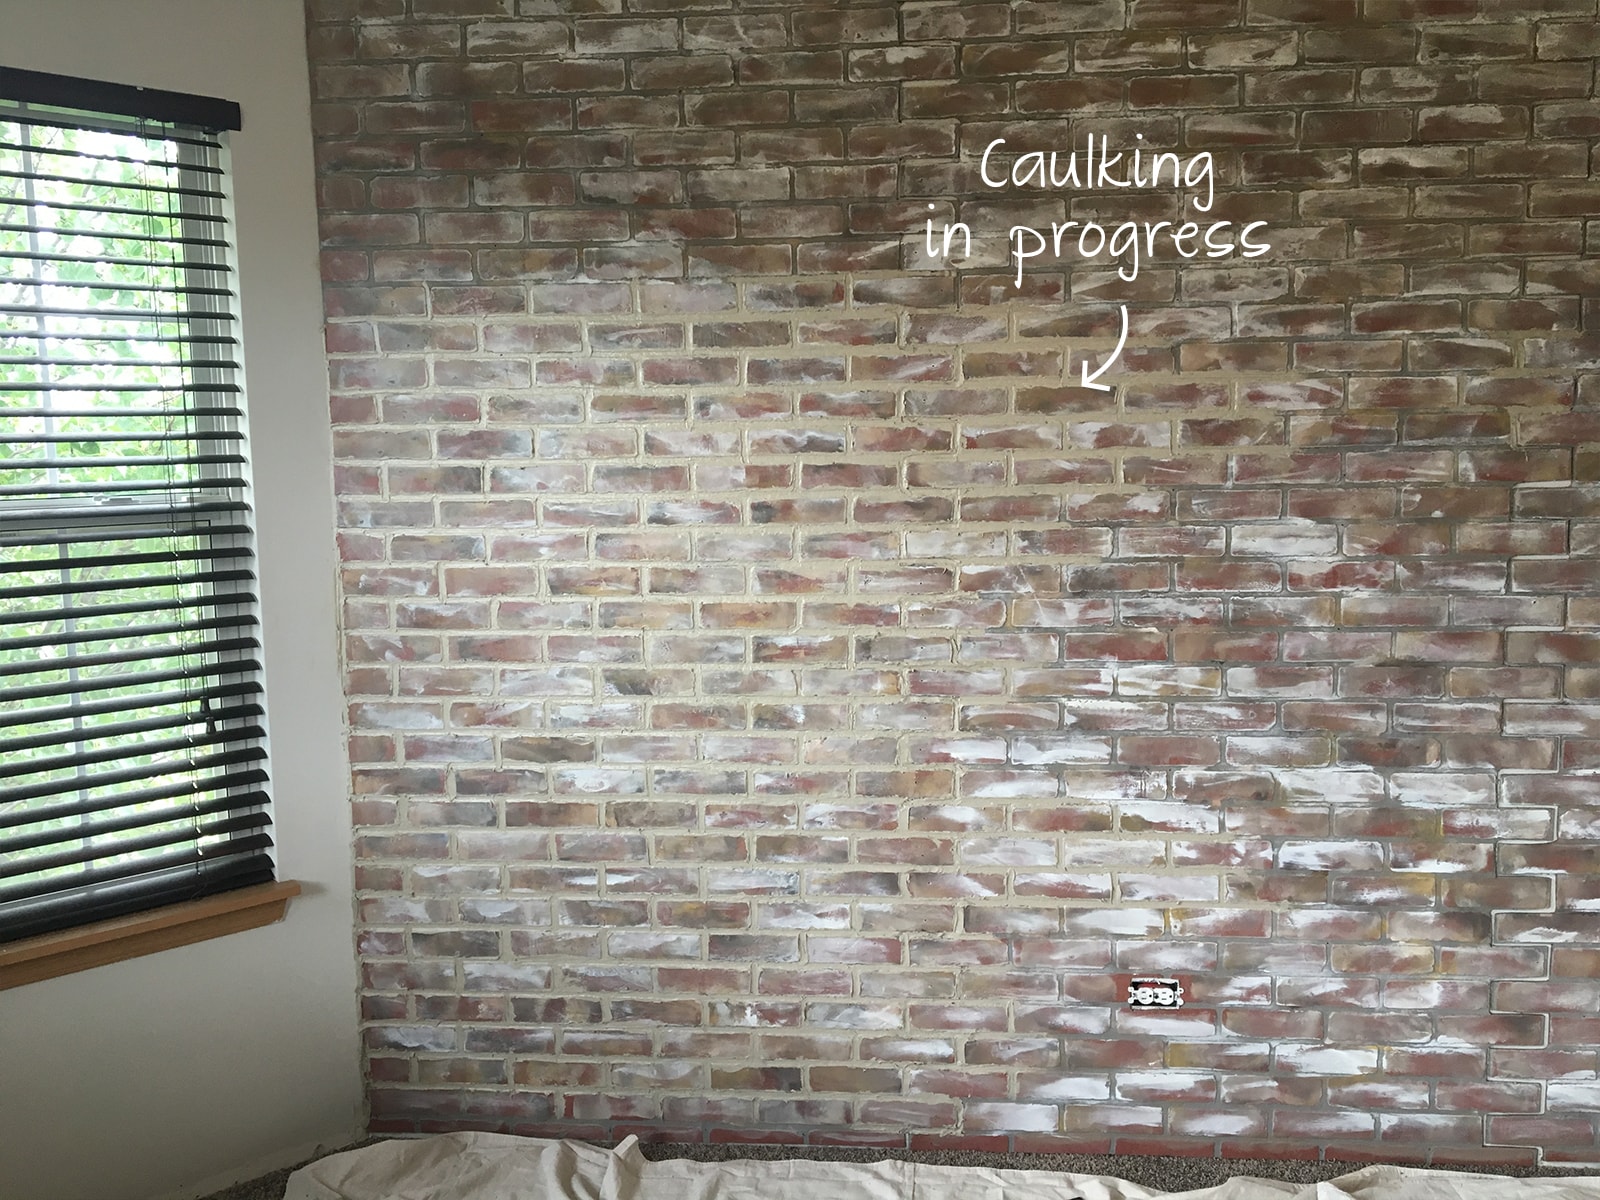
STEP 5 – Caulking Time
Last but not least, the caulk. Because we wanted to make this look as close as possible to a real brick wall, we used concrete patching caulk. It looks closest to the real mortar that would go in between real bricks without having to actually use the real thing.
So, run a thin bead of caulk with your caulk gun and trace the outside of all the bricks. As you go, drag your finger over the bead of caulk to spread it out evenly. I started from one side of the wall and slowly made my way to the other side.
-side note-
Make sure your using your latex gloves on this step!
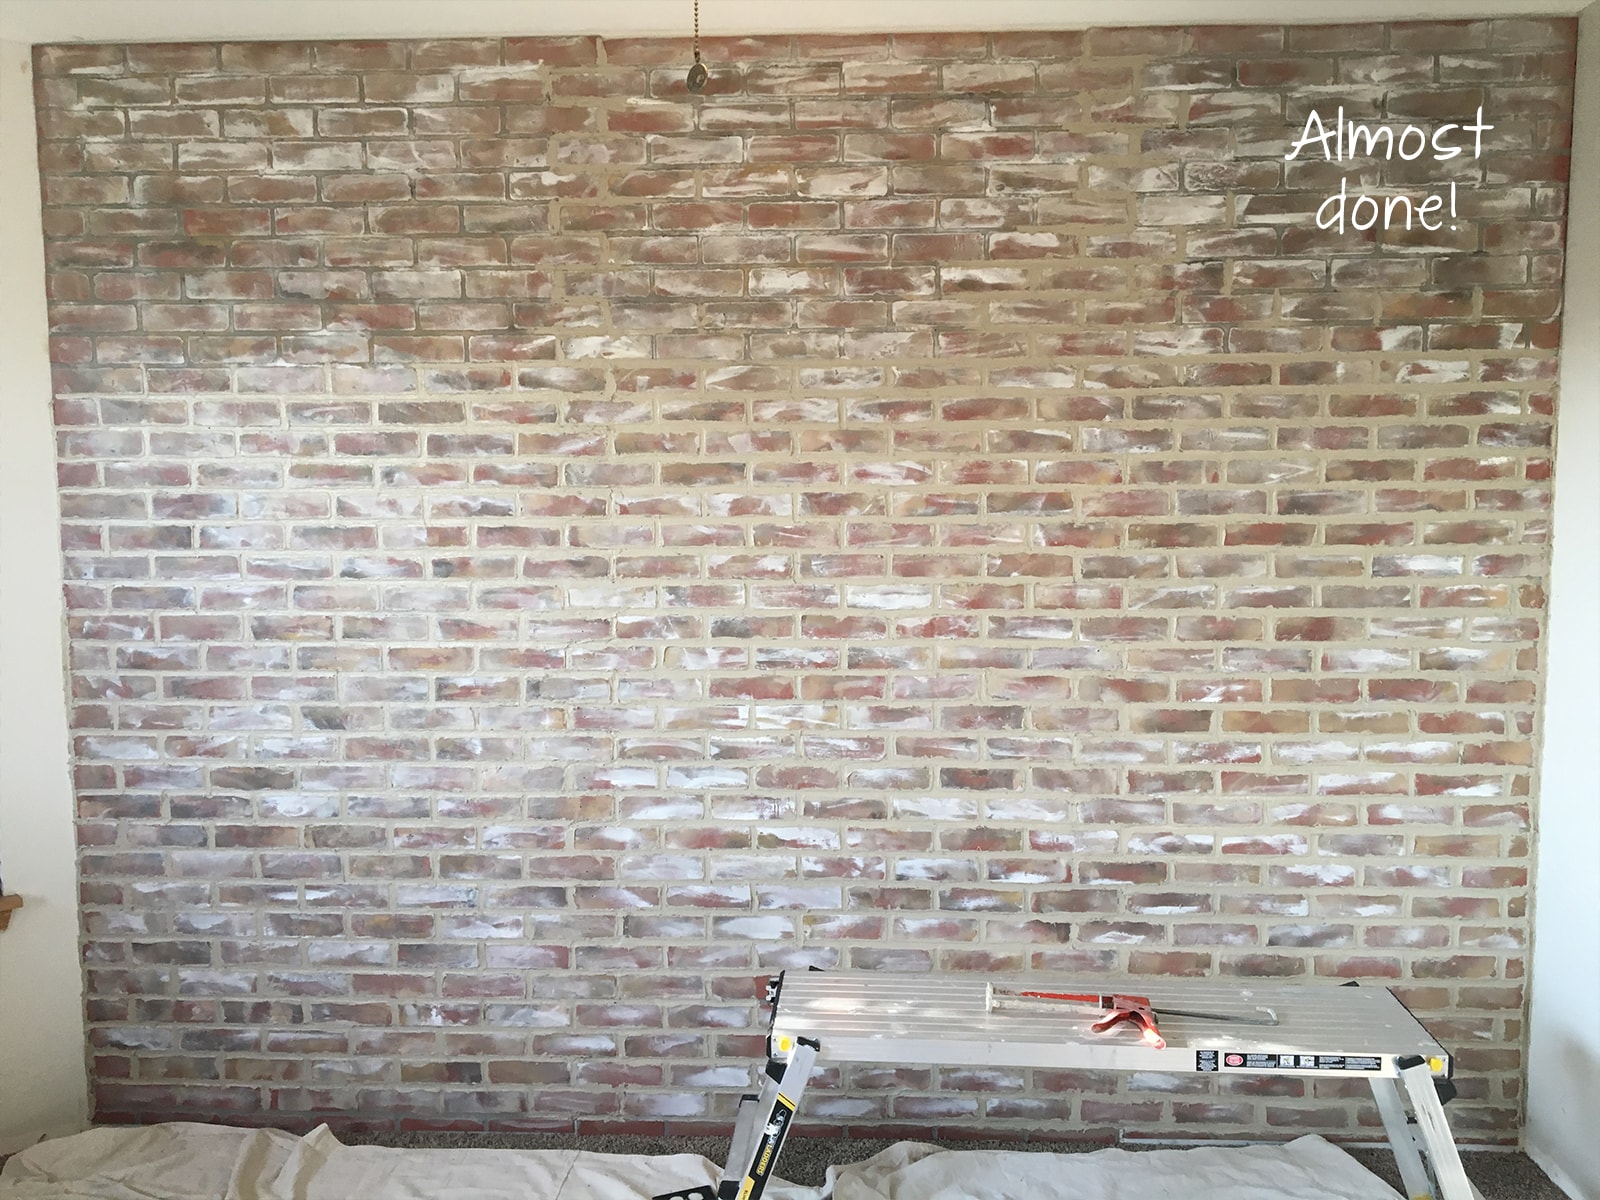
STEP 6 – DONEZO 😀
Let it dry! Caulk takes several days to completely cure, so I wouldn’t be leaning anything up against it for a little while. But, you can still stand back and admire your hard work!
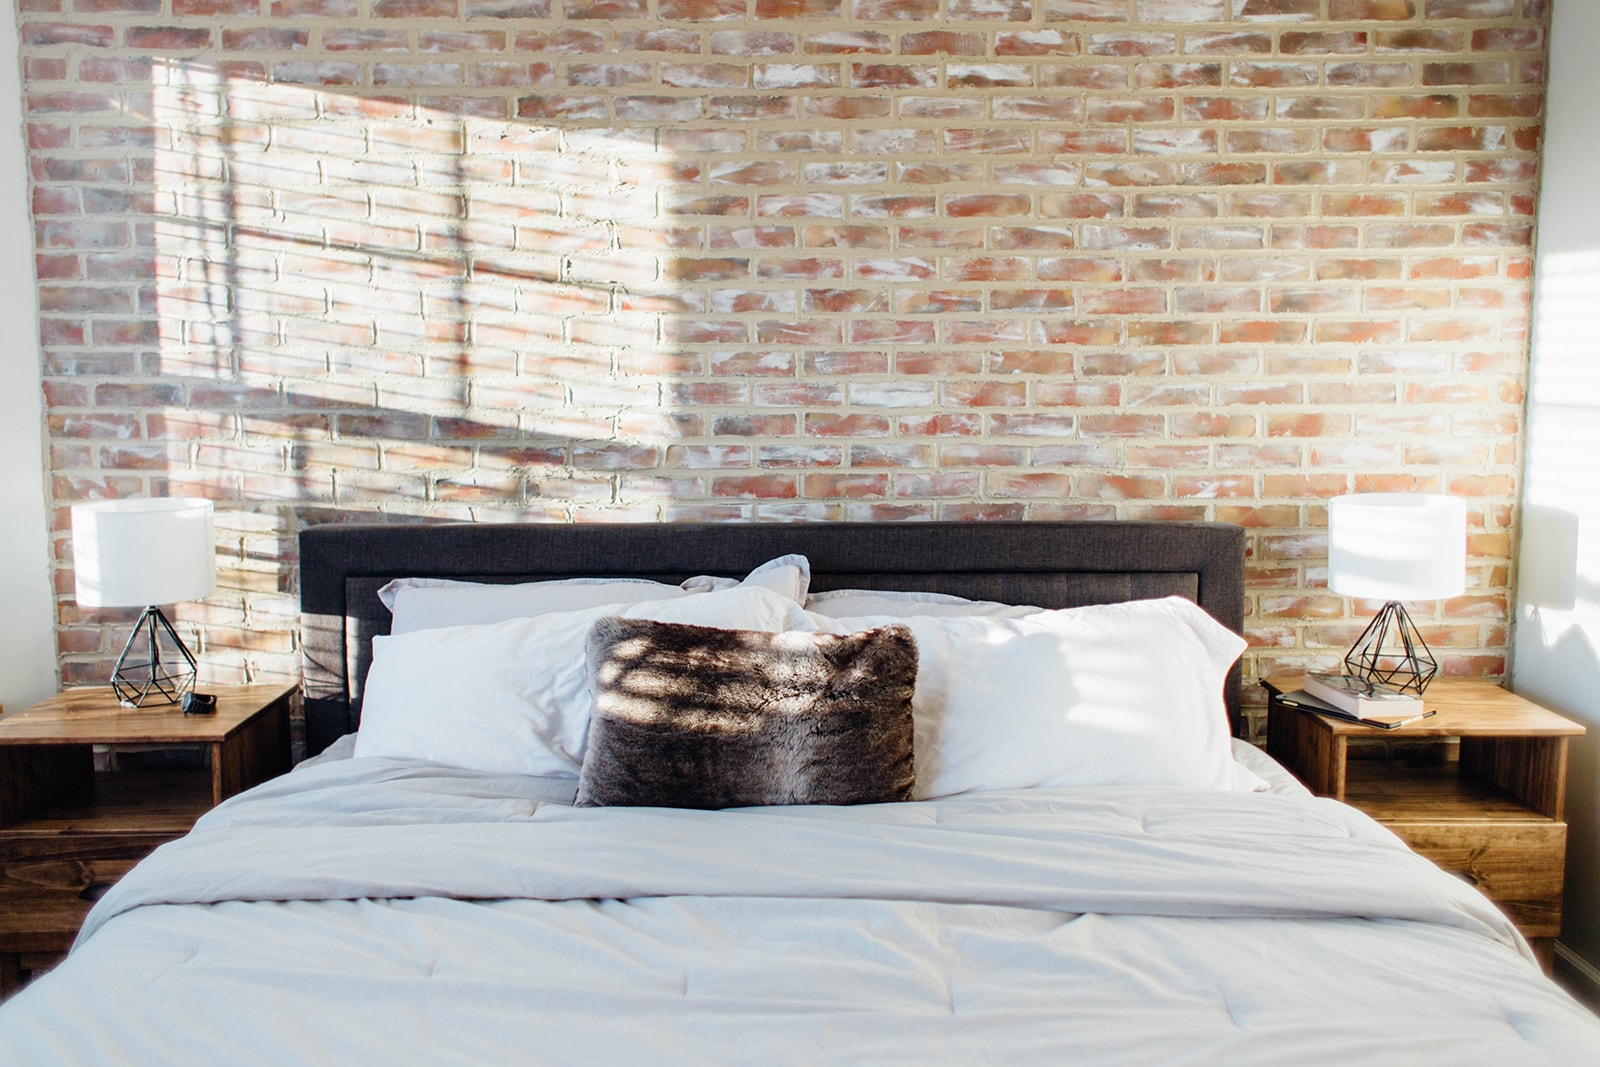
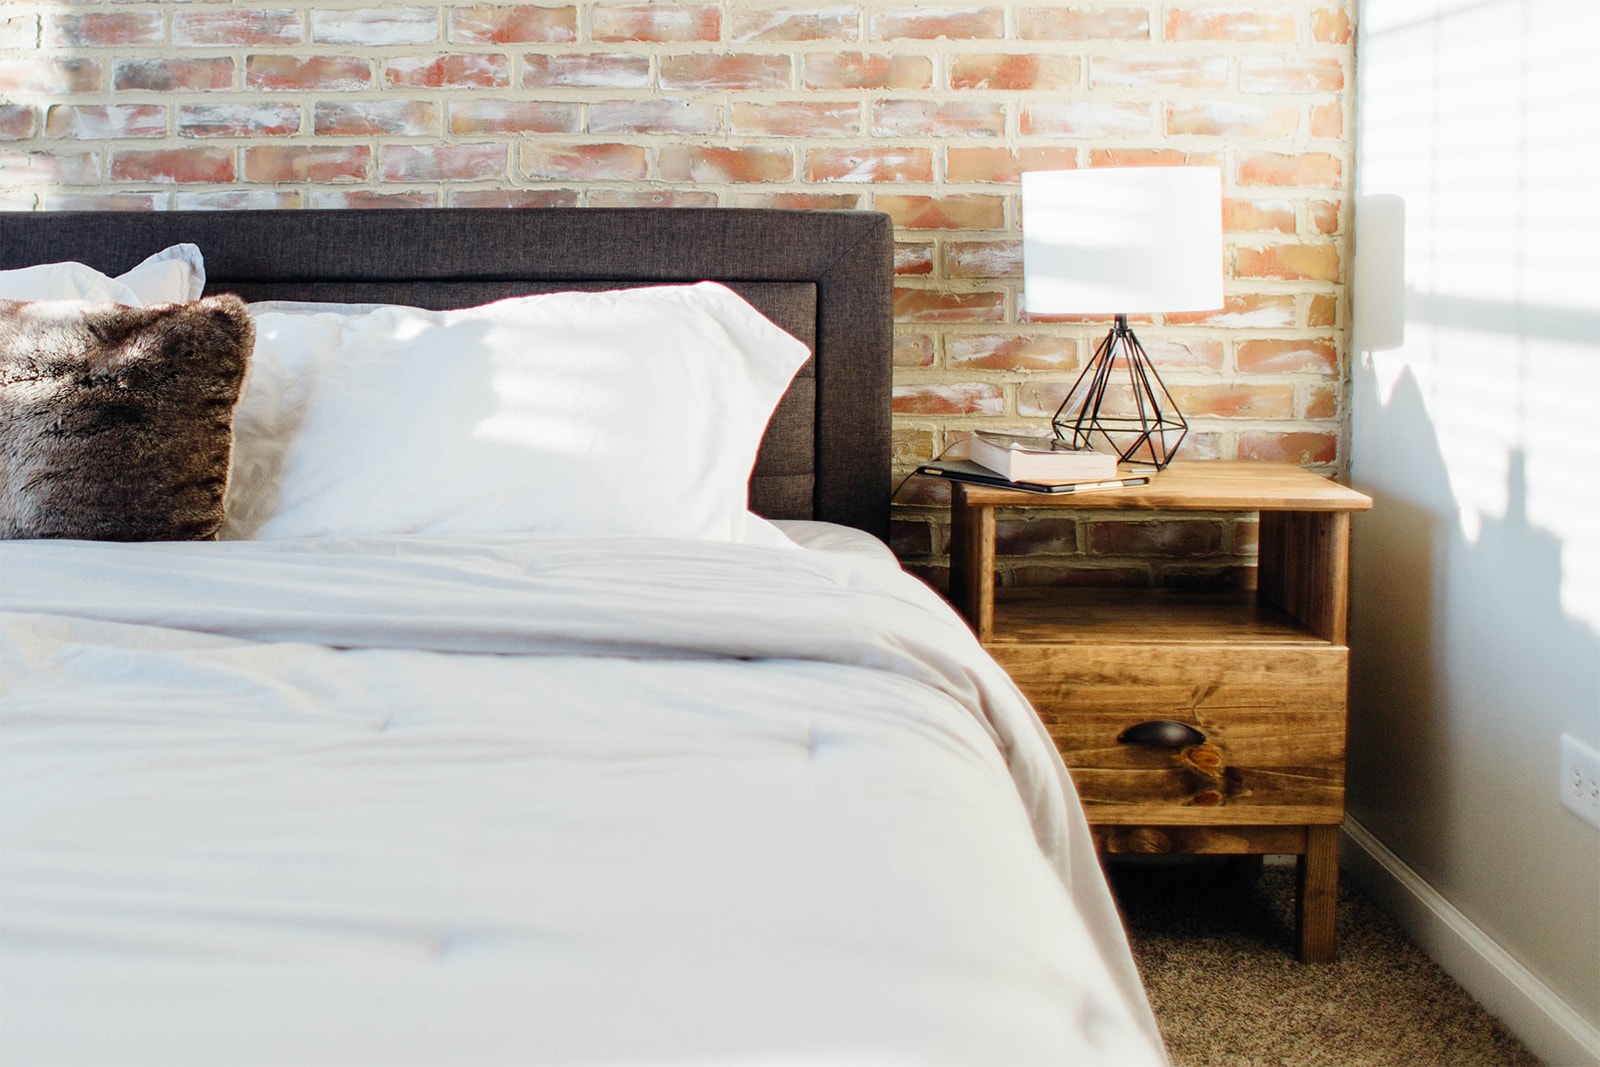
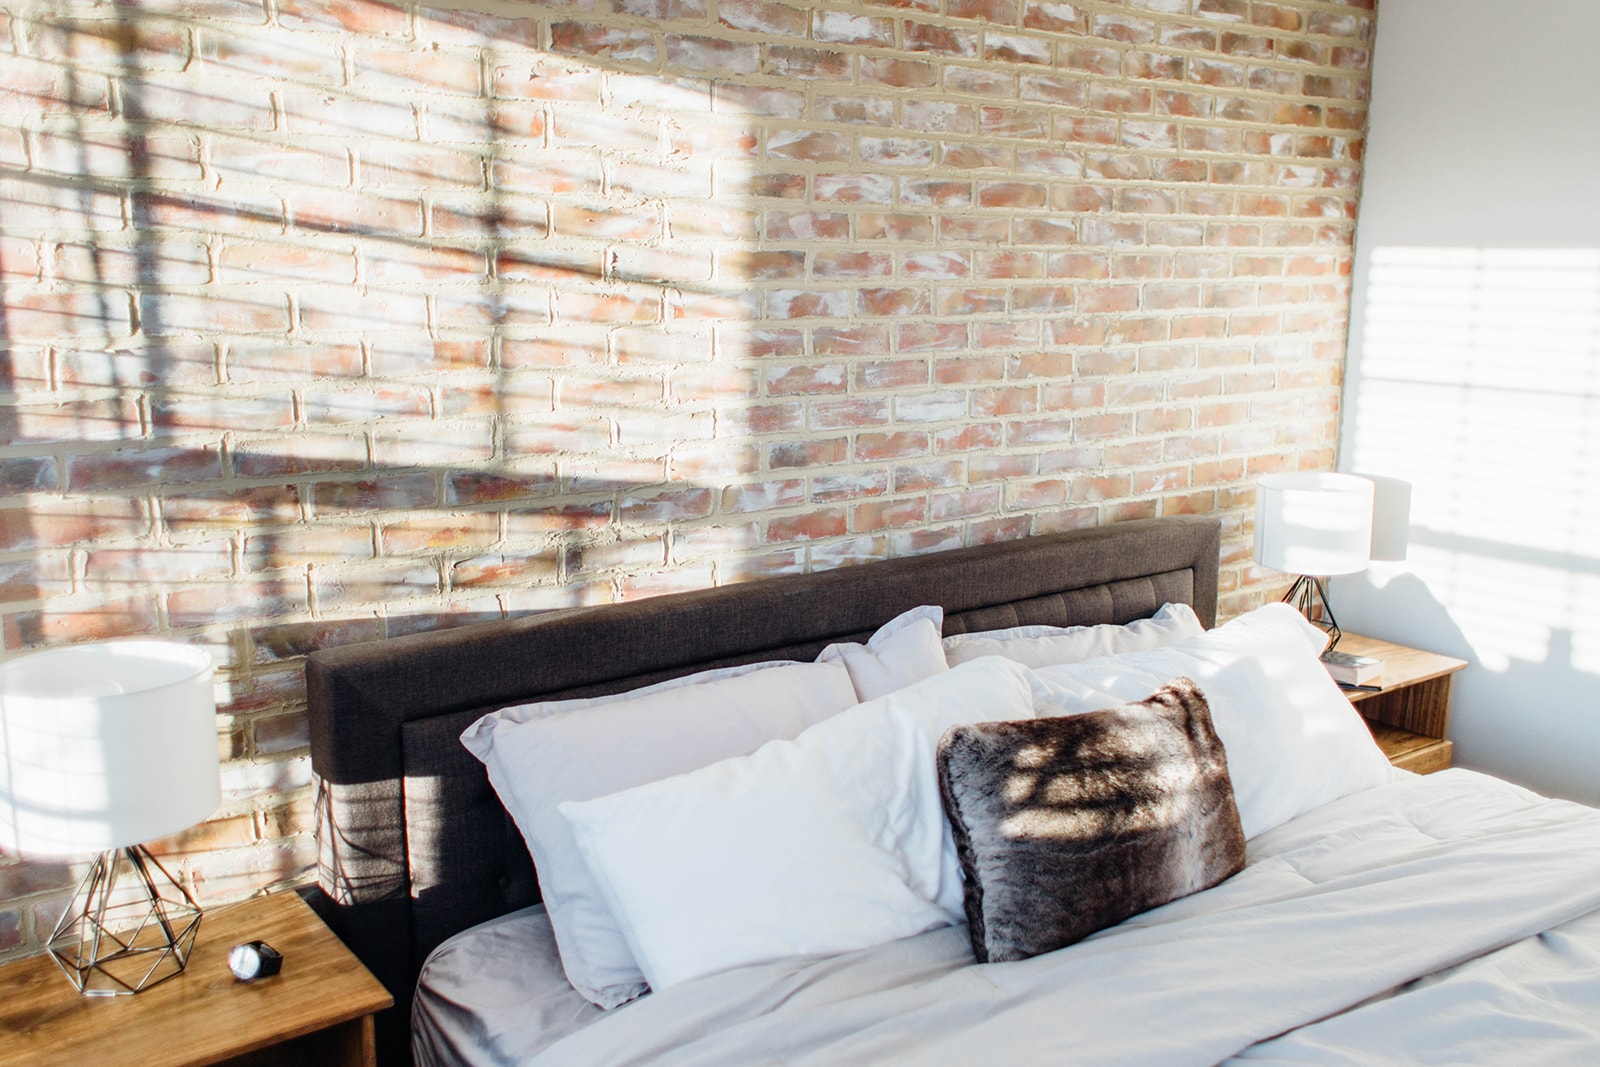
She’s a beaut! Finally, you got yourself a nice new, old accent brick wall. It even goes great with our DIY IKEA Hack Bedside Tables!
We would love to see you guys give this project a try! Post your brick wall photos on Instagram & tag @sammyonstate.
Don’t forget to share our post!


Awesome!
Your aged brick bedroom wall turned out beautifully! The idea of “interlacing” the bricks certainly contributes to the realism. You are brave to tackle such a large wall, bet you saw bricks in your sleep for weeks. I am considering a small faux fireplace for my bedroom with either an electric wood stove or small logs in a grate and planned to use the same type of brick paneling for the interior of the firebox and small raised hearth and have been looking at uses of the brick panels. I like the look achieved by dabbing the paint on with a sponge as opposed to dry brushing. Thanks for sharing your ideas.
In many interiors, such a wall looks very nice, but I can’t use a similar option in my interior because I have it classic.
This looks amazing. I love that you didn’t smear joint compound and have to sand. How is the concrete patch holding up?
It’s holding up great! Still one of my favorite projects to date!
Did your tutorial and worked GREAT! Would love to share pictures.
Hi Carolyn!
Awesome! We would love to see photos of your finished project as well! If you have Instagram, you can tag us @sammyonstate or you can email us at sammyonstate@gmail.com
We can’t wait to see!
Sarah & Tammy
Is your brick pannel a bit textured?
Looks great…..
What brand of concrete caulking did you use?
Hi Natalie!
This is what we used from Menards. It’s the brand “Loctite“.