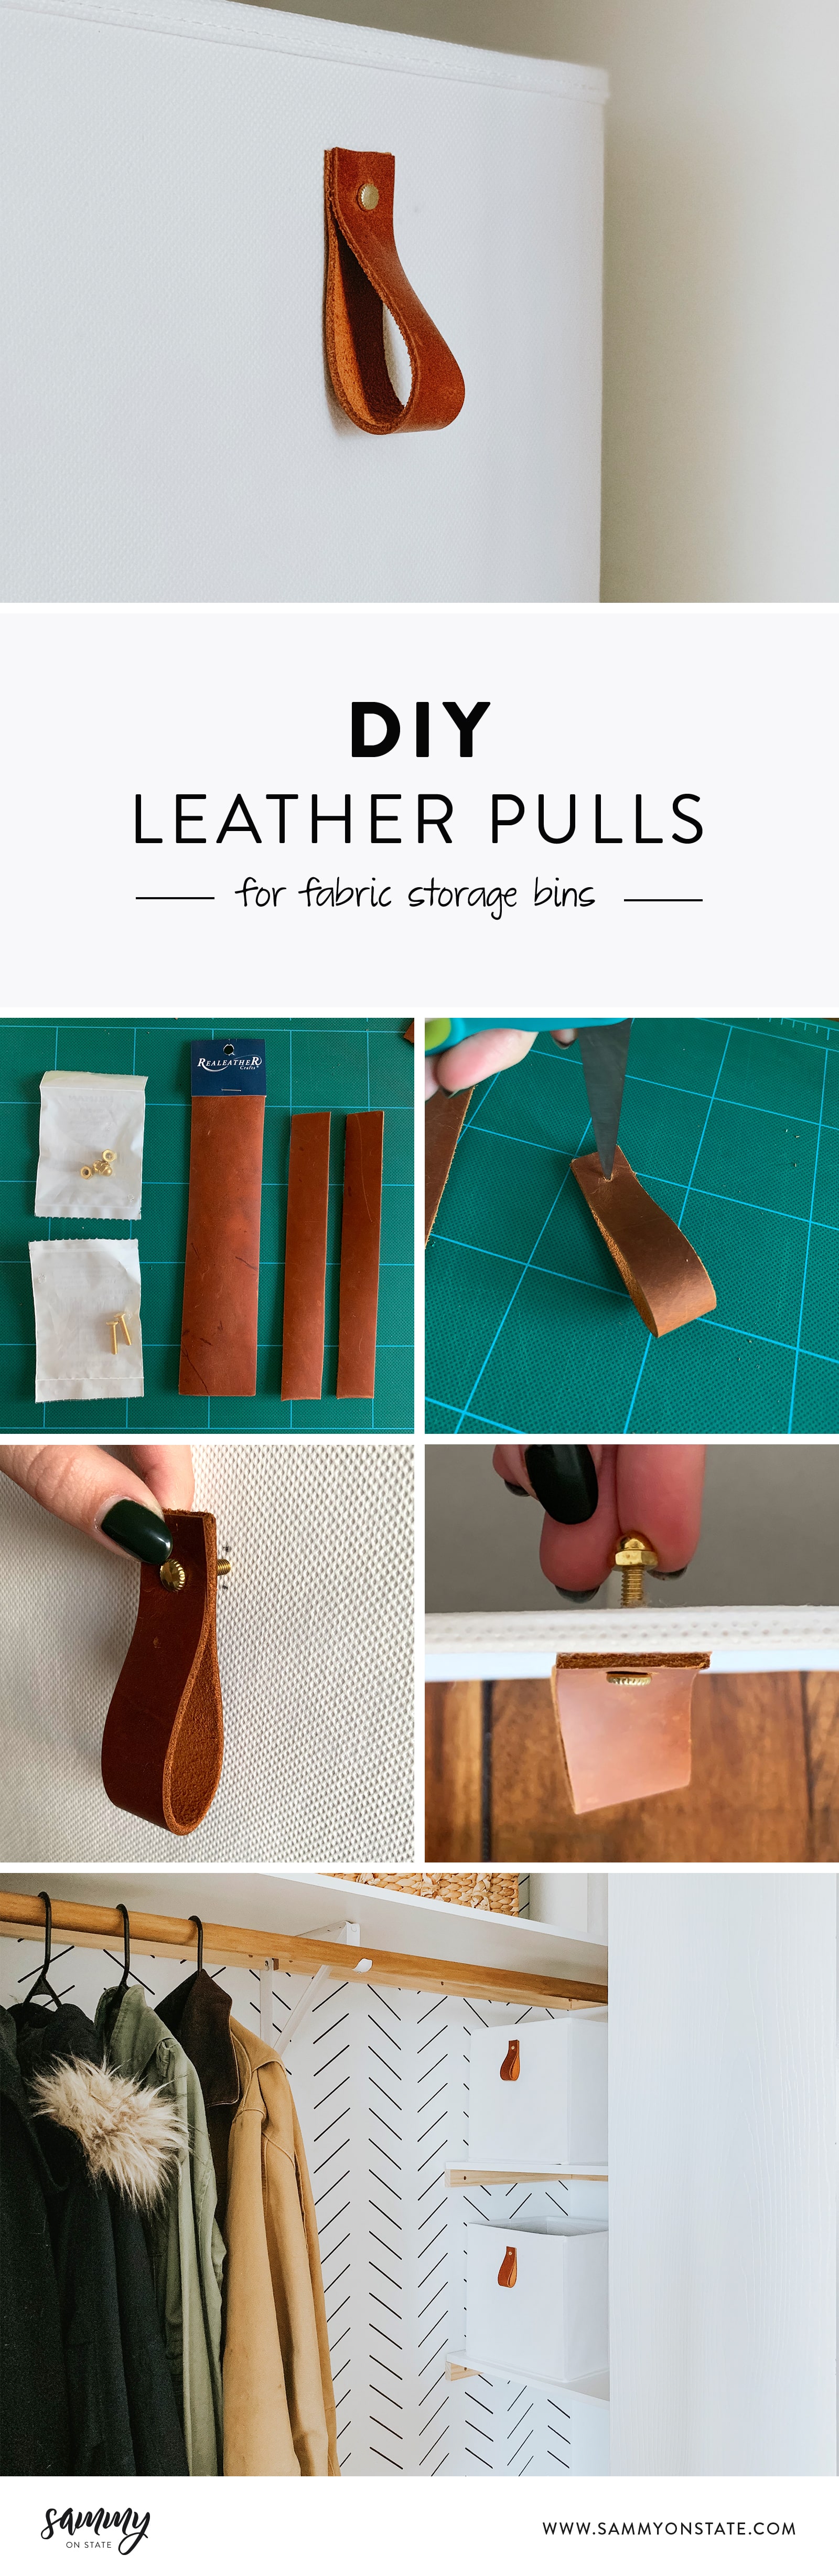
Happy Monday you guys! This weekend seemed to fly by (as they always do), and I was really hoping to get more projects done than what I actually did. But, that always seems to be the usual every weekend. Anyways! I thought it would be a great way to start this week by sharing this DIY leather pulls project that I recently tackled.
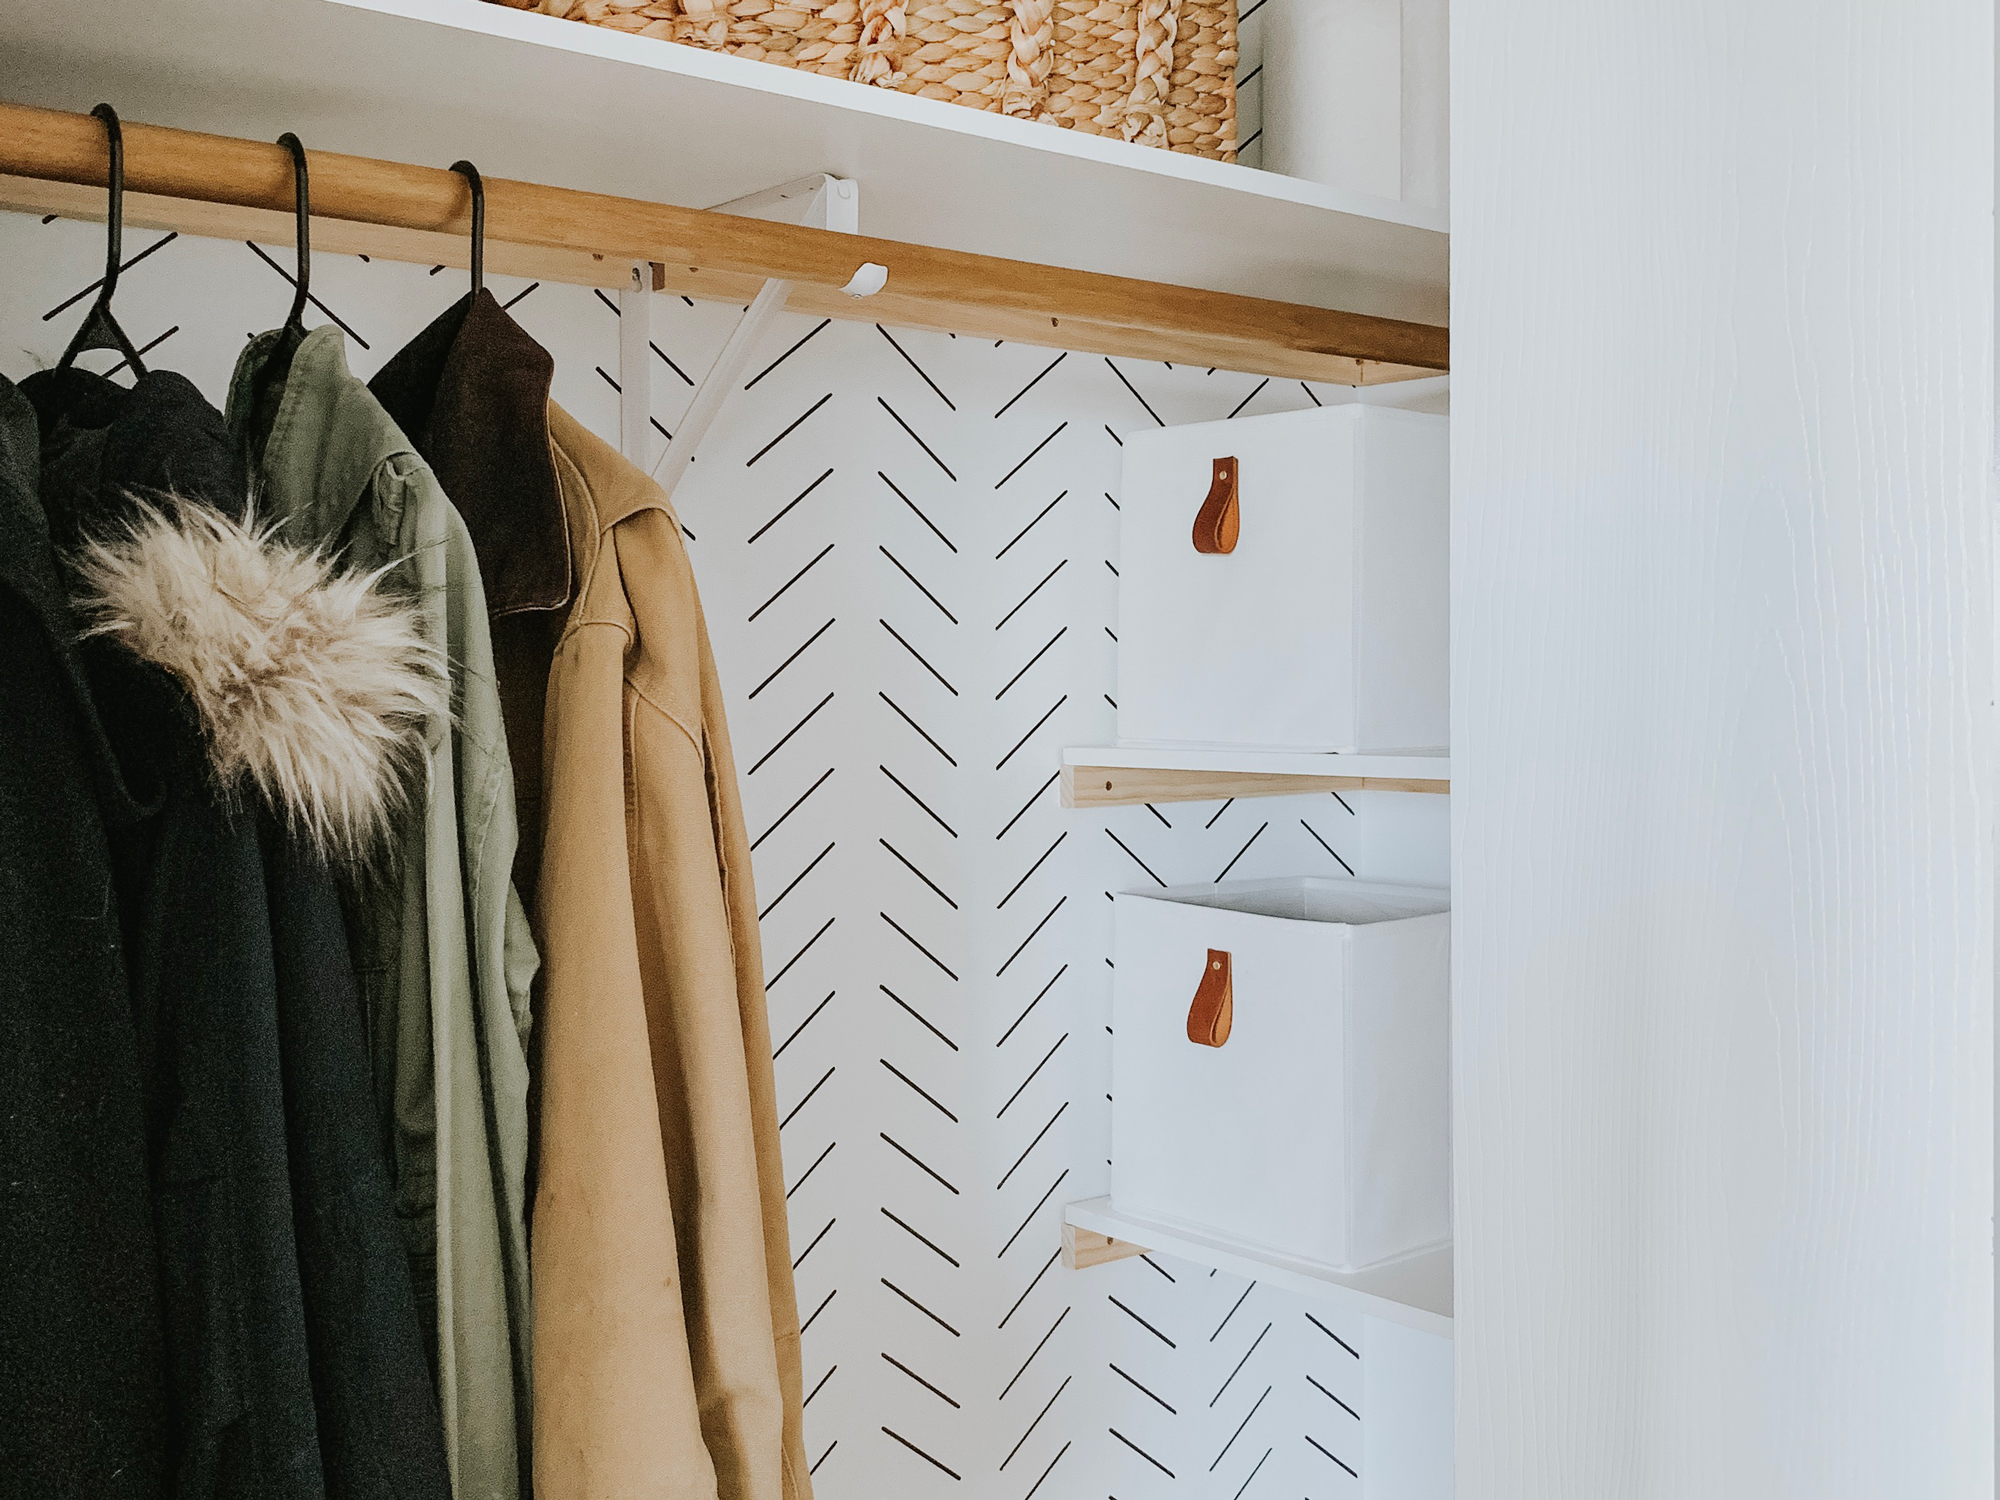
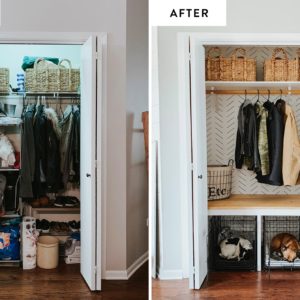
If you follow us on Instagram, you may have seen our stories last week on how I created these leather pulls for our entryway closet. I bought these in-expensive fabric storage bins when I did our closet makeover, knowing that I would dress them up later with some leather pulls. It was super simple to do, and as always, budget-friendly!
Another great thing about this DIY tutorial is that it can be used for any other project! As I mentioned, I made these leather pulls for my fabric storage bins, but you could easily follow this tutorial to make the leather pulls for dressers, cabinets or nightstands!
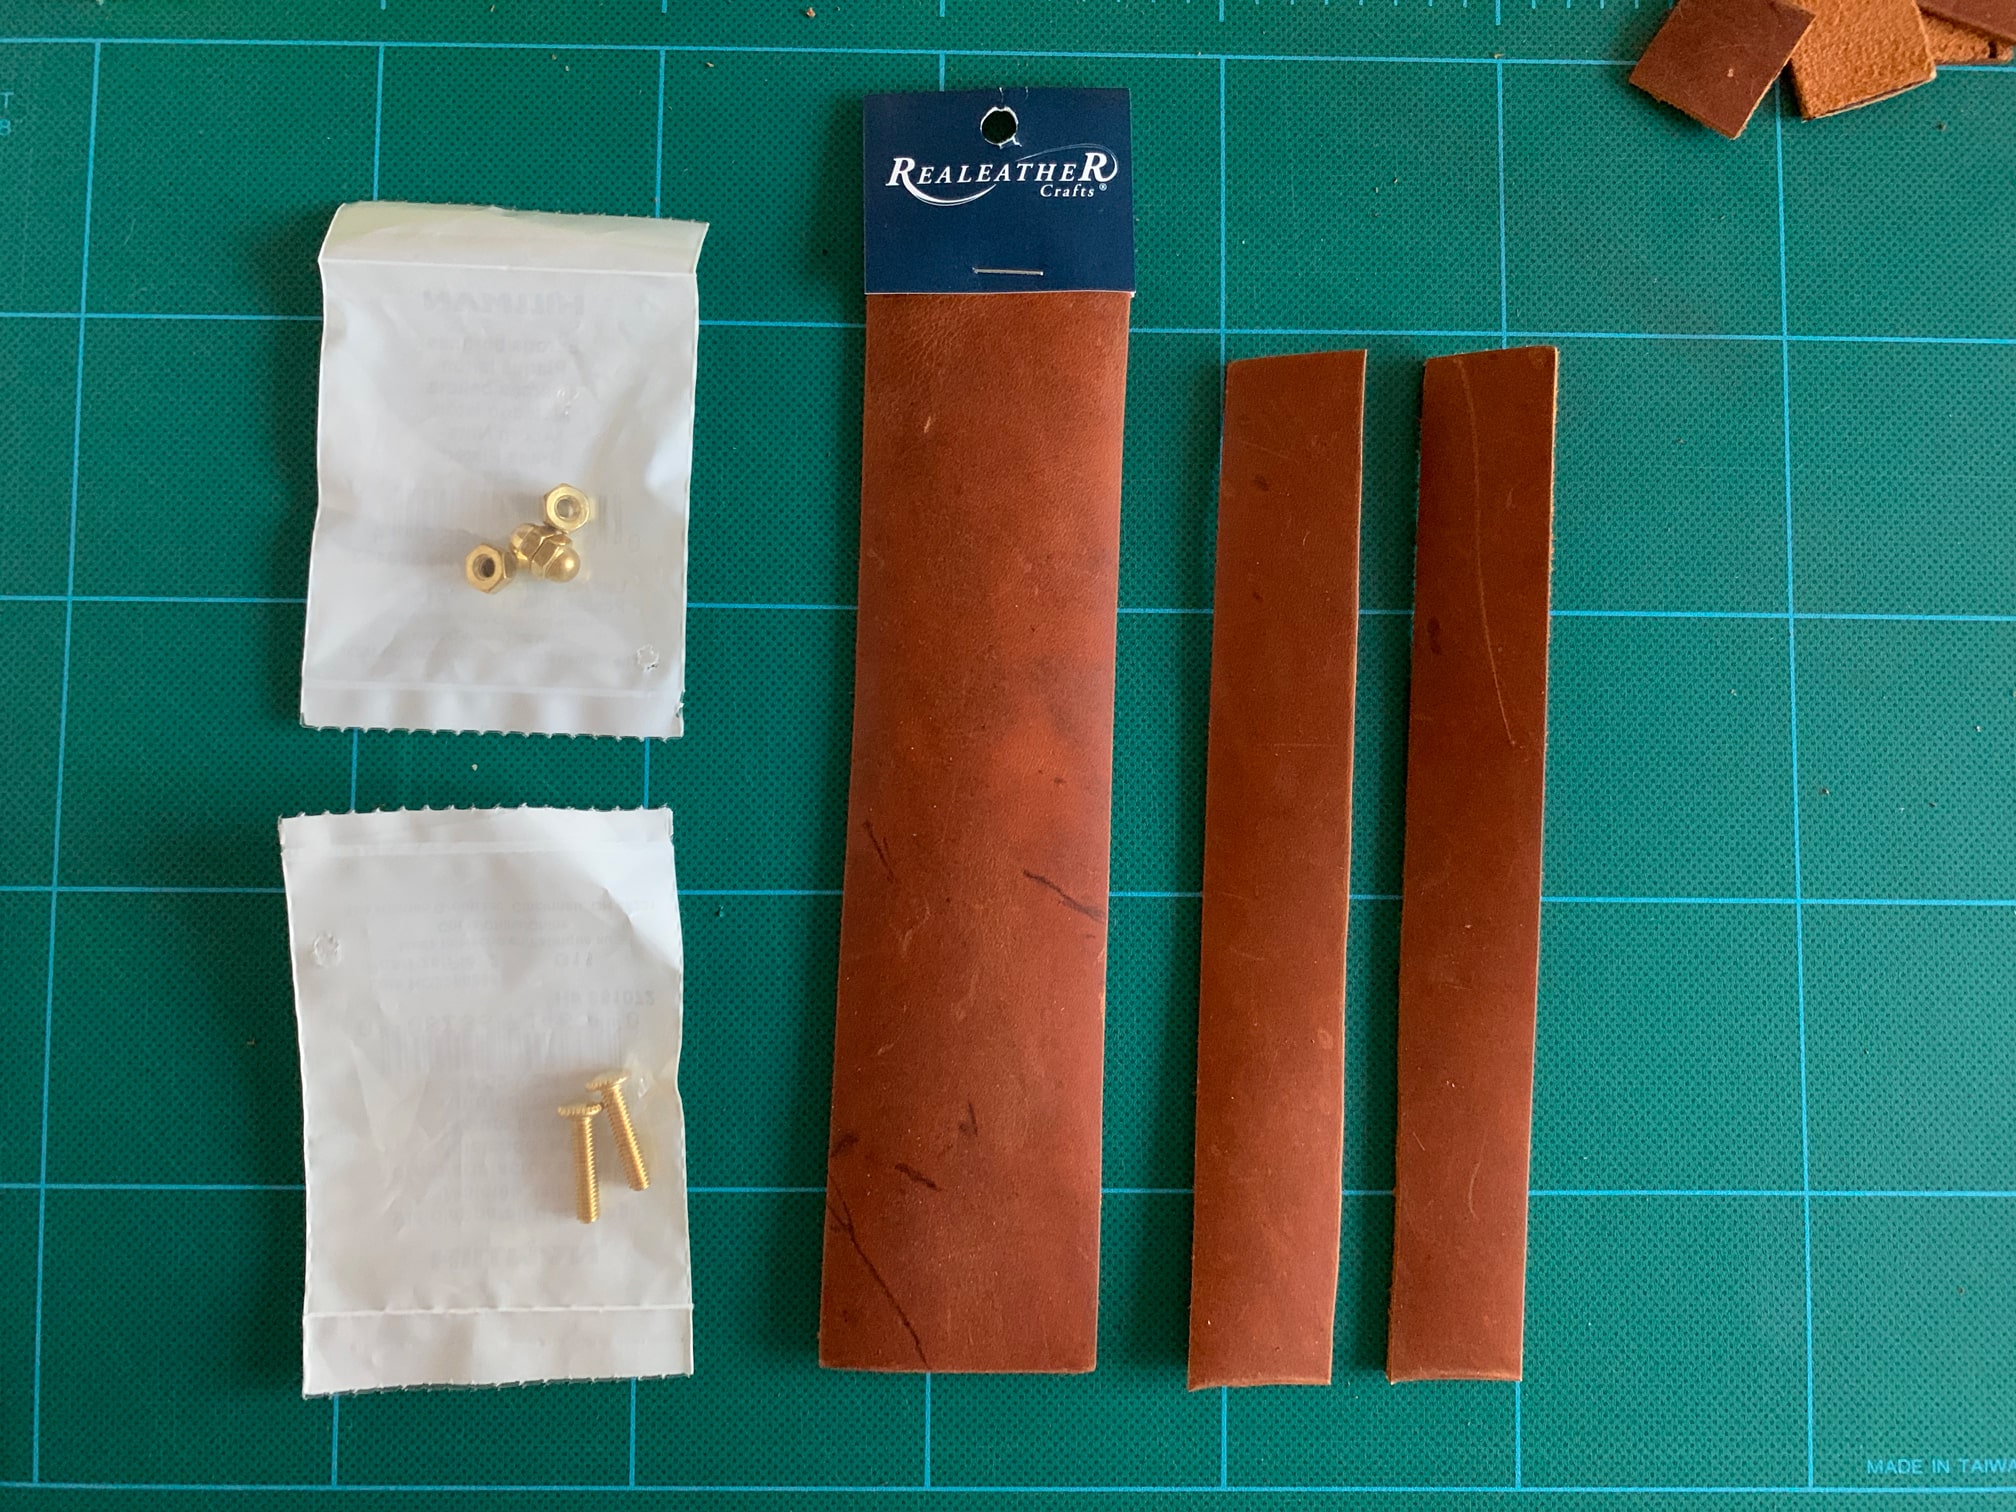
SUPPLIES
- Leather Material (I used these from JoAnn Fabrics)
- Screw (I used these fancy screws from Lowe’s)
- Cap Nut (for the back side of the screw)
- Storage Bins (if you’re making the leather pulls for storage bins)
TOOLS
- Scissors (make sure they’re pretty sharp!)
- Ruler
- Marker
- optional – Drill & drill bit OR box knife. (This is if you’re making the leather pulls for fabric storage bins. Also, depending on what you have and are comfortable with.)
- Hammer
- optional – Awl (this is a handy tool if you have it! You’d use this instead of scissors when creating your holes in the leather pulls)
- Cutting Mat (or something that protects the surface you’re working on)
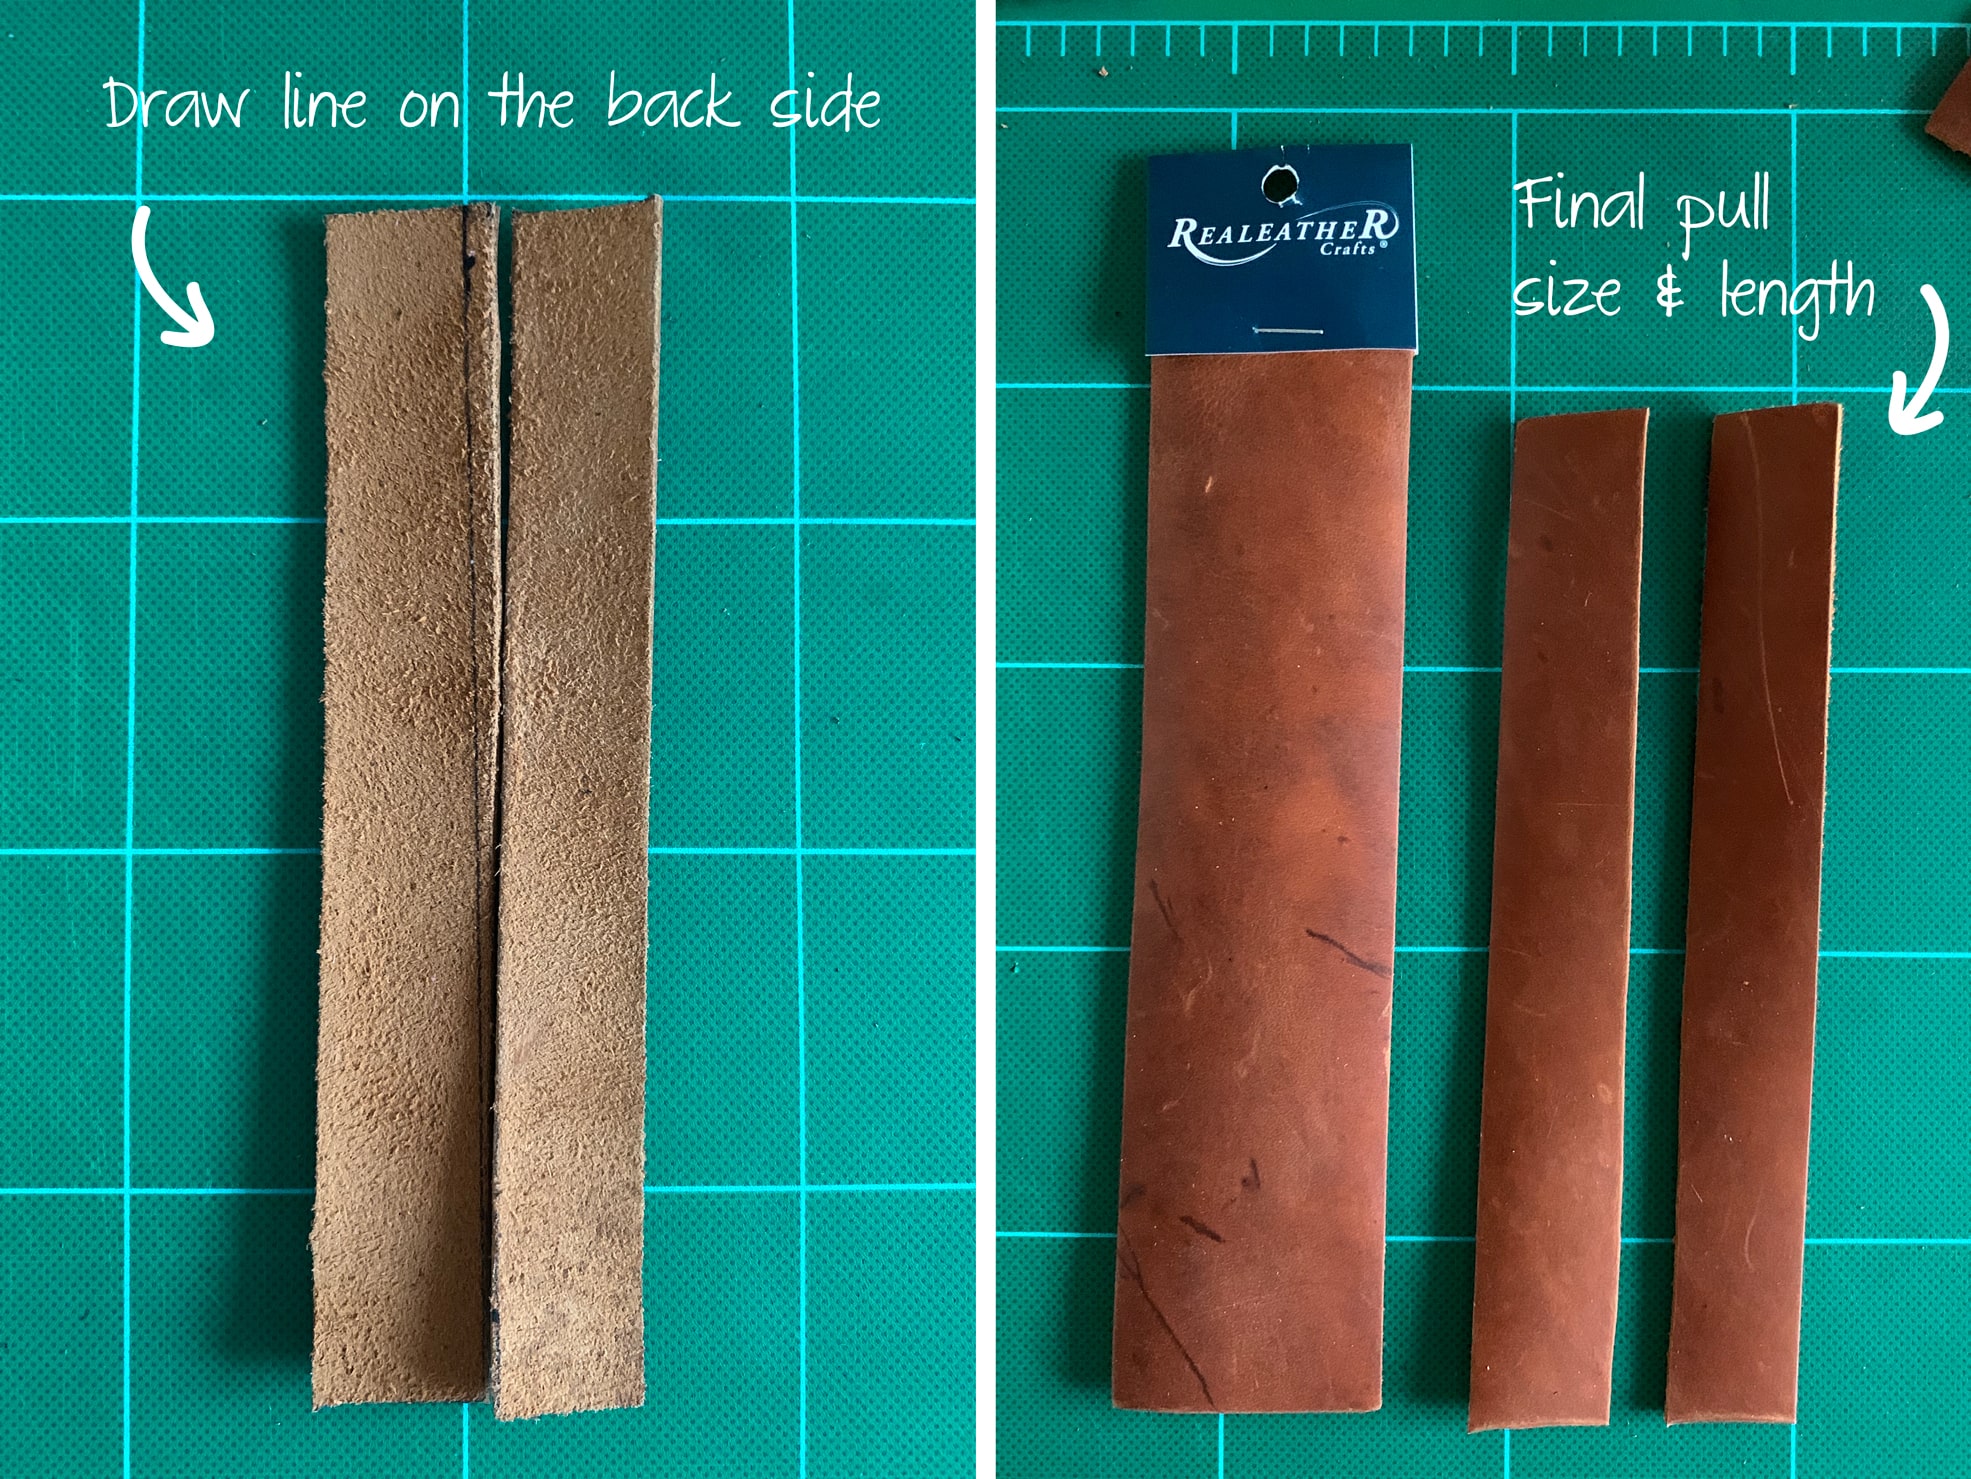
STEP 1 – MEASURE & CUT LEATHER PULL STRIPS
The first thing you want to do is determine how wide and long you want your leather pulls to be. For my leather pulls, I liked the look of a 1″ thick strip. I ended up taking the strip of leather material I bought, which was around 2″ wide and divided it in half. This ended up giving me two, 1″ in width strips. Also by doing this, I saved money without having to use more material!
Once I determined the width of the leather pull, I folded my strip to get an idea of how long the pull would be. I ended up cutting off 1″ of each strip to get the length I liked best. You can determine the length based on your preference!
STEP 2 – CREATE HOLES IN THE LEATHER STRIPS
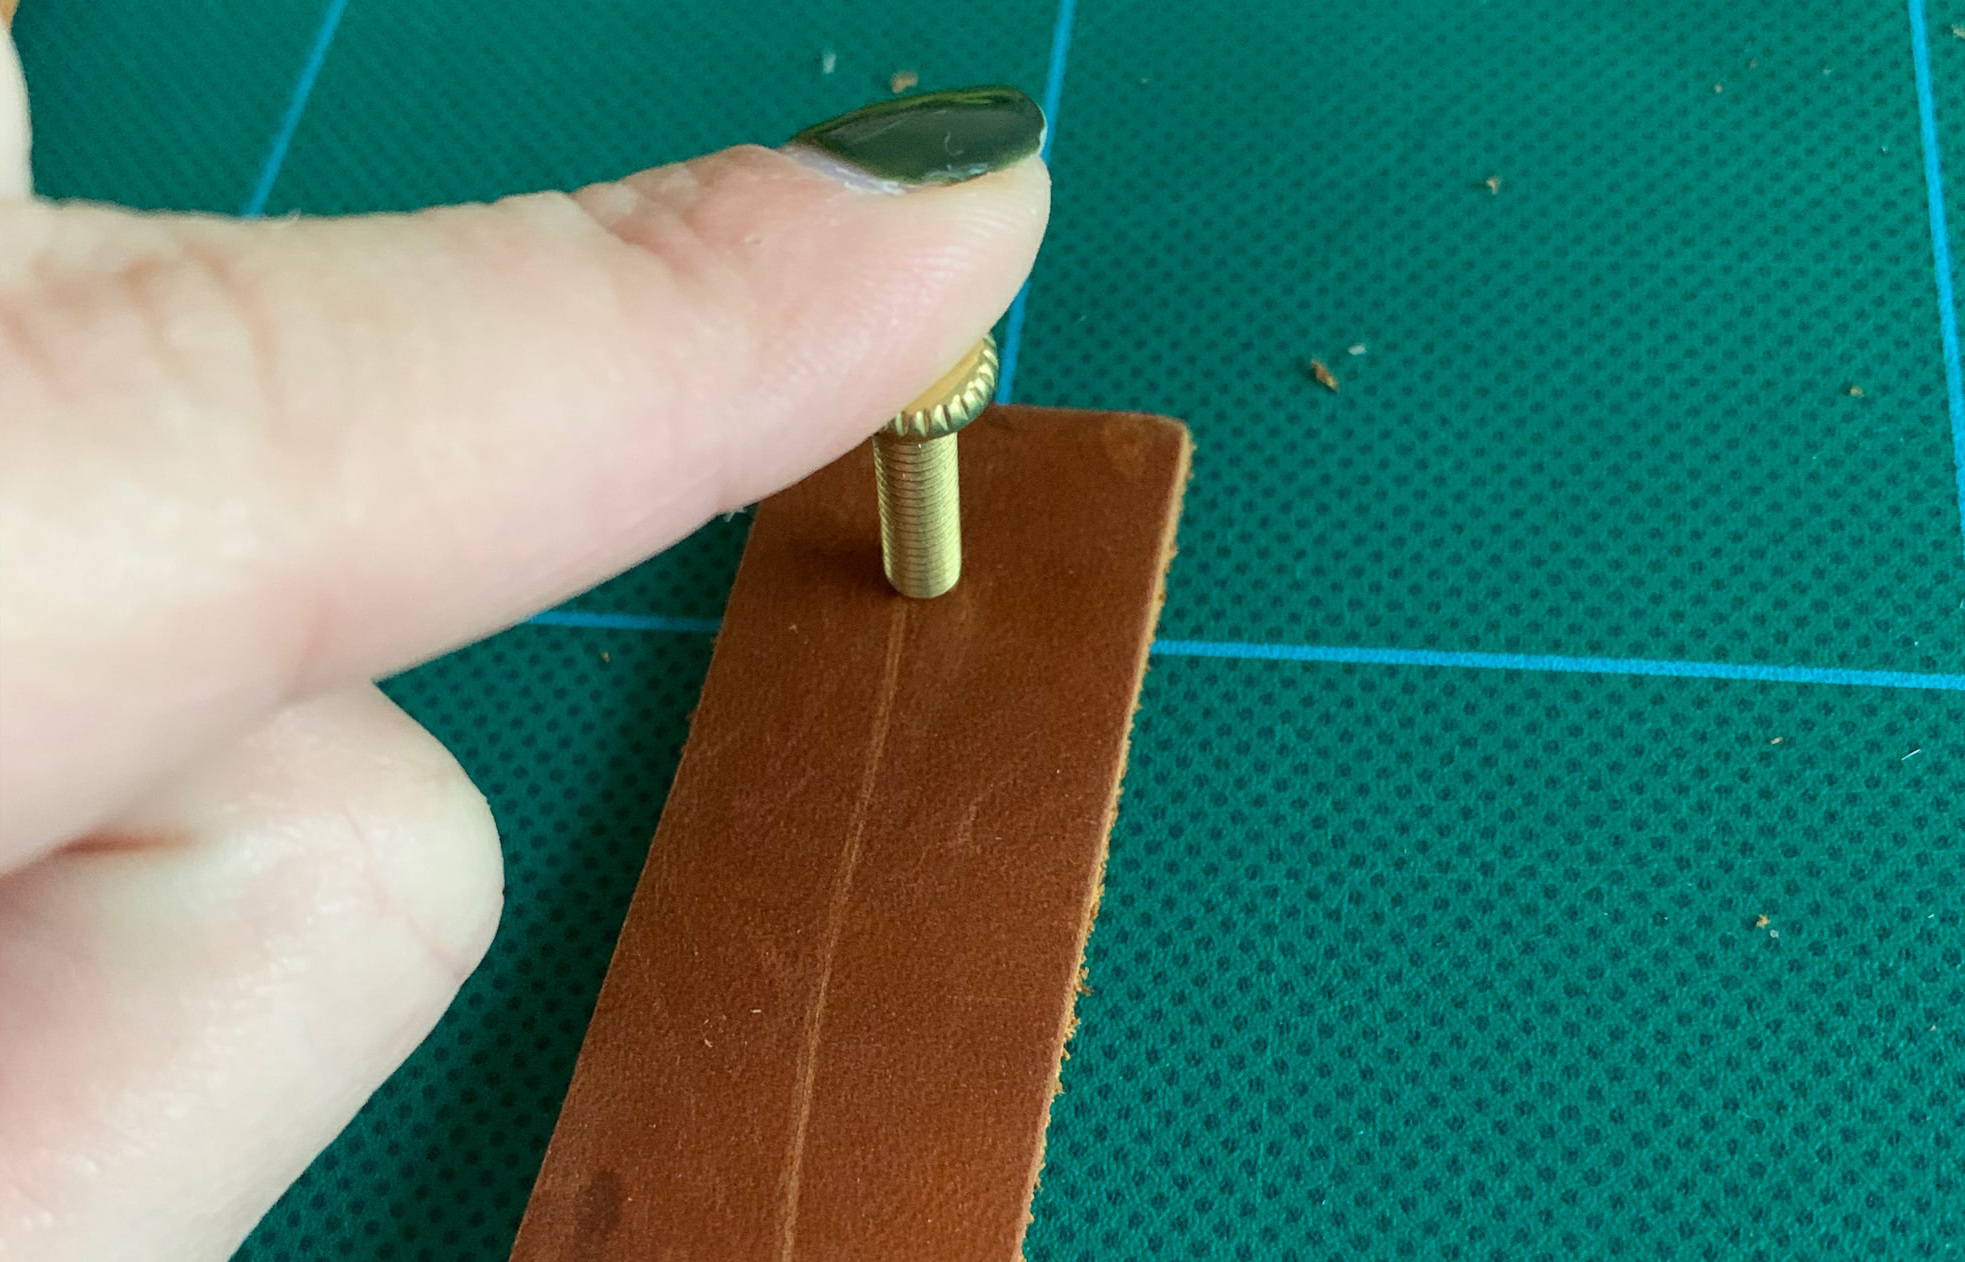
Since I was adding these leather pulls to fabric storage bins, I needed a screw and nut. So the next step is to determine where you want to put the screw at on the pull. I ended up putting the screw about 1/2″ down from the top of the pull and then centered. Again, this is based on your preference. 🙂
First, put the screw on the leather piece to see where you want it to line up. Once you find your spot, push down on the screw to leave a mark on the leather. Then, take your hammer and lightly tap the head of the screw so you start your indentation of where you will cut your hole.
This is where the awl tool will come in handy. If you have one of these, this is the tool you’ll use to create your hole for the screw.
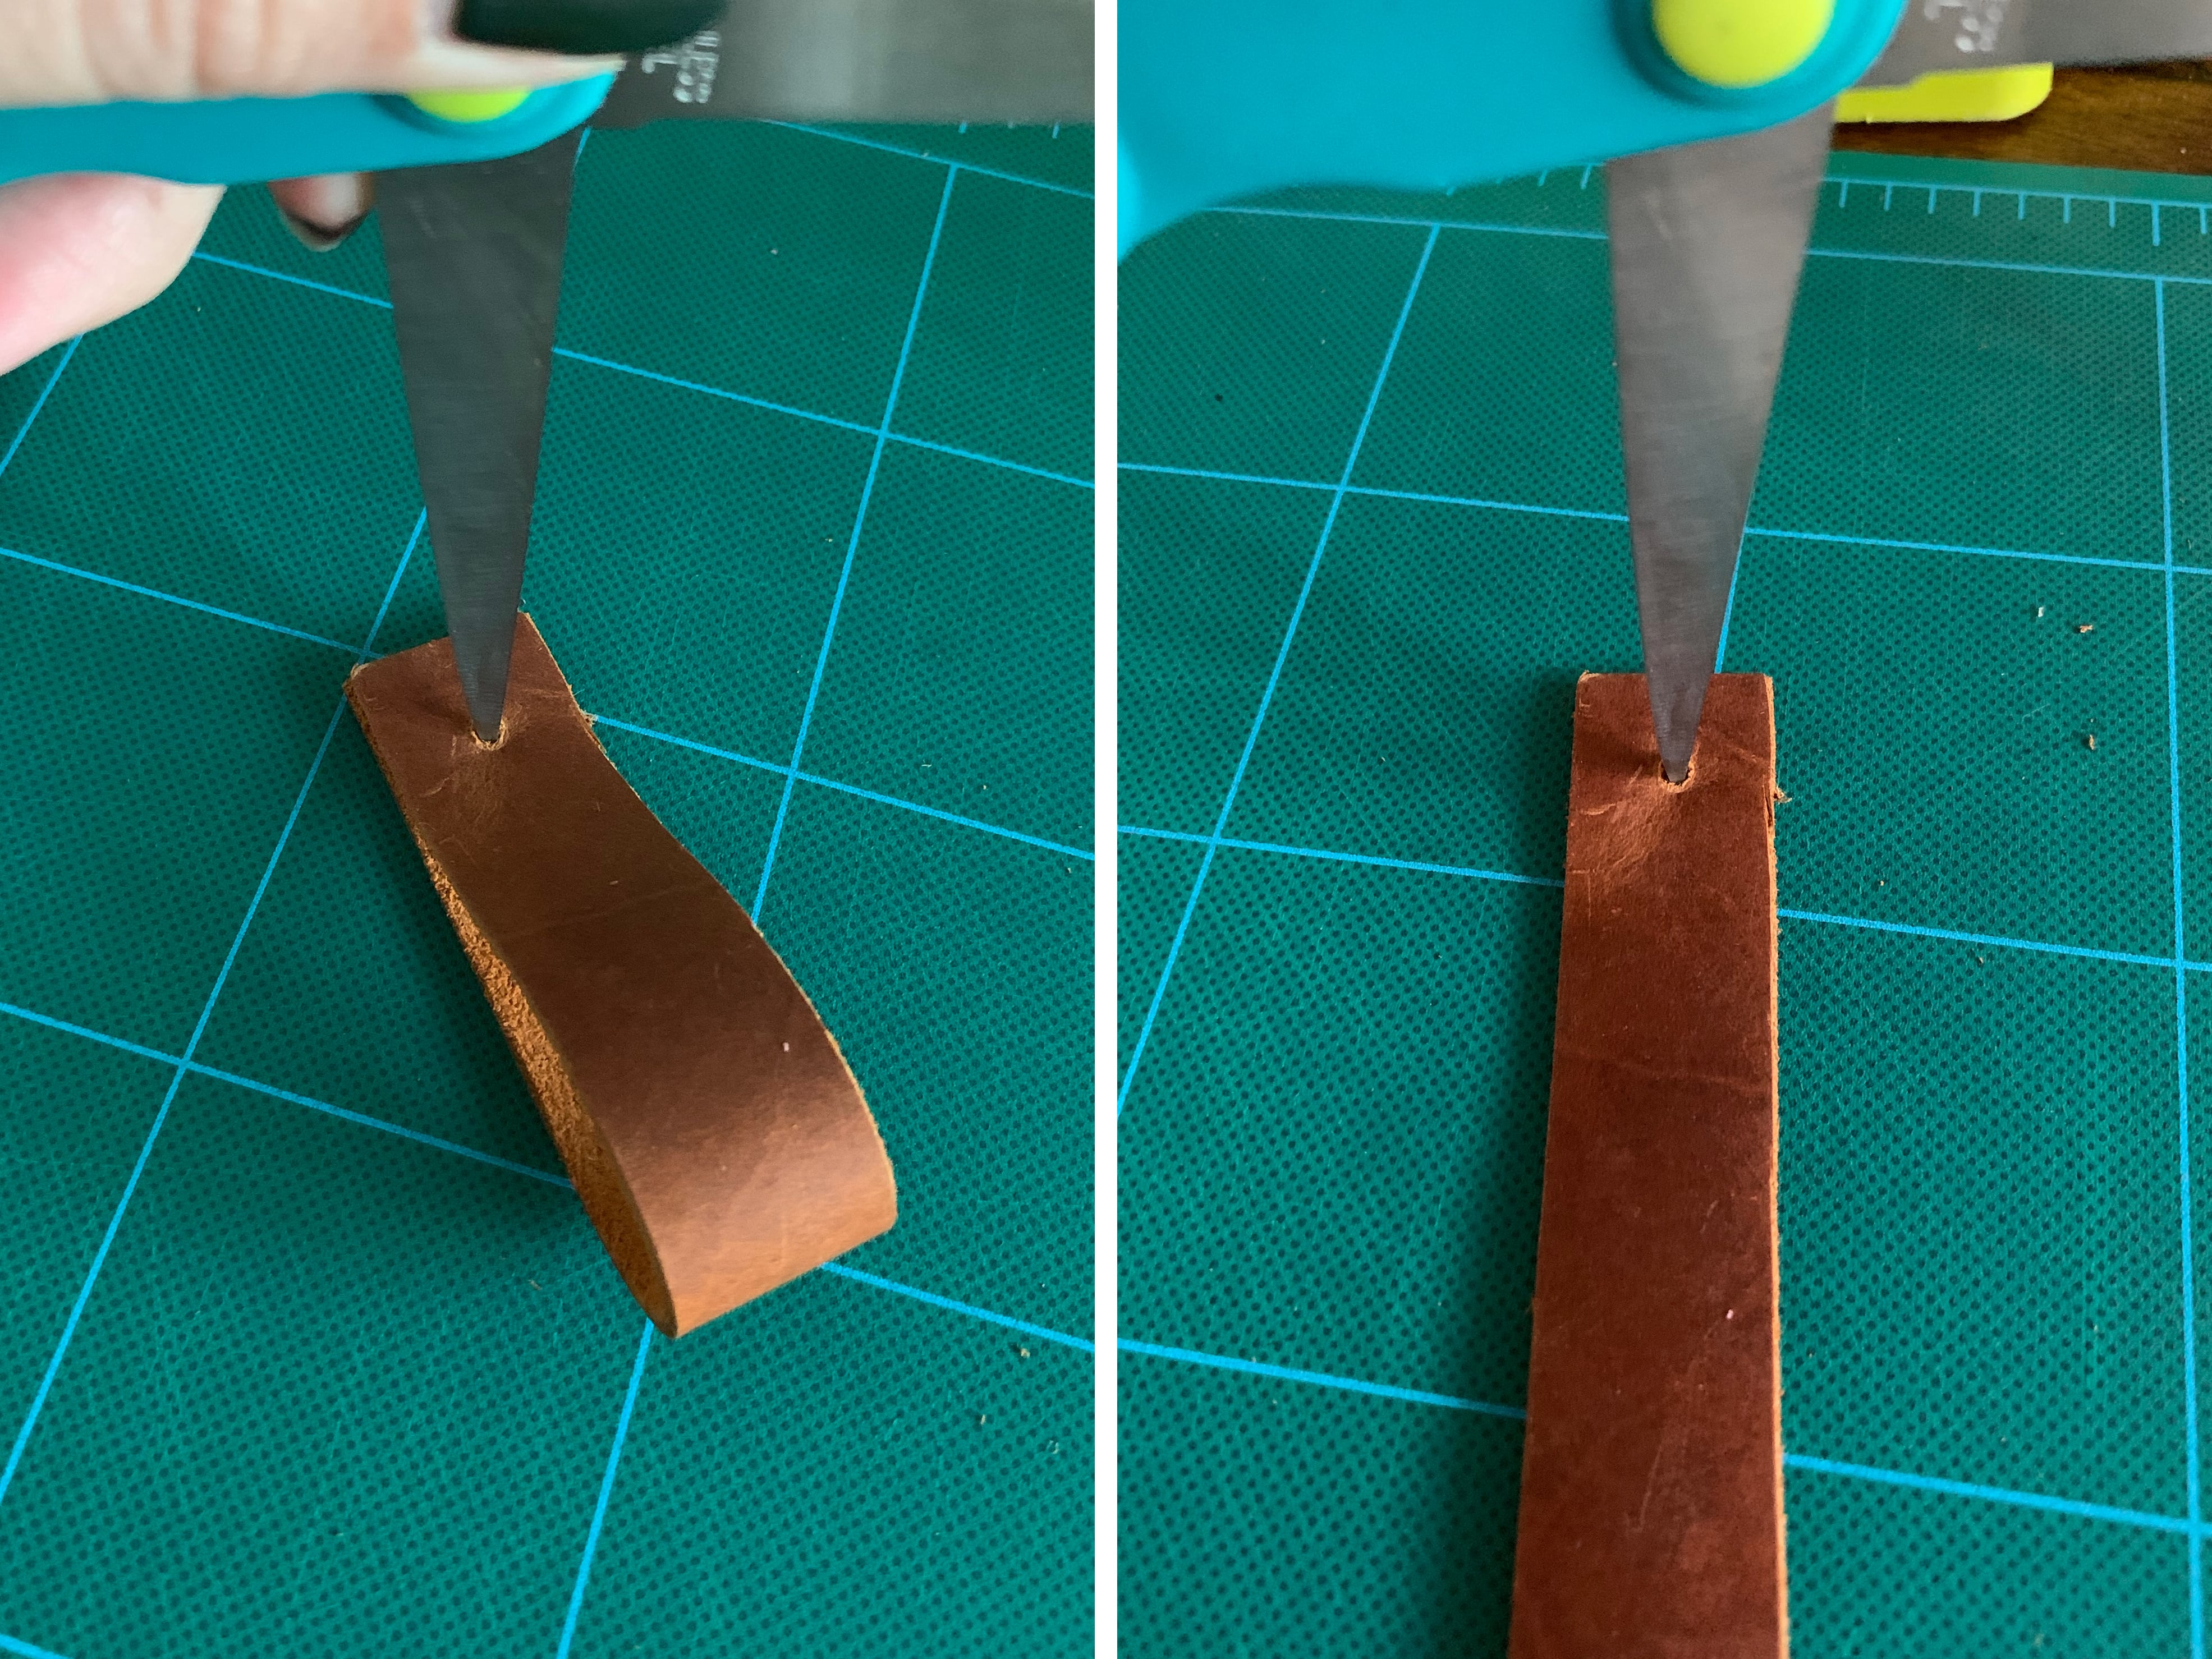
If you do not have an awl tool, then grab your scissors (sharp scissors will be very helpful!) and create your hole! I folded the leather piece and then used my scissors to make the hole. Folding the leather while creating the hole, assures that each hole will line up perfectly. All I did was twist into the leather strip until I got through the other side.
You should continue to twist as you go, to make sure the hole gets bigger. Once the hole in the leather piece is big enough, it’s time to add the screws!
Also, as I am writing this blog post, I am just realizing you could use a drill and drill bit to create your hole! I don’t really know why I didn’t think of that while I made these (LOL). However, if you don’t have access to a drill and drill bit, I can vouch for using scissors – it does work!
note – Make sure your hole isn’t too big! You don’t want the leather pull to move around the screw hole because you made it too big. It should definitely be a snug fit.
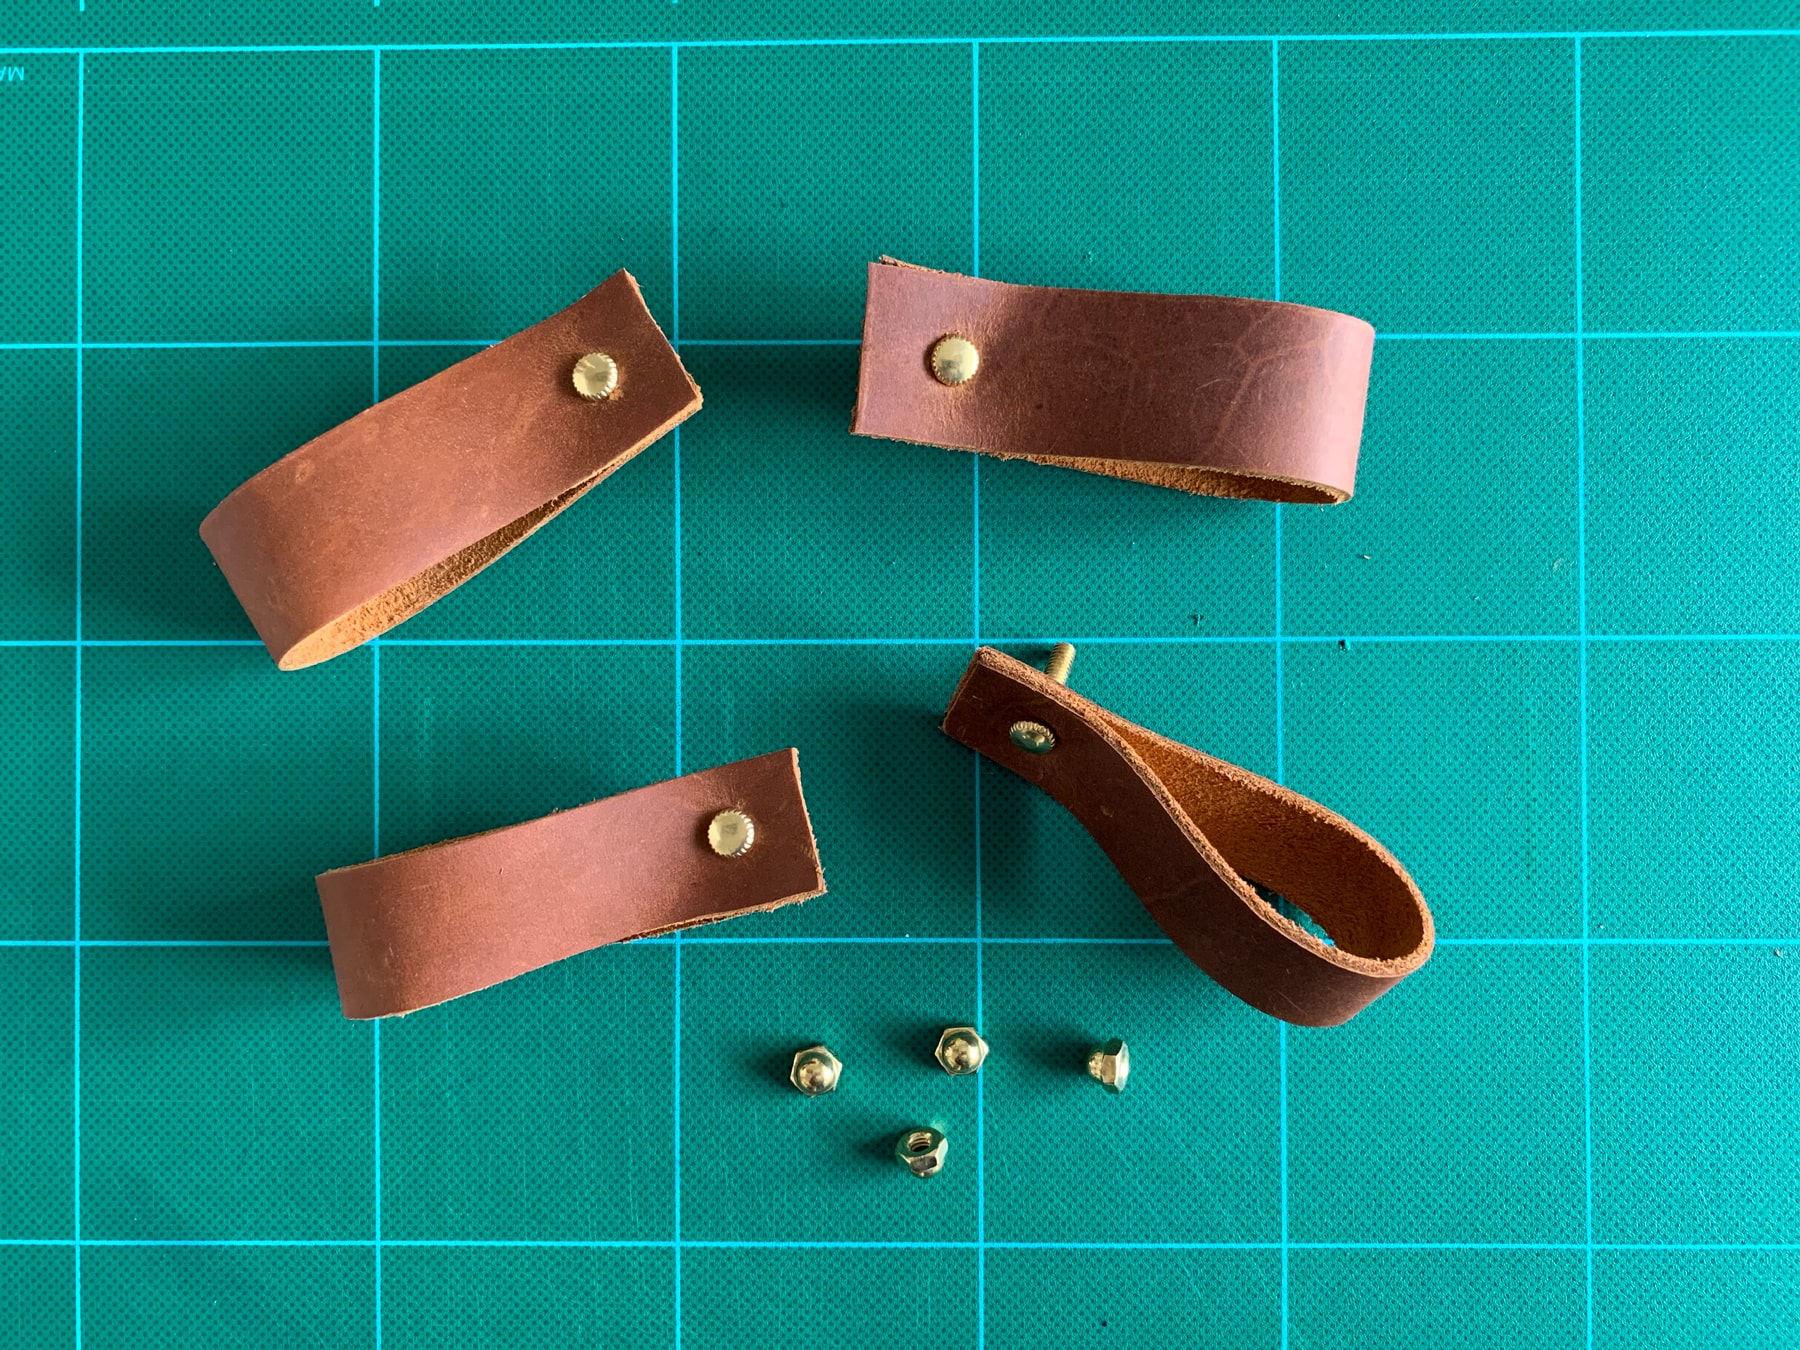
STEP 3 – ADD SCREWS TO THE LEATHER PULLS
When adding the screws to your leather pull, it should be a snug fit, so it might be a little difficult to push through. It’s best to wiggle it a little bit as you’re putting it through the leather strip.
If you do find yourself struggling to get the screw through, no worries! Just grab your scissors and make your hole a little bit bigger!
STEP 4 – ADD LEATHER PULLS TO STORAGE BINS
If you’re going to add these leather pulls to a storage bin as I did, then this step is for you! If you’re not, then actually you’ve completed your leather pulls (yay!) 😀
The fabric storage bins I purchased came with a fabric handle on the front side. I left those on and added these pull handles to the backside of the bins. Essentially, the backside of the storage bin will now be the front side – with the leather pulls 🙂
The first thing you want to do is make a mark on your storage bin where you want to add your pull. I went about 2″ down from the top of the bin, to the center of the screw.
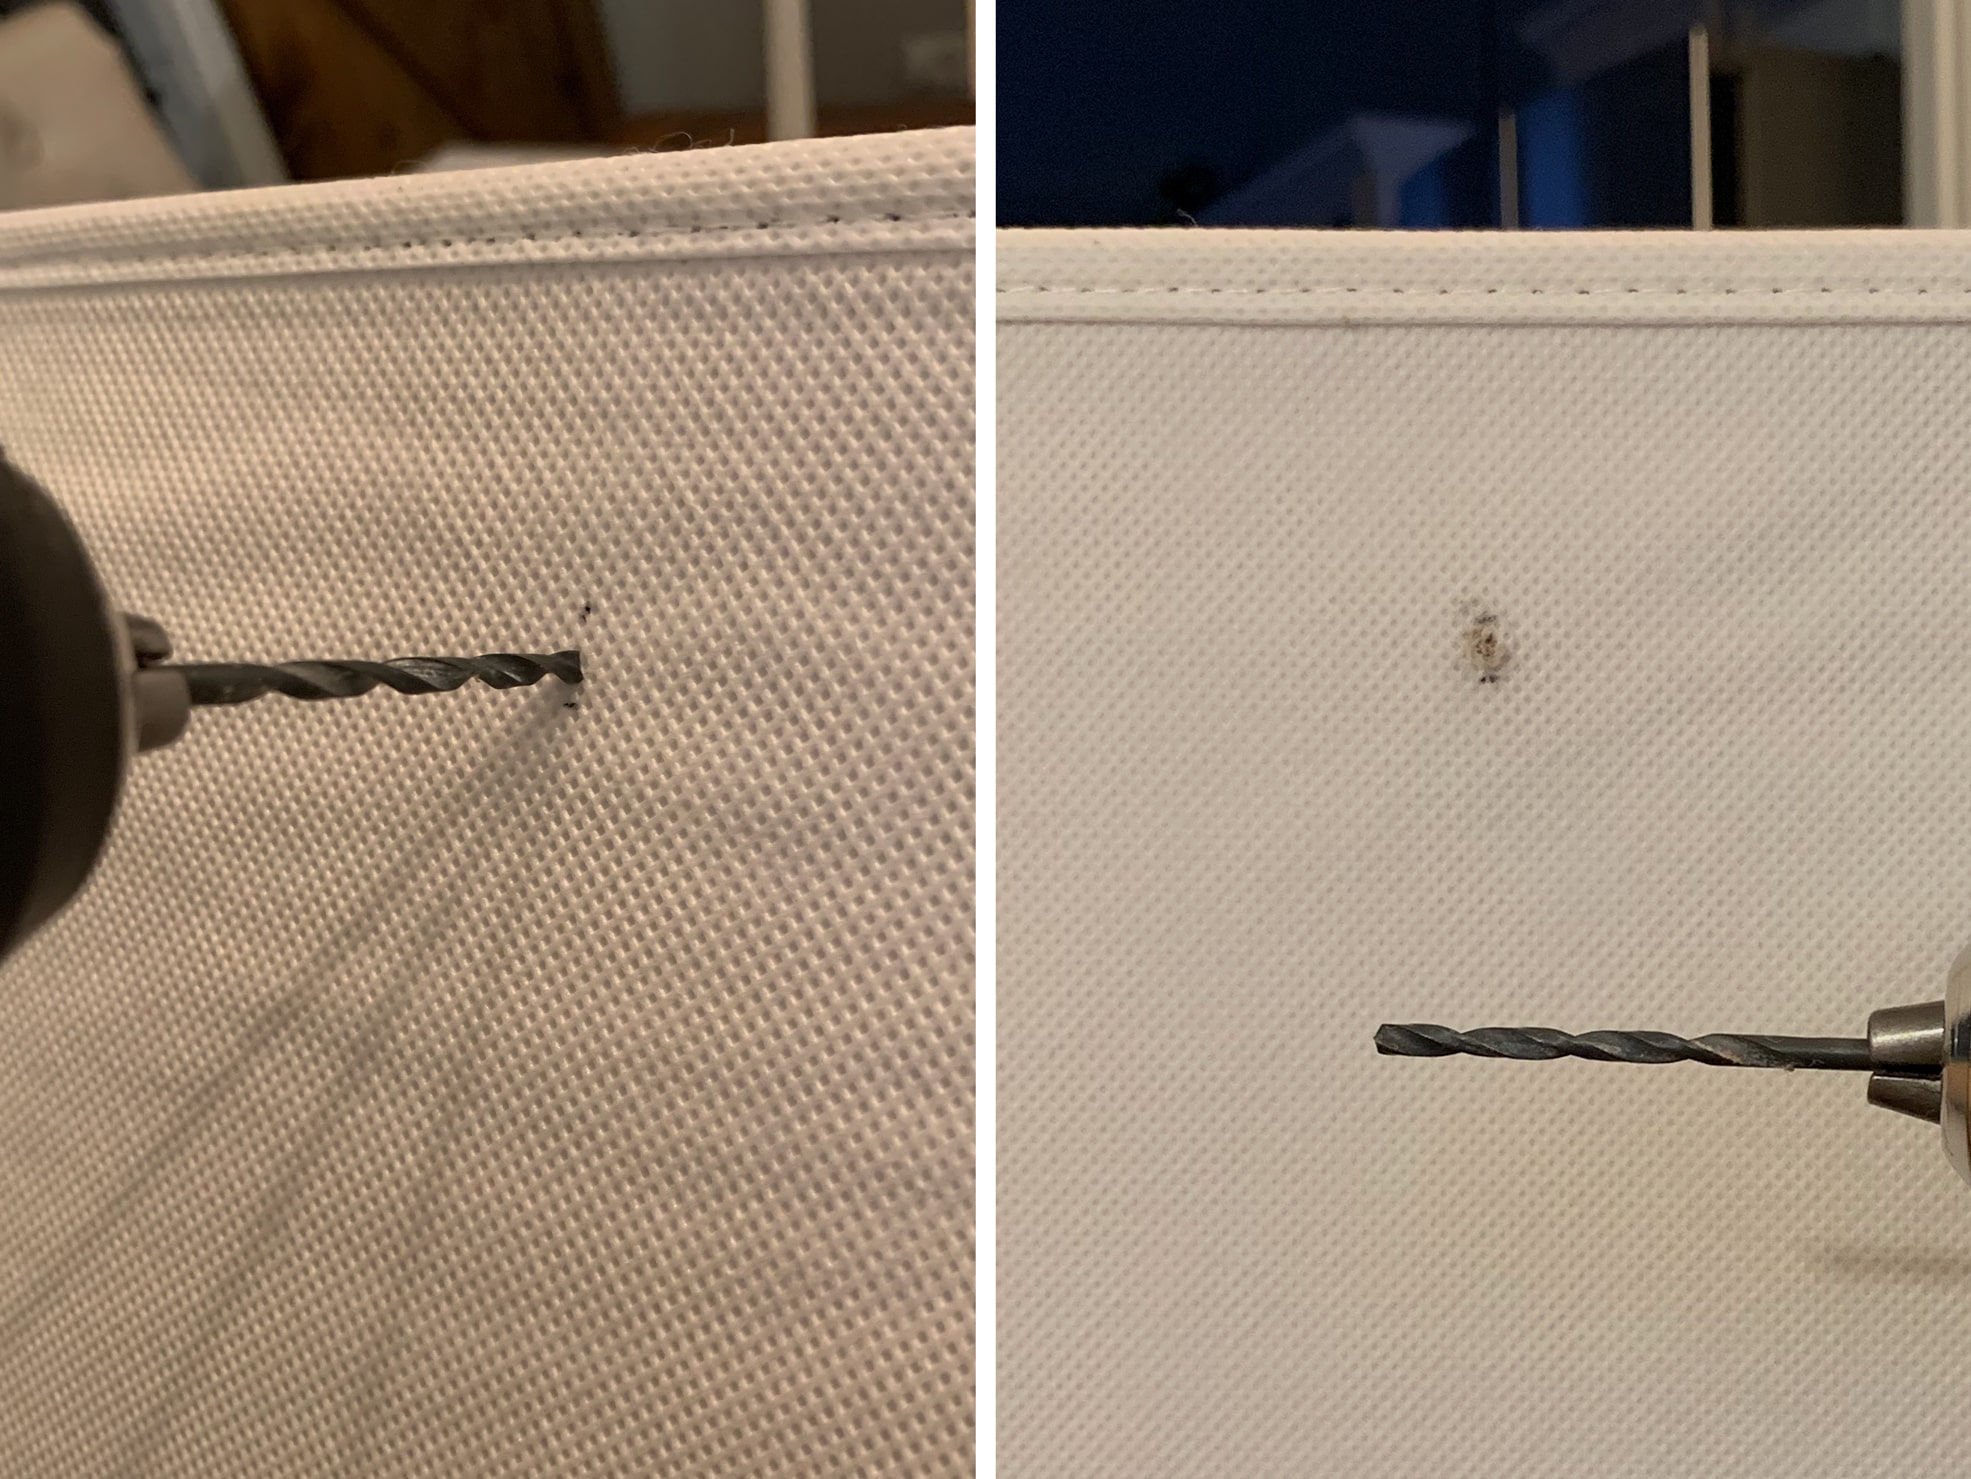
Since the fabric storage bin is made out of a thin, cardboard-like material, it was a breeze to use a drill and drill bit to create the hole on the bin. If you don’t have access to a drill or drill bit, you could also use a box knife, or scissors to poke a hole through the storage bin – just watch your fingers!
When using a drill and drill bit, make sure your drill bit is smaller in size than the screw itself. You don’t want the screw to have any wiggle room in the hole you create in the storage bin.
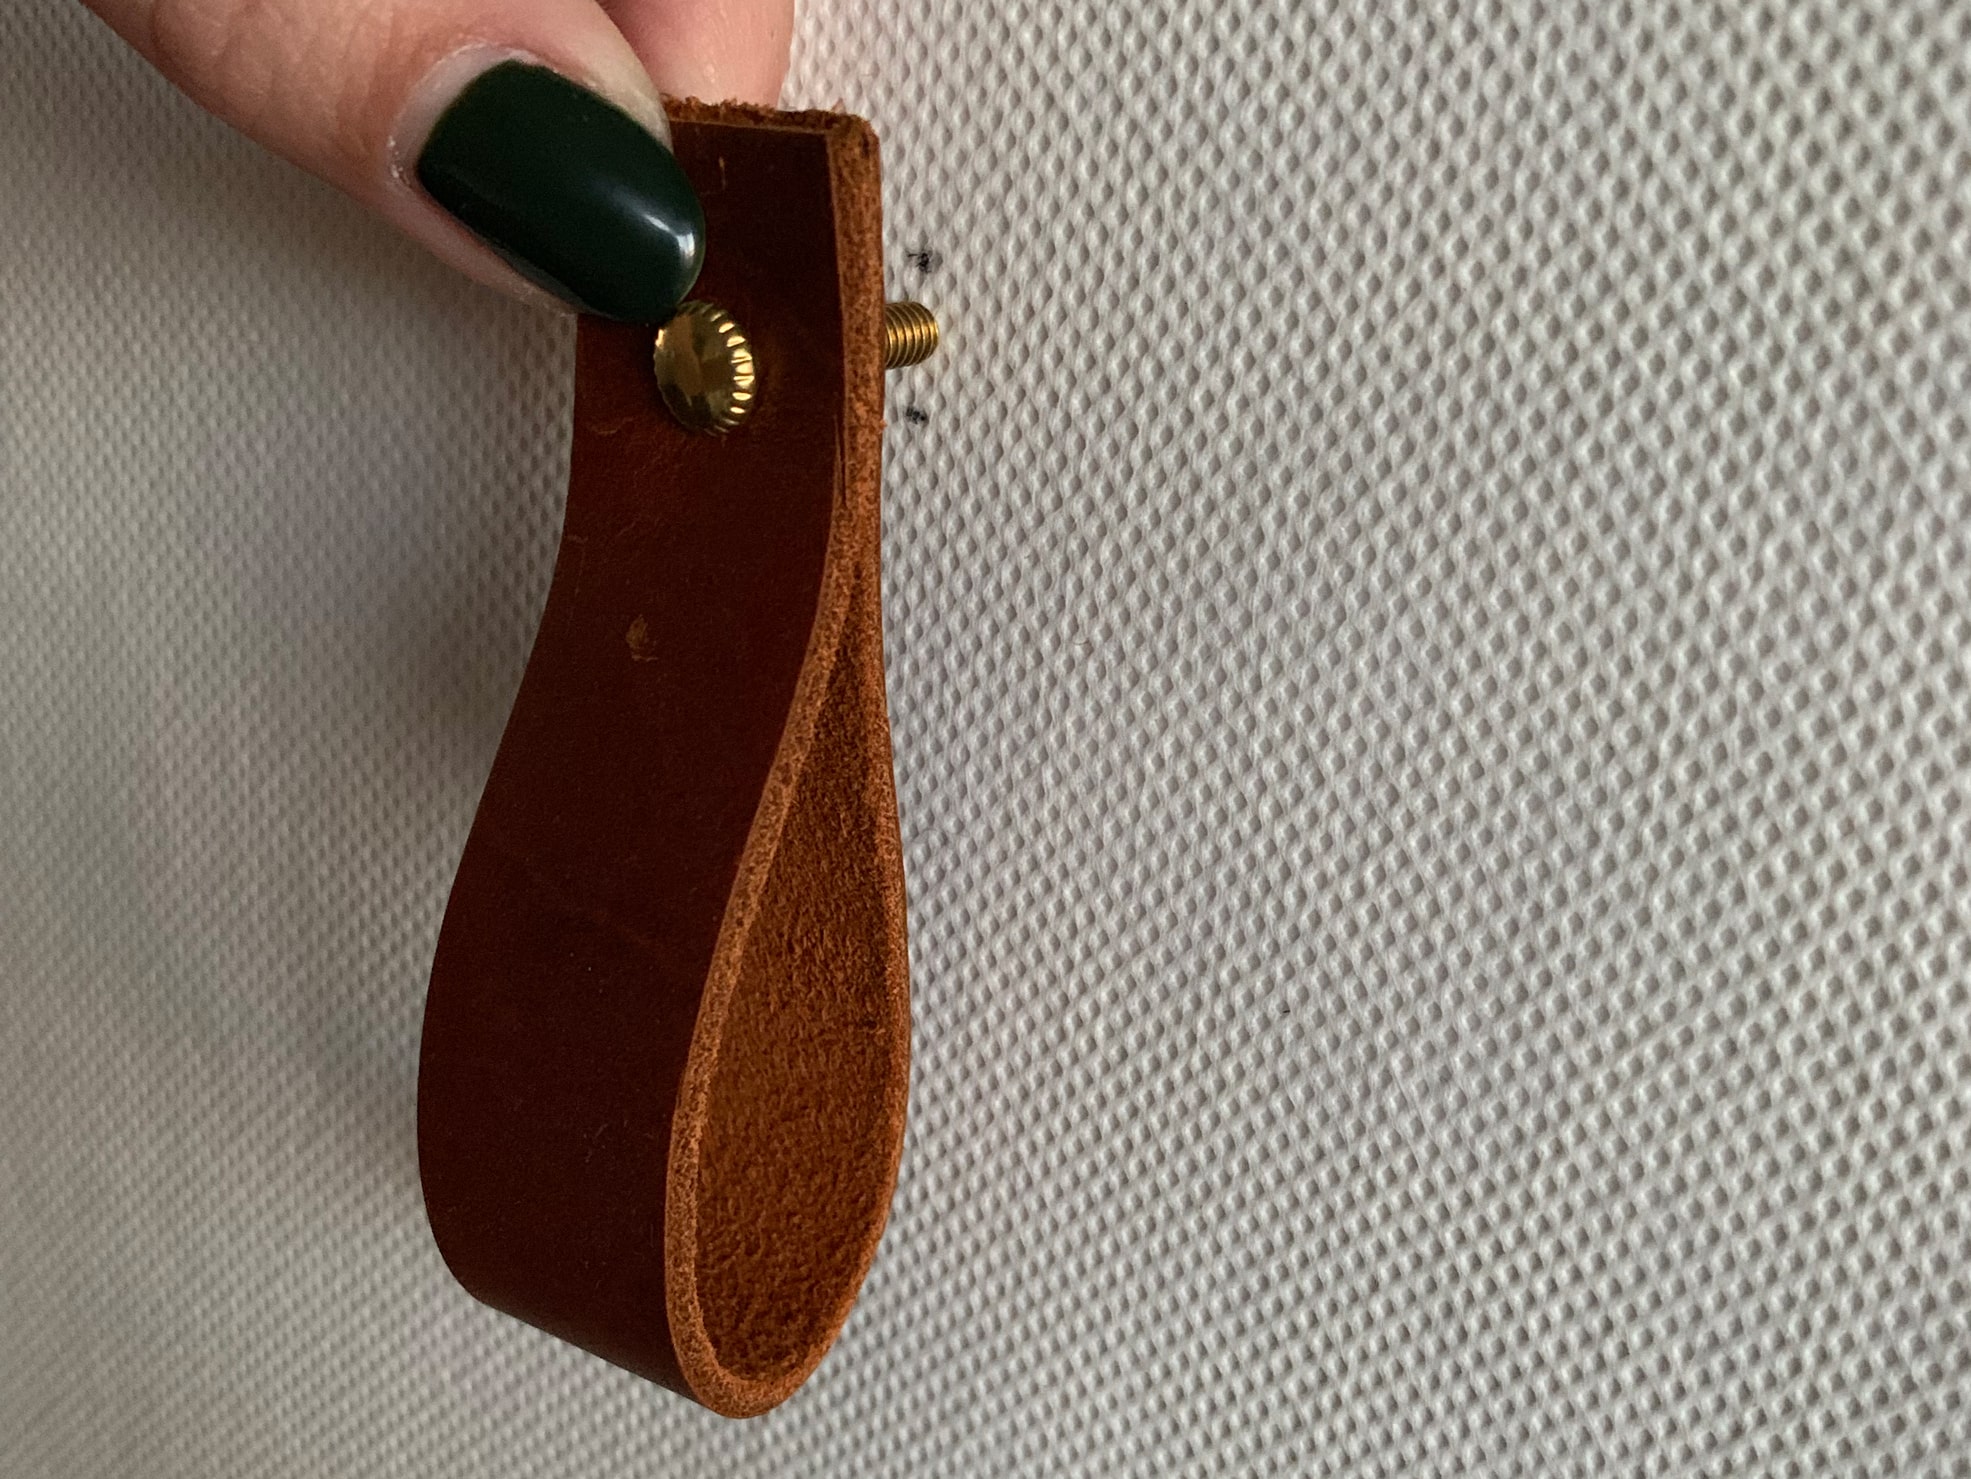
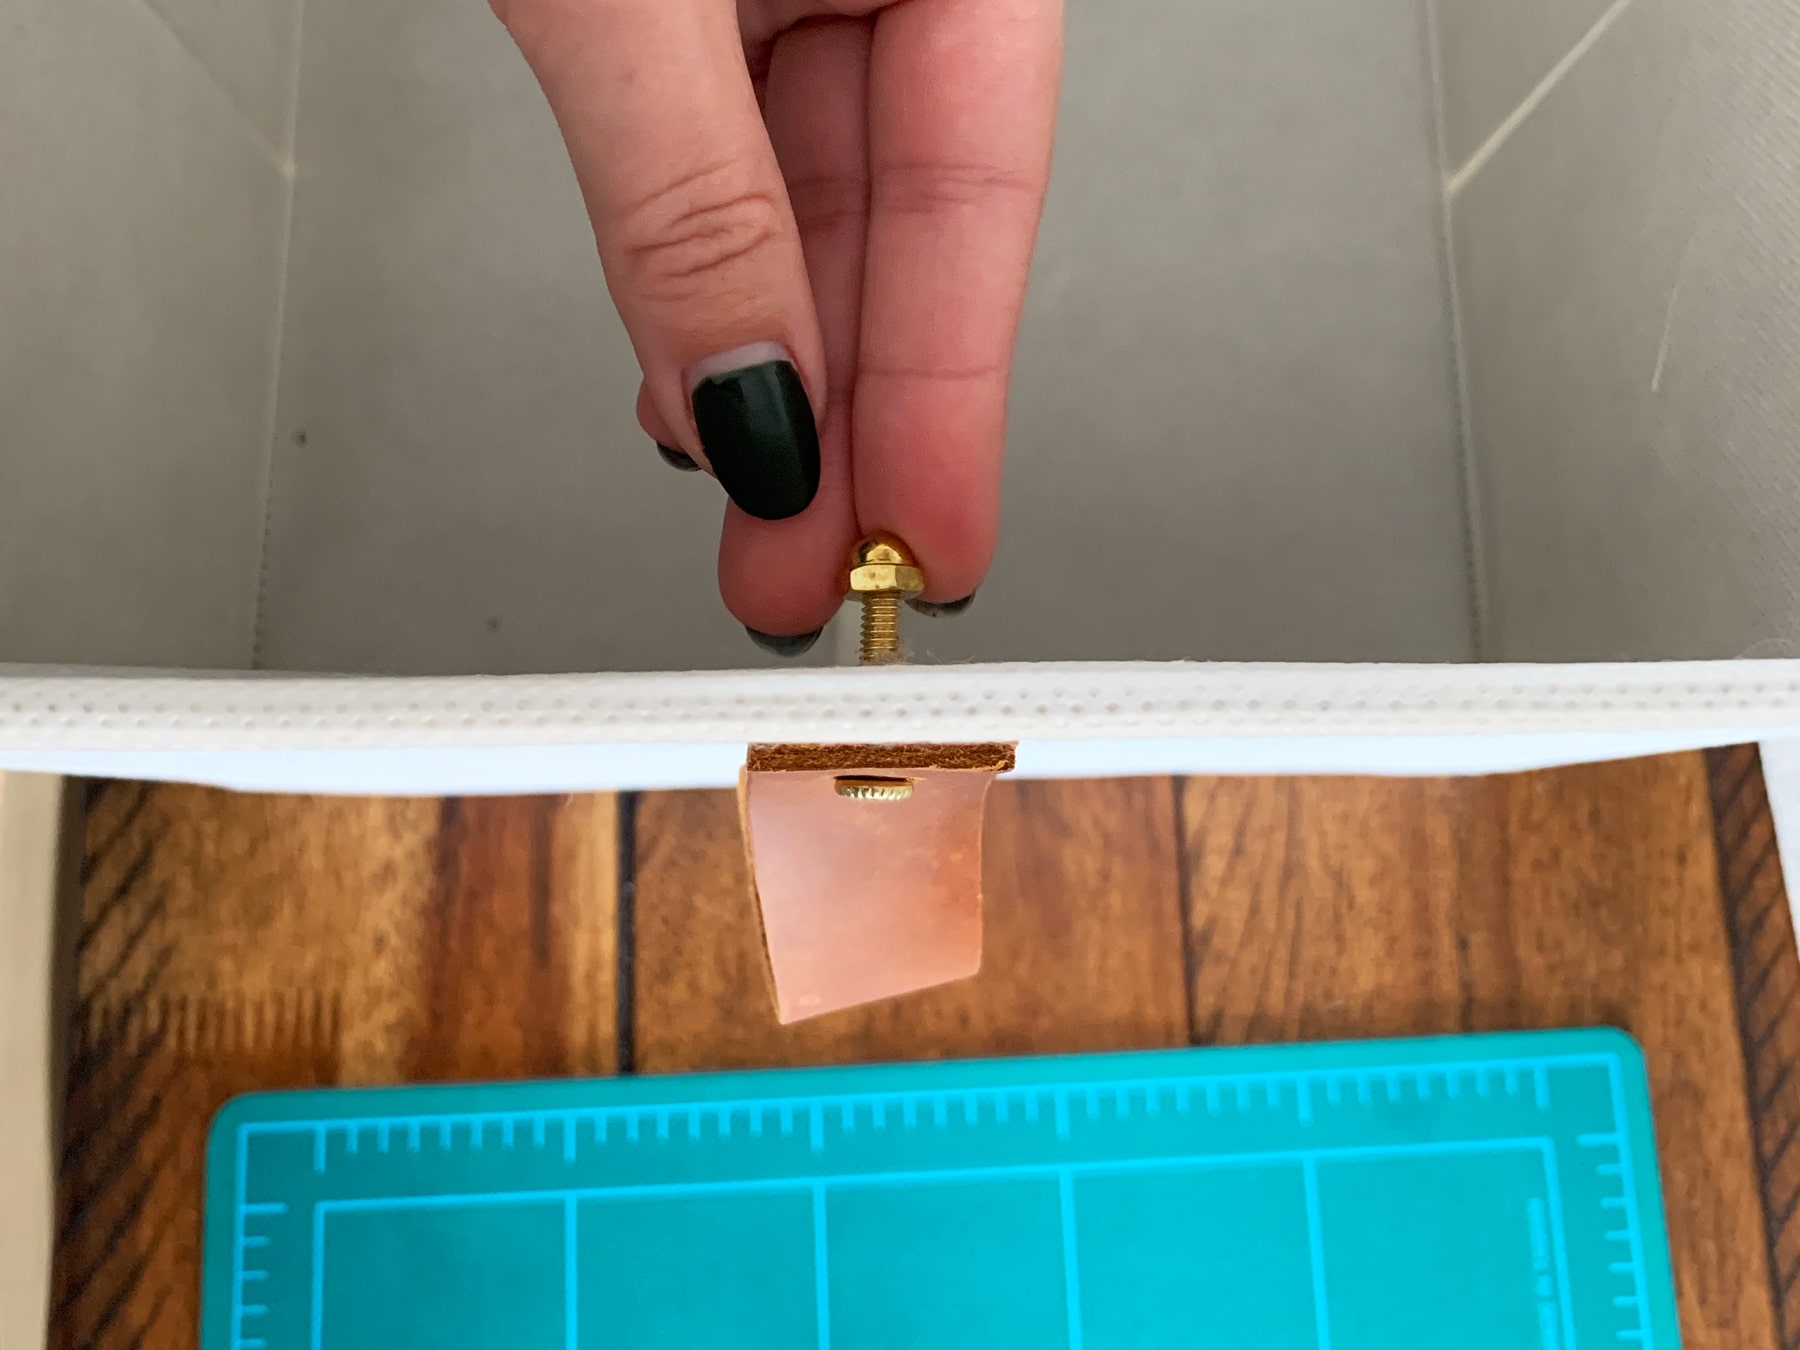
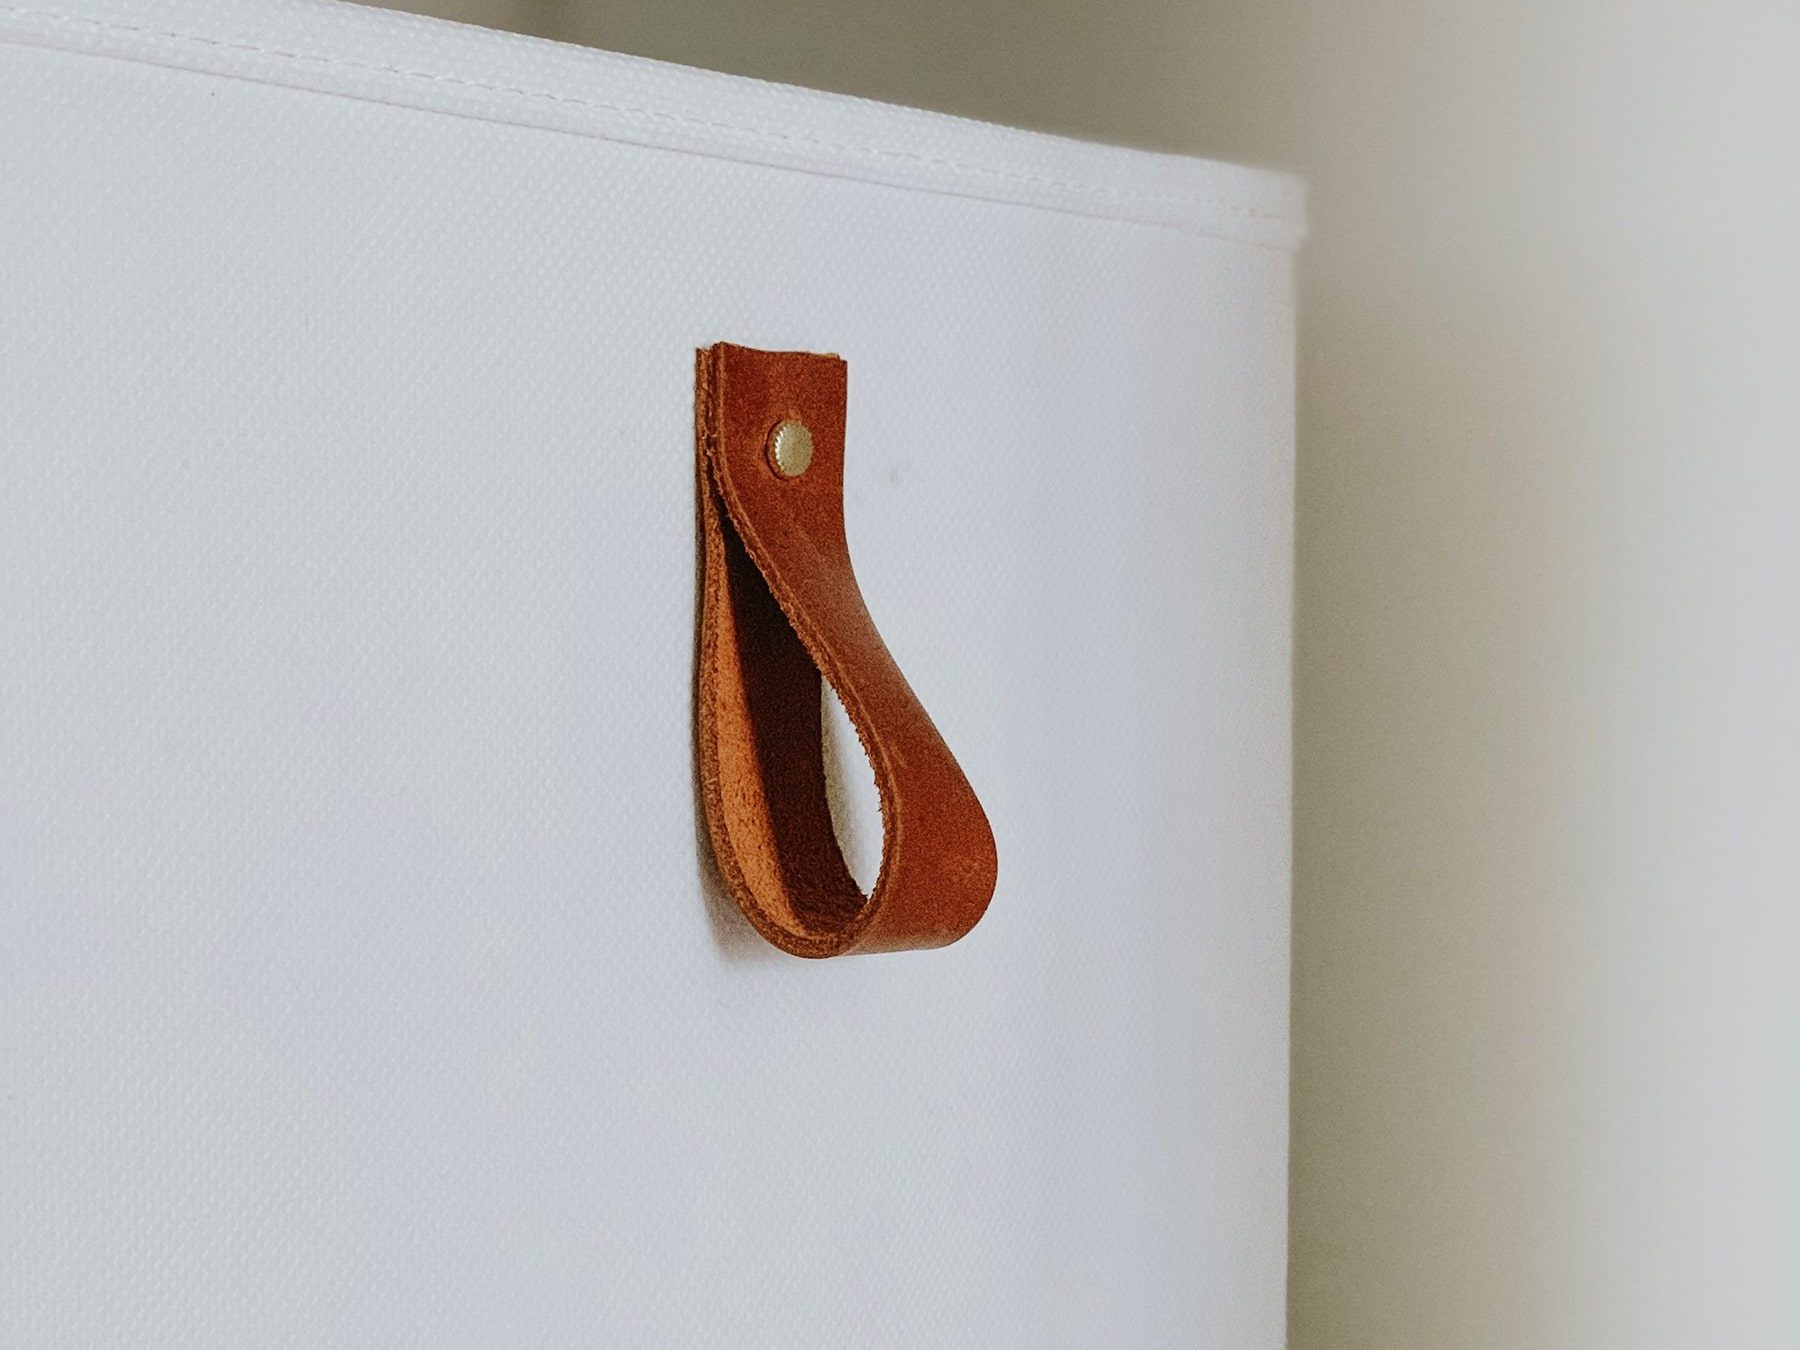
Once you’ve made your hole in the storage bin, grab your leather pull and just push the screw through the hole! Then, take your nut and tighten it onto the screw end that is on the inside of the storage bin.
THAT’S IT!
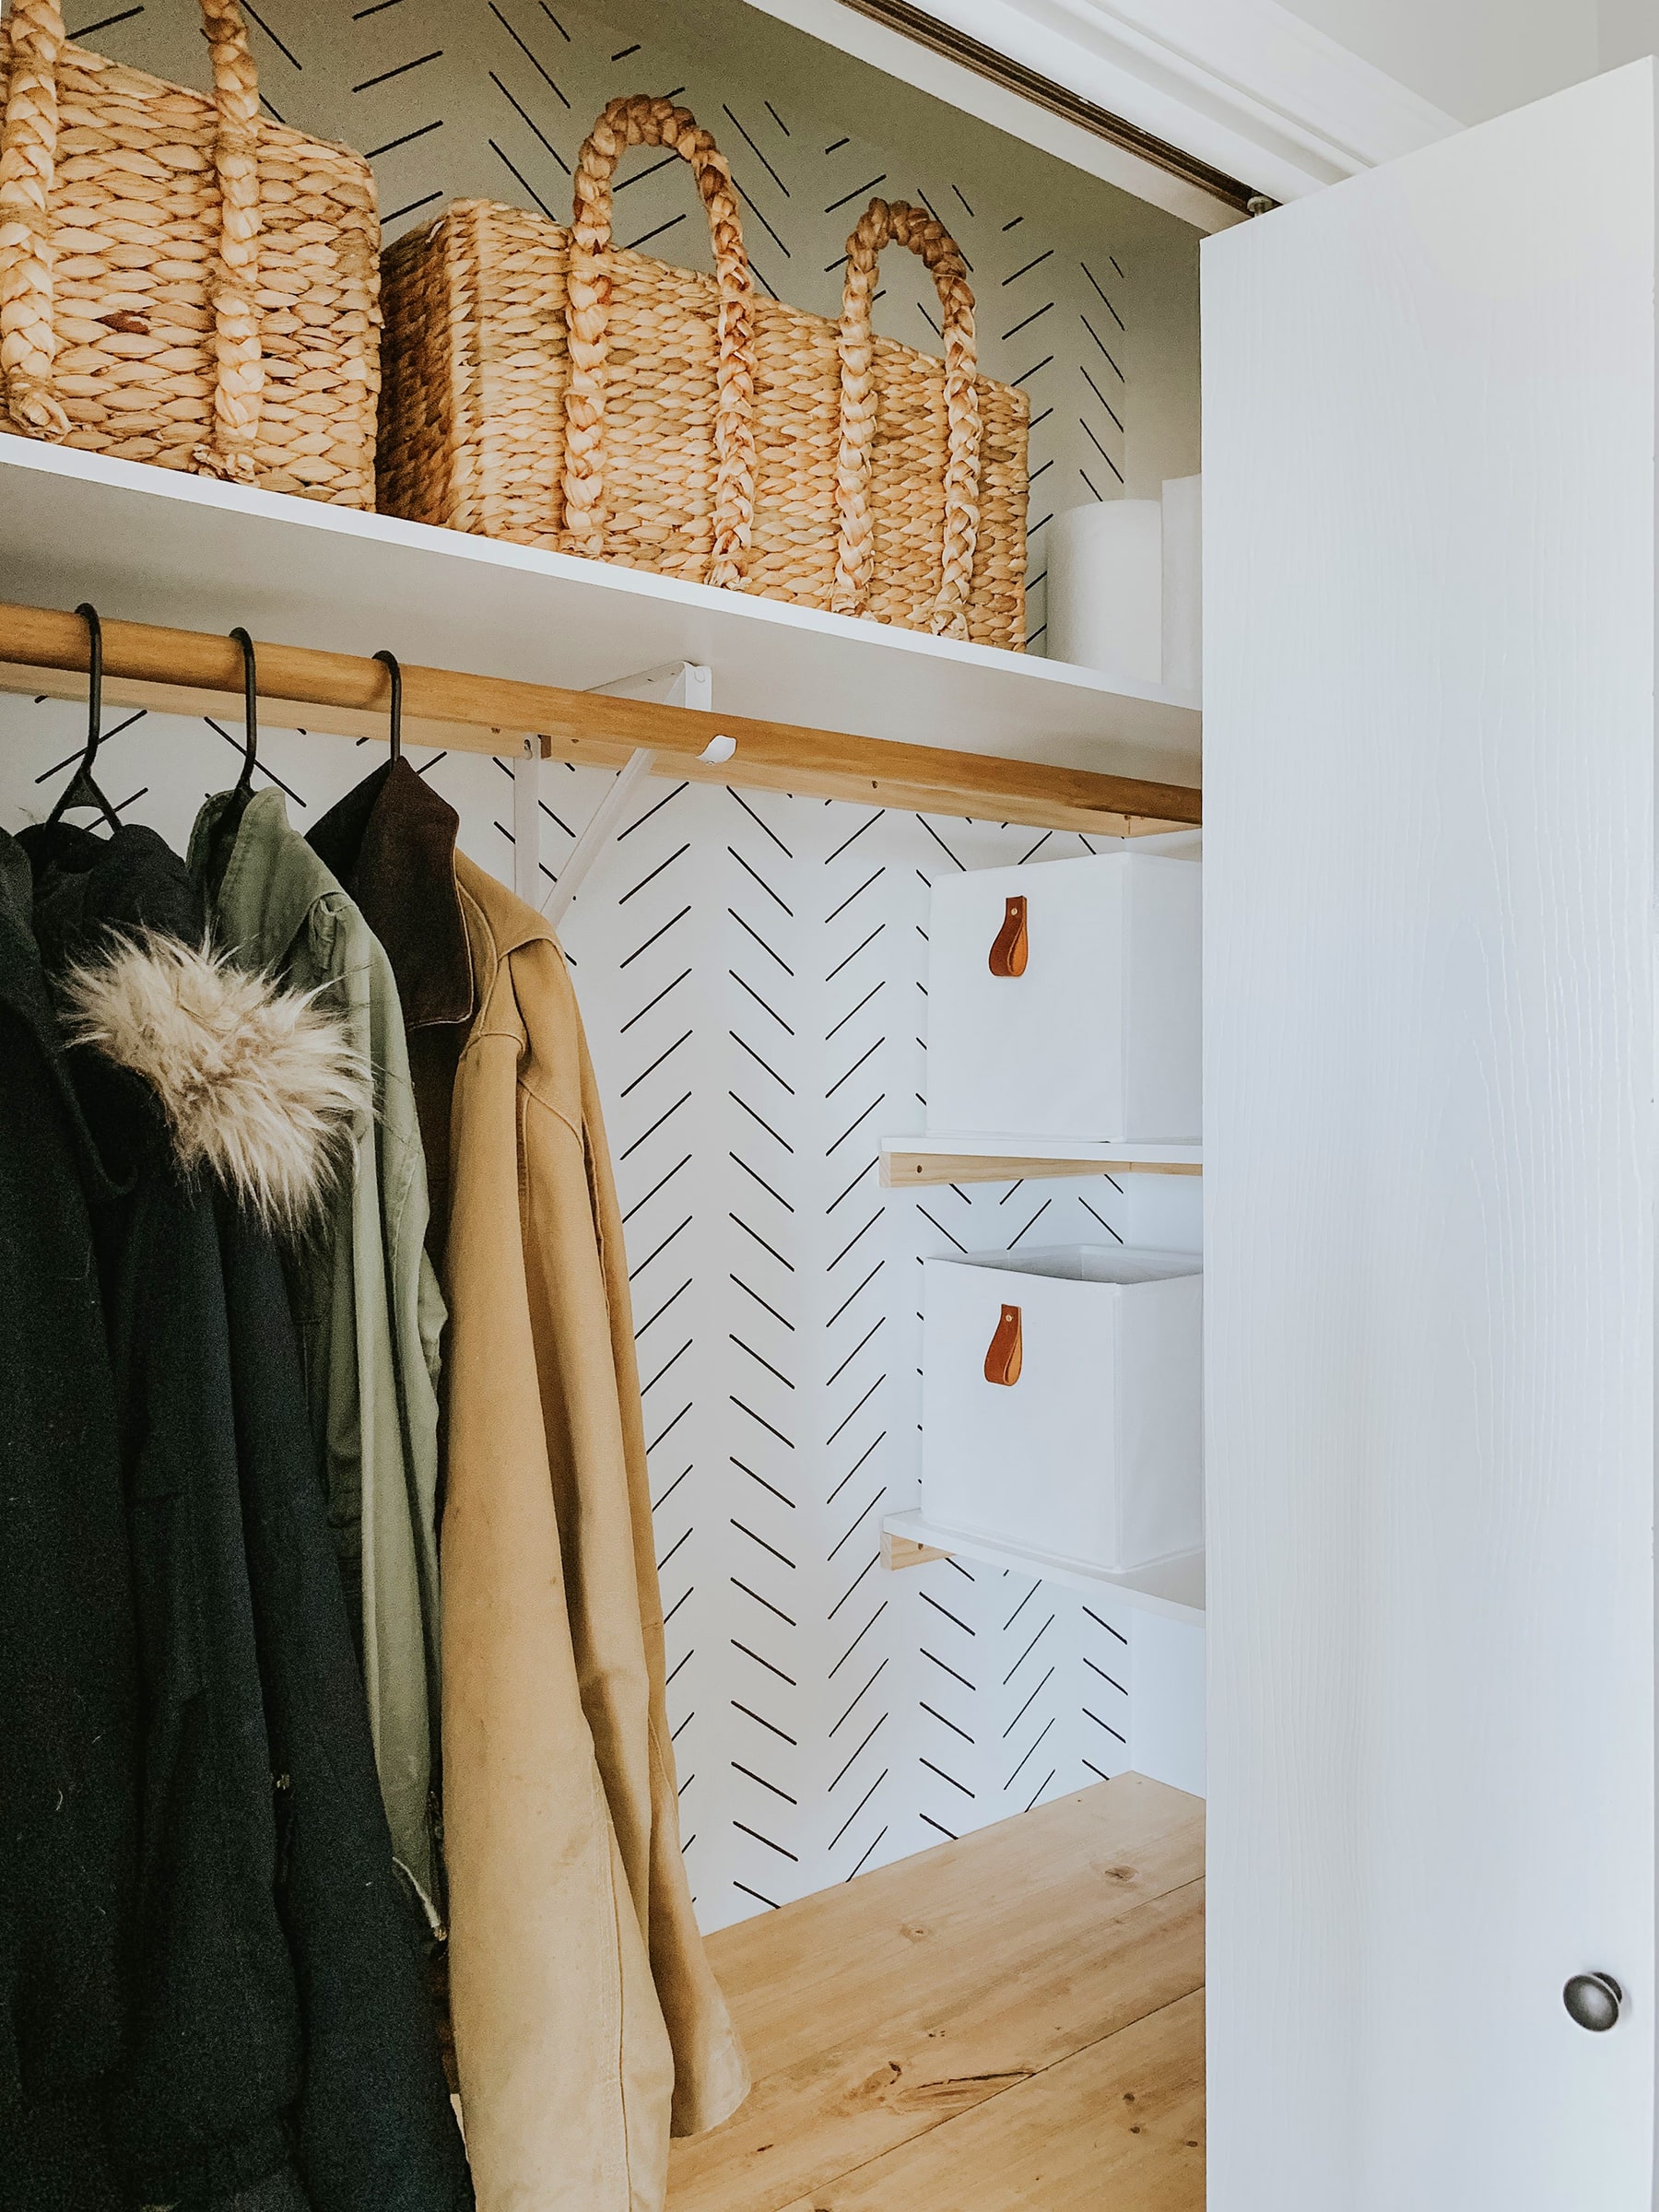
Gah! These leather pulls are definitely the perfect little touch for this space! Also, I’m still in awe with the herringbone pattern I created by just using a stencil and a sharpie paint pen (yep – that’s right!). If you’re wanting to do something similar in your own space, we have this stencil available in our Etsy shop!
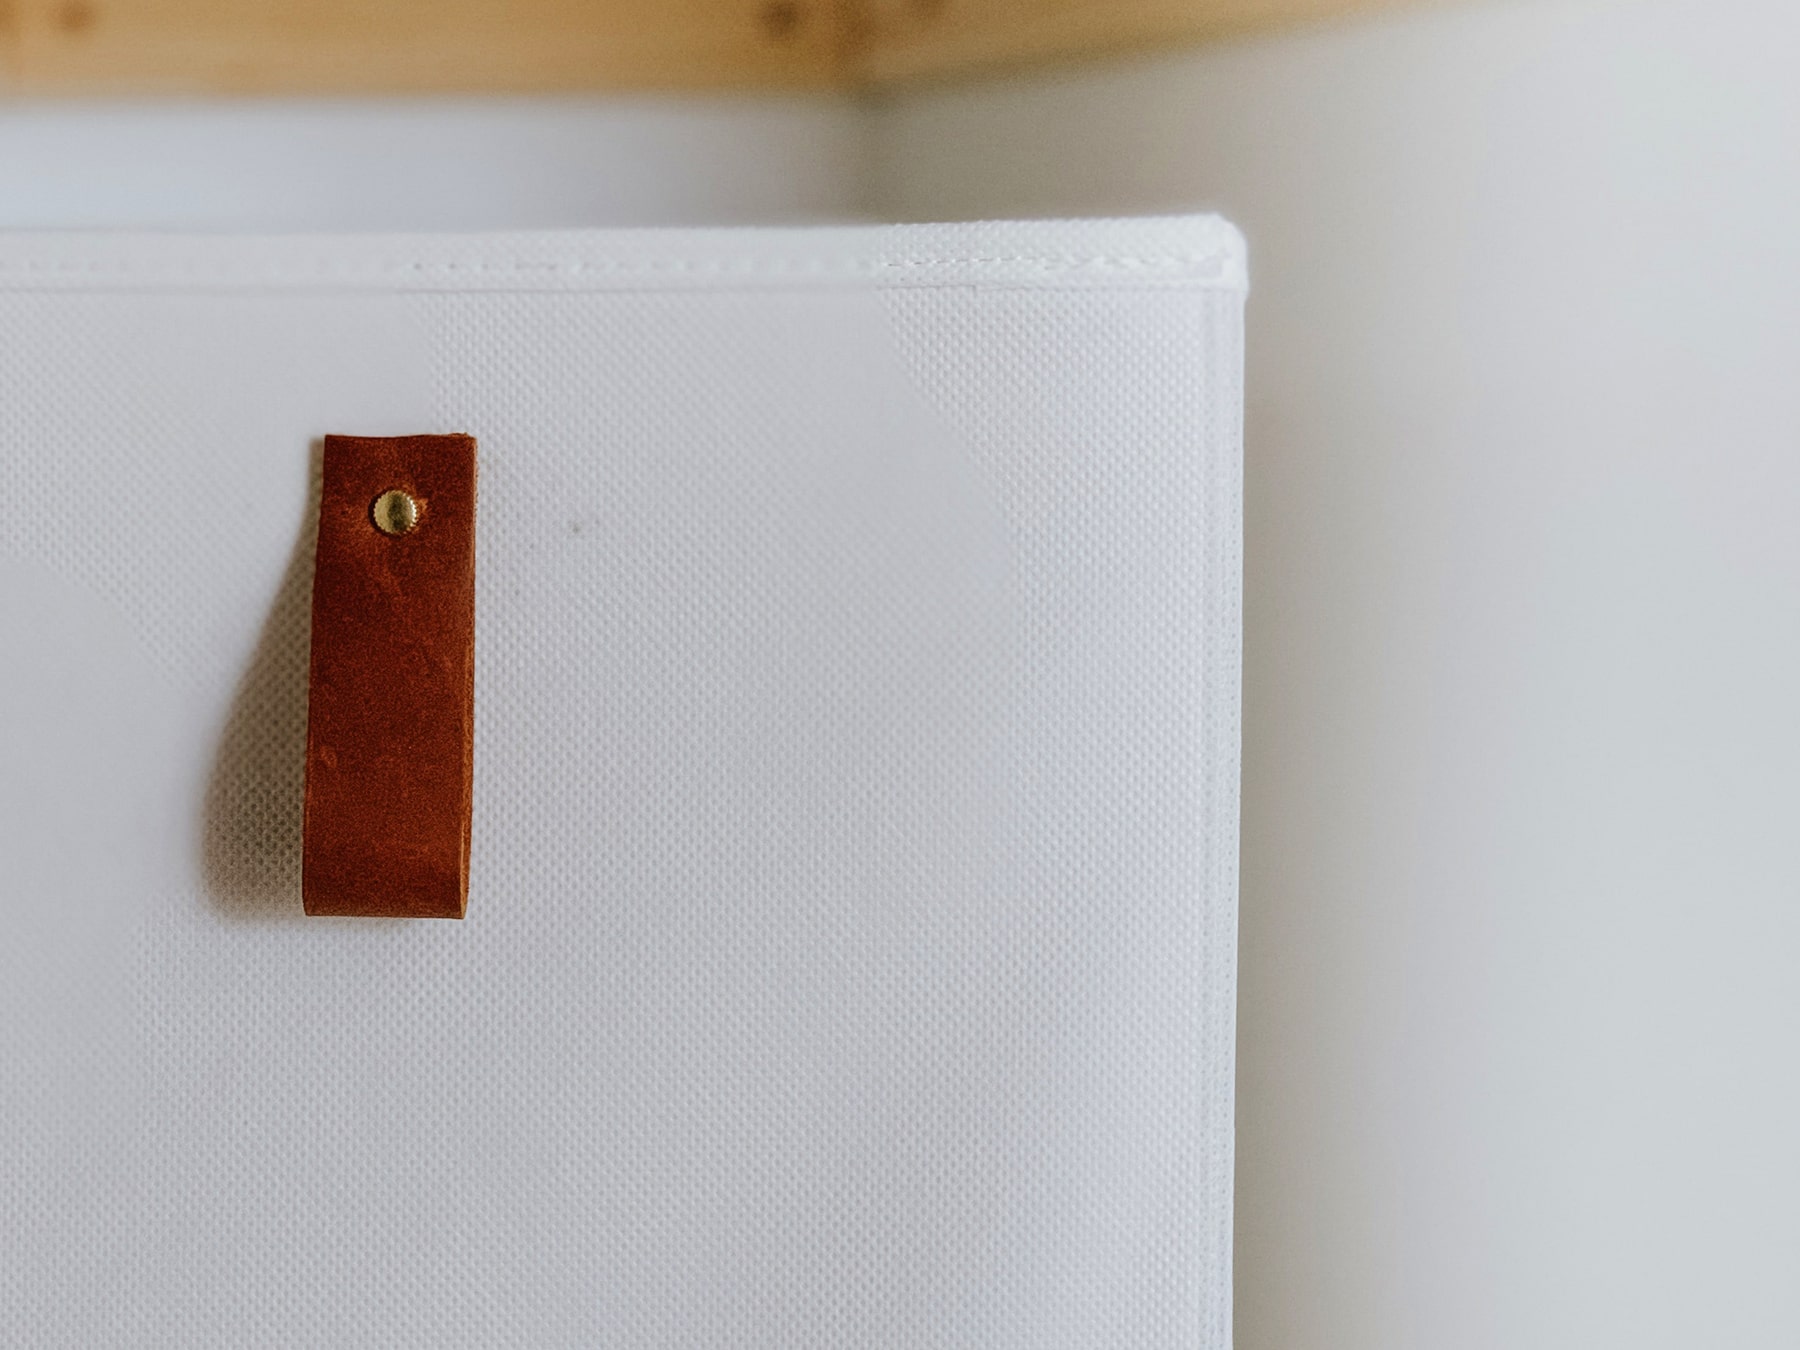
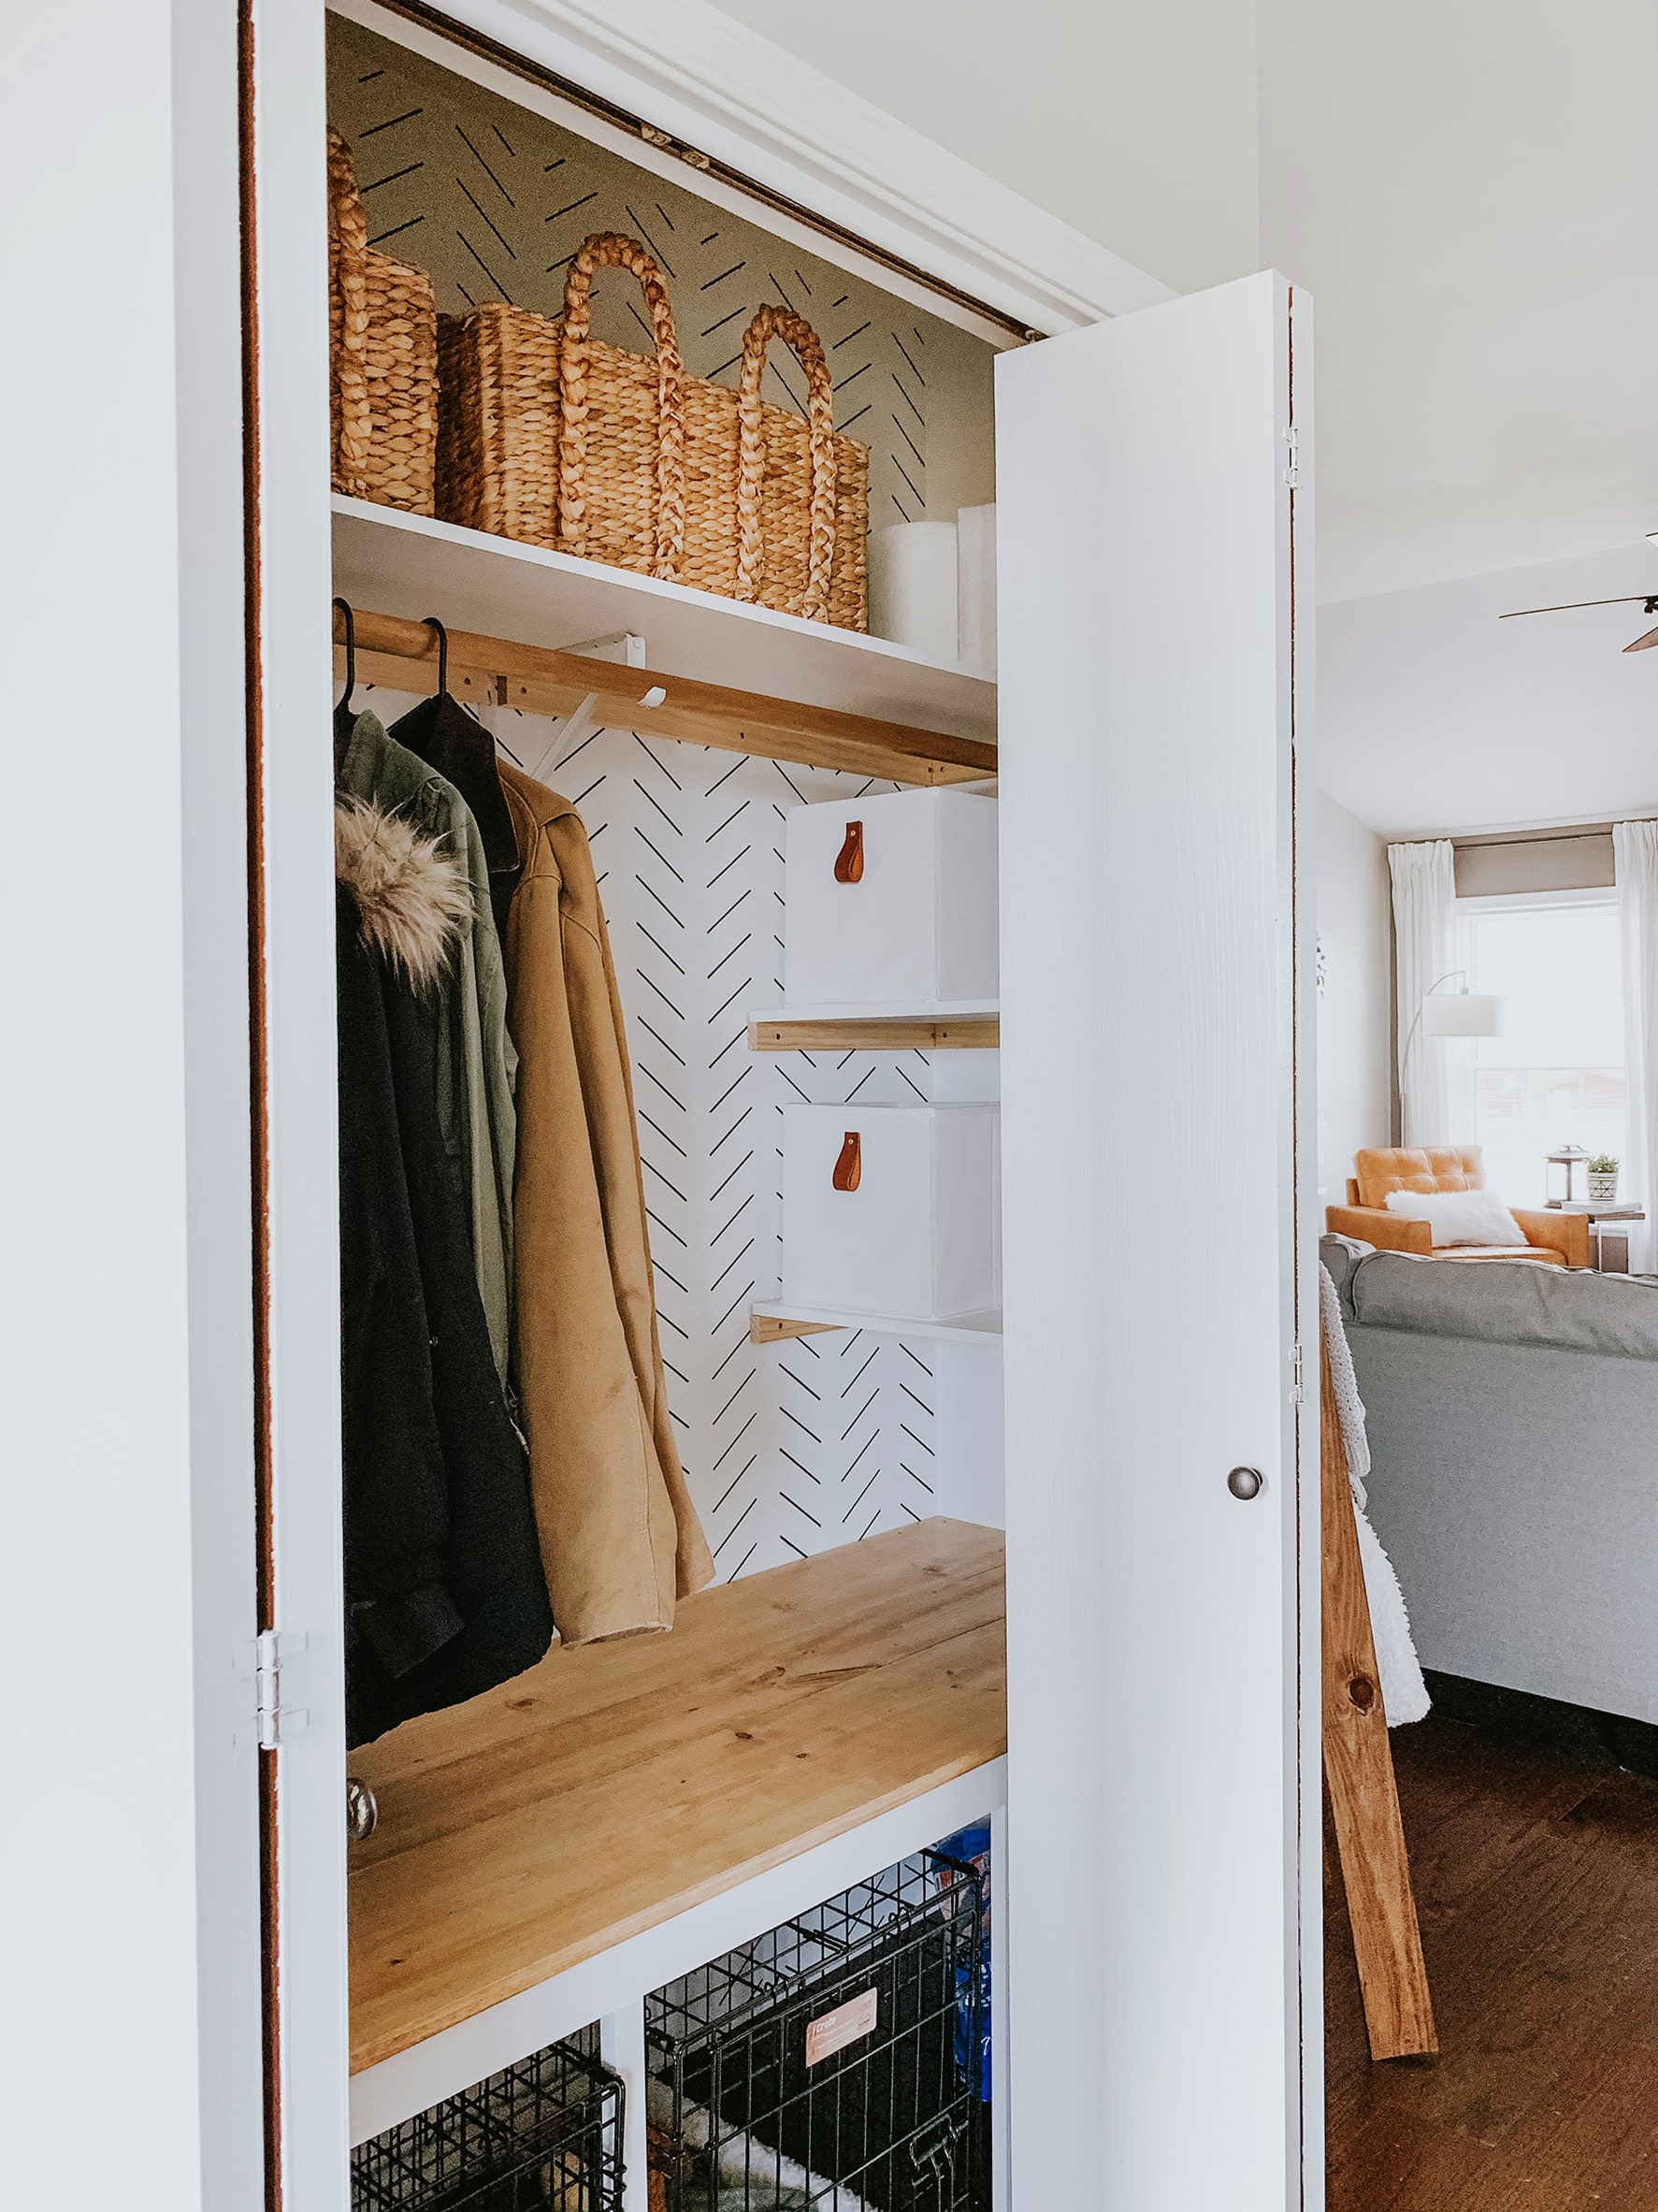
So happy how these turned out! Storage bins or storage baskets can definitely get pricy (especially when you need more than 1!) so these DIY leather pulls was a win for me!
The storage bins were less than $4 a piece and then the hardware and leather pieces were around $12 total. That makes it less than $20 total for 4 storage bins! Who doesn’t love an affordable home decor DIY?!


What an easy way of having lovely handles! Thanks for sharing this DIY! Carolina at Ironmongery Experts.
Thank you so much Carolina! 🙂