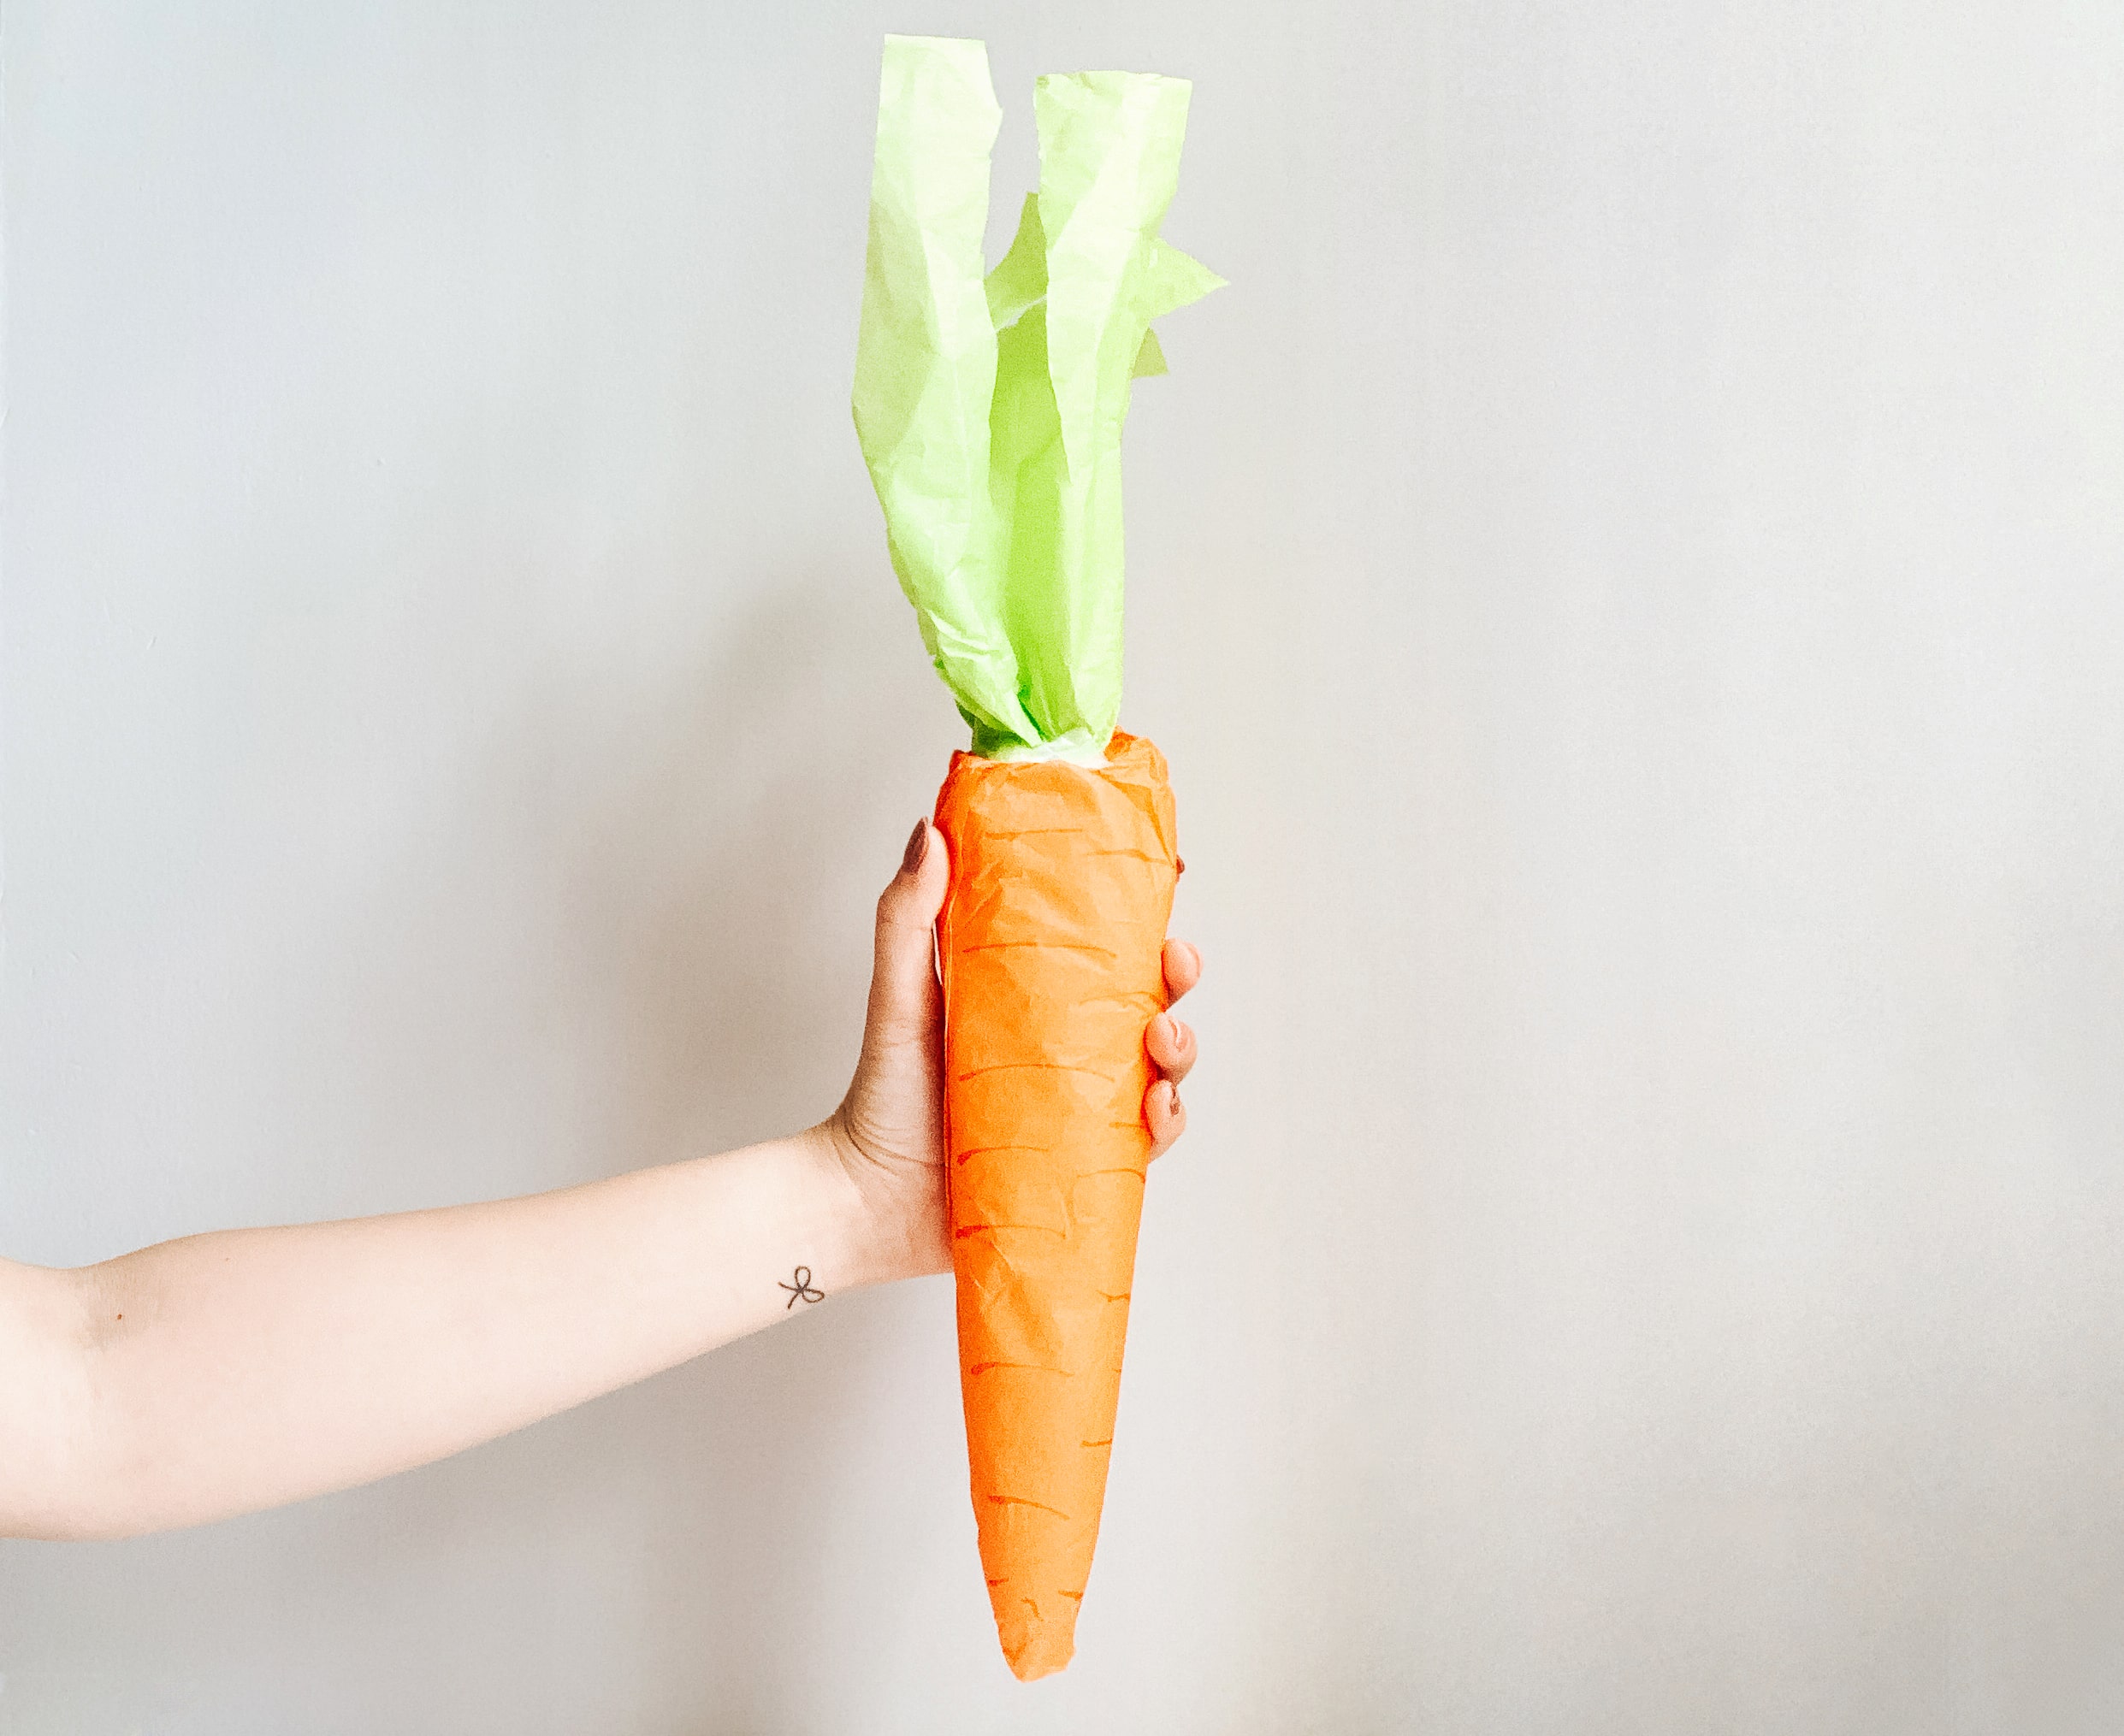
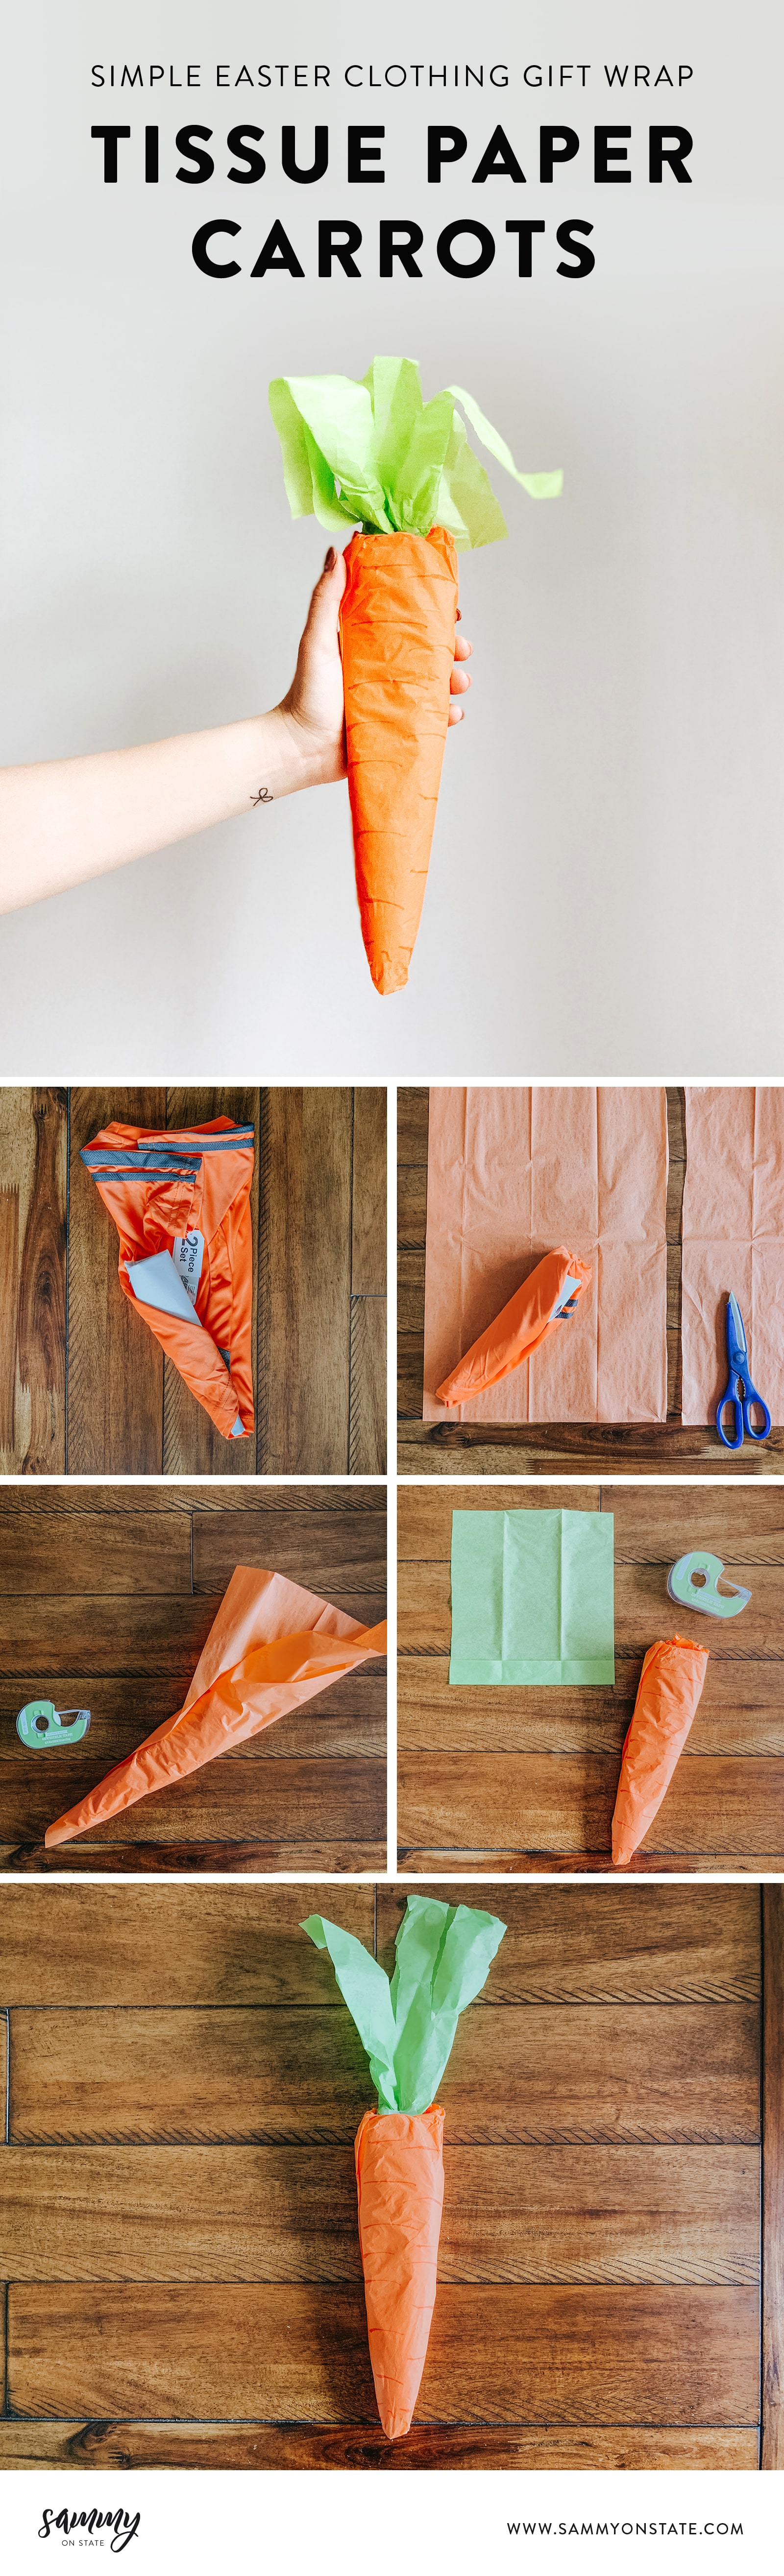
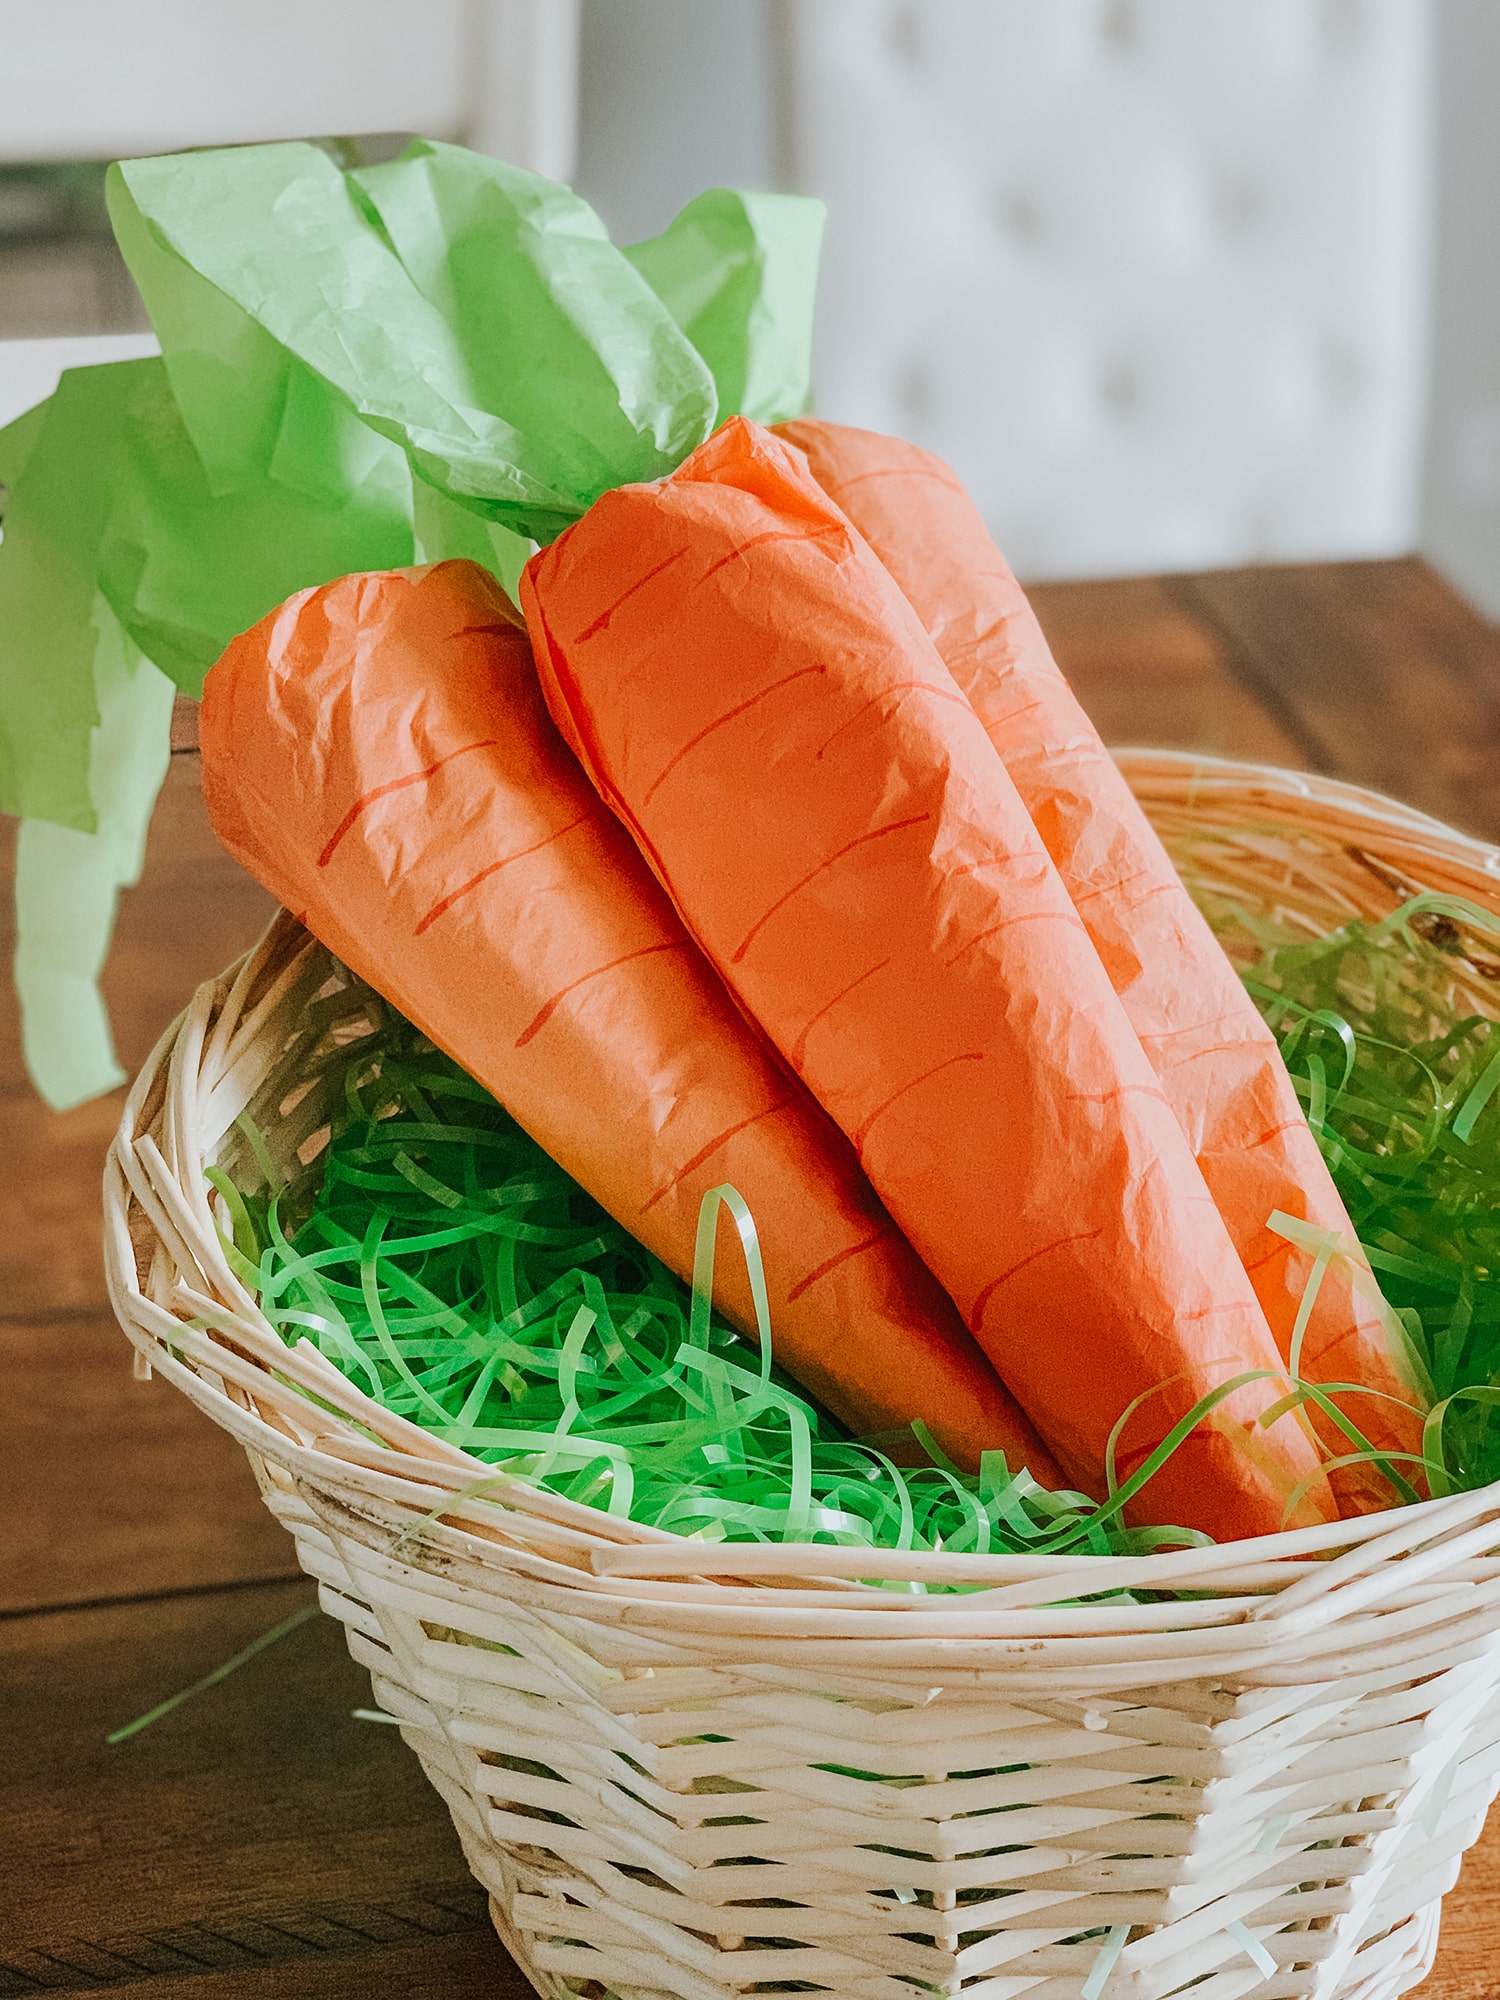
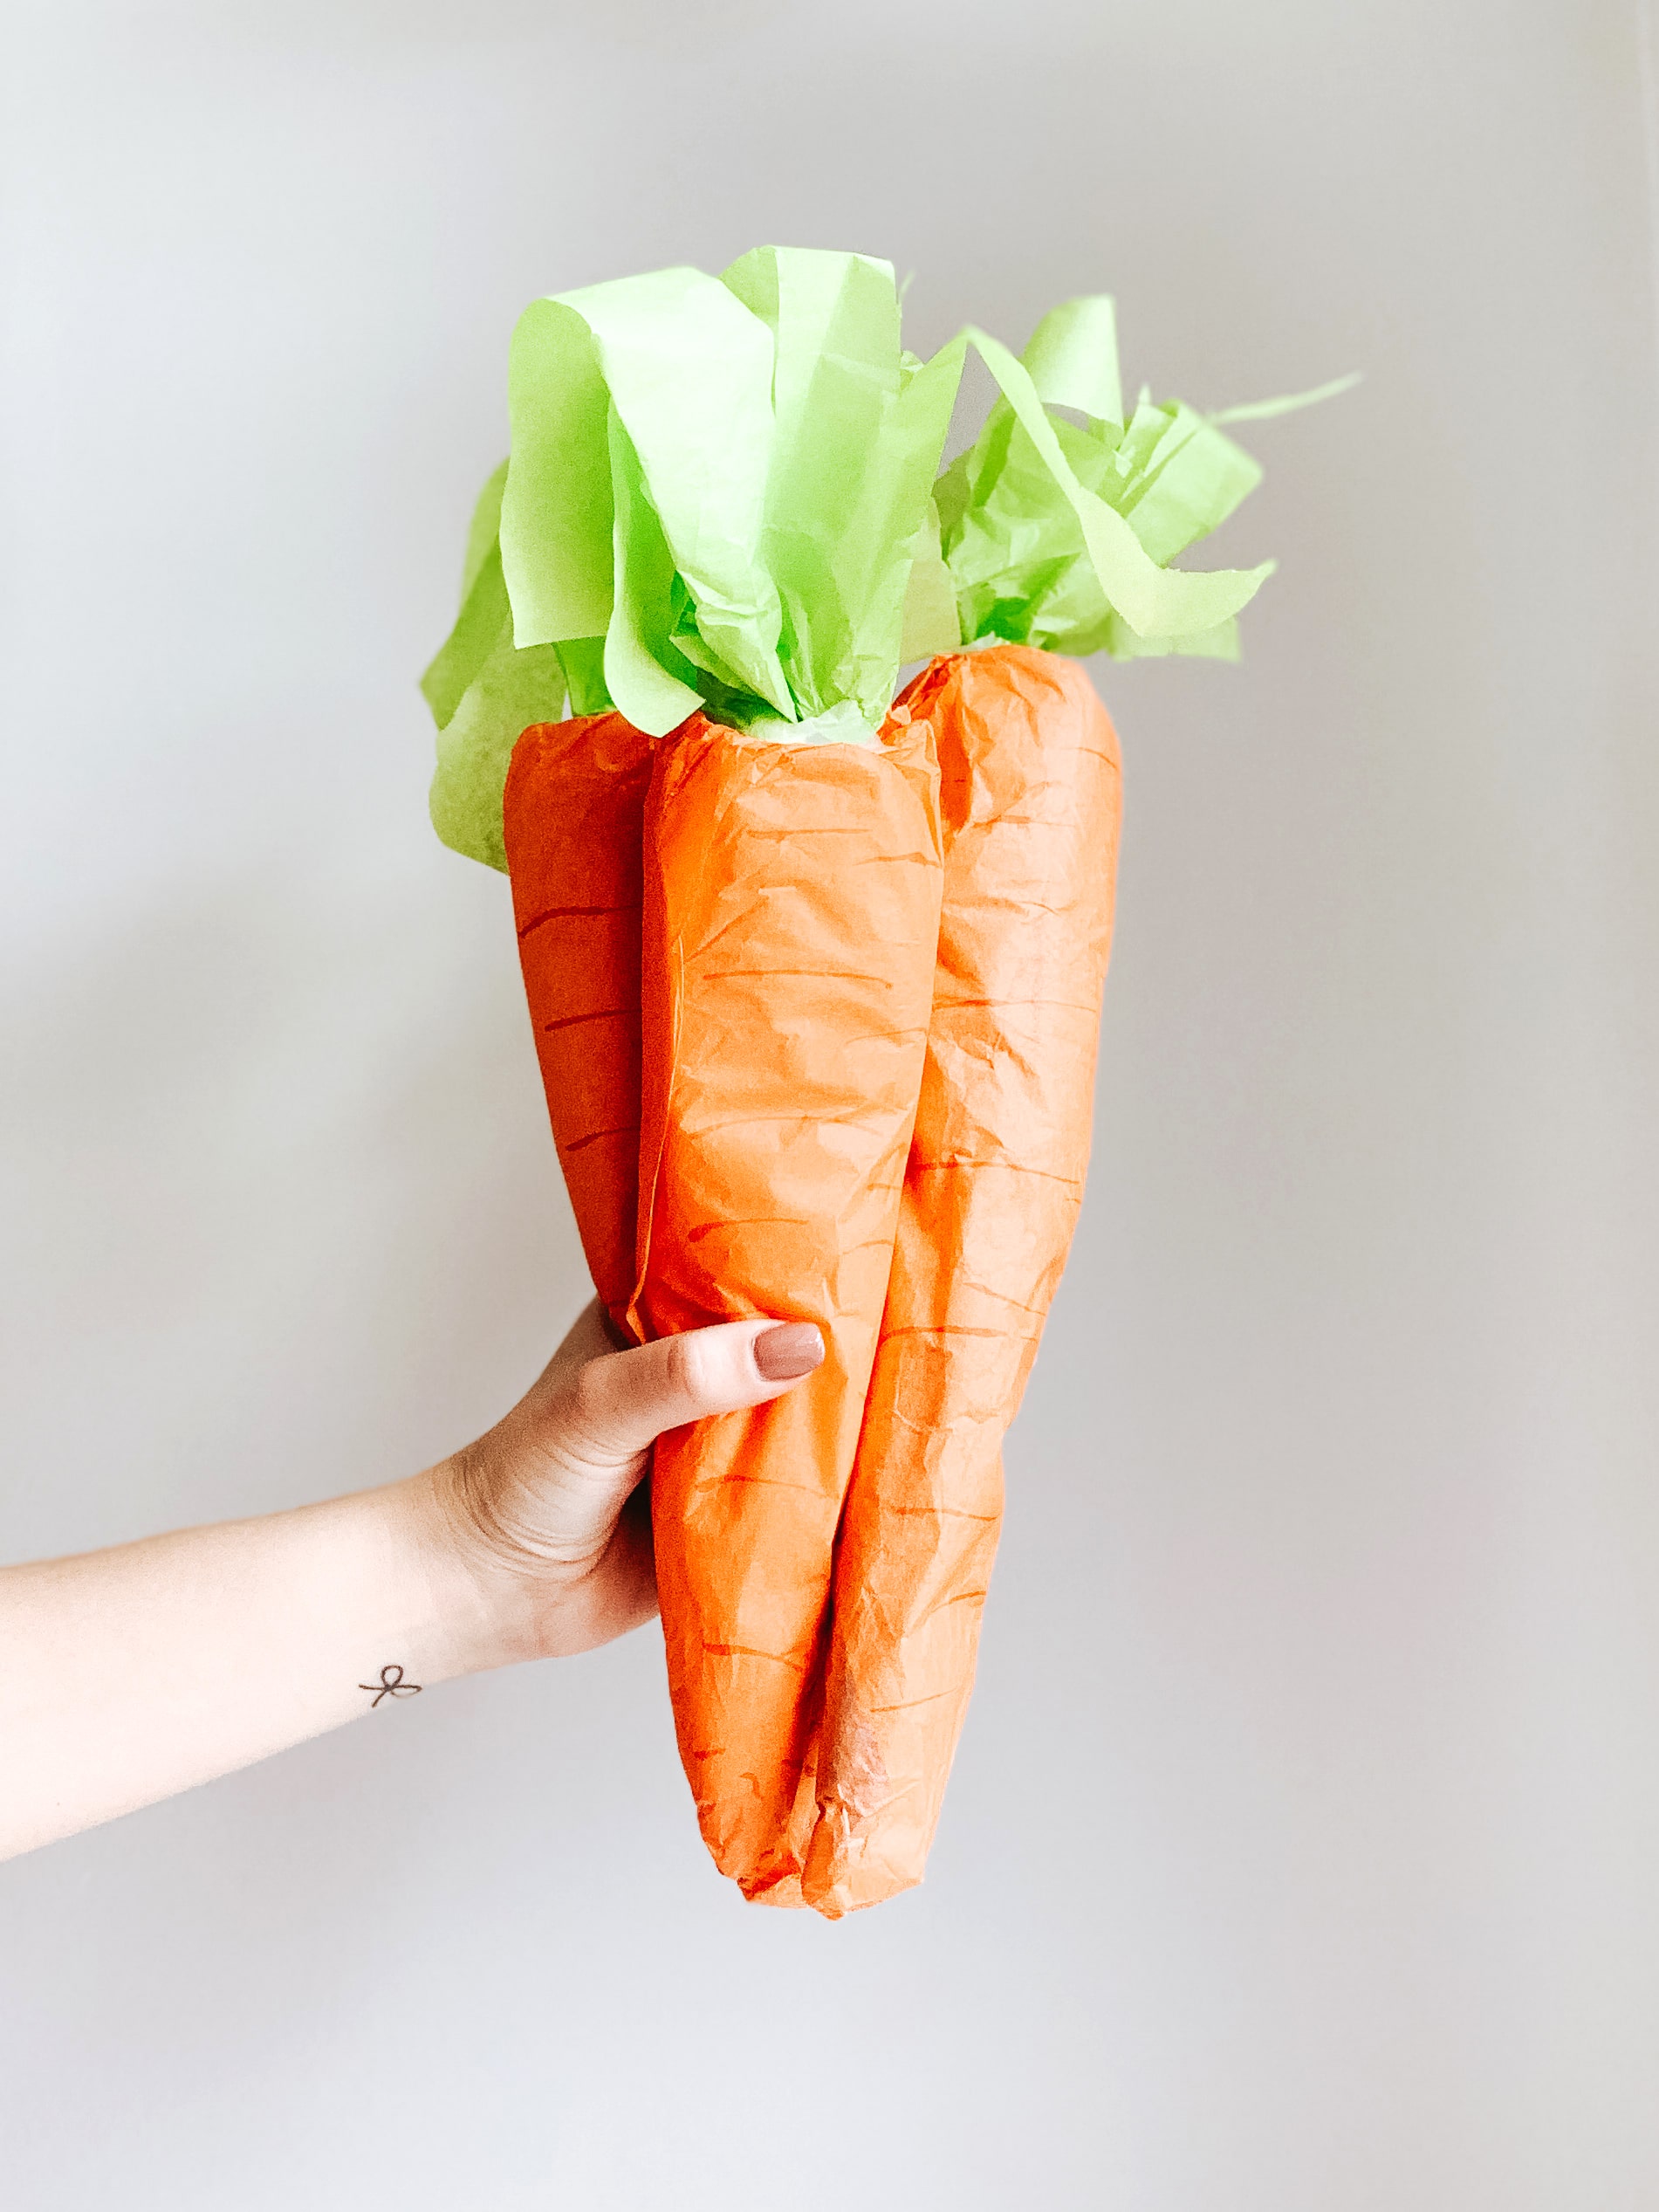
With Easter coming up this weekend, I wanted to share this cute and easy craft I did for my nephews Easter basket! I remember as a kid, I always got my “Easter Outfit” as part of my Easter Basket. I came up with this fun idea to wrap my nephew’s Easter outfits with tissue paper, to look like carrots!
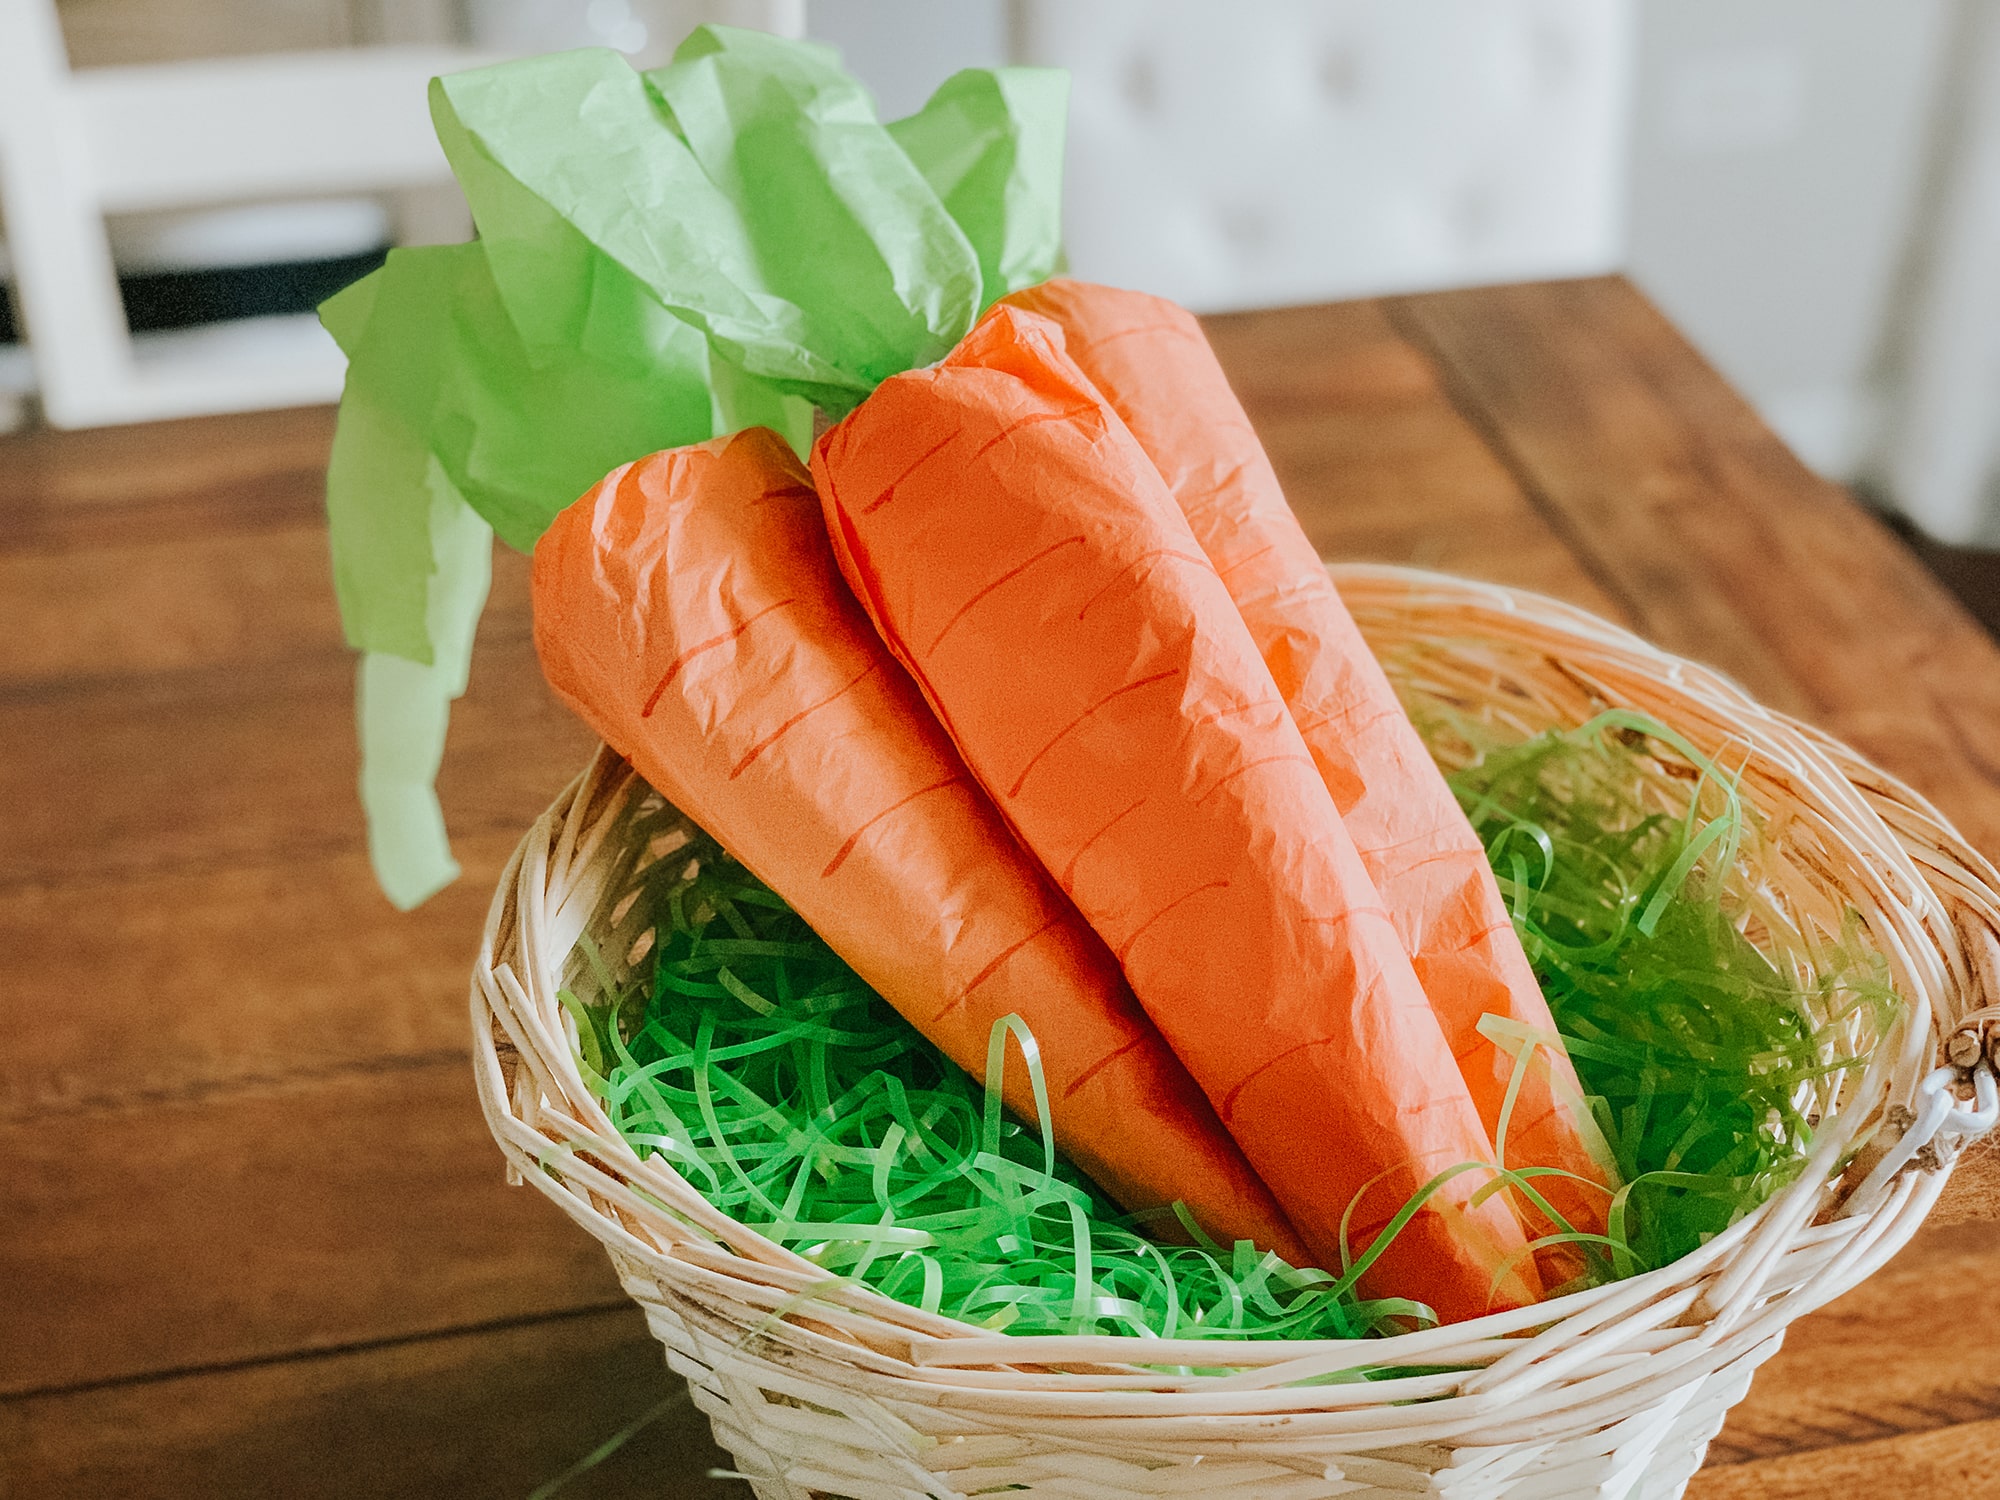
Since we do spoil him (it’s hard not to!), he got more than just one outfit in his Easter basket. I ended up making a bunch of these tissue paper carrots, but it only took around an hour to do! What I really like about these, is that its another fun “surprise” added to the Easter basket. Almost like Christmas, with unwrapping some gifts 😉 If you’re looking to add some fun to your children, grandchildren, or nieces and nephew’s Easter basket, give these tissue paper carrots a try!
WHAT YOU’LL NEED
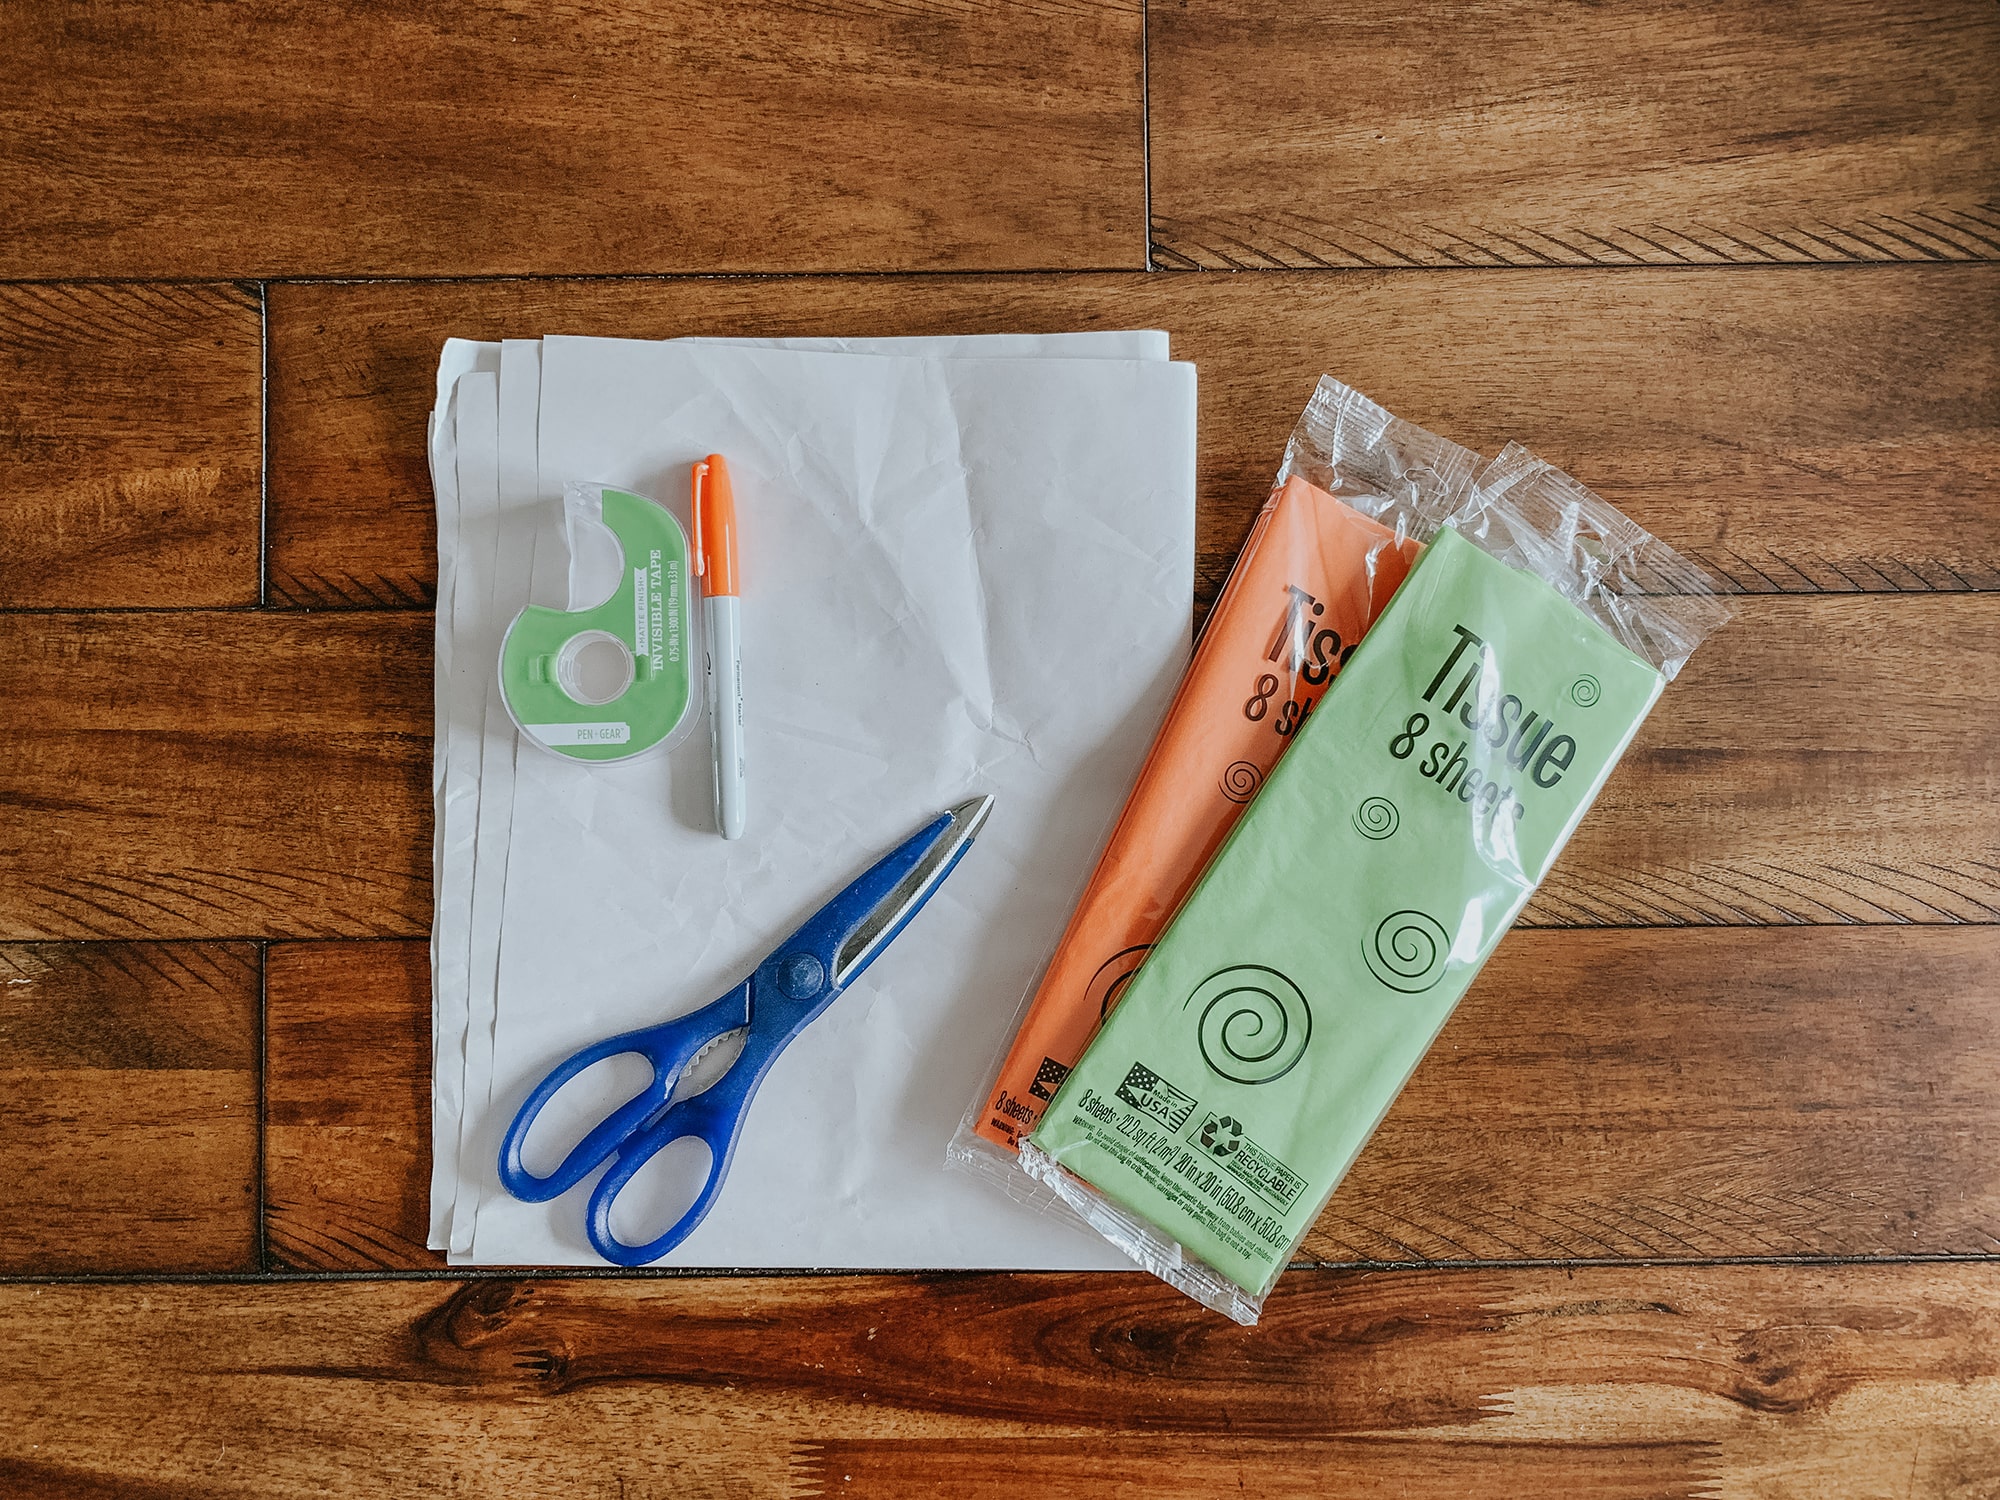
- Orange tissue paper
- Green tissue paper
- Orange marker or Sharpie
- Scissors
- Tape
- Packaging or computer paper (for the filler)
- The clothes you’ll wrap inside each carrot!
STEP 1 – MAKE THE PAPER FILLER
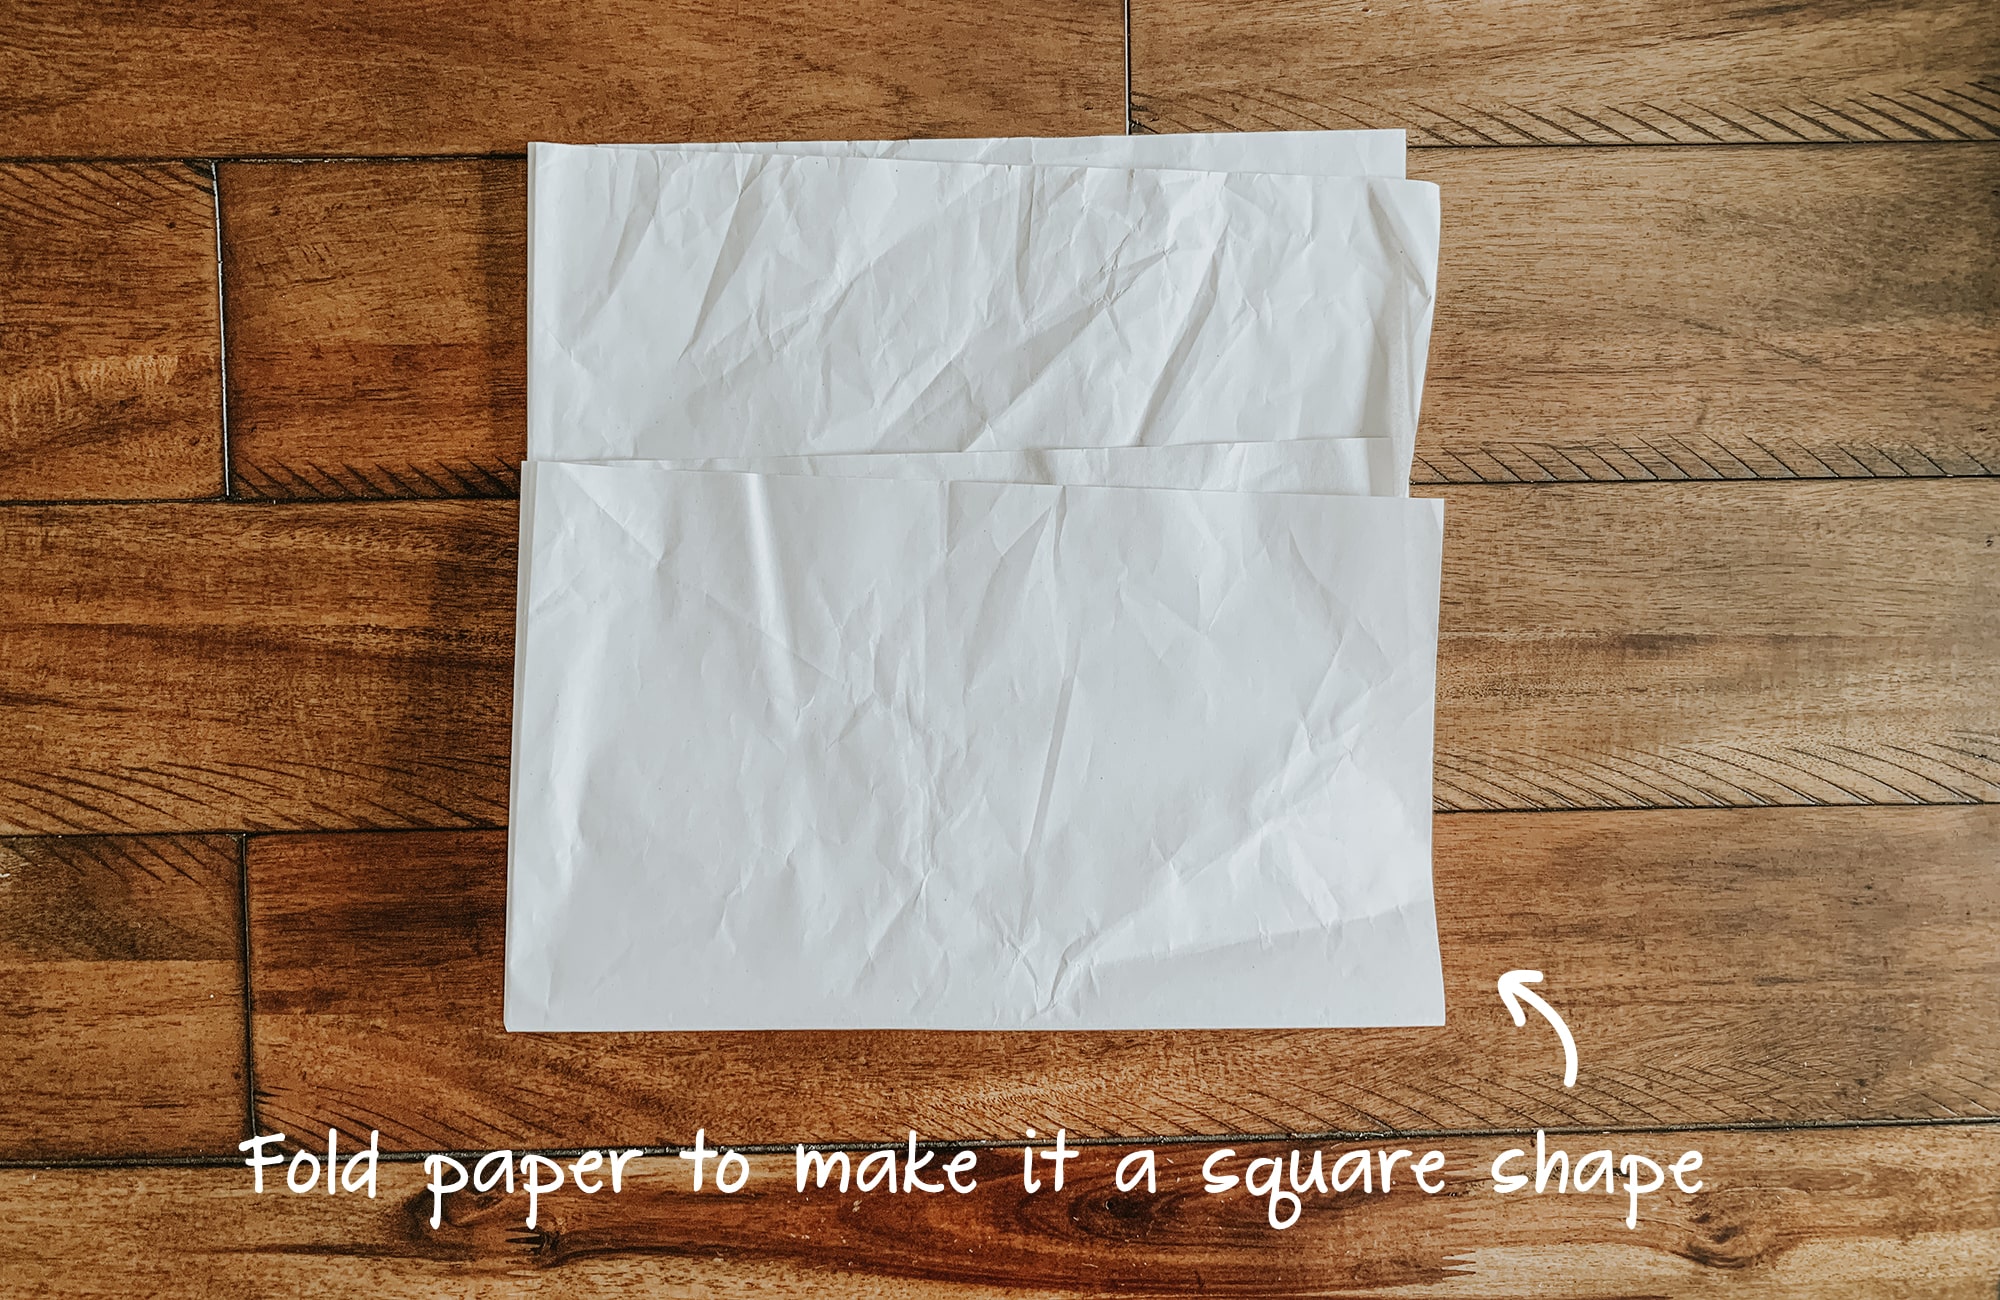
Grab your packaging paper and fold into a square. I used packaging paper that you get from stores when you buy breakables items, but computer paper works just as well!
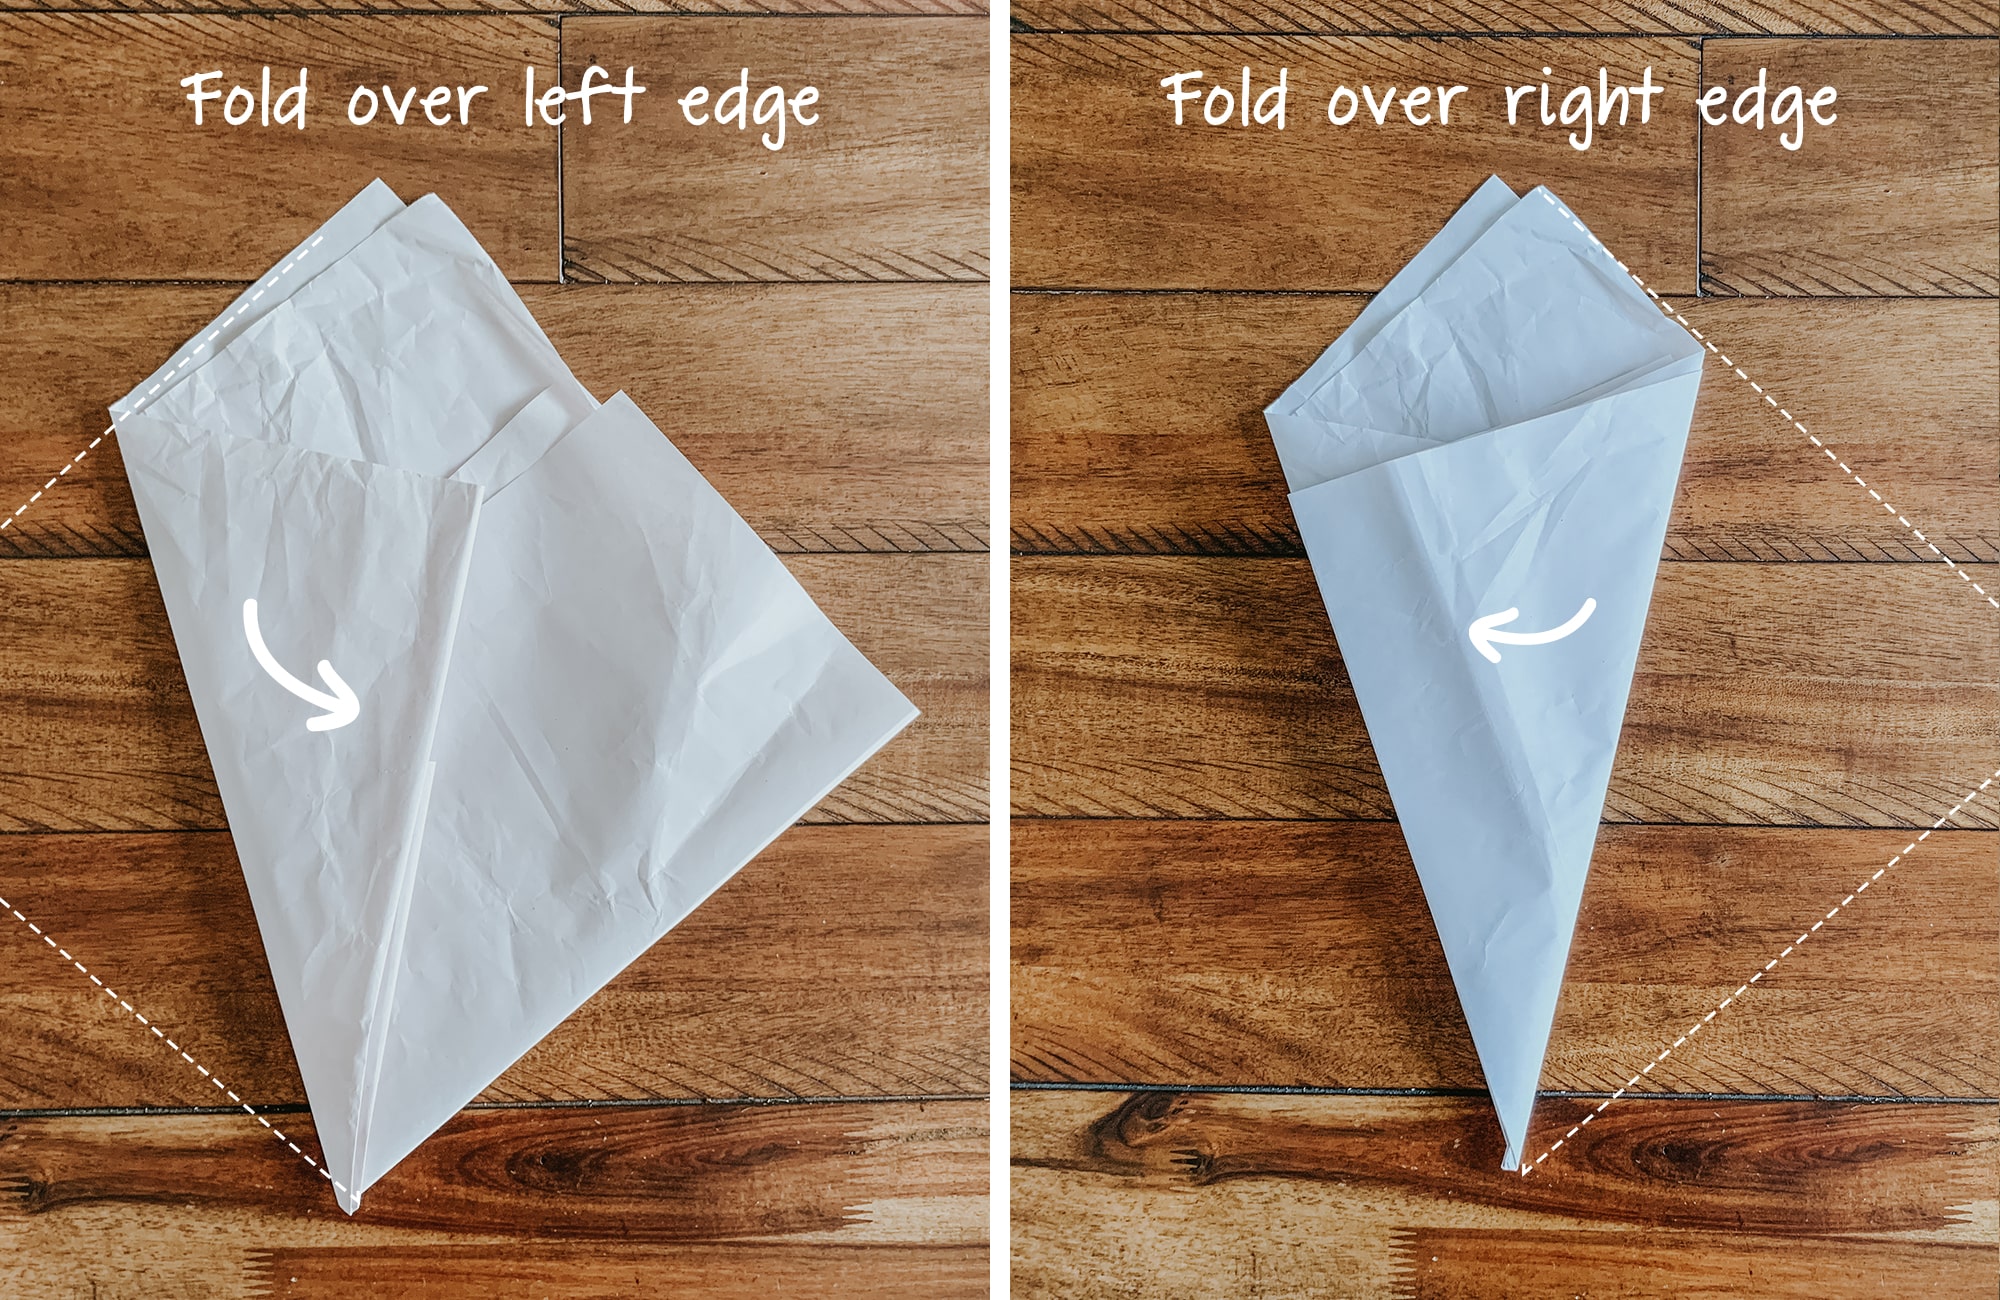
Once you have your paper in a square, fold your edges inwards, to begin making the triangle shape.
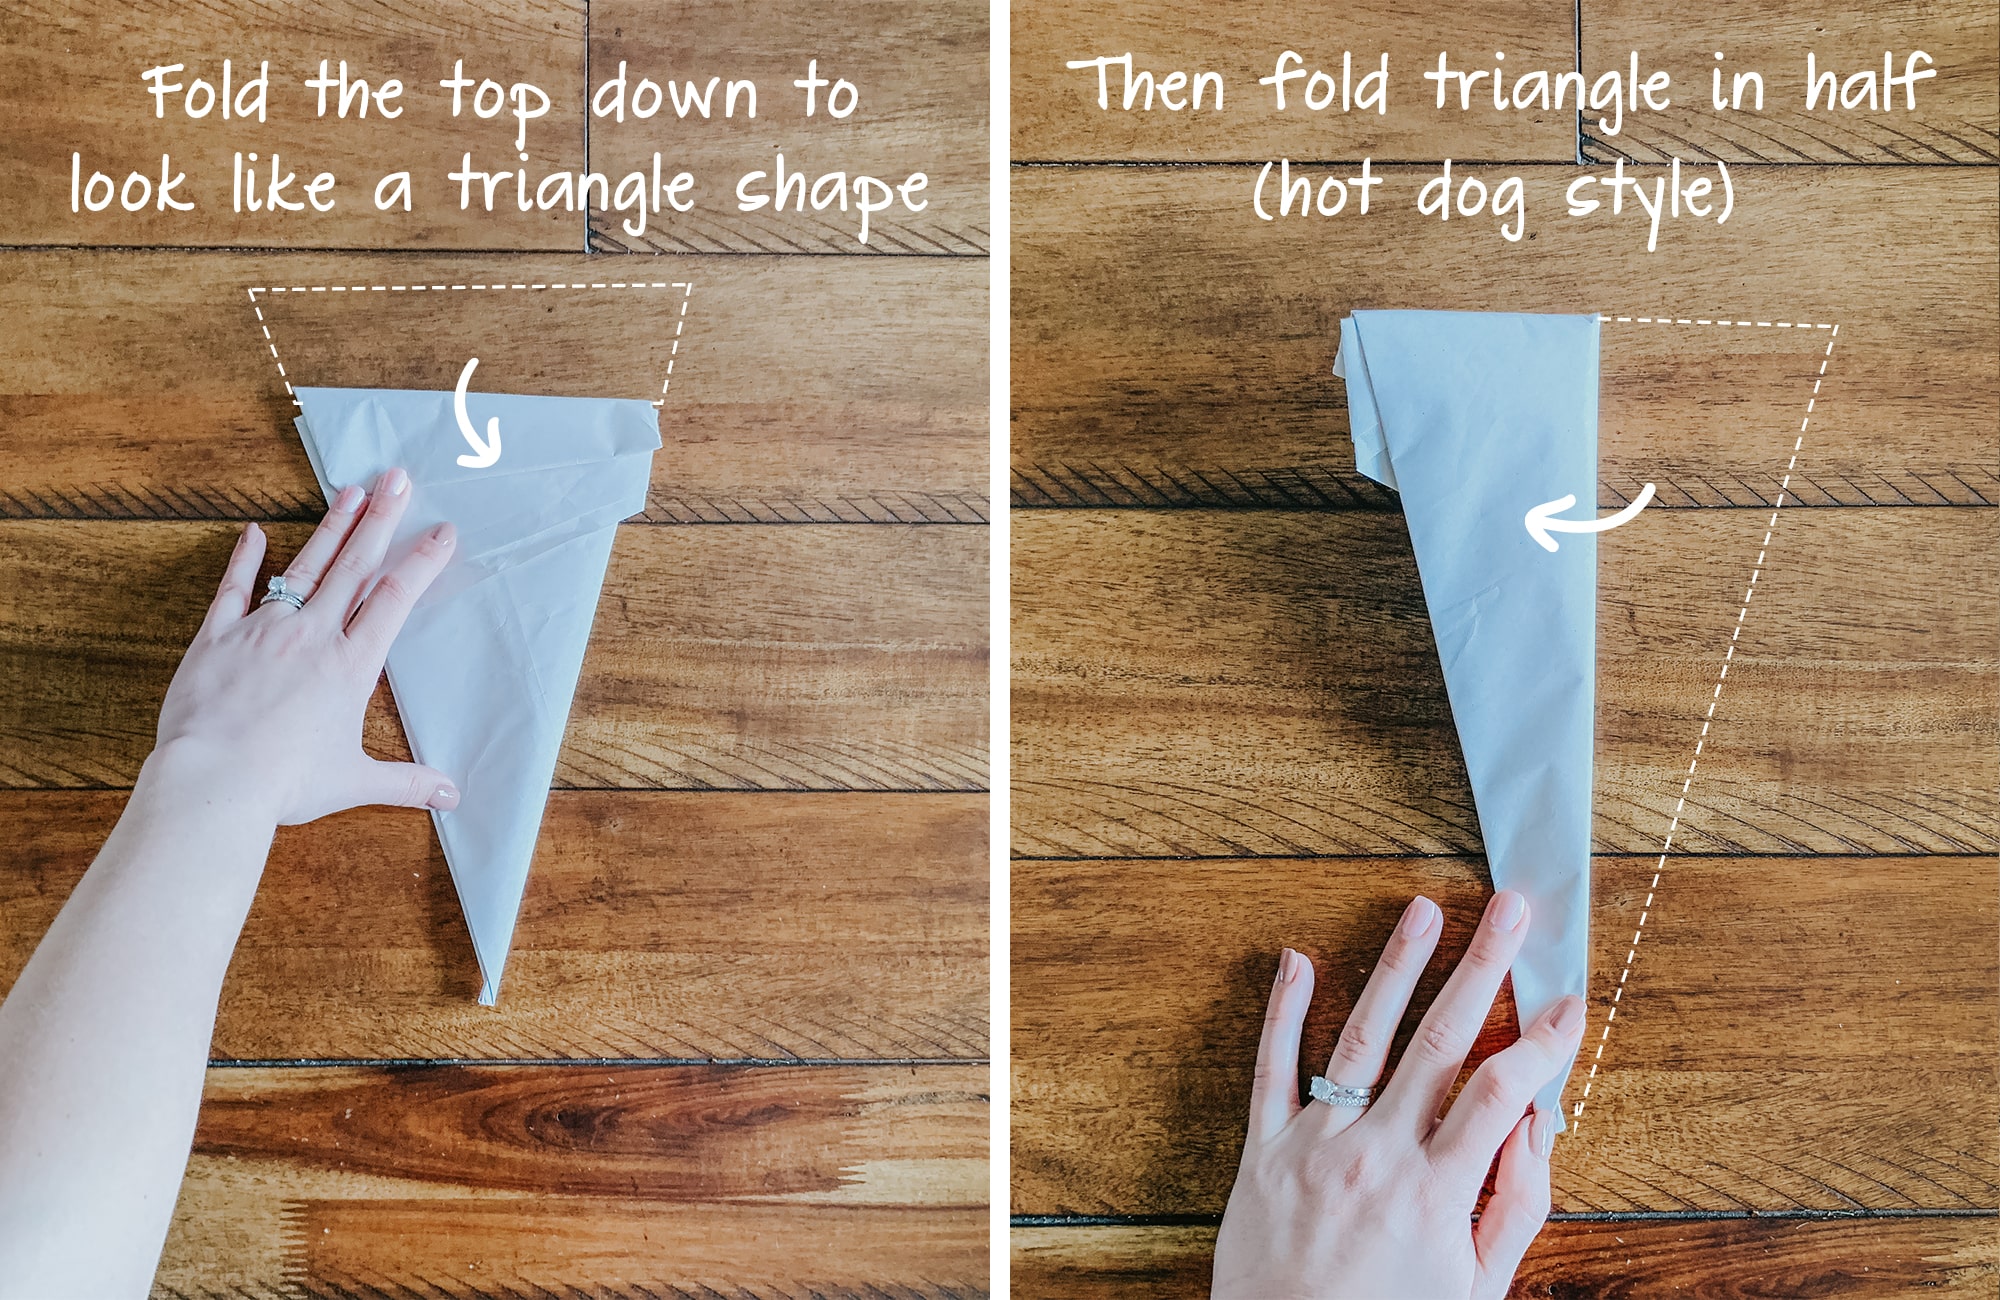
Then, fold down the top part of the paper, to finish off the triangle shape. Once you do that, fold your triangle in half (hot dog style) to get that carrot shape.
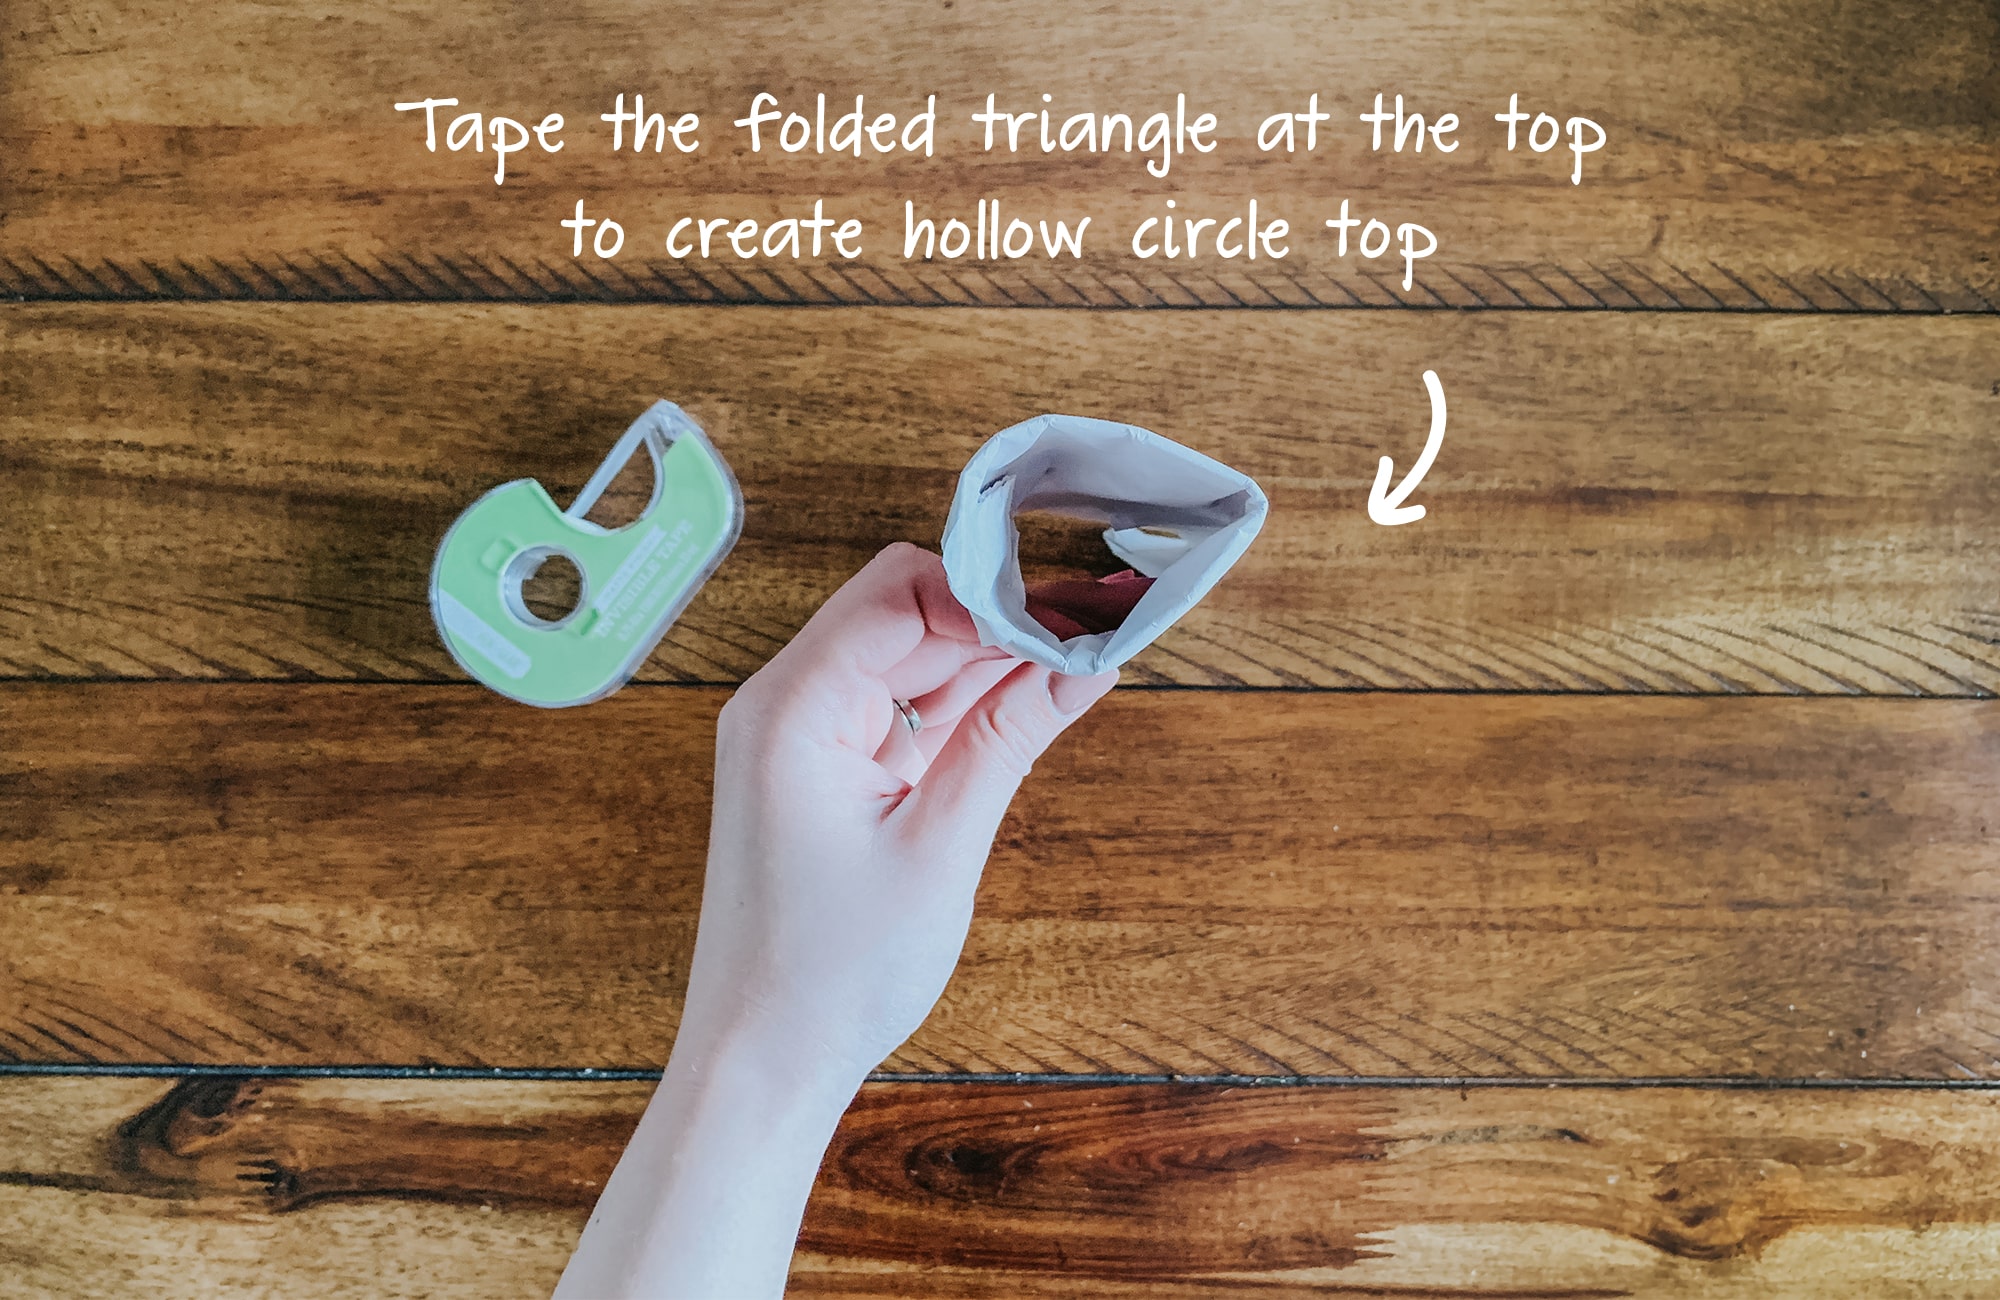
Take your tape, and tape the top part of your paper filler, to make a hollow circle at the top of your “carrot”.
STEP 2 – WRAP CLOTHING AROUND CARROT FILLER
You can easily wrap shorts, pants, dresses, etc… it’s just all in the folding! Pants are tricker then shirts – just use your best judgment on how to fold your clothing. The goal is to make it easy to wrap around the paper filler. I found a long and narrow fold works best, so the top part of the carrot is fuller.
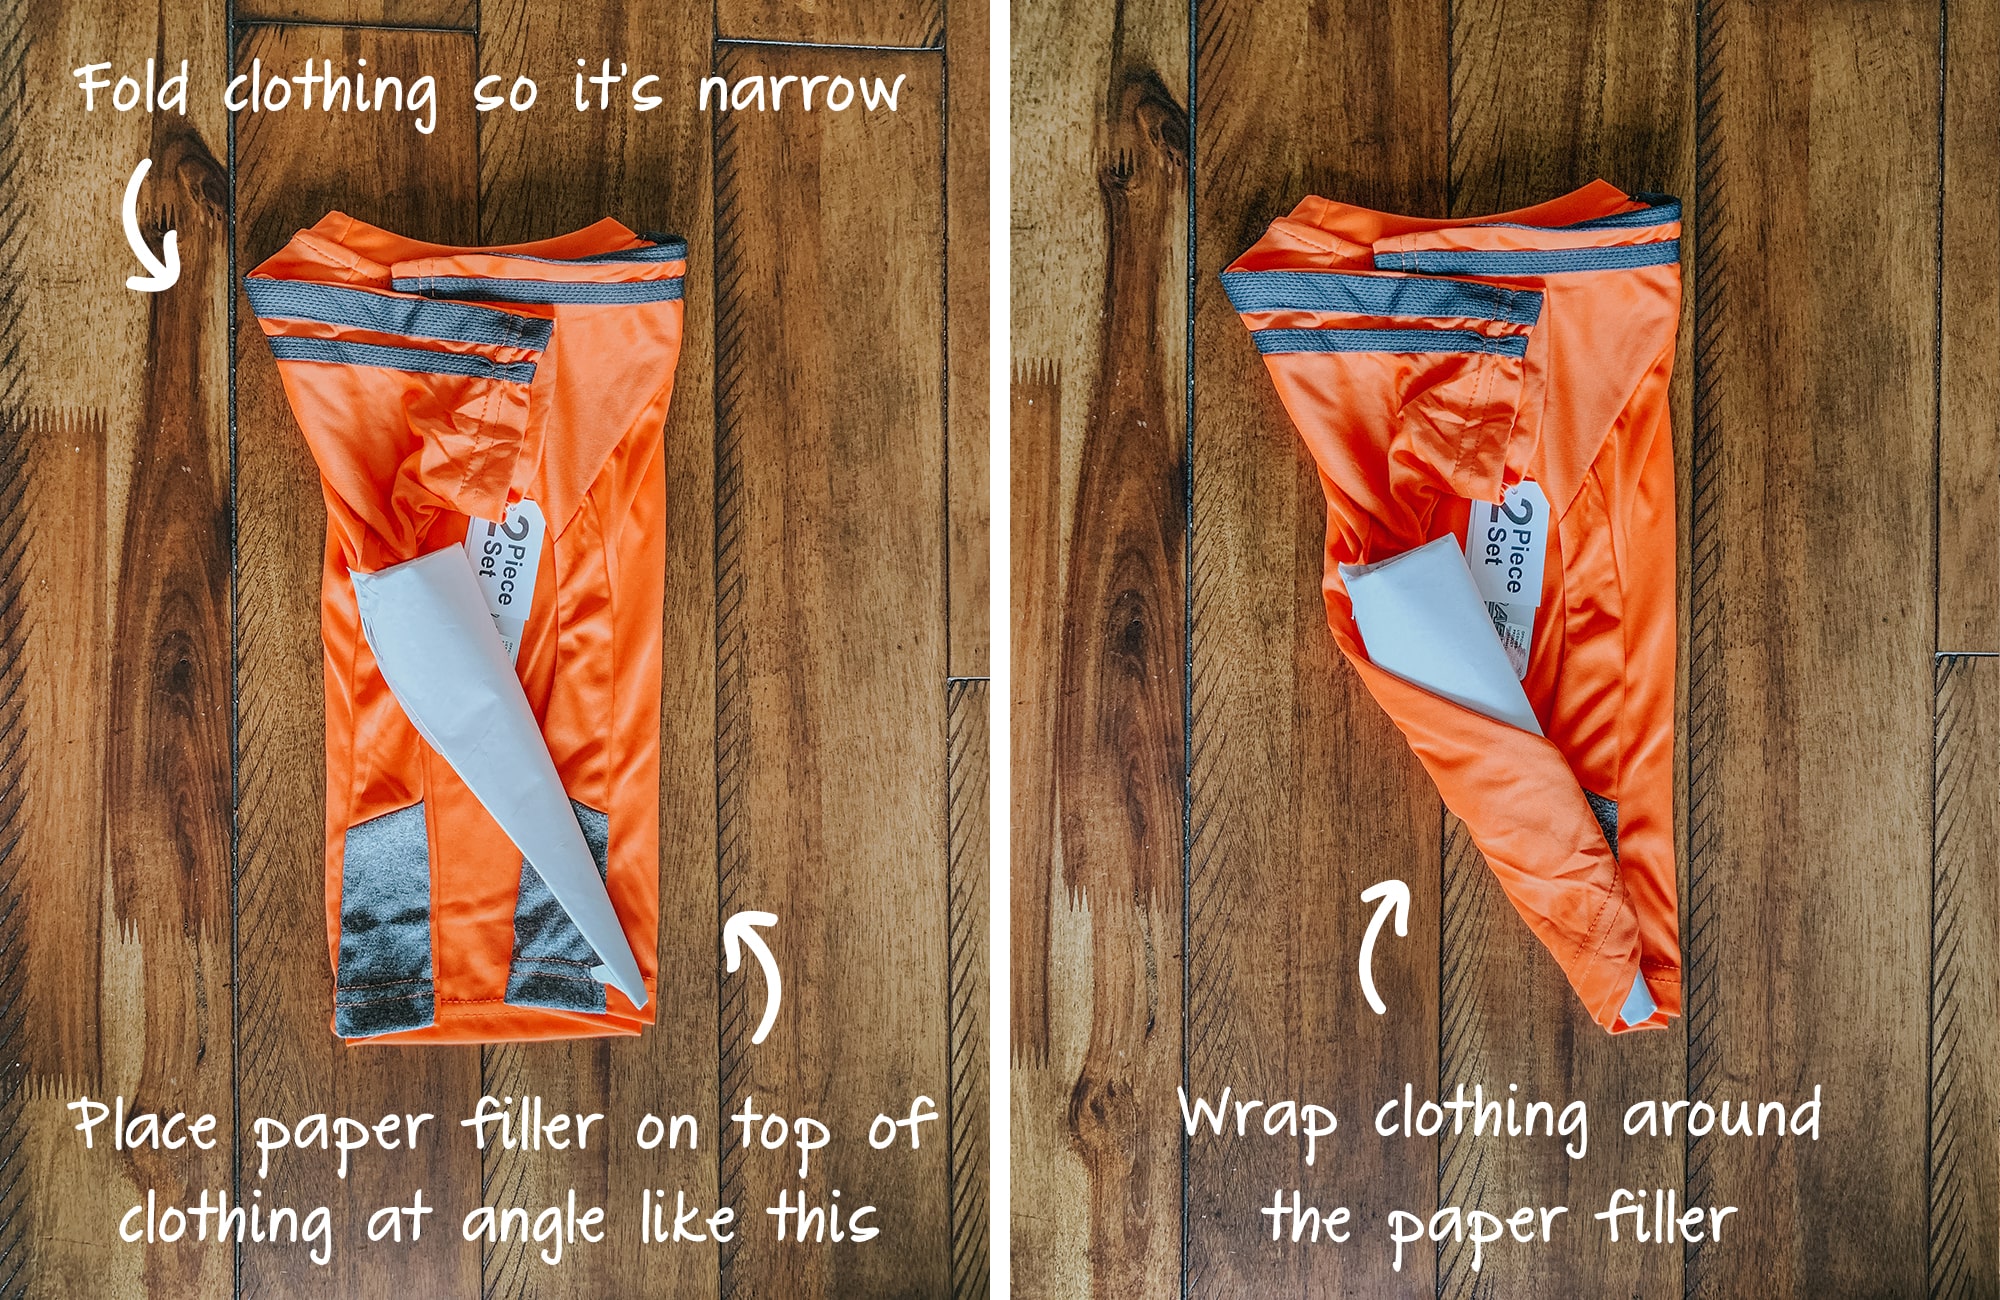
Place your paper filler at an angle (as shown above) on top of your clothing. Then, you’re going to start by wrapping the bottom left corner of your clothing around the paper filler.
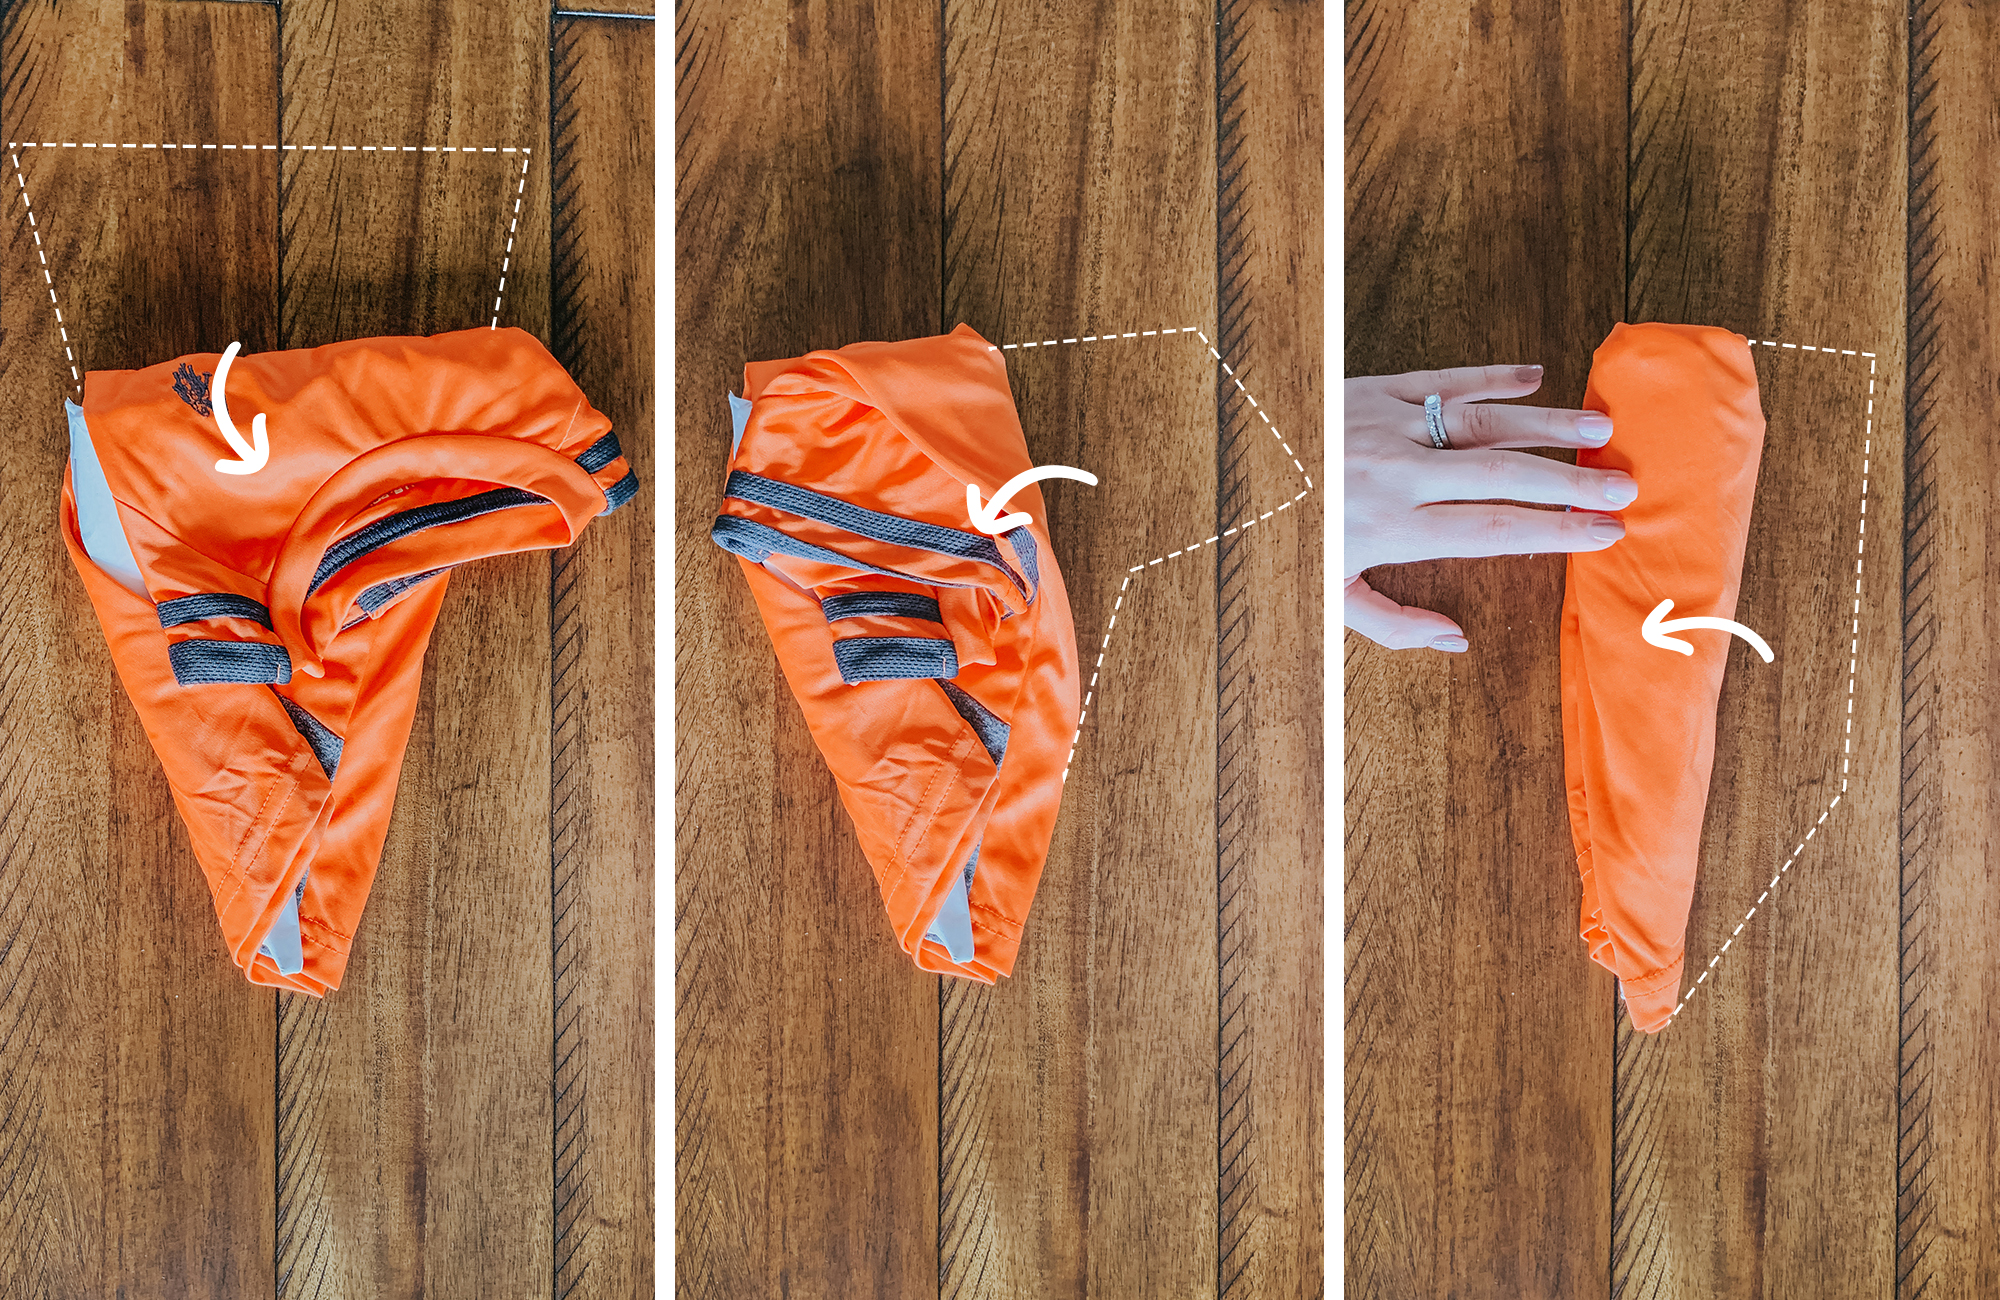
The top part of the shirt or clothing is a little tricky to fold! It works best to start at one shoulder/arm and fold inward, and then bring in the other shoulder/arm. You want to have a bulkier top part and a skinny bottom. This way, you’ll have a carrot shape at the end 😉
STEP 3 – WRAP CLOTHING WITH TISSUE PAPER
Grab a piece of your orange tissue paper to begin.
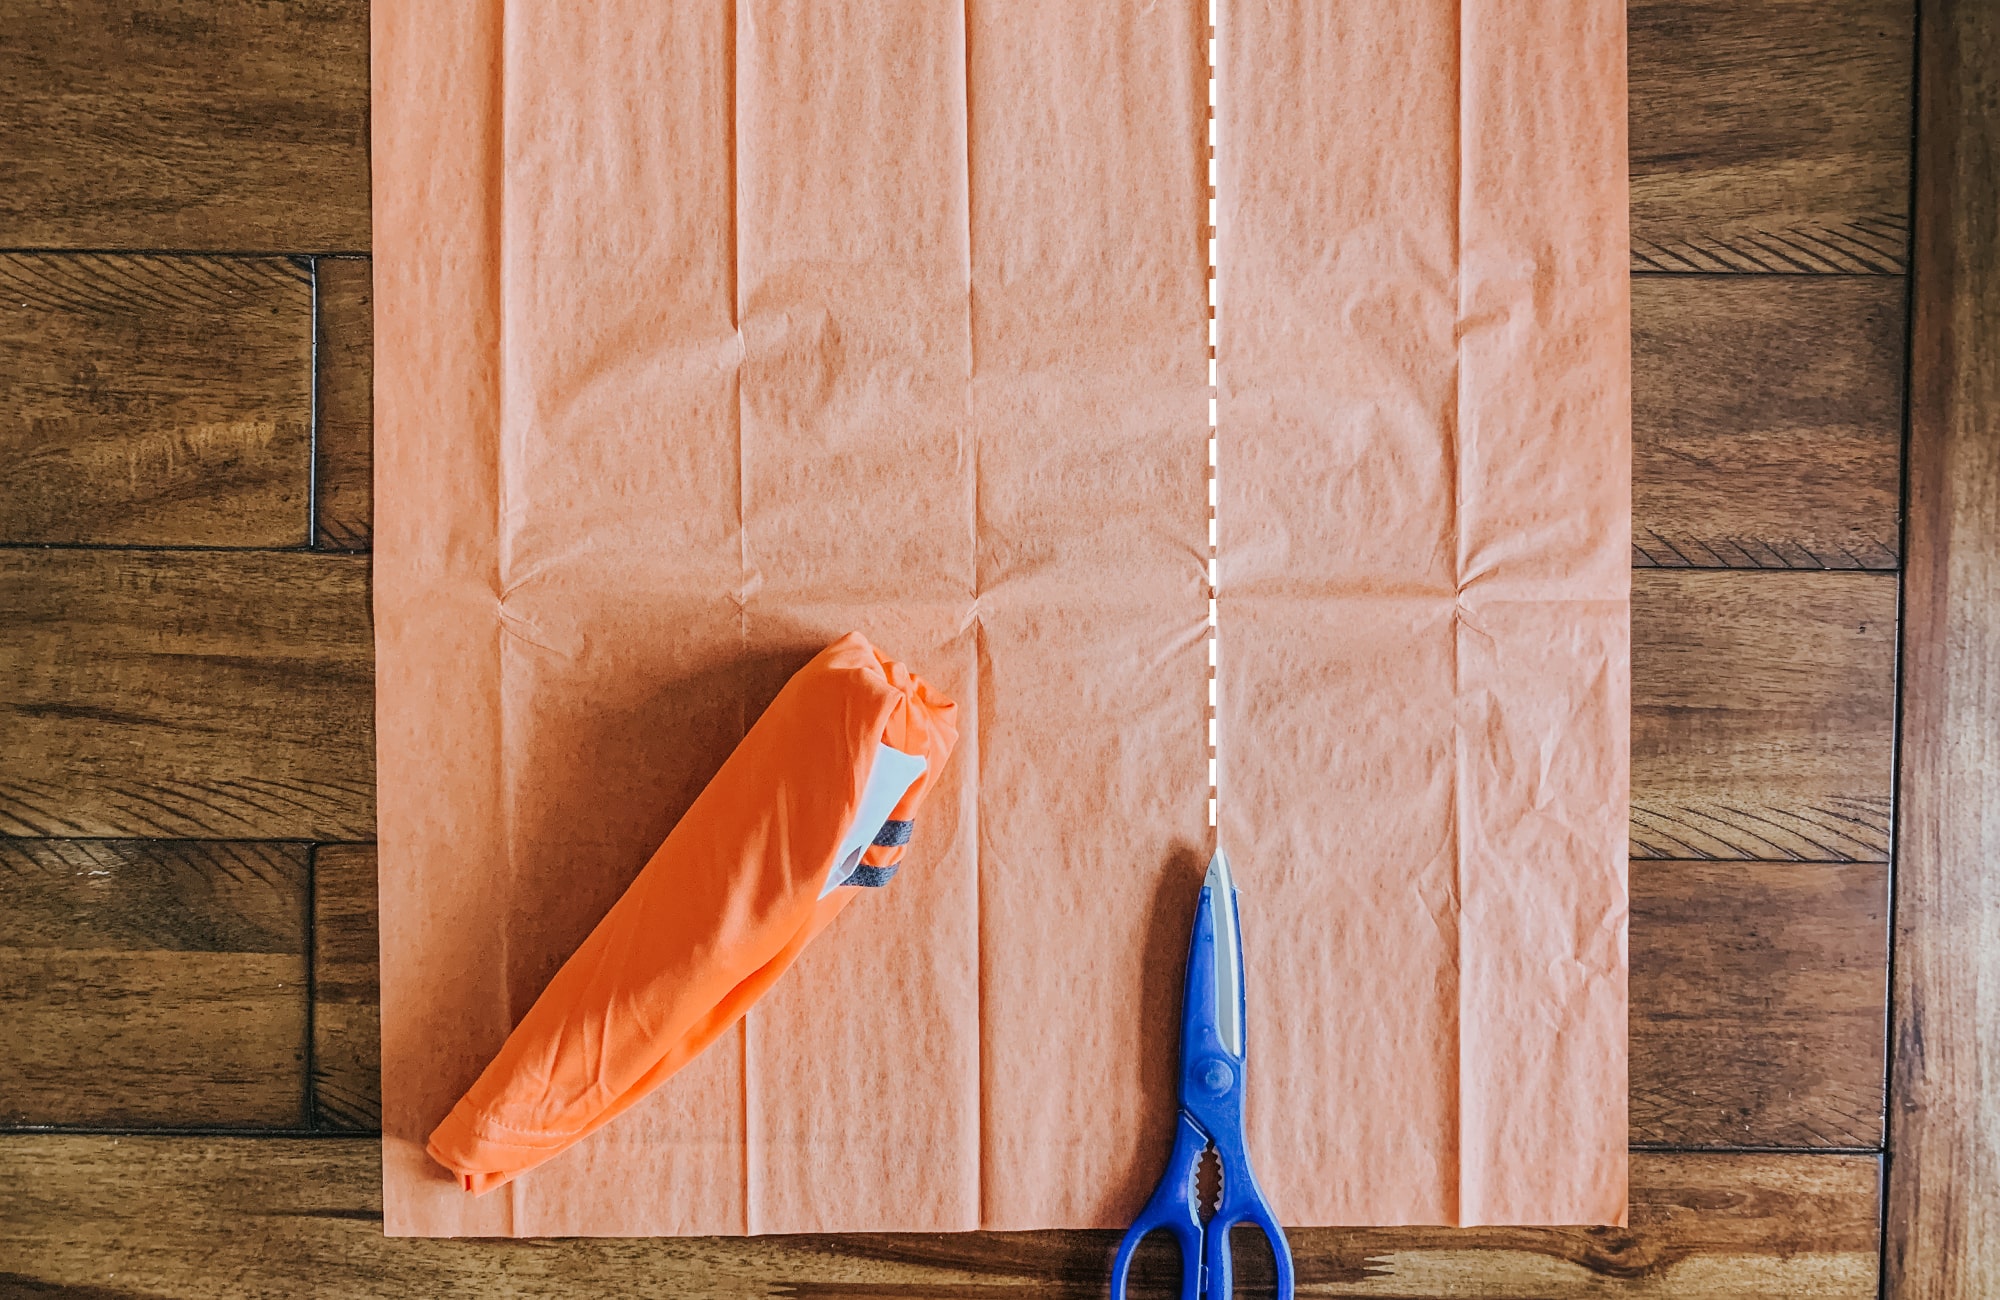
The first thing you’ll need to do is cut down the tissue paper. Depending on how large your carrot is, depends on how much you should cut off. I found for myself, that cutting off 1/3 of the tissue paper worked best.
I also went ahead and cut off some of the top part of the tissue paper, so there was not so much left over to tuck into the top (that’s the next step!).
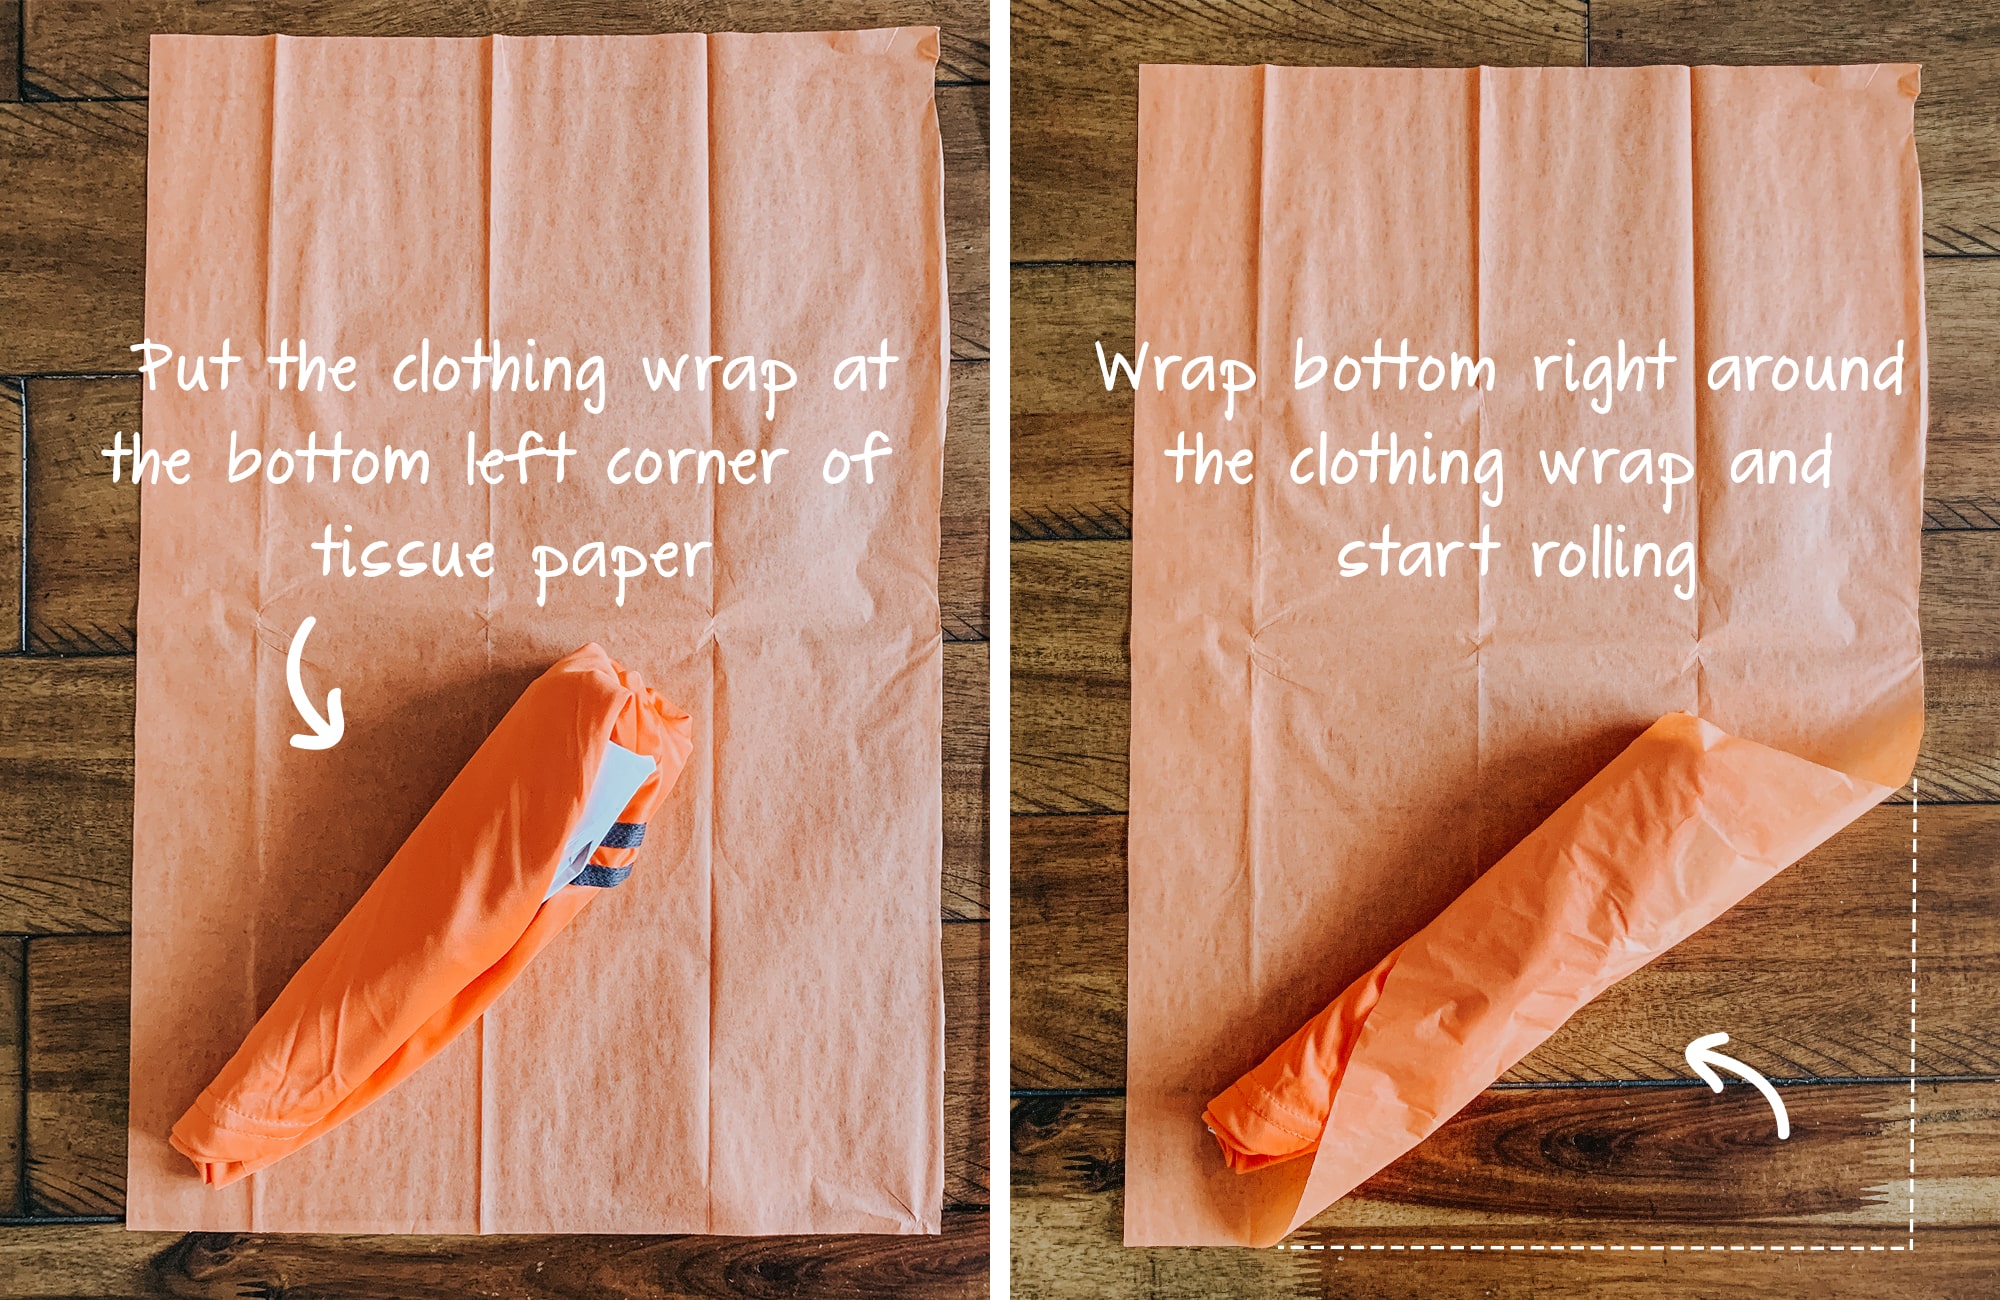
When wrapping the clothing with the tissue paper, you’ll want to place your clothing wrap on an angle and then roll. This is kinda similar to wrapping a sub sandwich! LOL
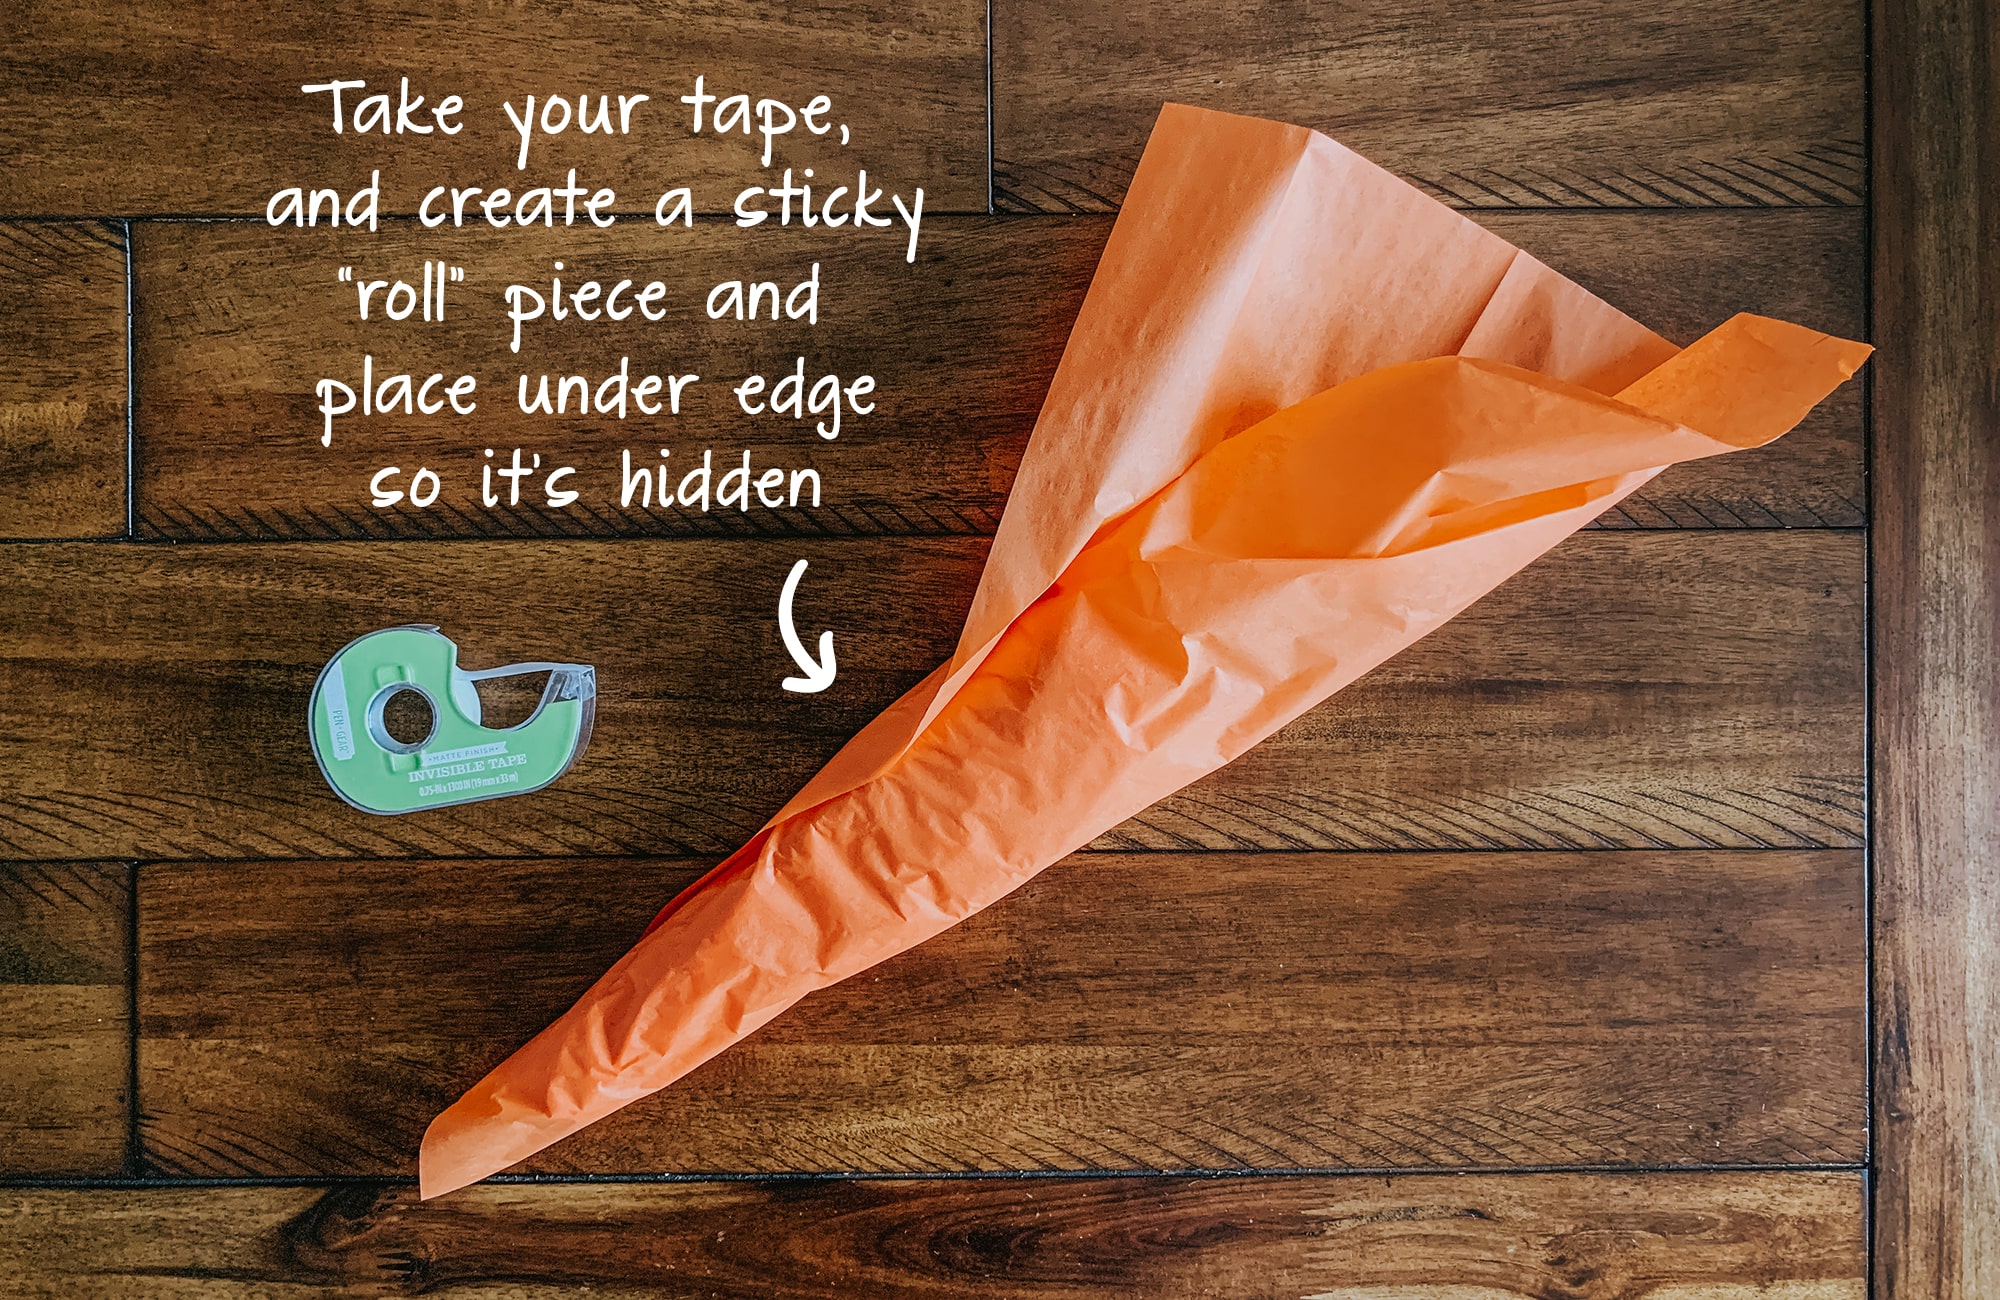
Once you’ve completely rolled your clothing, take your tape and create one of those “Sticky” rolls (that acts as double-sided tape) and place under the edge, so it’s hidden. If you have double sided tape, that will work as well!
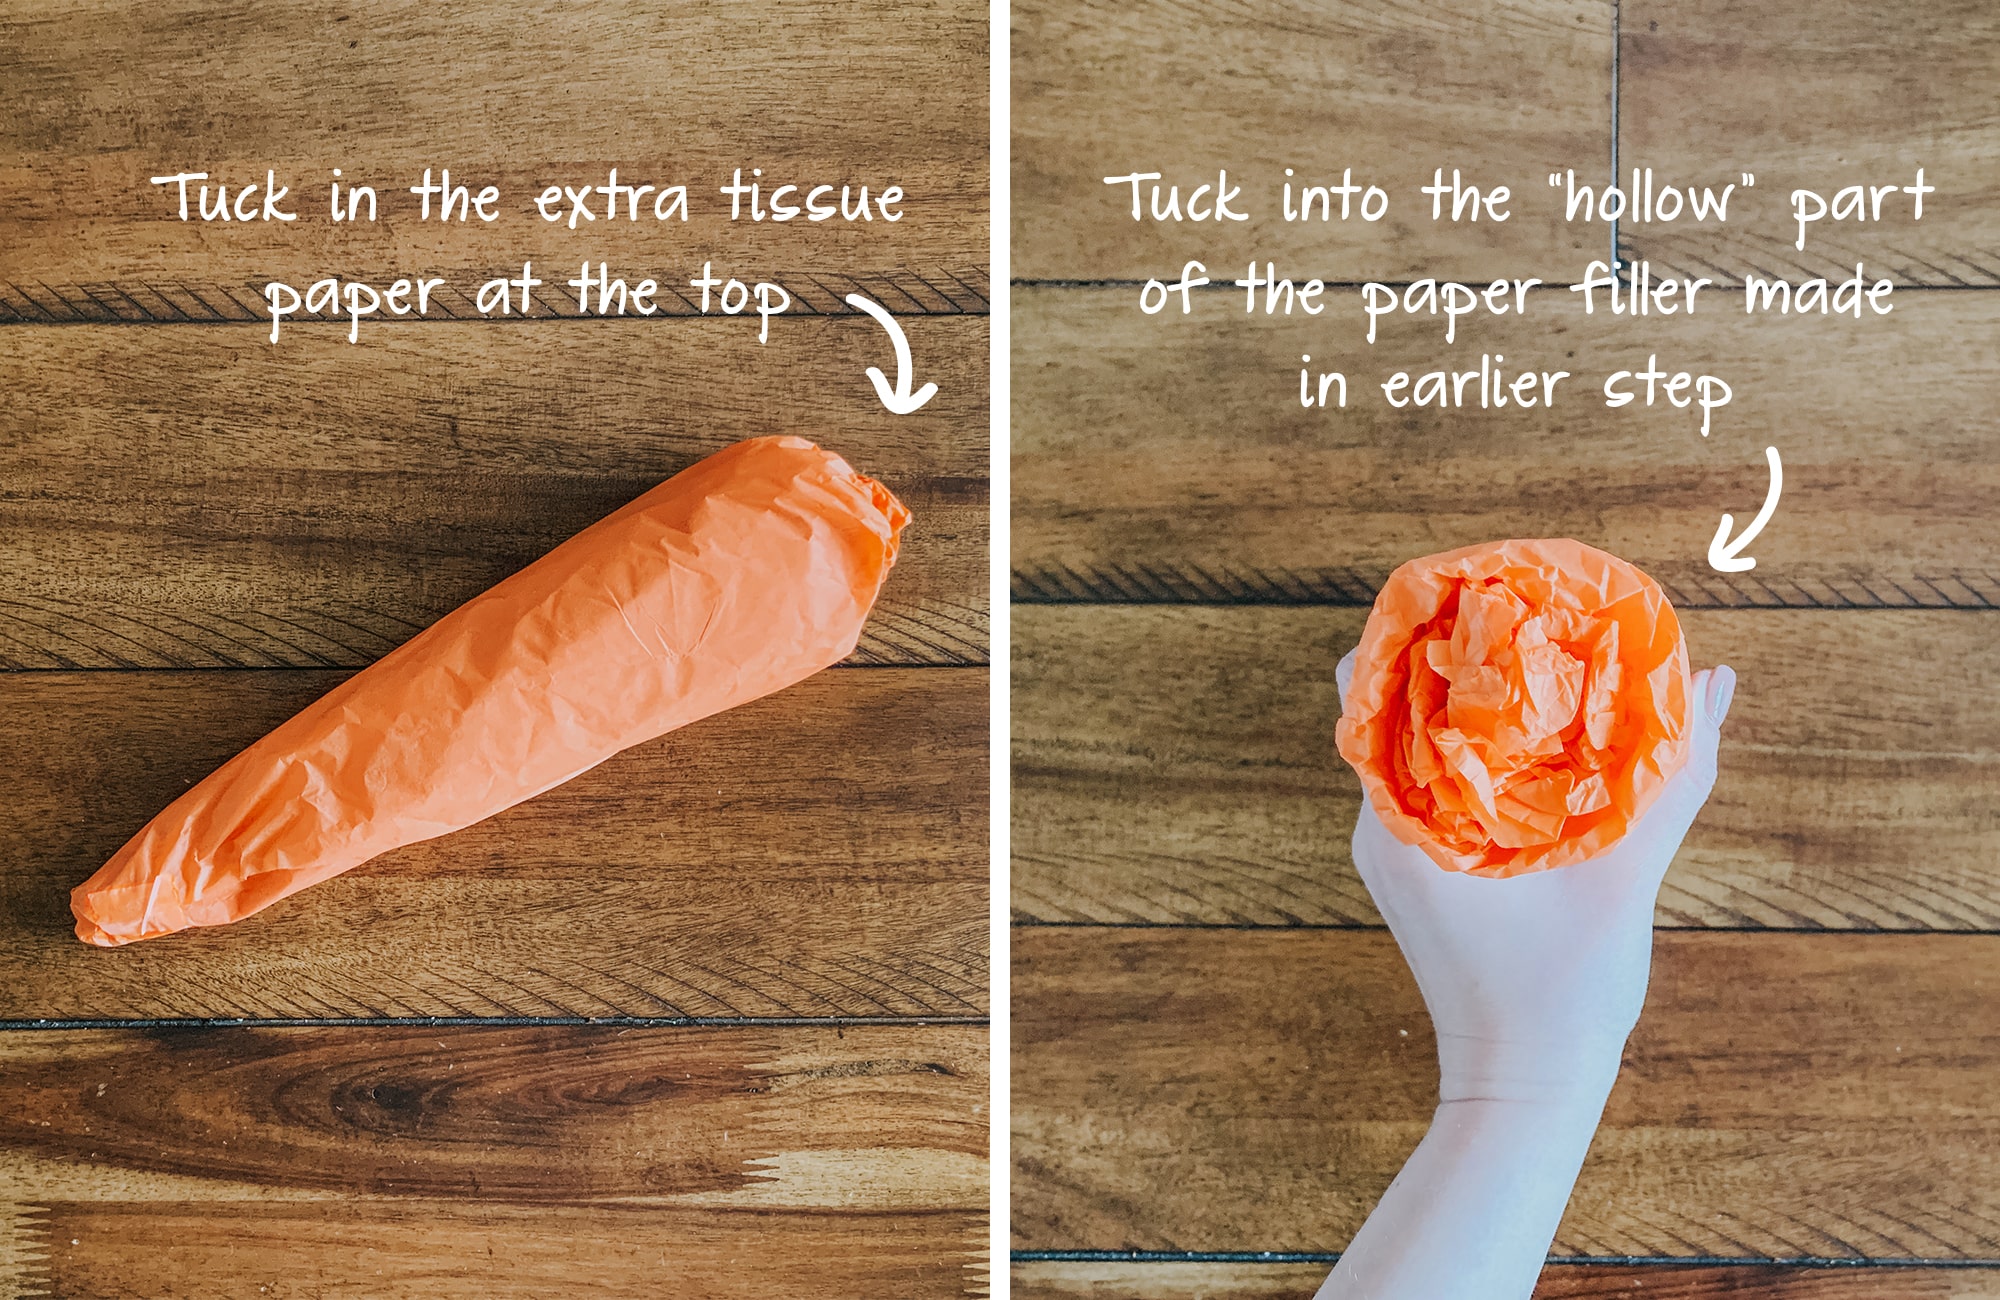
Lastly, you’ll tuck in that leftover tissue paper that was at the top, inside the hollow hole you made with the paper filler during the first step.
side note – if you find yourself having too much extra to tuck in, don’t worry! You can just take your scissors and cut some of that excess off.
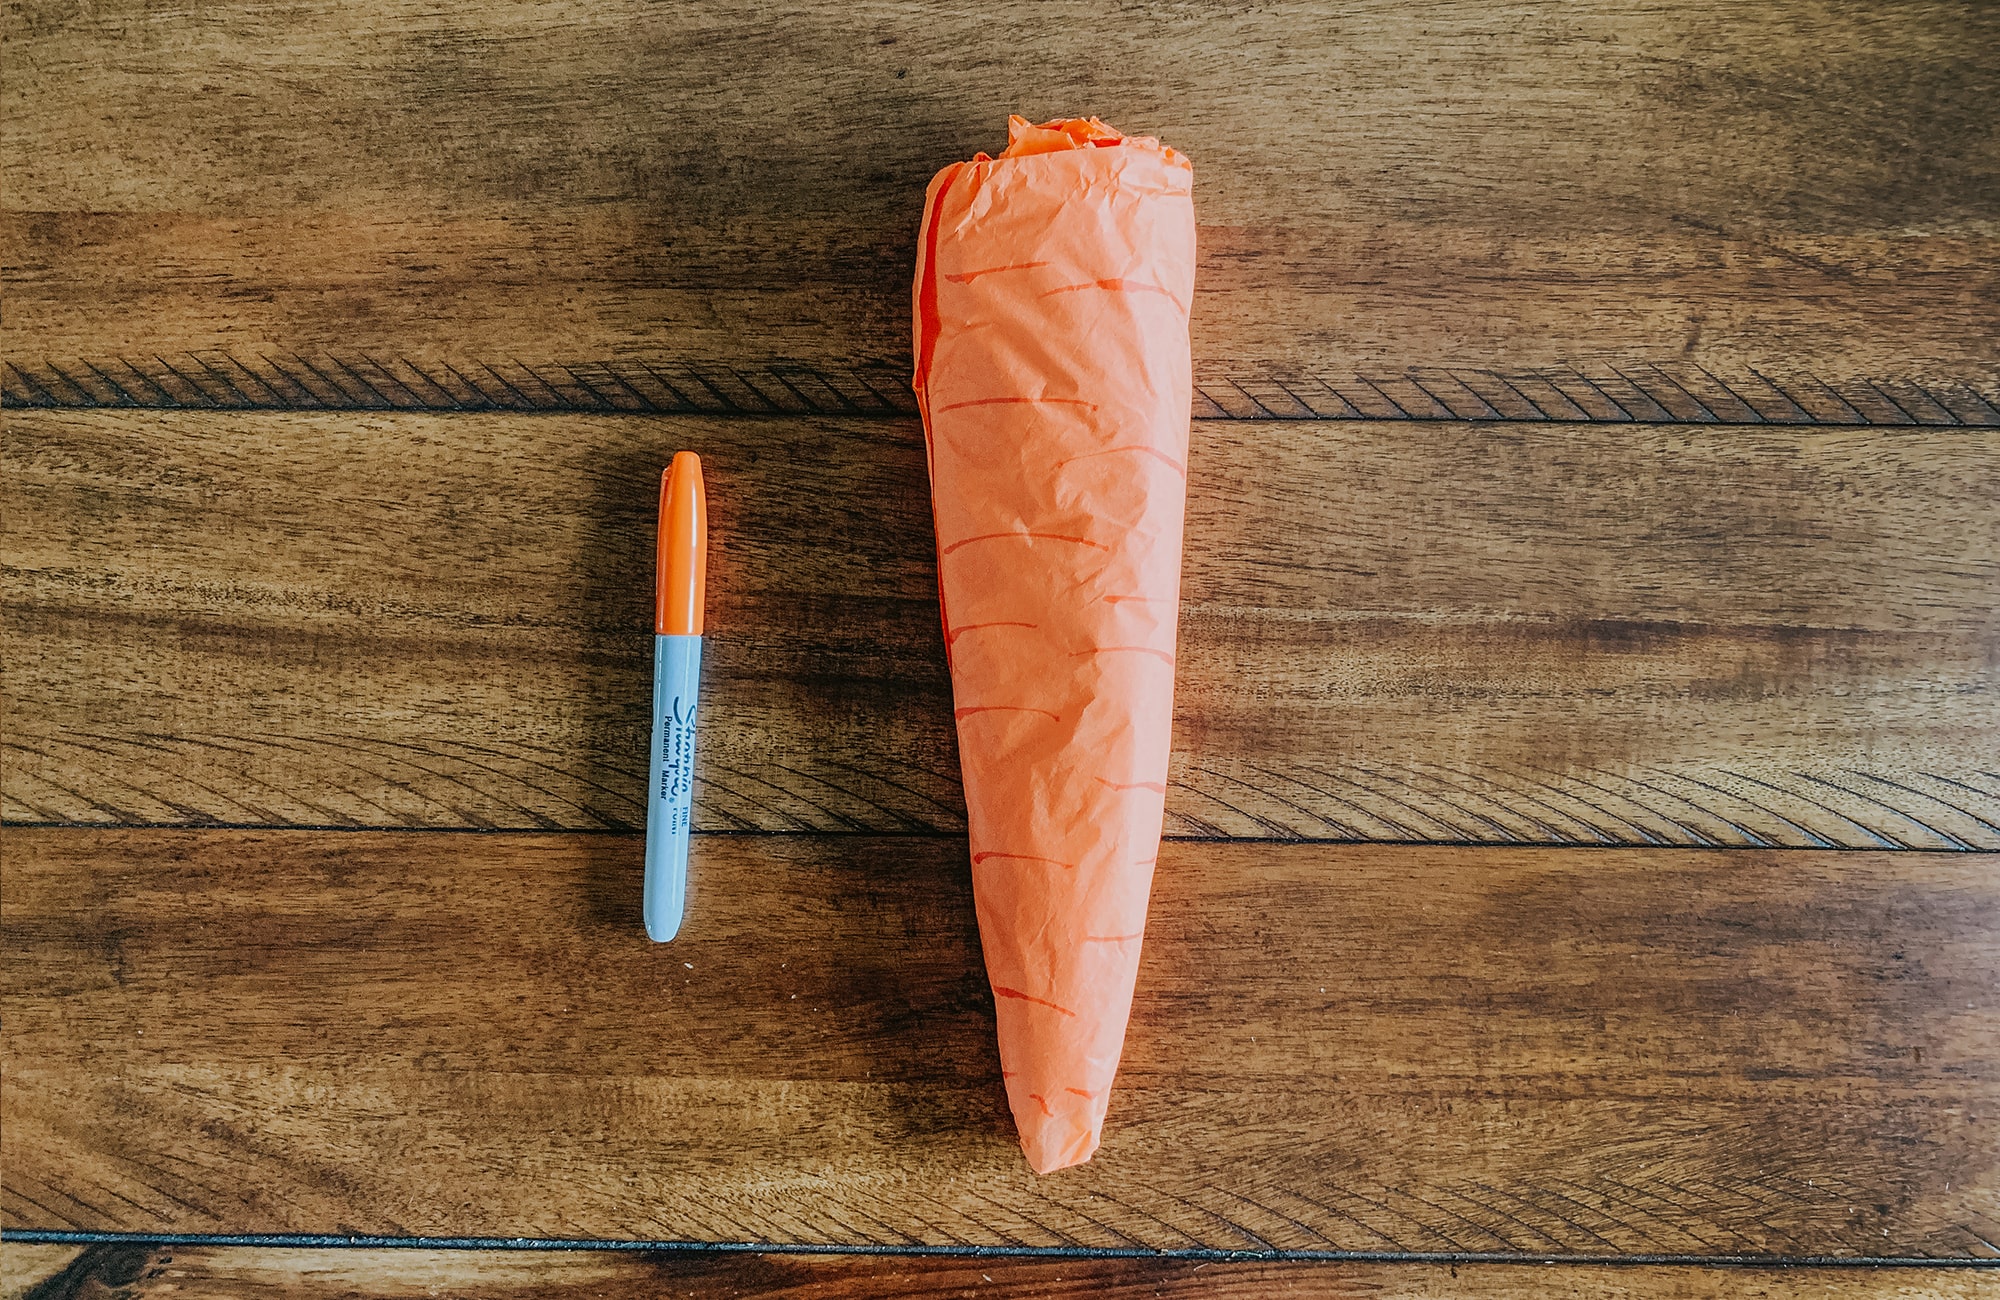
STEP 3 – DRAW LINES
Using either an orange marker or orange sharpie, draw some horizontal lines on your tissue paper carrot, to give it some definition and to make it look more like a carrot!
STEP 4 – MAKE LEAFY TOP
The final step!
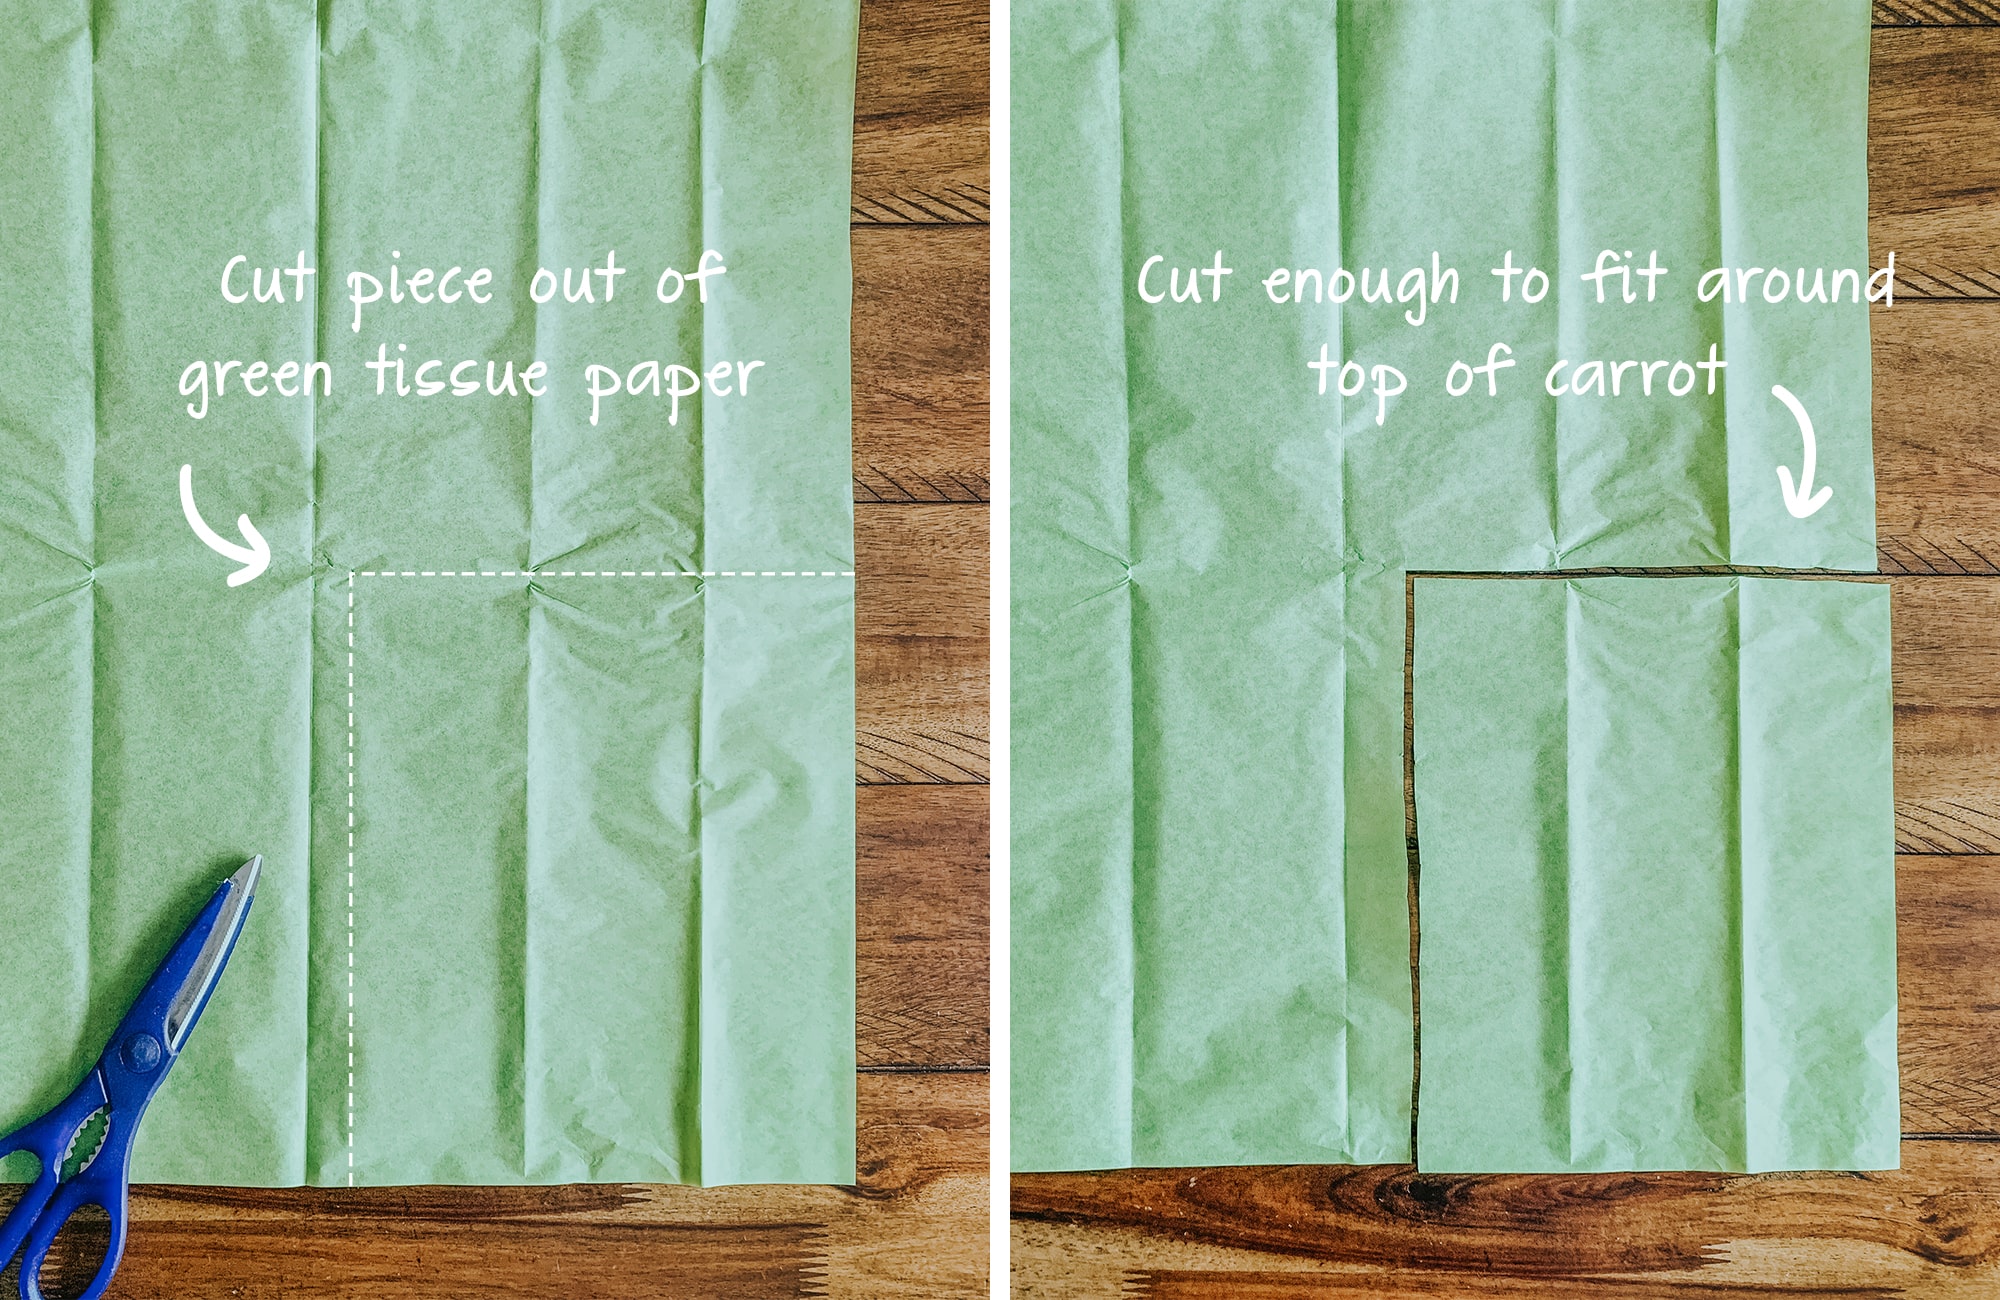
Grab your green tissue paper and cut out a small rectangle piece. It is important that the piece you cut is wide enough to fit around the top of your tissue paper carrot.
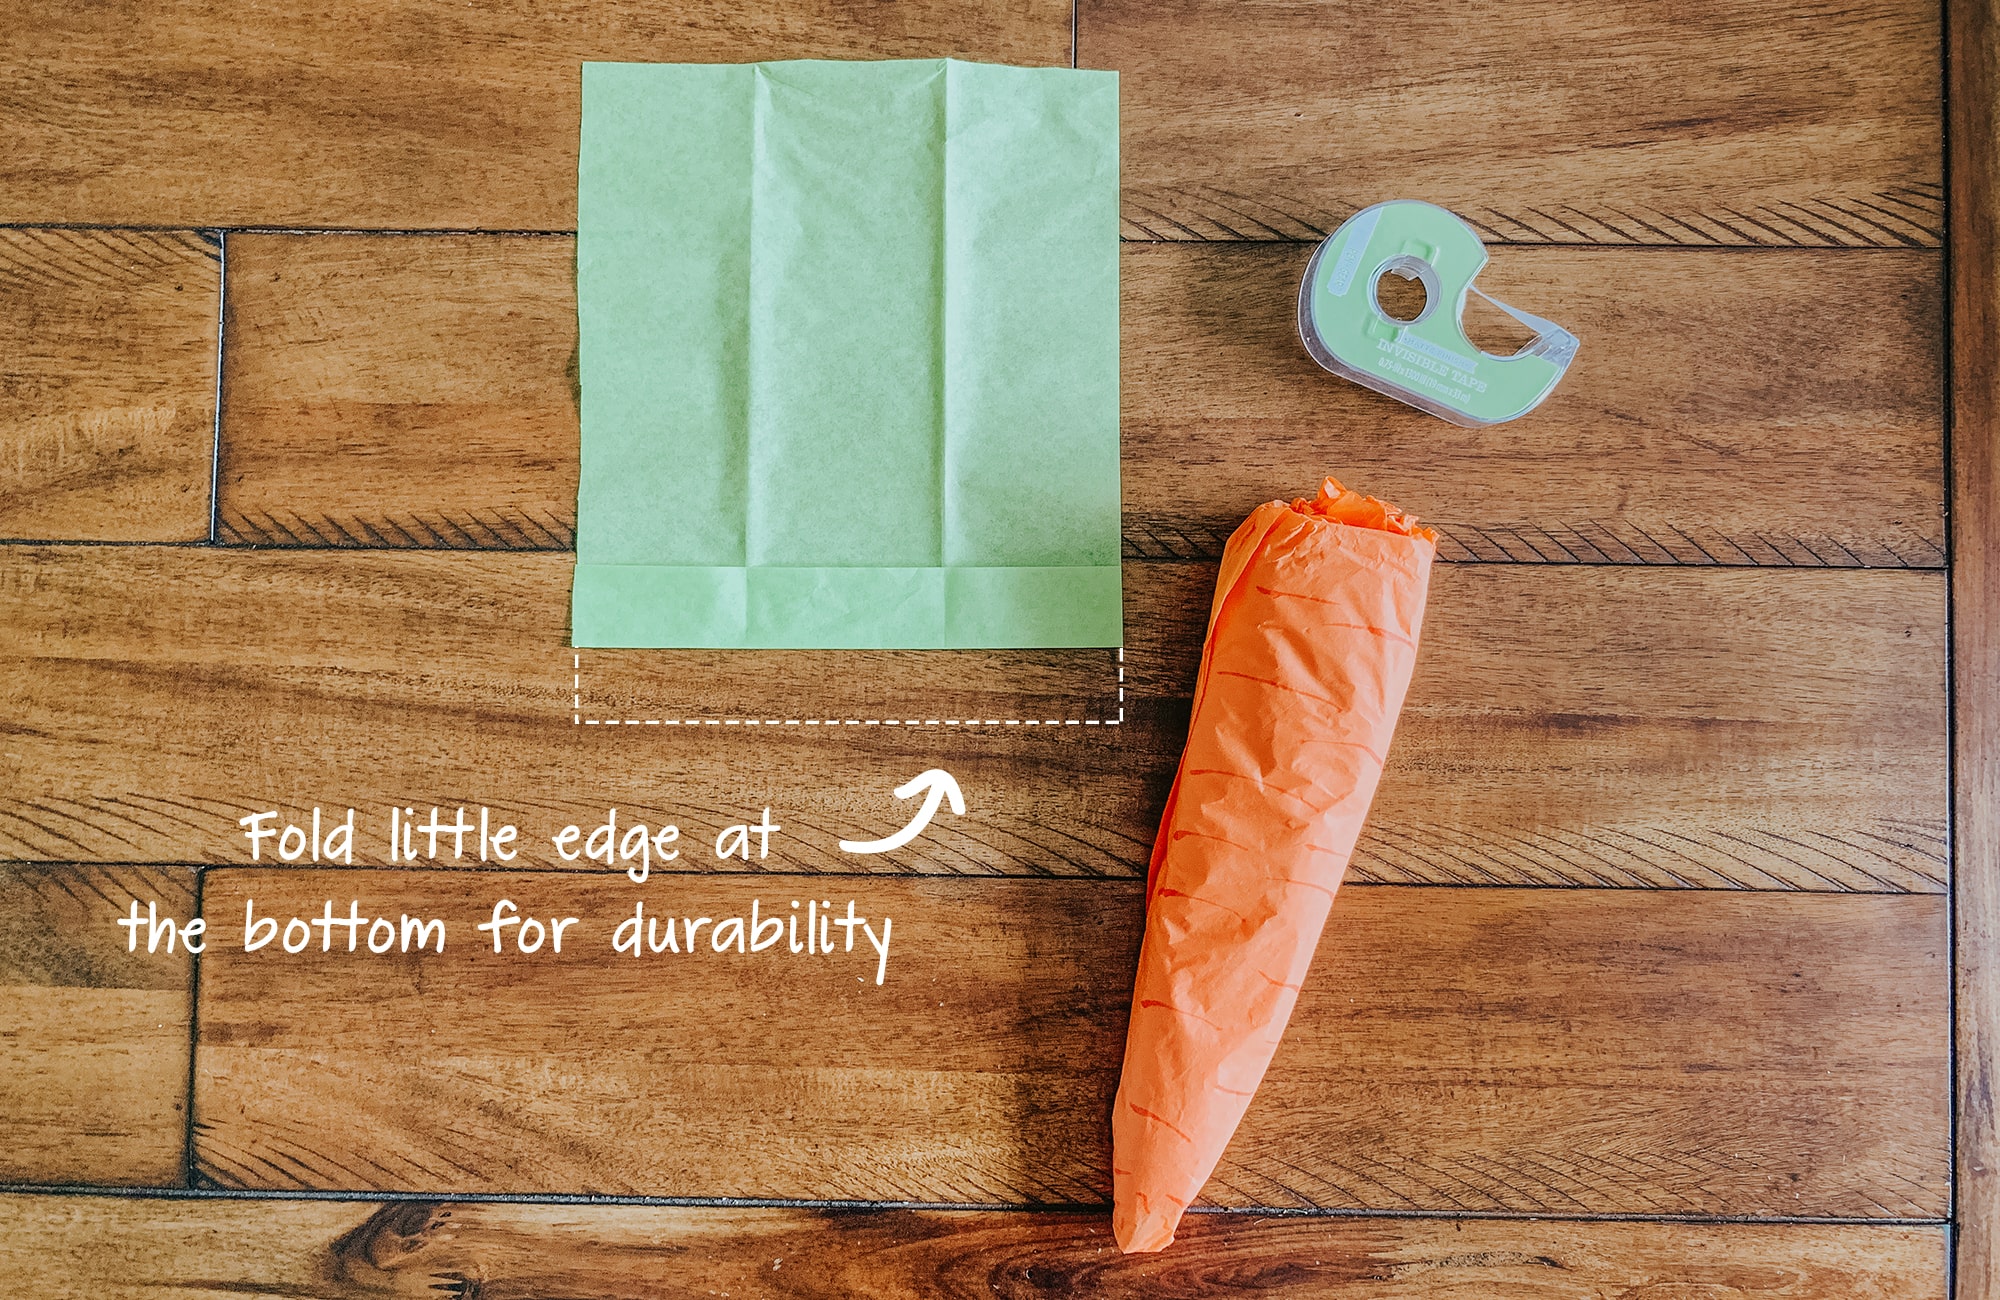
I folded the bottom of my green tissue paper to make it more sturdy when adding it to the top of the carrot.
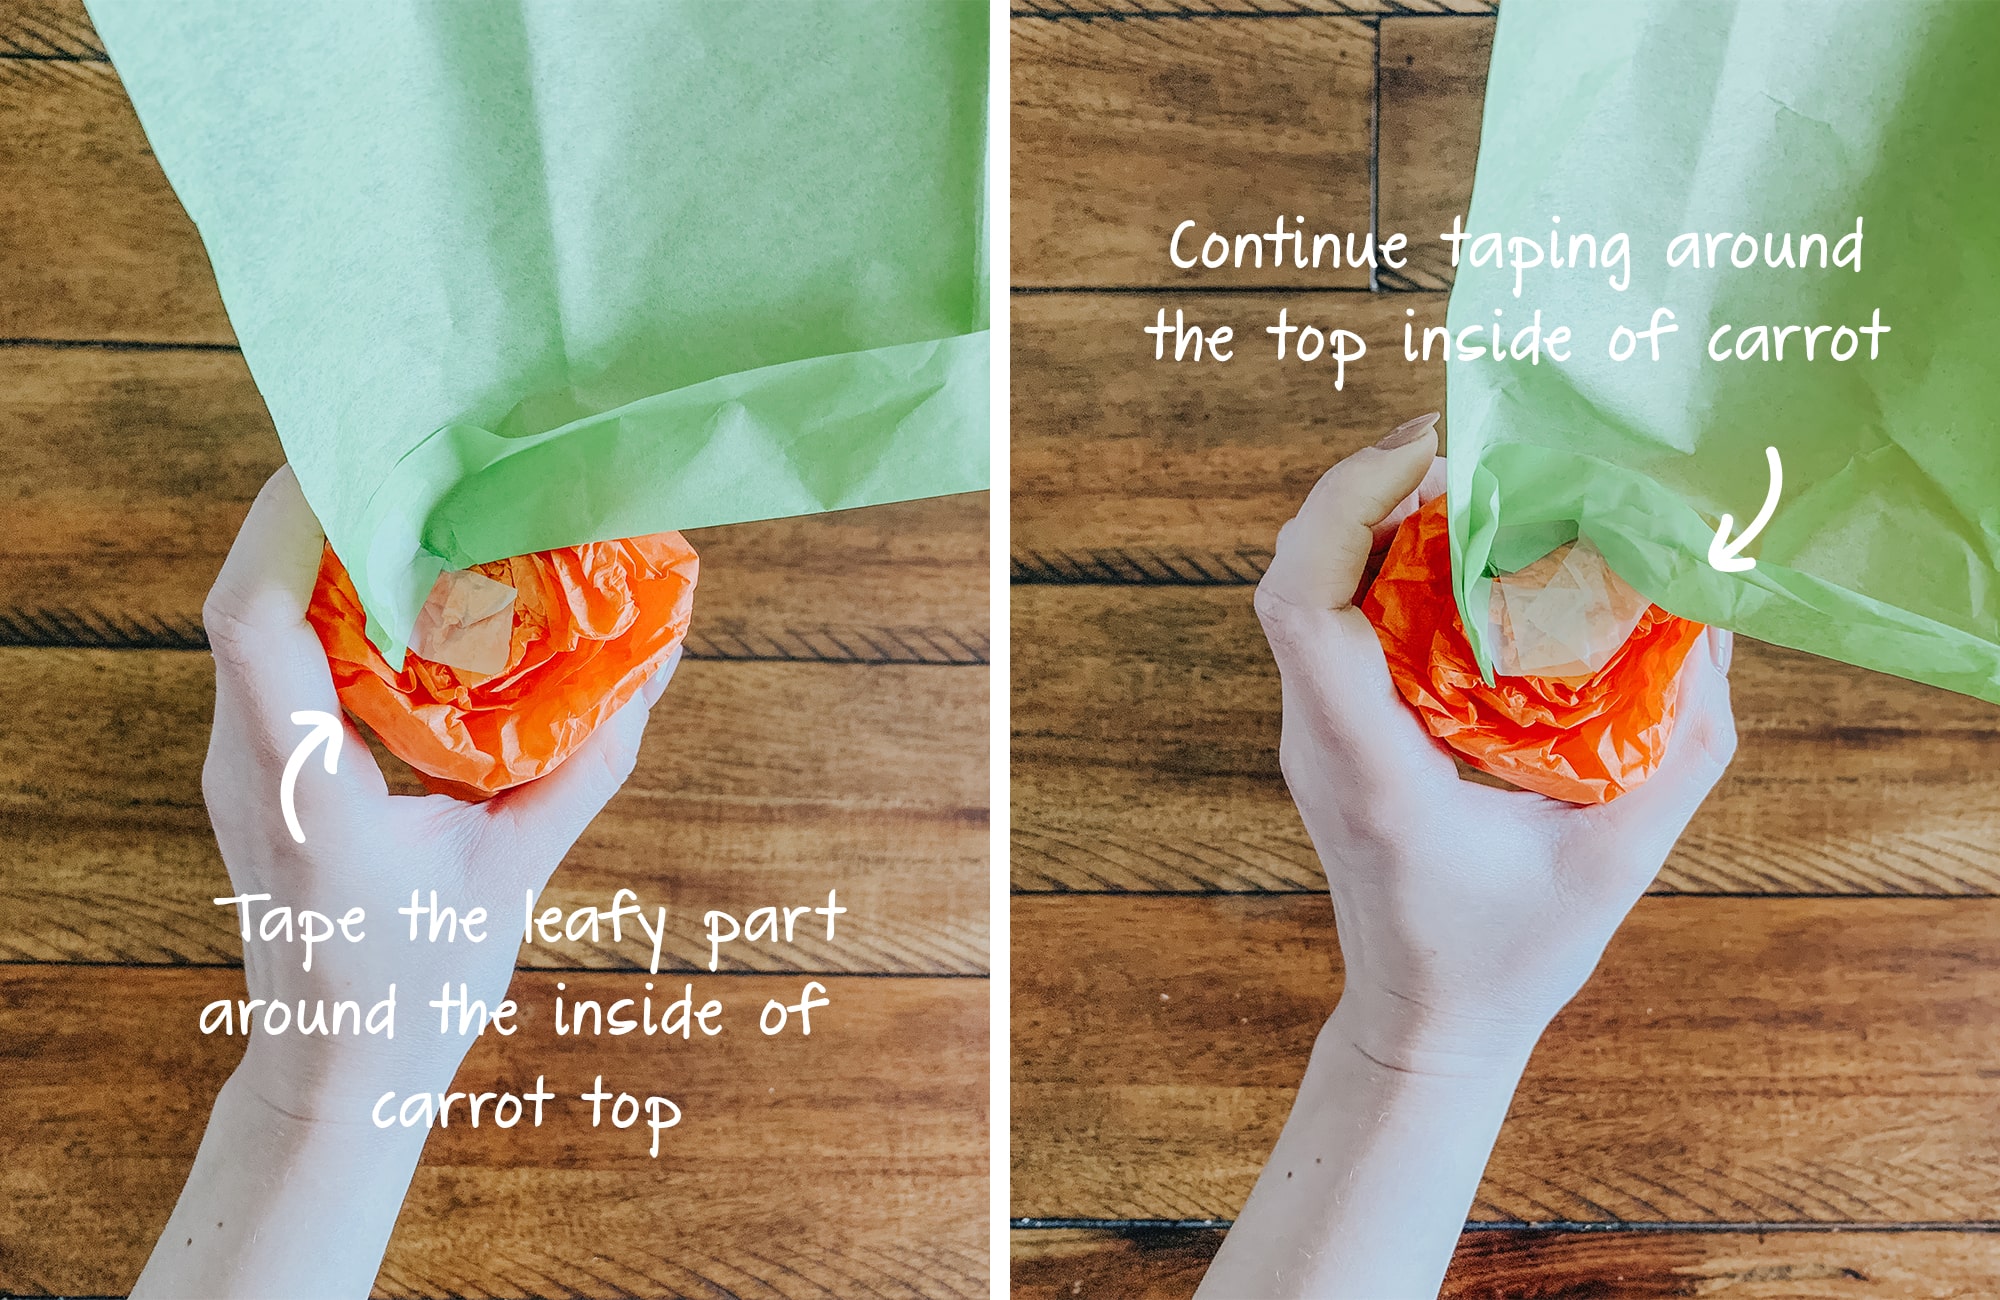
Next, you’re going to tape your leafy top, into the inside of your carrot top. Start with one piece of tape, and then keep adding them as you go around the inside part of the carrot top.
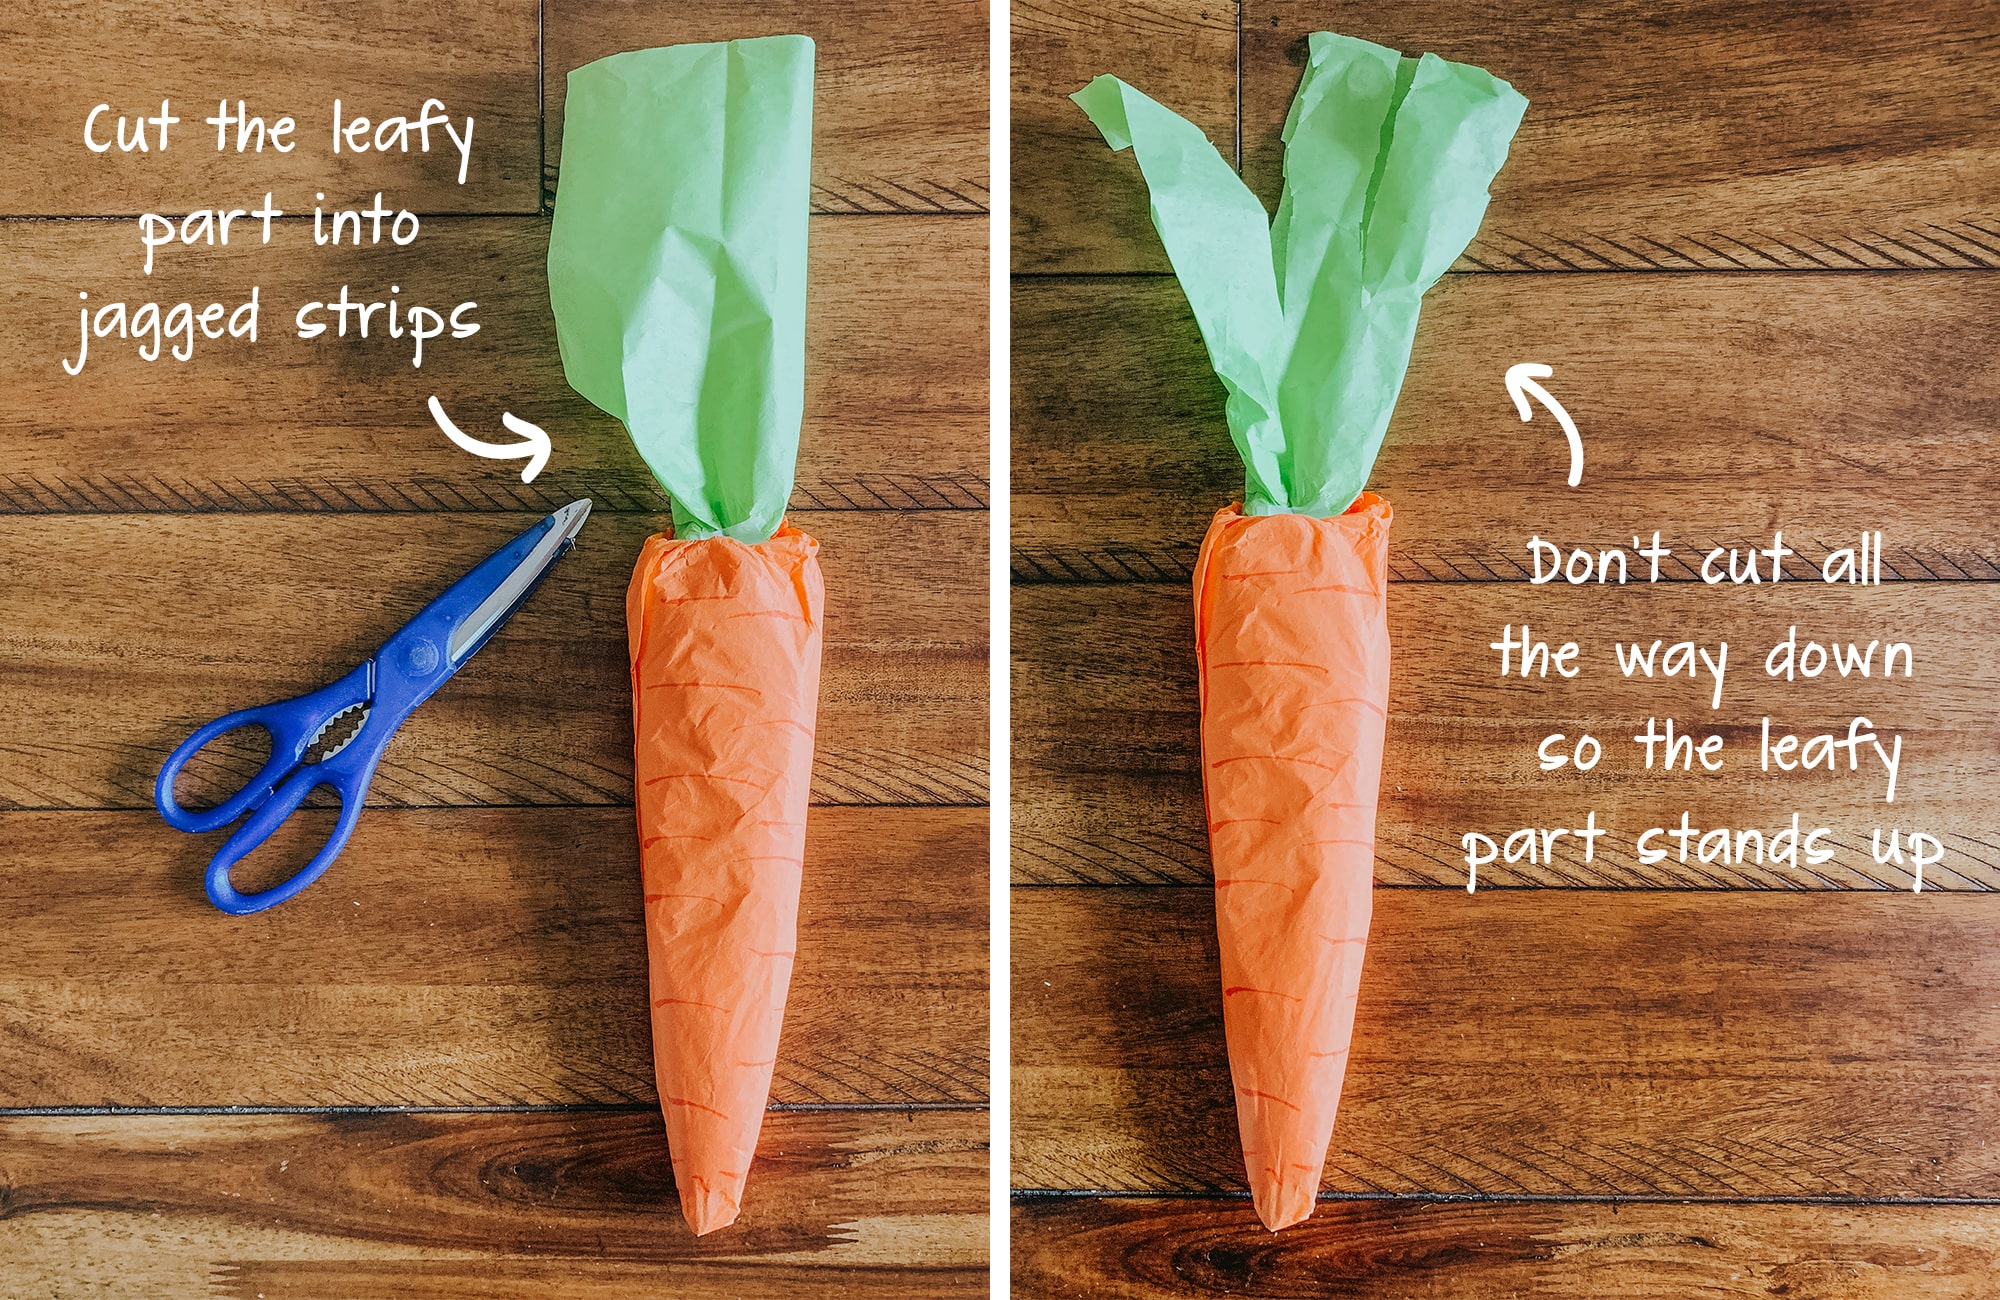
Finally, once your leafy top has been added to the carrot, take your scissors and cut the leafy part into jagged strips. Make sure not to cut all the way down the leafy top because then your leaves won’t stand up. I went about 3/4 of the way down the leafy top when cutting. Also, it doesn’t have to be perfect. No carrot is really the same!
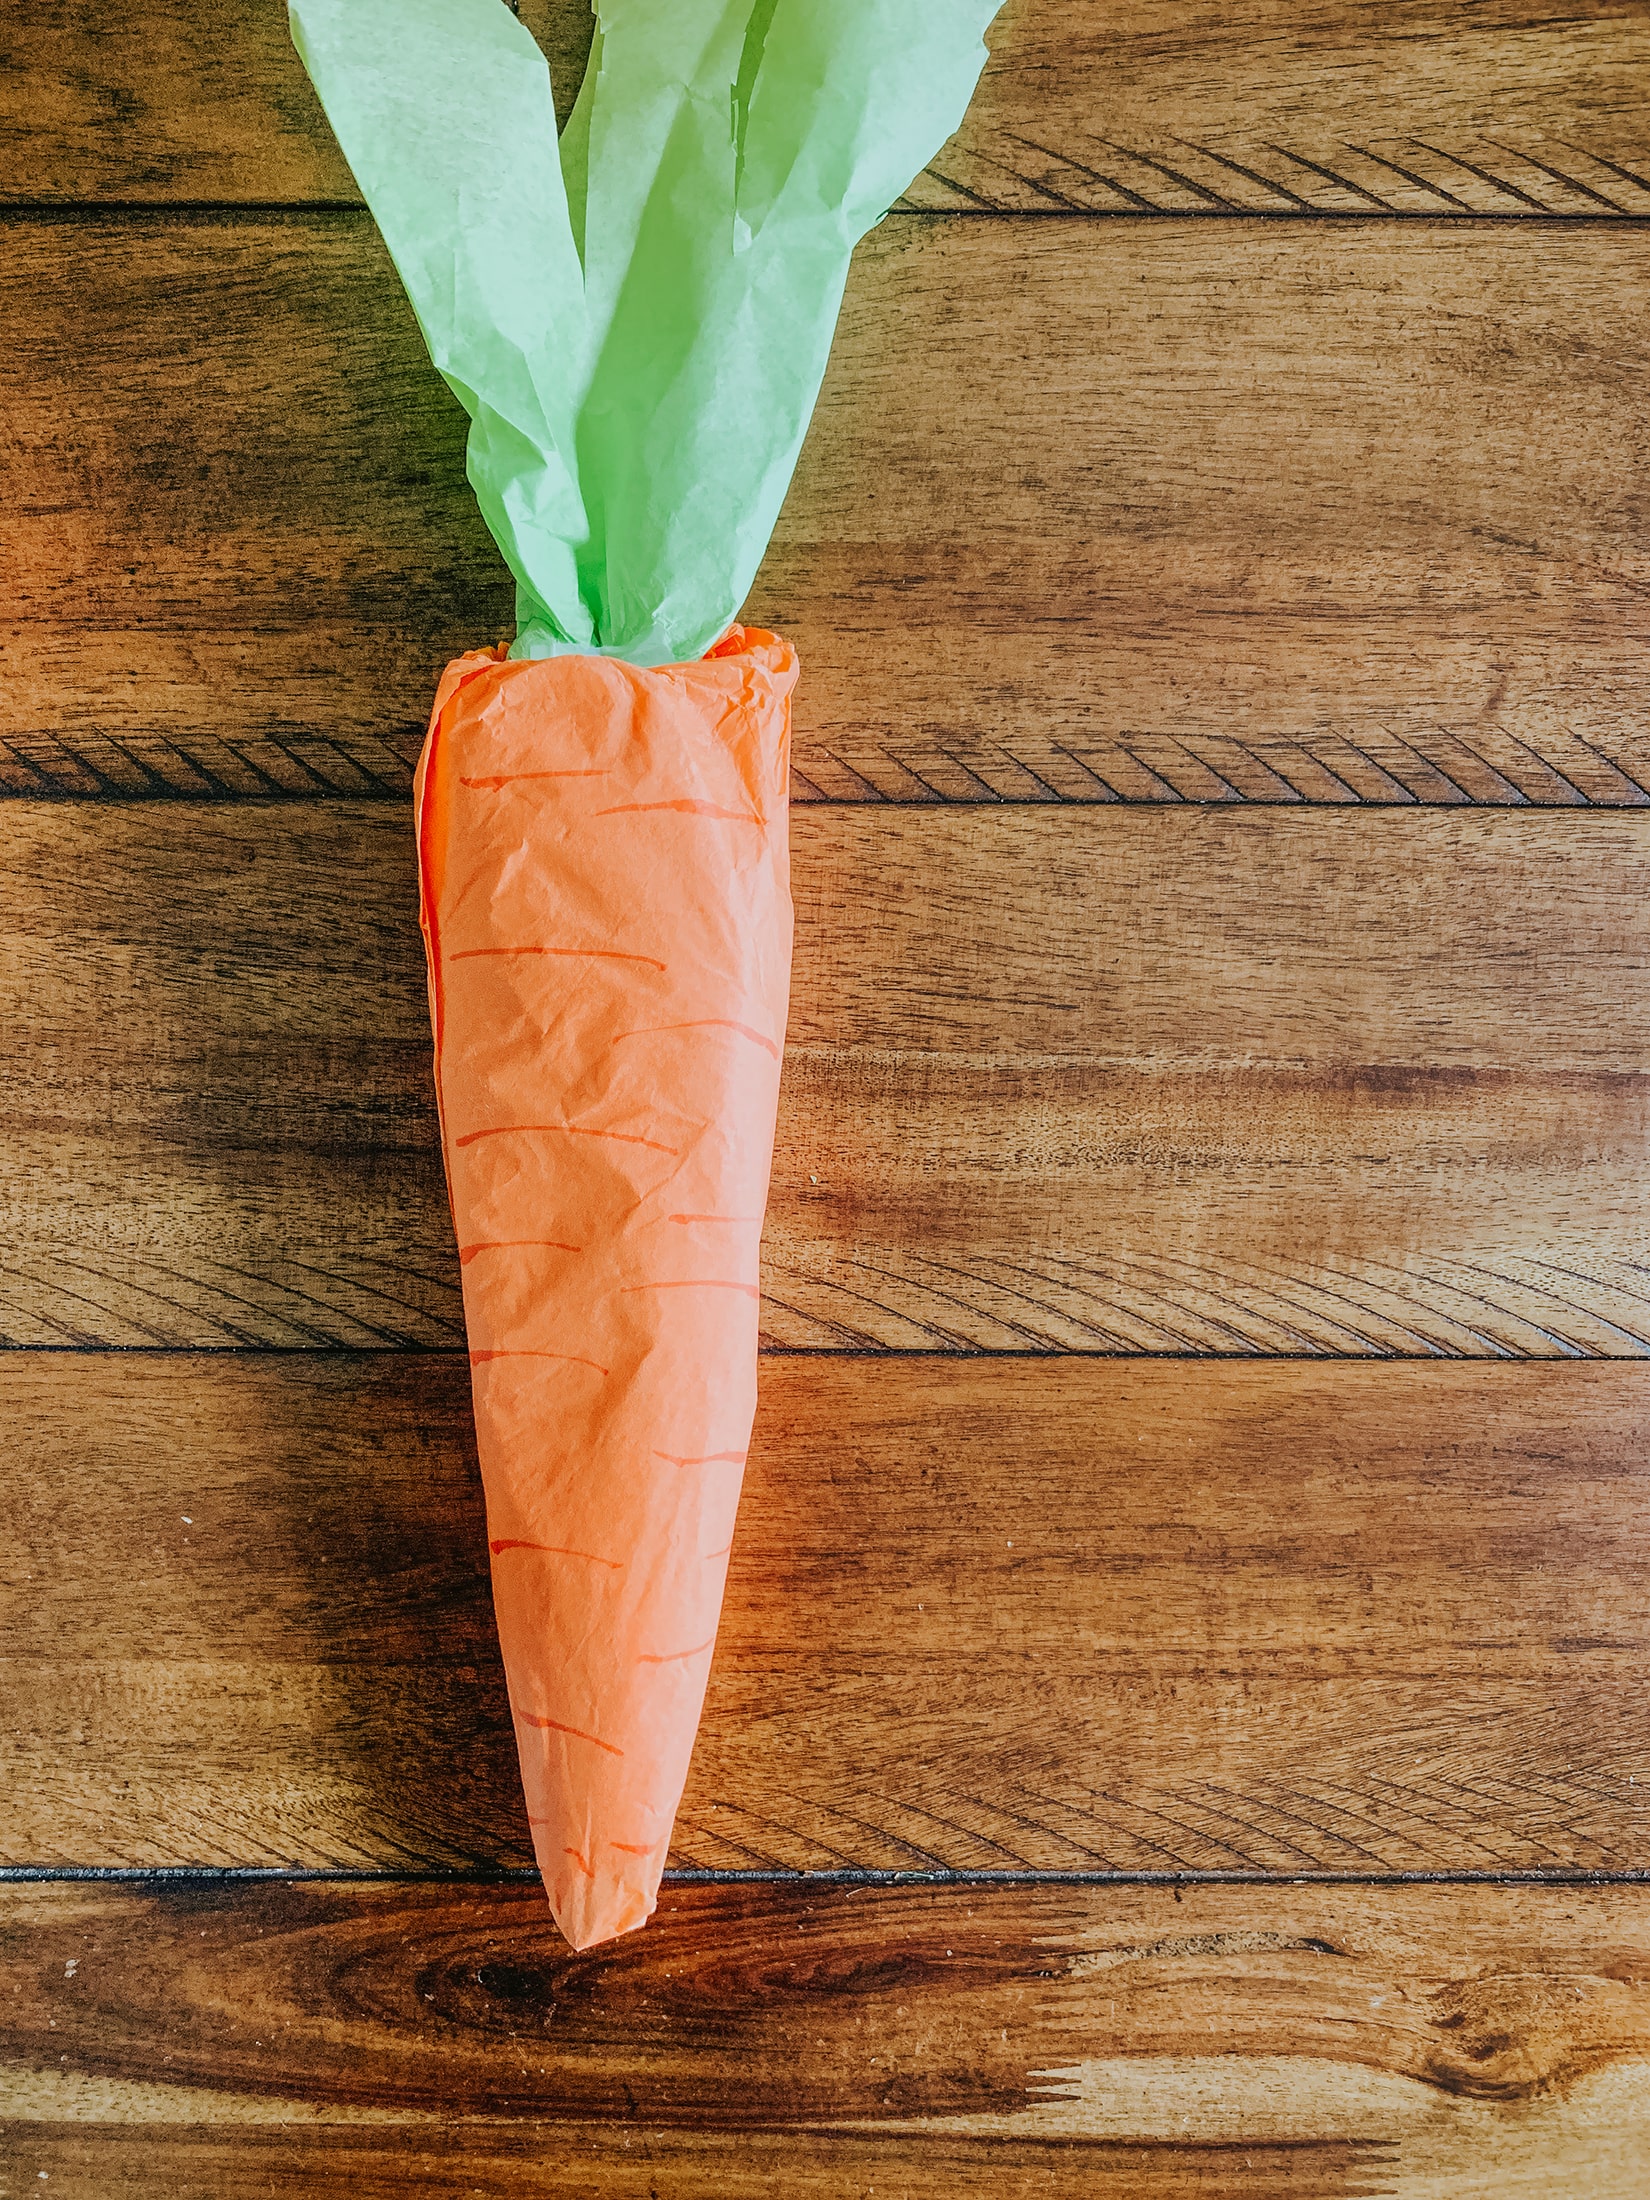
And there you have it! Super easy and so cute!
We hope you have a wonderful Easter Weekend!!


Amazing! tissue paper carrots art is appreciated. This article is helpful for kids and must read this article. You have a great way with words as shown in your article.
Thank you so much for your kind words! We’re glad you enjoyed the post 🙂
– Tammy & Sarah