Hey! It’s Tammy here 🙂
My husband and I recently finished our laundry room “make-over” and I’m excited to share the final look with you all! This room was LONGGGG overdue before we even started. It was that one room in the house that you walk into, but keep your head down and eyes closed… I’m still cringing looking back at the before photos.
When we moved into our house (about a year and a half before we started this project) this was the one room we didn’t touch and was towards the bottom of the “to-do list”.
As most of us have, a budget was involved. We didn’t want to do a full renovation – taking out the floors and switching out the utility sink, etc. We just knew the room needed a major face lift, some needed storage space and a place to hang and fold laundry. You know, the basics! If anything like the rest of our house, we also need to give it the modern farmhouse look to it too 🙂
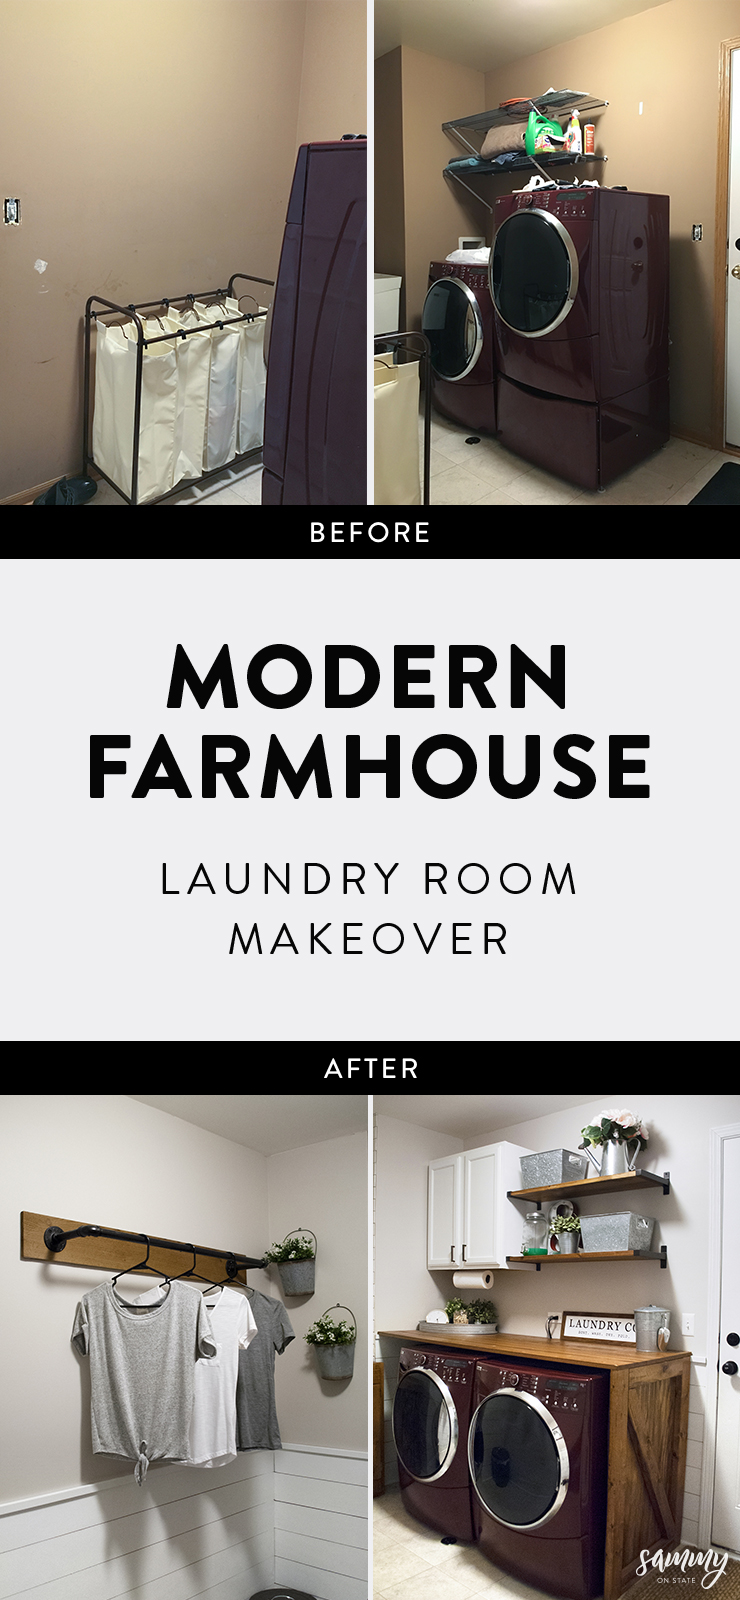
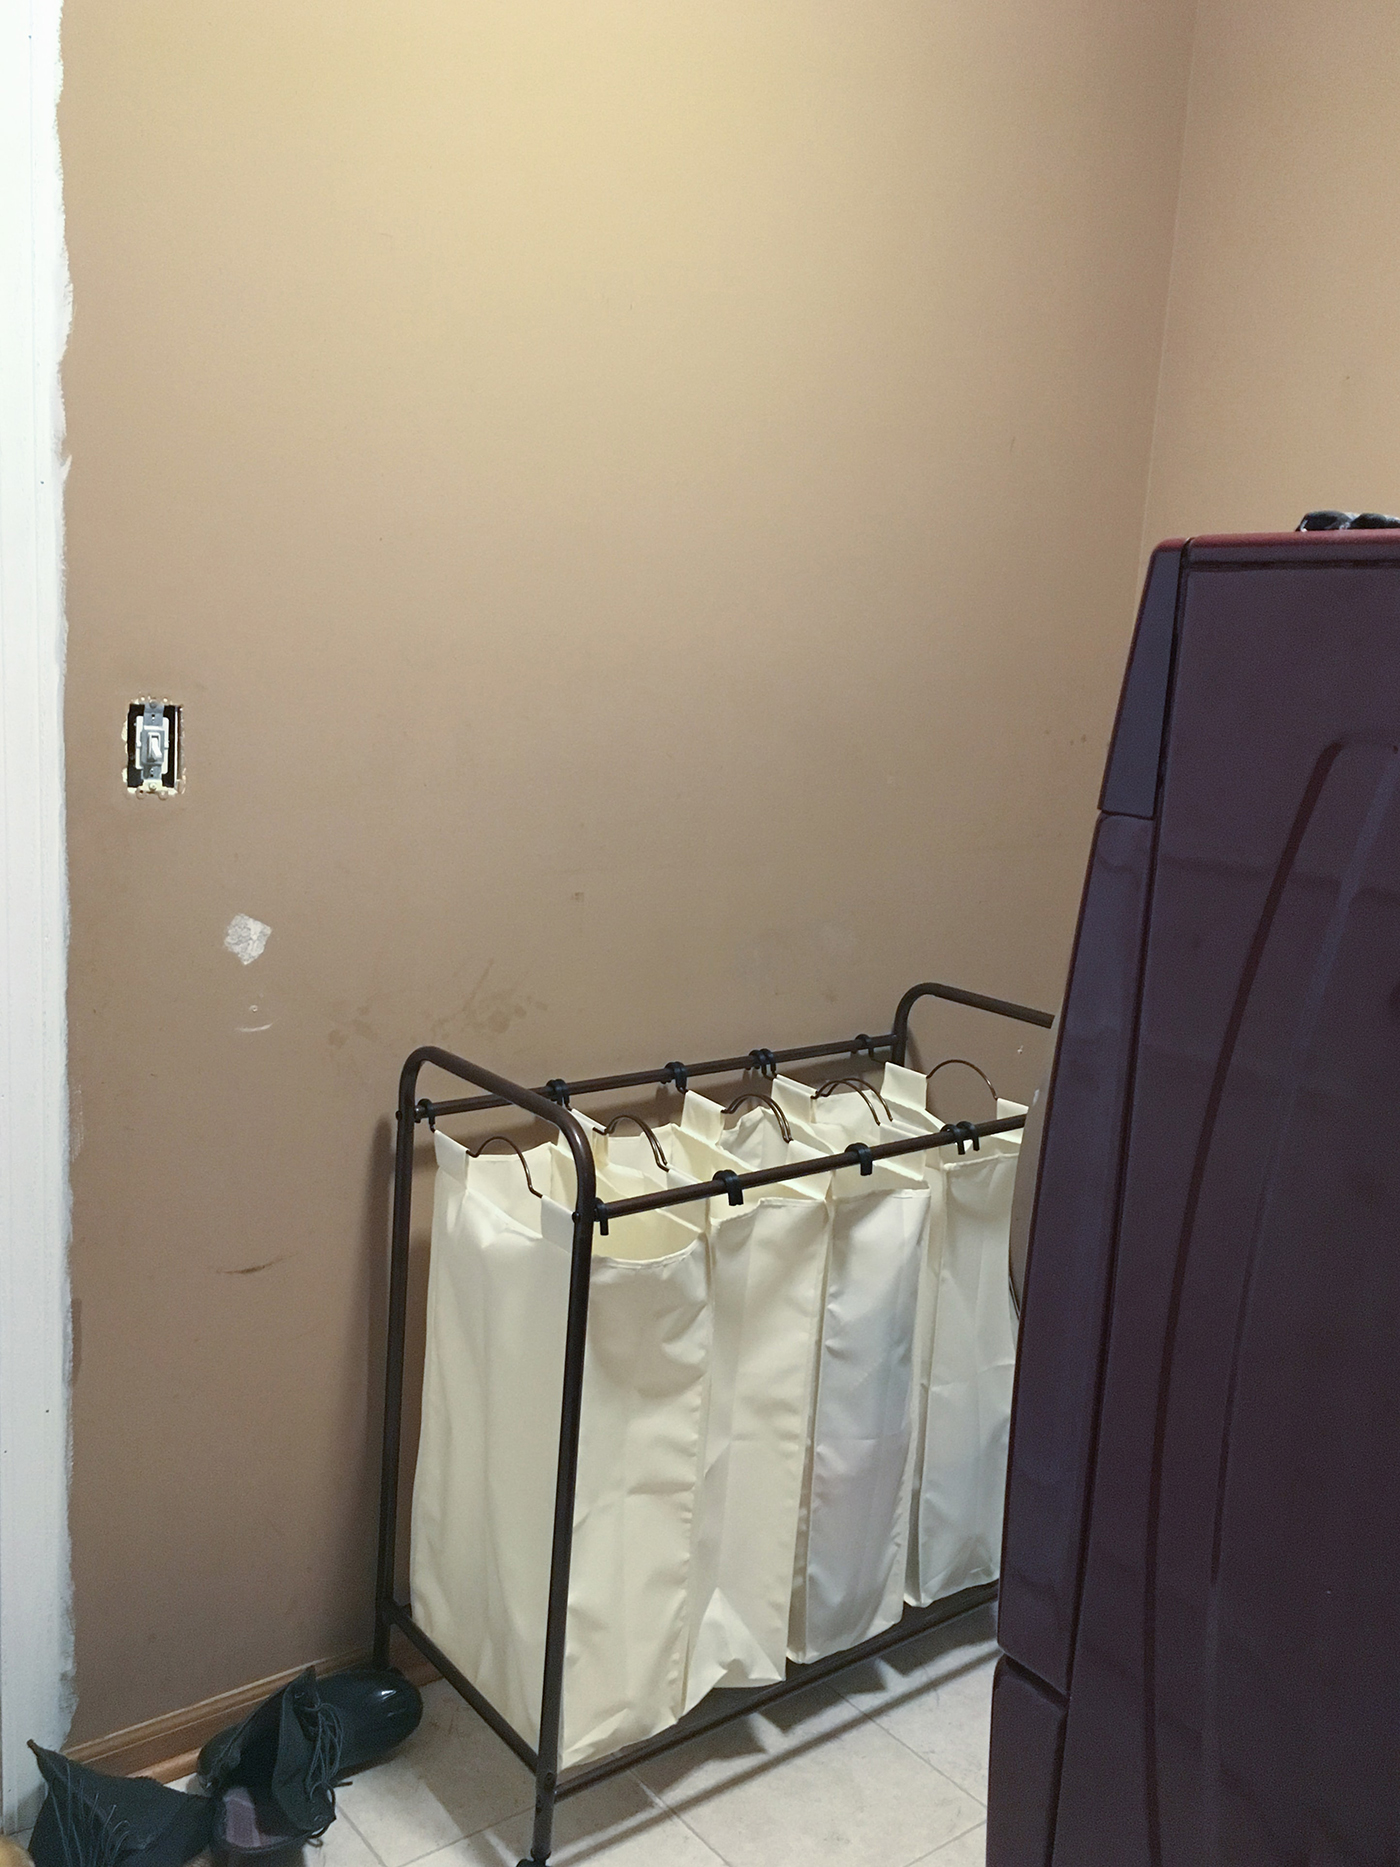
BEFORE:
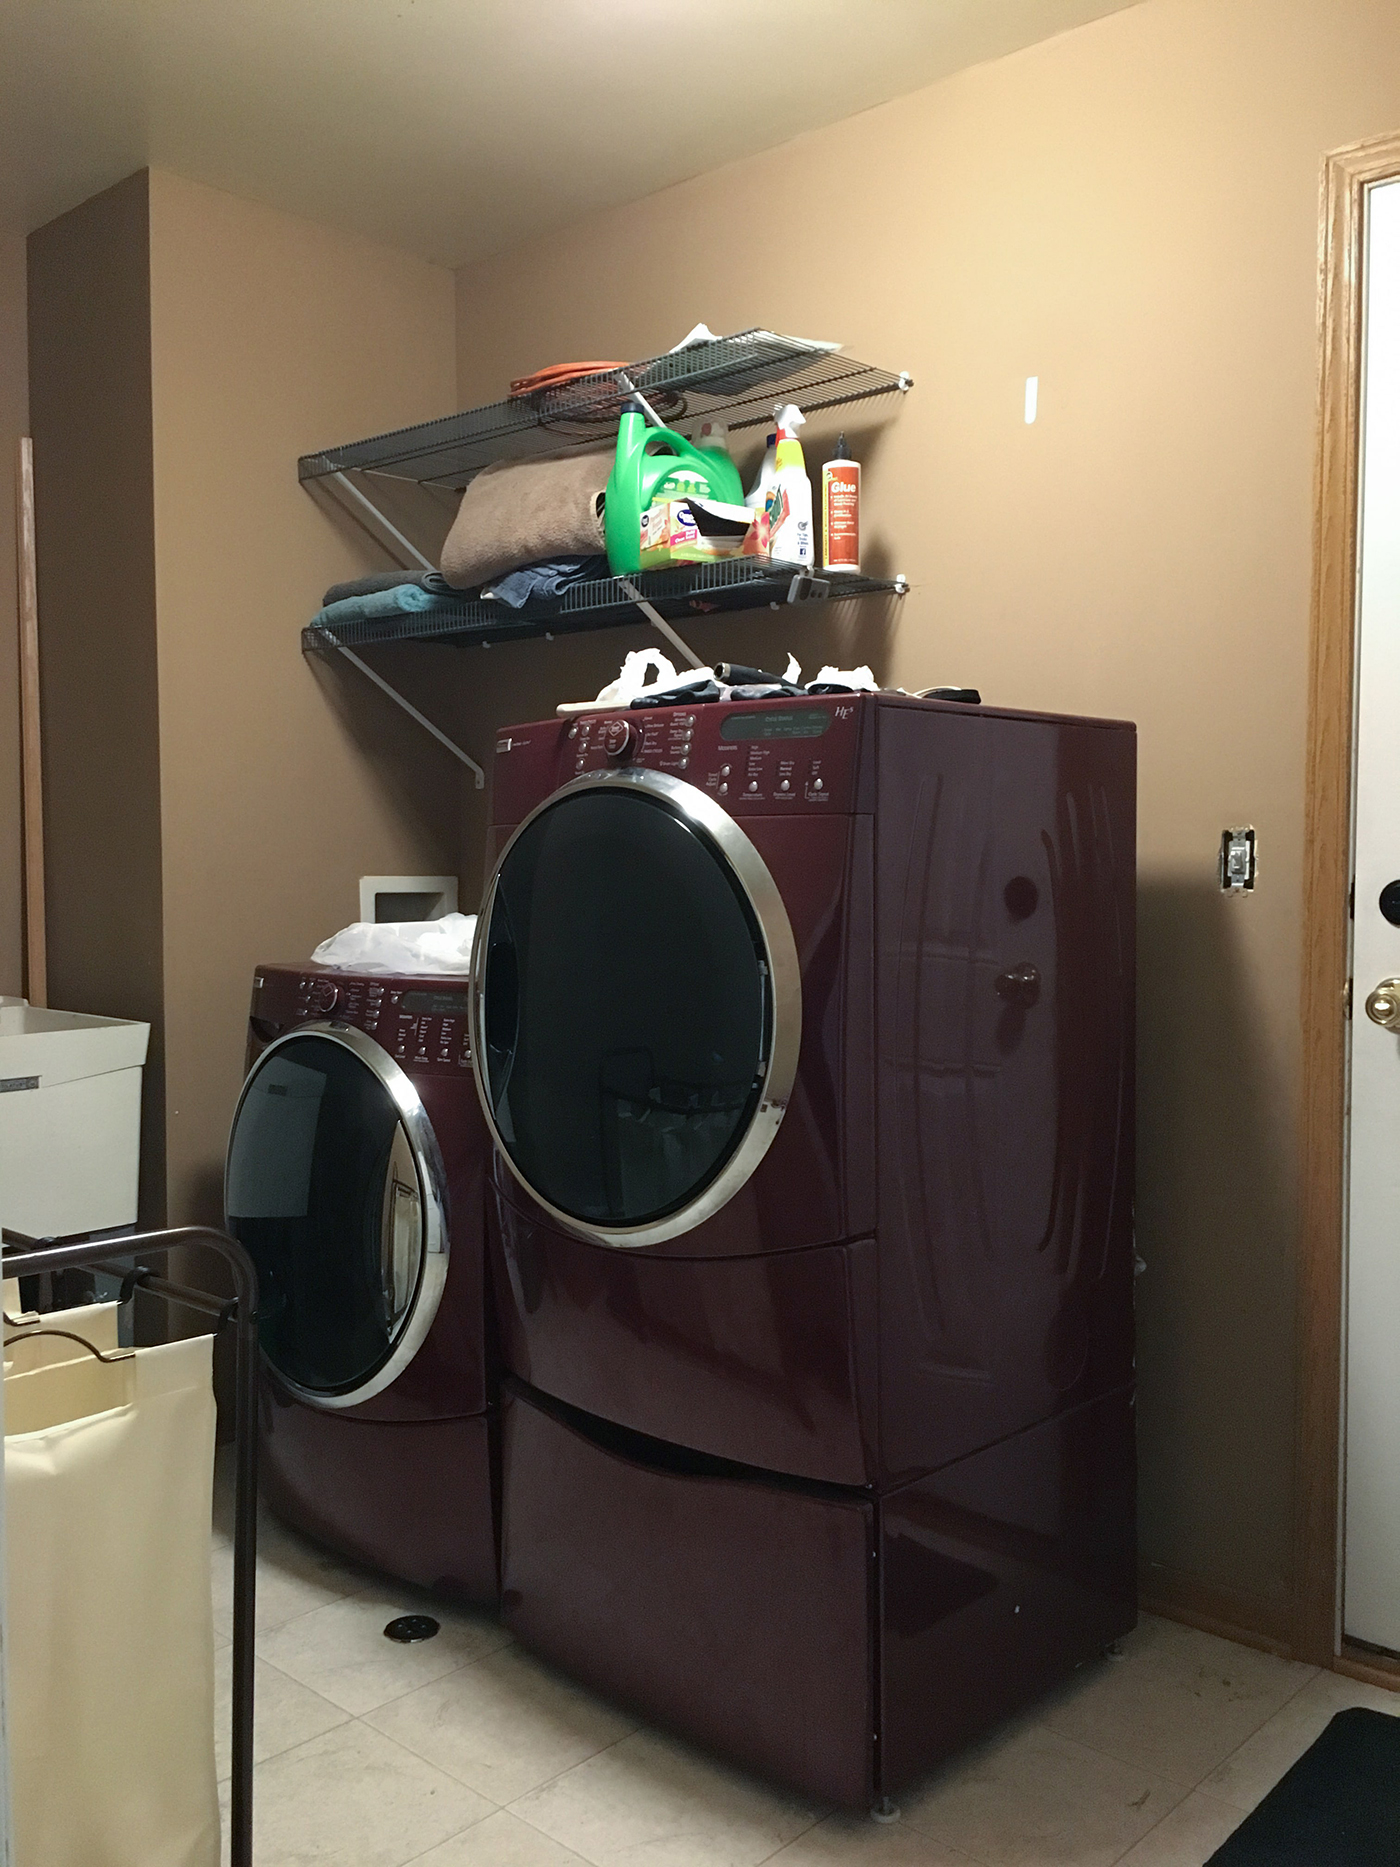
As you can see, there was no closed storage area, just the open wired shelving to show all of the things that should NOT be seen. And I don’t know about you, but I’m not a big fan of the pedestals that come with some washer and dryers. To add to it, there was only one installed to the dryer… odd. Like I said, I just turned my head the other way this whole time.
Too add to the gross paint color, the ceiling was a even yellow-ish white color. Not a pretty sight!
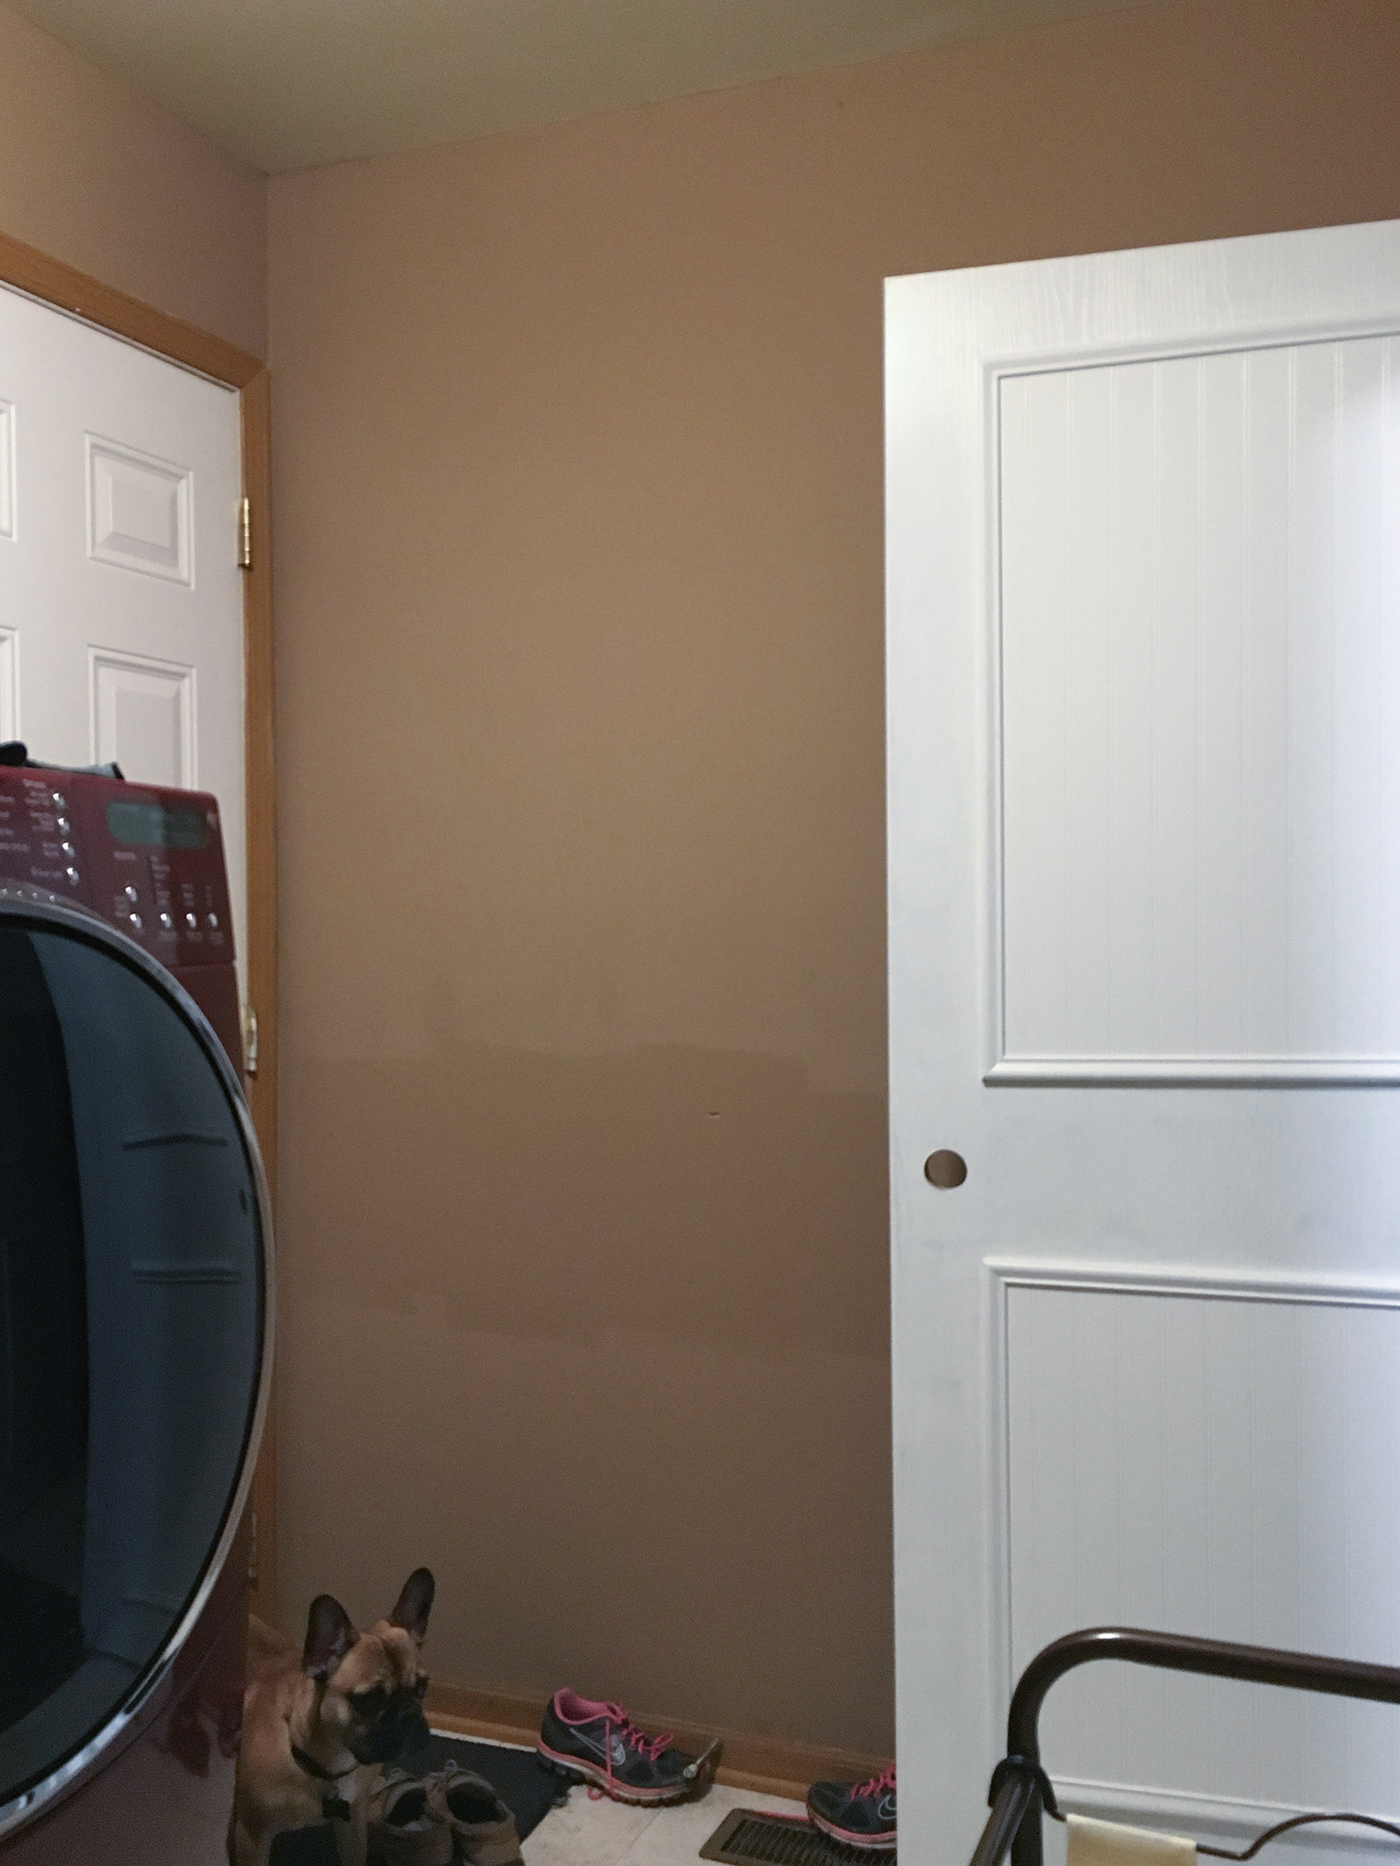
Like I said, this was the one room we did not touch, not even the trim!
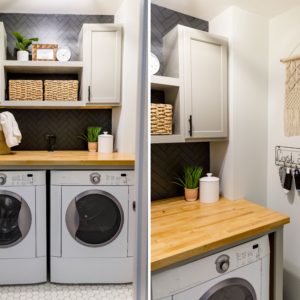
Folding clothes sucks. We all know that. But we all still have to do it (most of us). I was one of those who always resorted to the bed to fold clothes. Now, having a dog that sheds A LOT and shares the bed with us, that makes folding clothes on the bed even worse! I knew that we needed to suck it up, and get this makeover started. First thing on my list was to add a countertop on our front loading washer and dryer. This way, I can have somewhere to fold clothes, that doesn’t have dog hair on it 🙂
SHIPLAP
shiplap. shiplap. shiplap. Who doesn’t love shiplap!? Before we even started, I knew shiplap needed to be apart of this room. I still wanted to include some type of neutral color to the room, so we opted out for doing it about half way up the wall around the whole room. (This actually worked out in our favor for additional support of our wood countertop.)
Because we were on a budget, naturally went the DIY route for the shiplap. As seen all over Pinterest, there’s many tutorials on how to achieve the shiplap look, at a cheaper price. We went with the plywood and nickel route. So, we headed on over to Lowes, picked out our plywood and had it cut into 5 1/2″ strips. As soon as we got home, started nailing them to the wall.
It worked out better for us to install the faux shiplap first, and then to paint it. Depending on your preference, you can paint before or after. As I always say “You do you Boo-Boo.”
– side note – If you’re not doing a full shiplap wall, start from the bottom and work your way up.
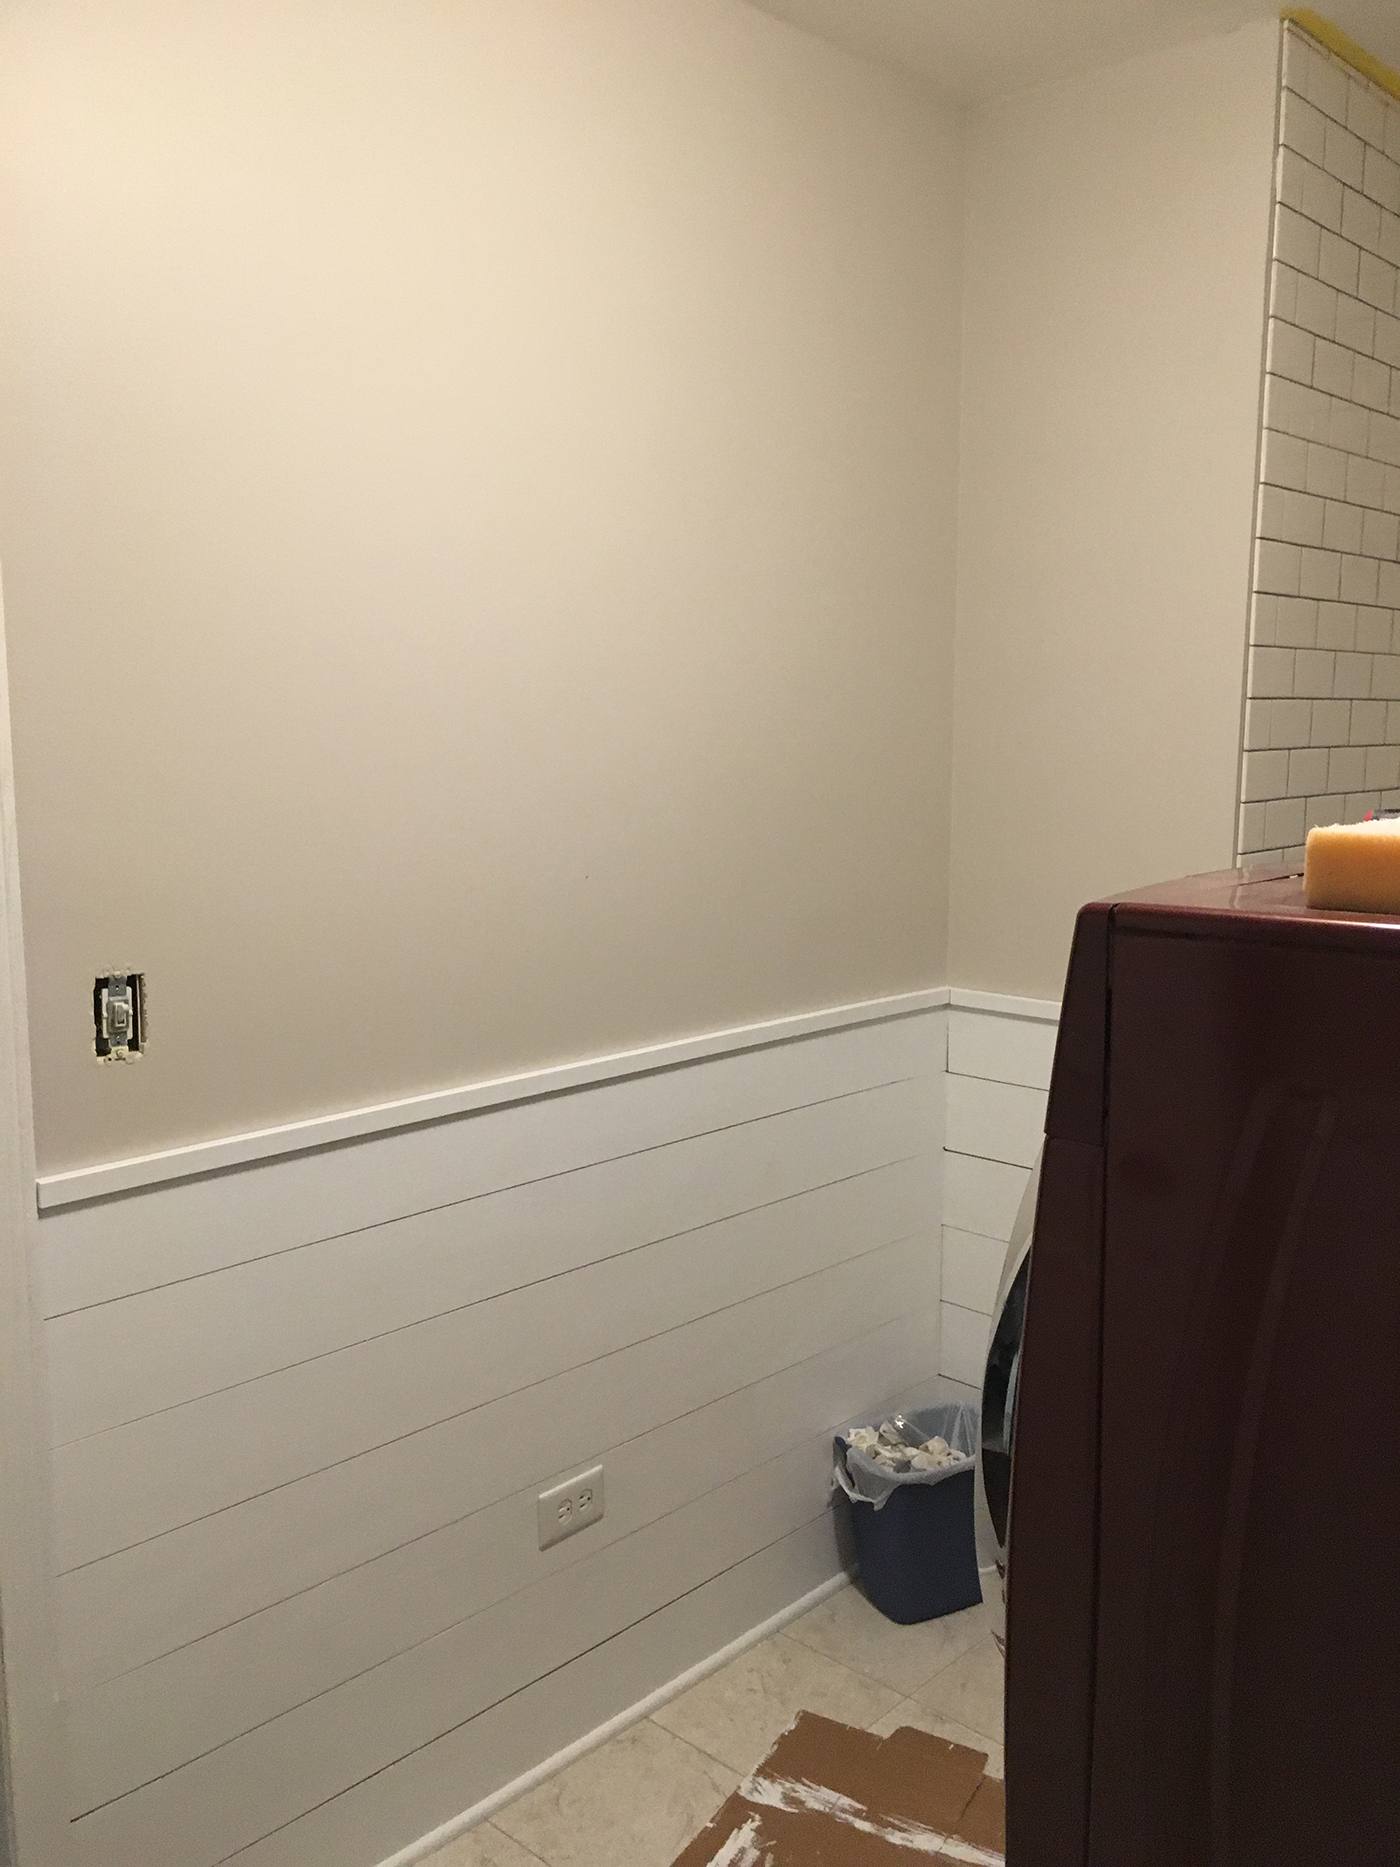
Once we finished painting we added on the top and bottom trim! To stay consistent with the rest of the trim in our house, we ended up just using base shoe molding at the bottom. We considered adding on additional molding, but then it would have stuck out past our door trim (no thanks).
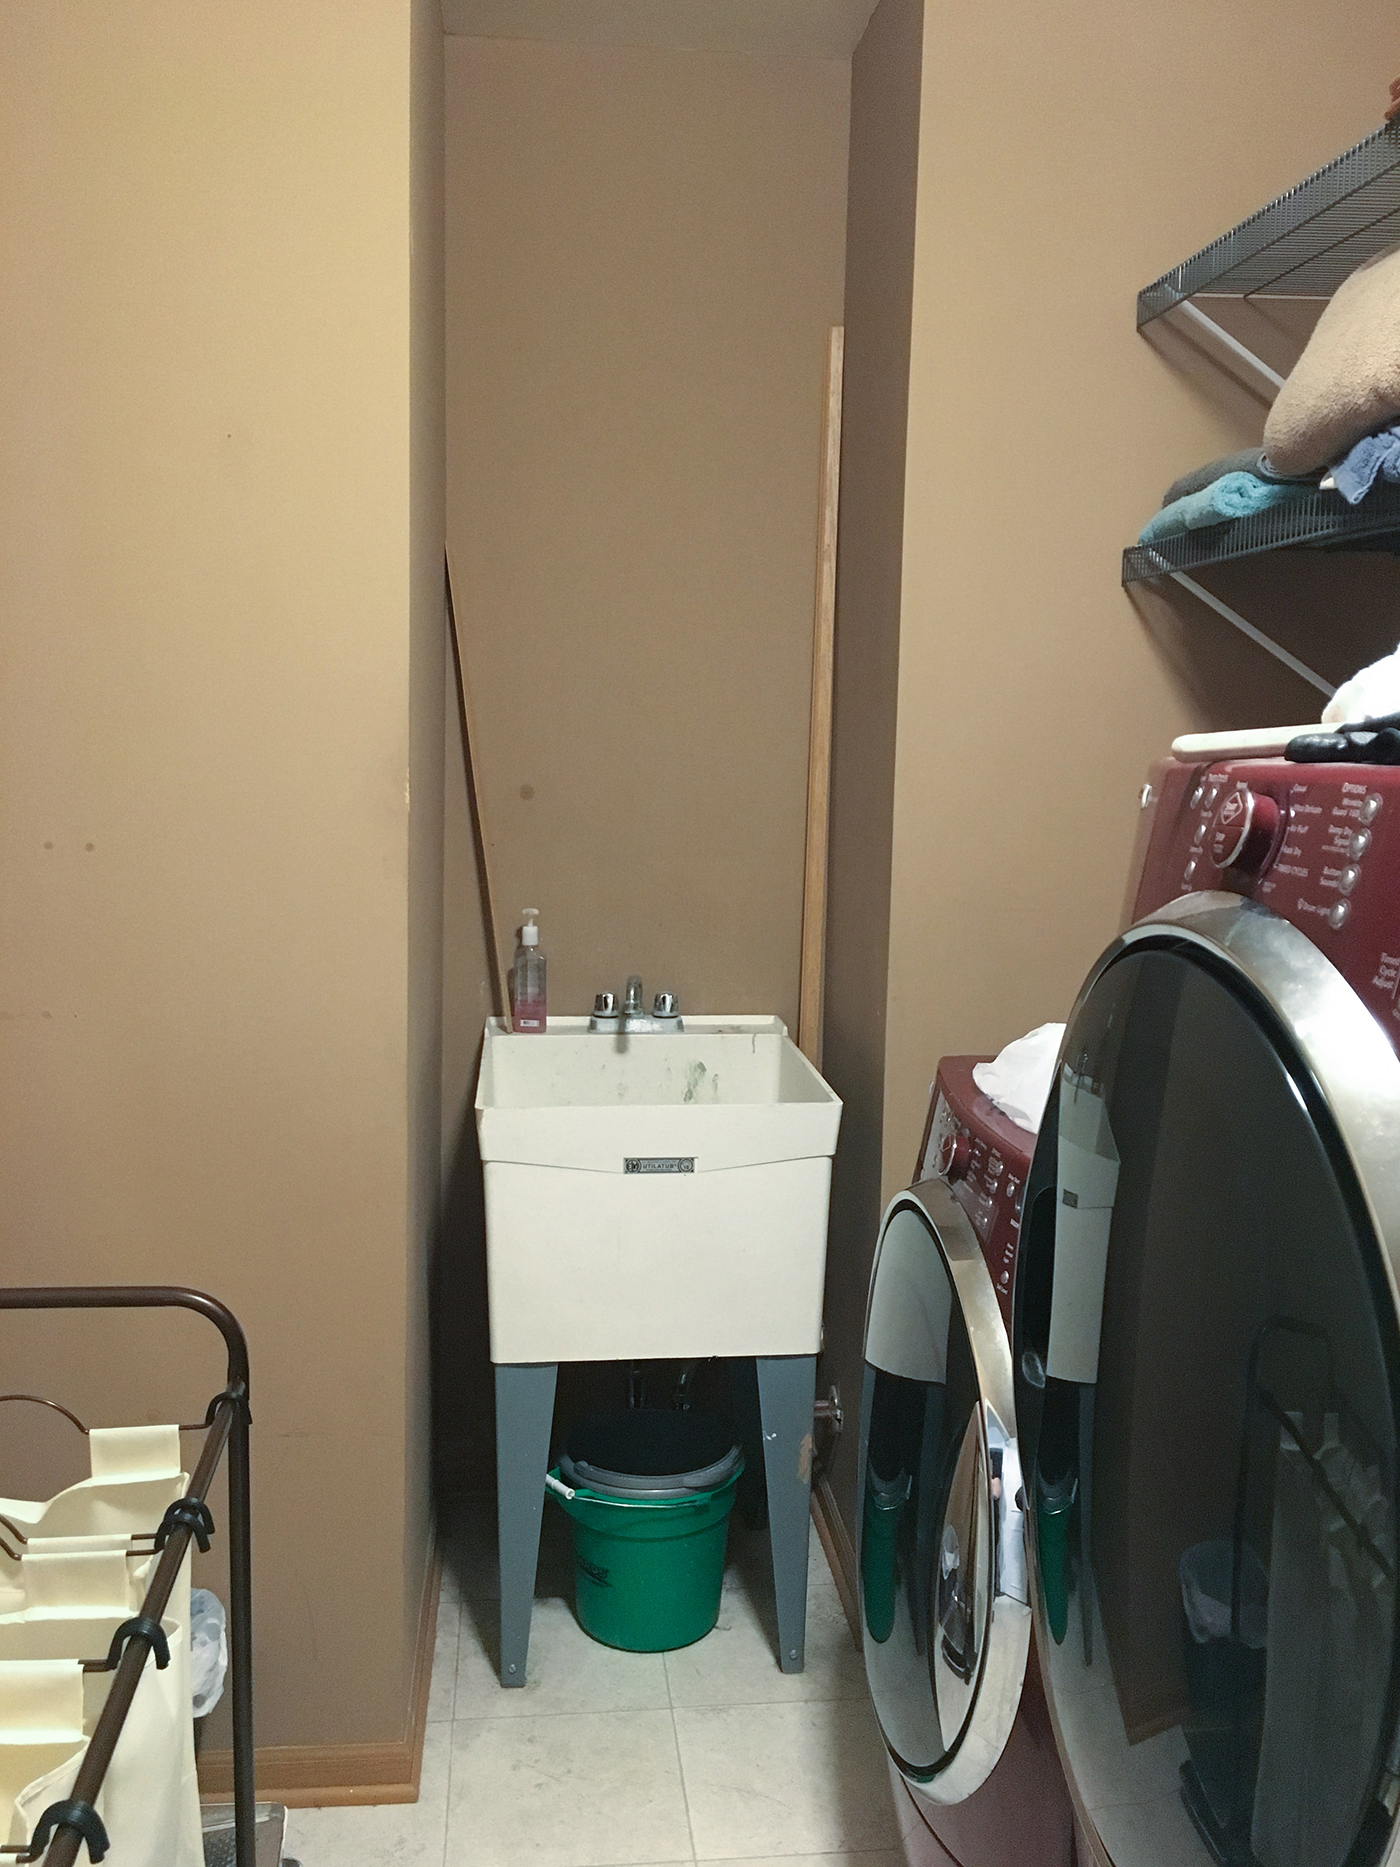
SINK
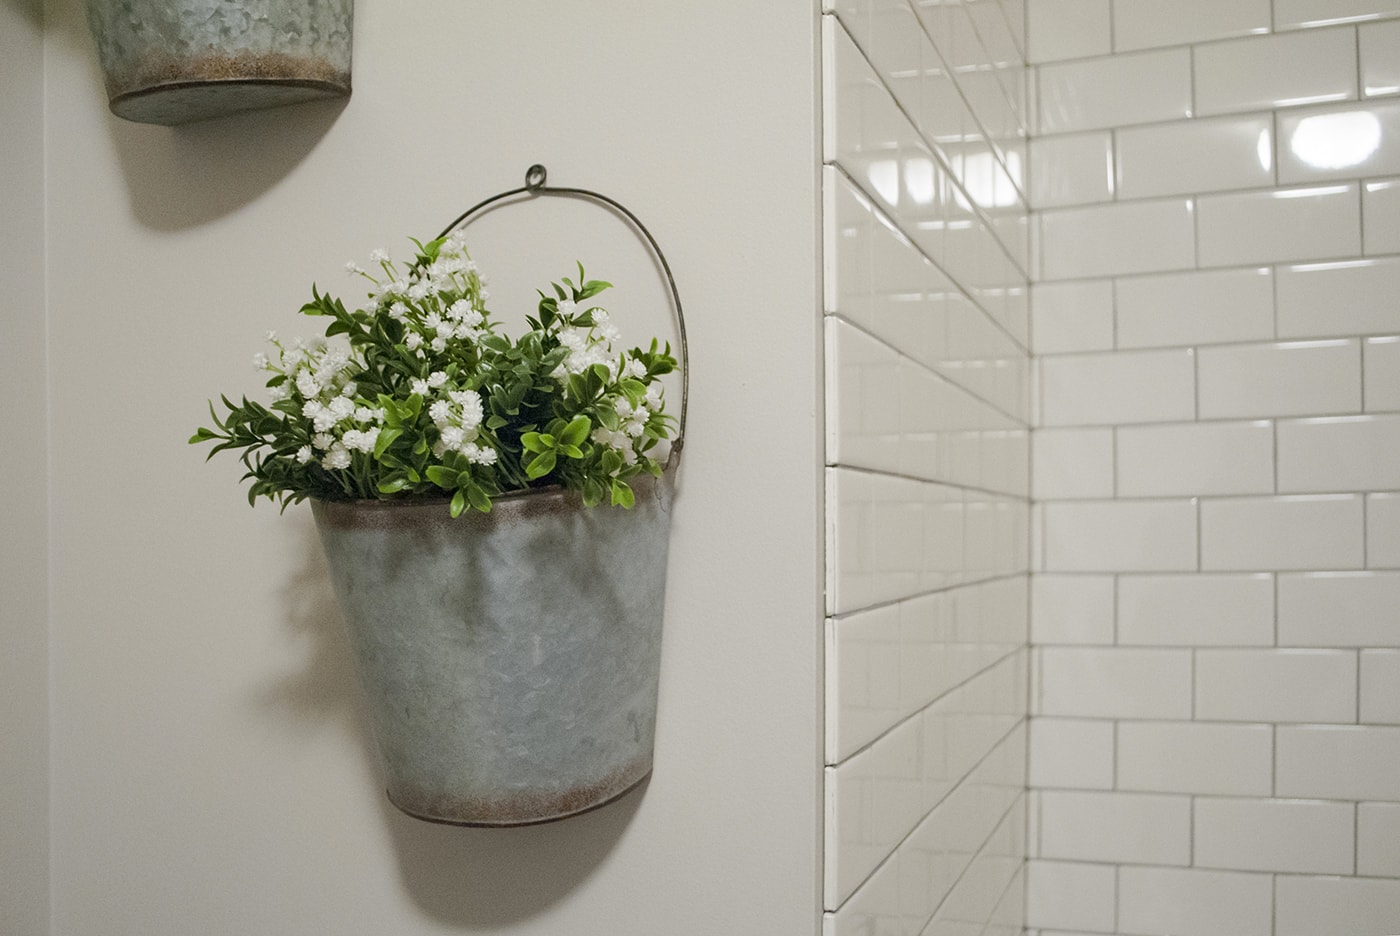
My husband is obsessed with subway tile, which is PERFECTLY fine with me. I love the look of subway tile too, so it was a win-win. If he could, he would have made the entire room subway tile, whichhhh is a just a little bit overboard for me 😉
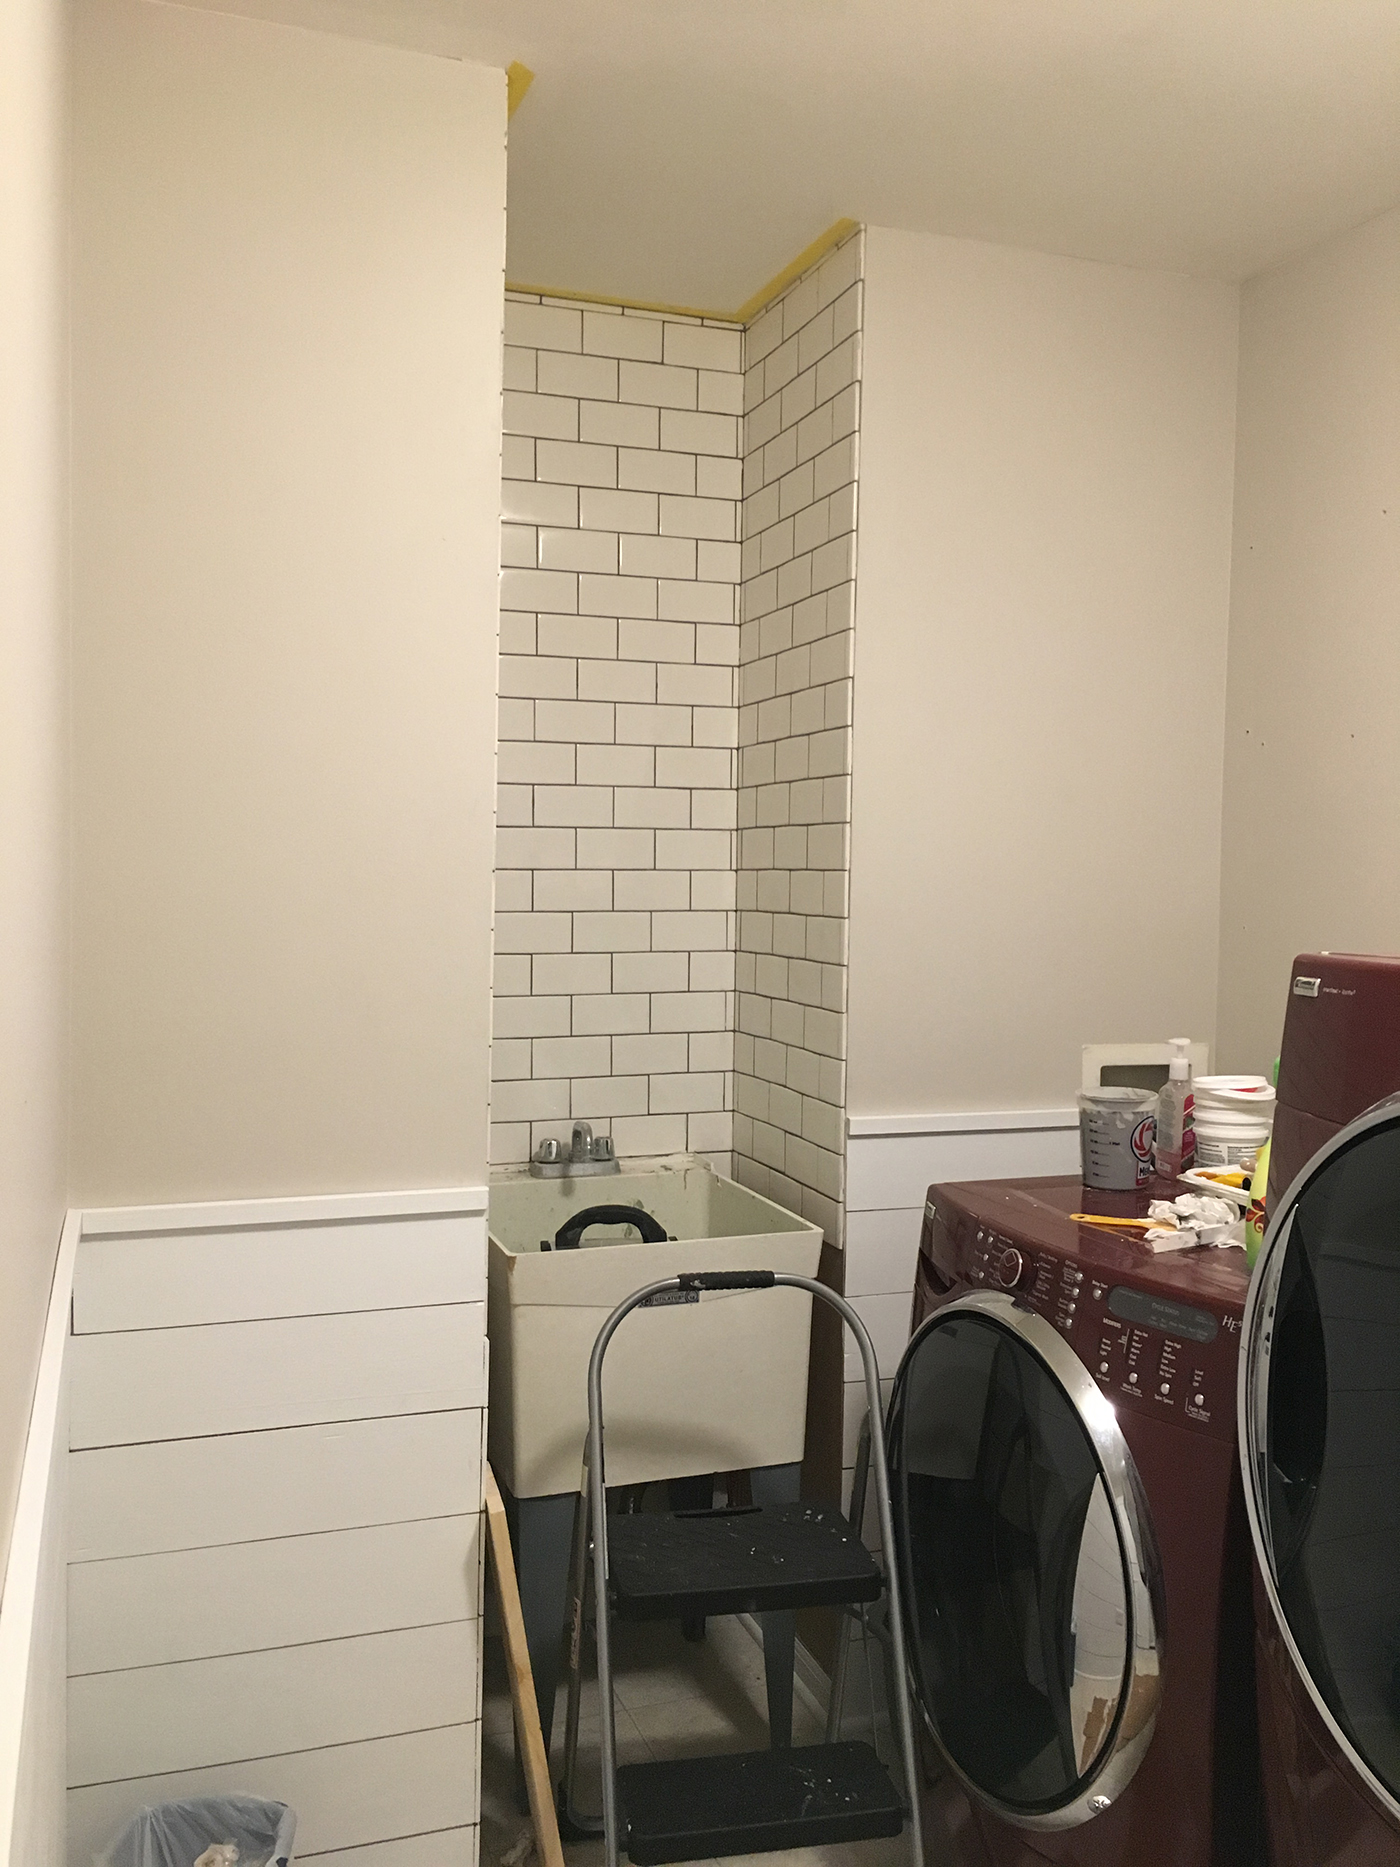
We end up always using a grey grout with white subway tile. We both really like the crisp lines it gives.
Now, for the utility sink… We knew it needed to be covered. How we were going to do it, was the real question. What my husband ended up doing was building a “slide-in” cabinet using 1×4’s and 2×4’s. For the door, he used 1x4s for the outer edge, and then used the extra 5 1/2″ strips from the shiplap for the “backboard” of the cabinet.
– side note – What I meant by “slide-in” is what it literally means, we slid it in. There’s no backing, just 3 sides that surrounds the sink.

WOOD COUNTERTOP
This is by far the best piece we added to the room. SO happy we decided to incorporate this! We were torn on what type of wood to use for the countertop. Obviously, butcher block would be ideal, but we knew that was not going to fit the budget.
My husband, Brad, was at Lowes searching for what options we had for the counter top. He stumbled upon these craft wood (?) pieces that had a butcher block look, a little thinner and right in line with our budget – ringing up to around $15 a piece. They had them in 12″, 10″ and 8″ widths and in various lengths. I wish I had more details on what this was, but neither of us could remember! Next time I’m at Lowes, I’ll have to search for it and share the link here.

To fit the depth of our wall, we ended up needing to use a 12″ and a 10″ piece together. To connect both pieces of wood, we used brackets with short screws and drilled them underneath the wood countertop pieces.
For support, we were able to use that top trim piece of the shiplap, to support the left and back wall for the countertop. Then, Brad constructed the right side wood piece to hold up the rest of the table. We drilled nails from the top of the table, into the shiplap molding and right “leg” for stability. They were small screws, so you can hardly see them.
Once everything was cut and in place, we put it together to make sure everything looked right and fit correctly than took it apart to stain in. Yes, I know, extra work. Again, this is based on your preference. I prefer to stain outside rather than inside. So, we took it apart to stain in the garage. For the stain, we used Early American Minwax.
THE FINISHING TOUCHES
This is the fun part – Adding all of the decor pieces to the room! To complete the Modern Farmhouse look we added the following to the room:
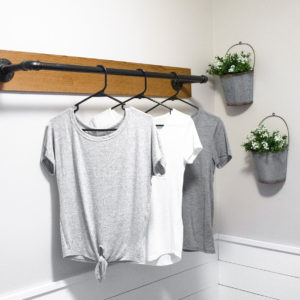
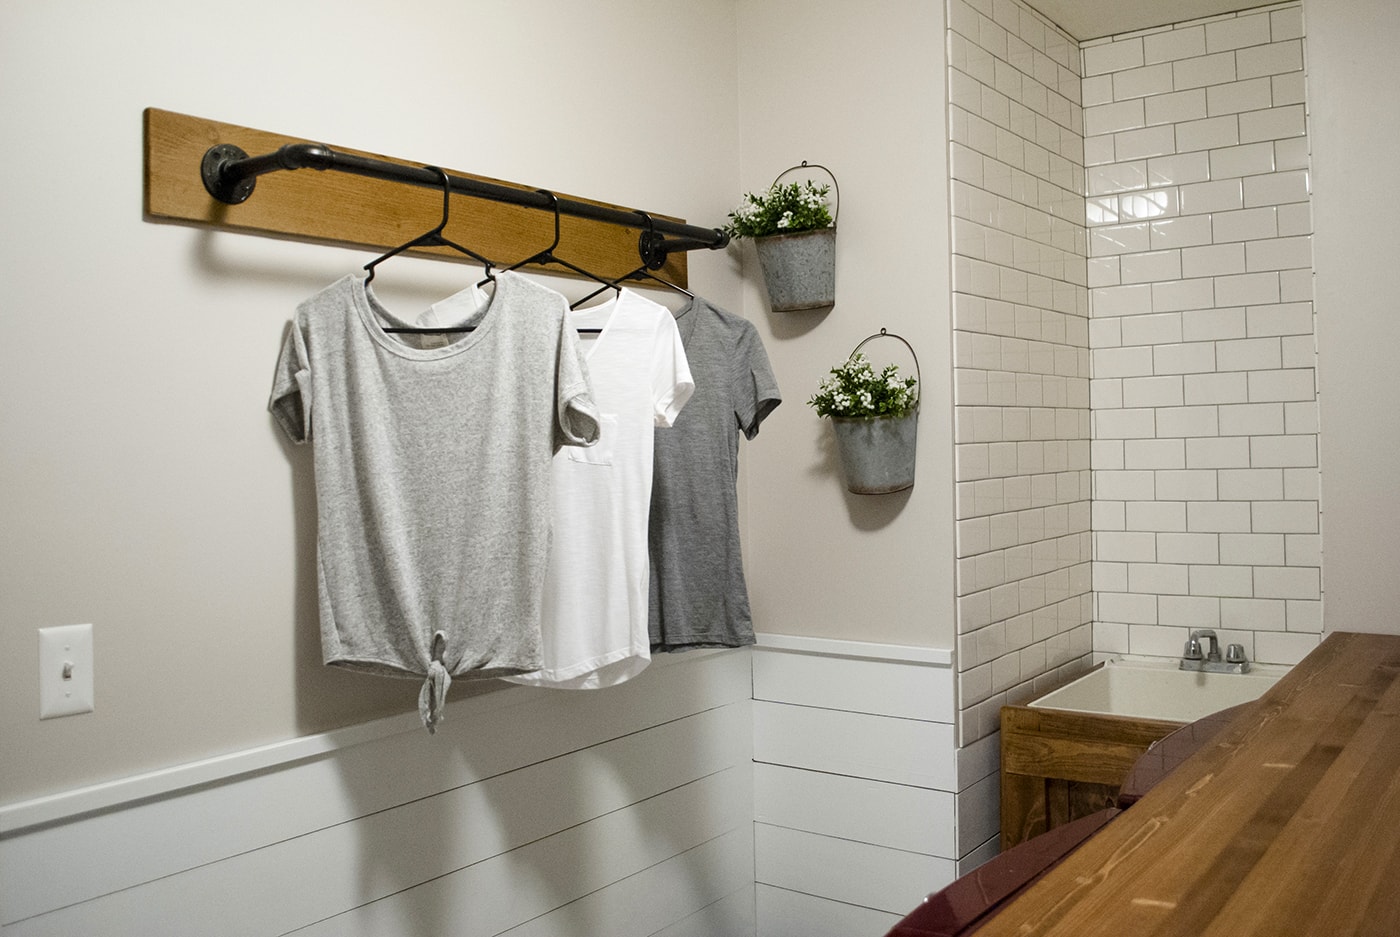
- Industrial pipe clothing rack (view how to make it here!)
- Open wood shelving (awesome Ikea hack!)
- A base cabinet – painted white (to hide all the stuff you don’t want to see)
- Greenery
- A ton of galvanized metal
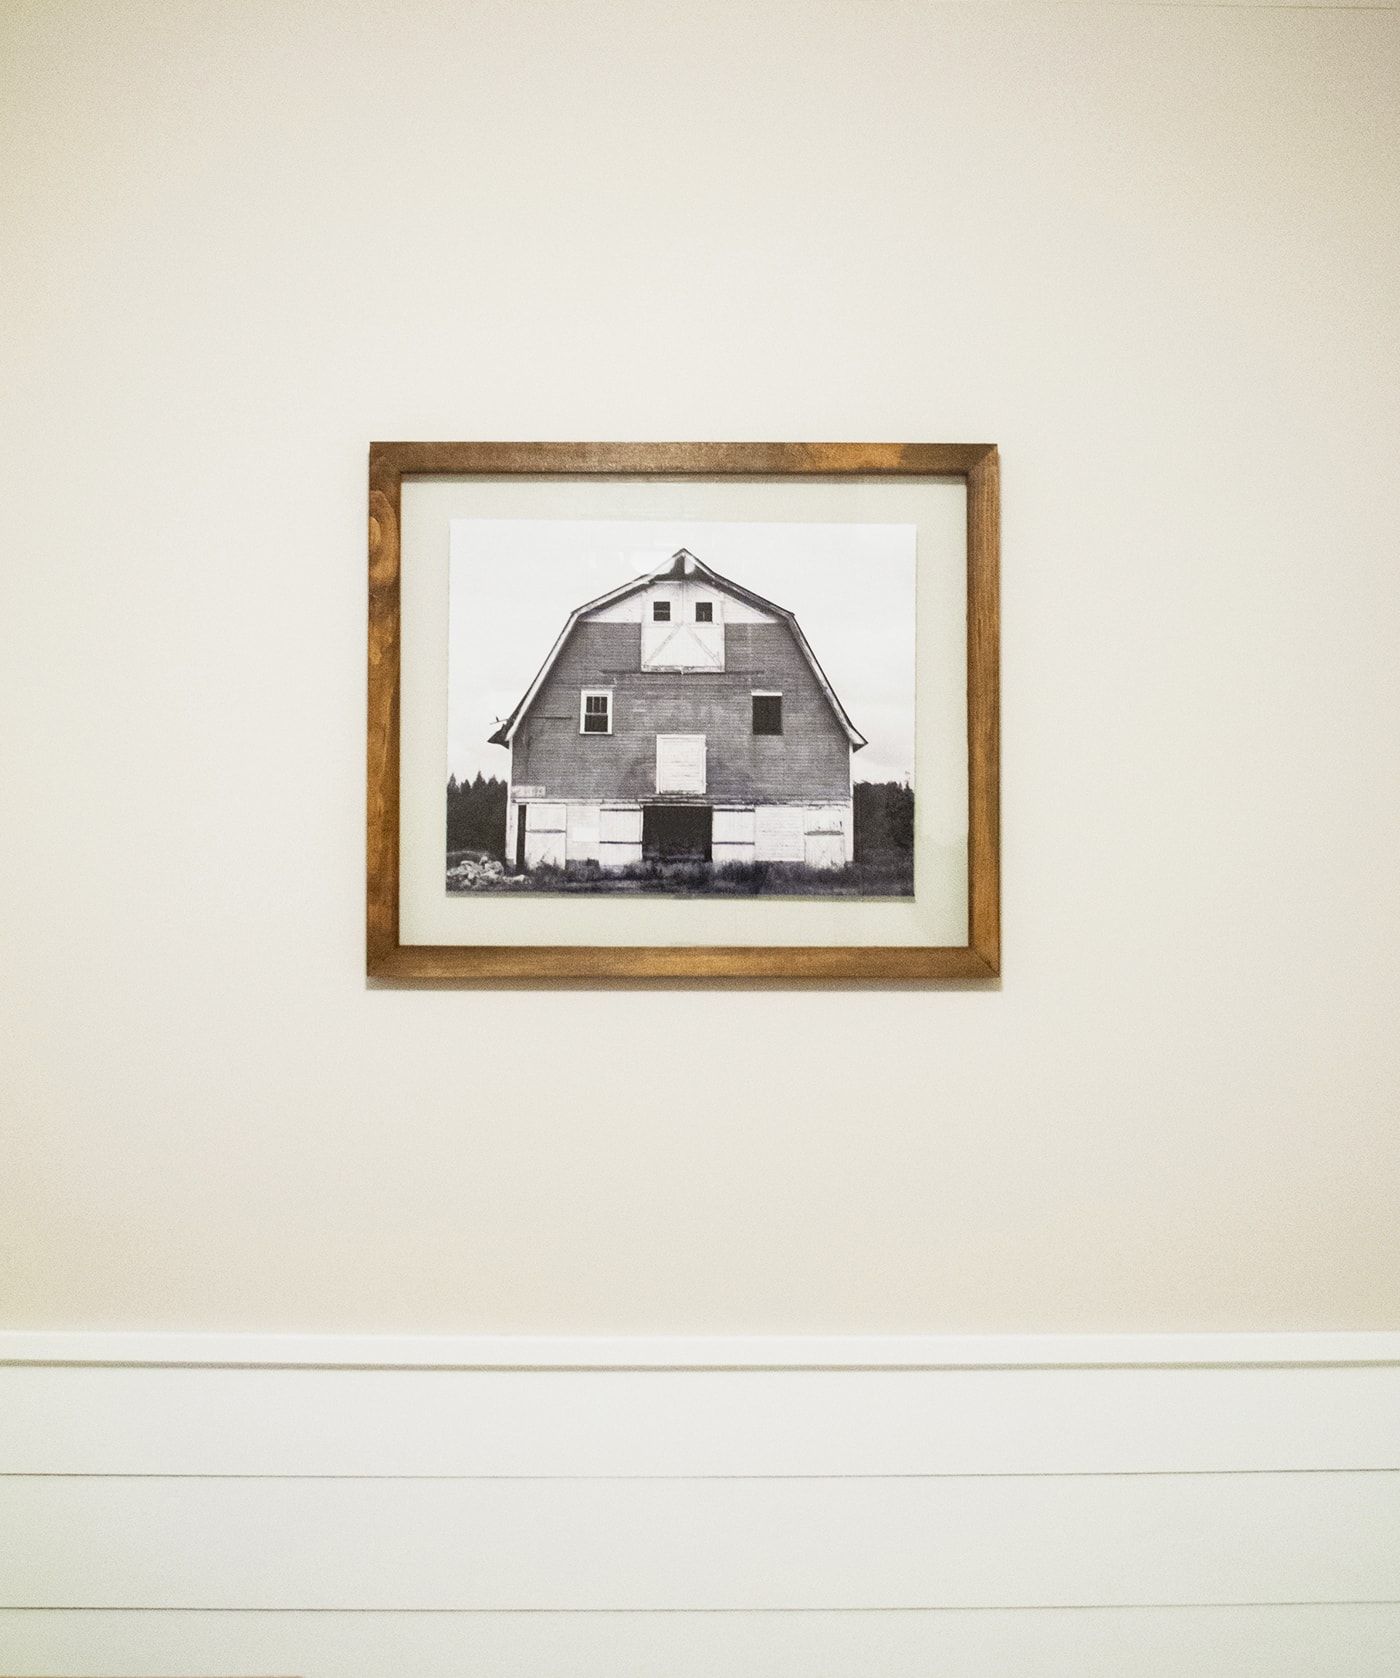
- And of course, a picture of a barn.
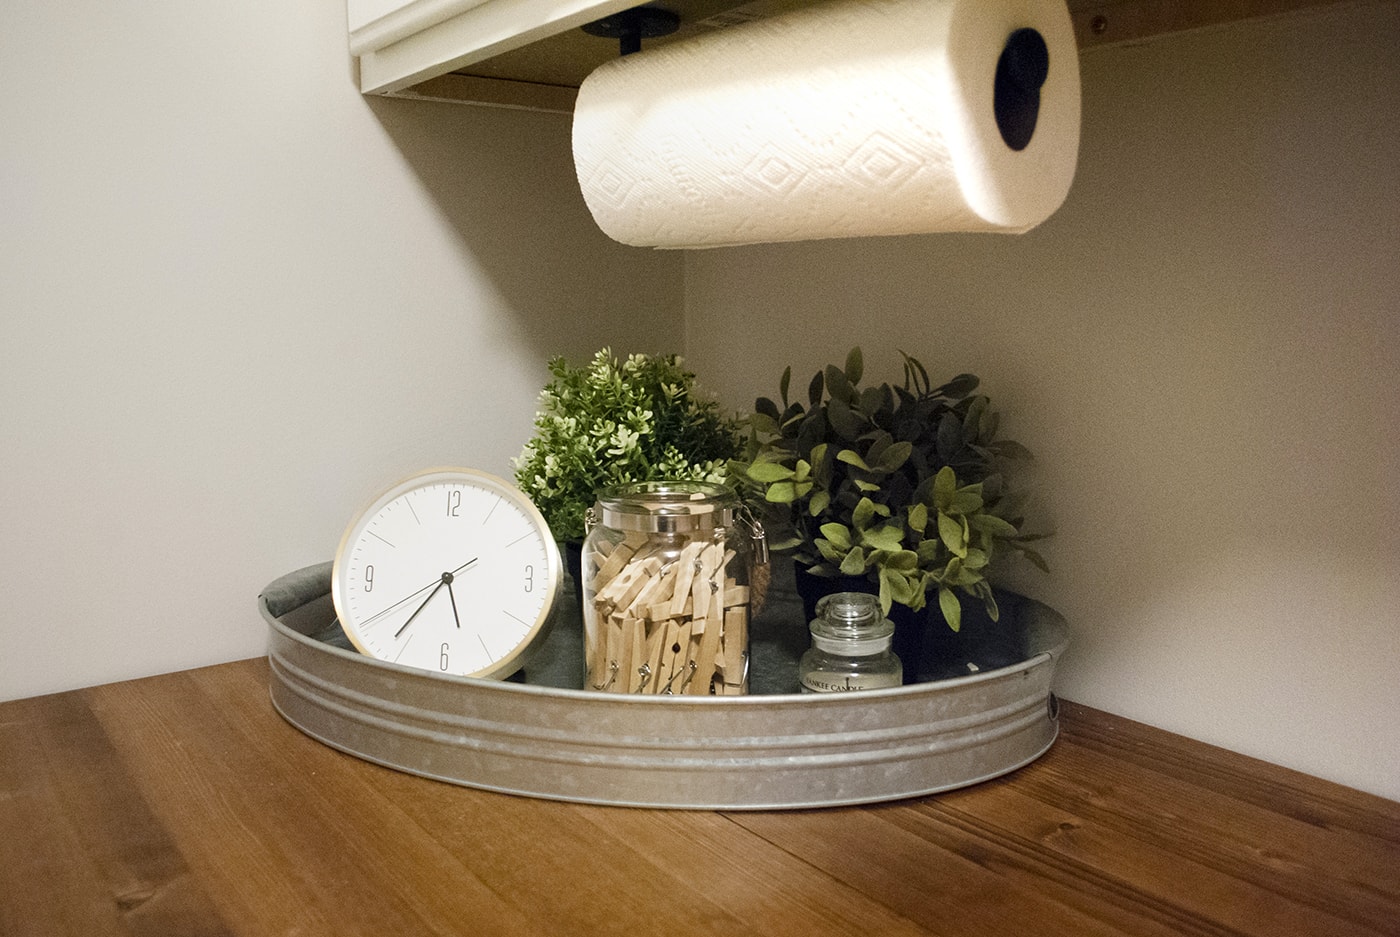
Every room needs some type of greenery added!
WELCOME TO OUR NEW LAUNDRY ROOM!
I am absolutely in LOVE with how the room turned out. Not only is it pretty to look at, but so much more functional too. It was well worth the wait!

This laundry room has become one of my favorite rooms in the house (Who woulda thought!)
Hopefully, I’ll enjoy doing laundry now… 😉 Doubt it.

This post may contain affiliate links where we earn a small commission on your purchases at no additional cost to you.
SOURCE LIST
Hopefully we can start incorporating separate DIY posts for all the stuff we made in this room. In the mean time, here’s the list:
Walls: Sherwin Williams Popular Gray
Shiplap & Trim & Cabinet: Sherwin Williams Extra White
Unfinished Base Cabinet: Lowes
Cabinet Hardware: Menards
Subway Tile: Menards
Tile Grout: DeLorean Gray – Menards
Hanging Rack: DIY (tutorial here!)
Hanging Galvanized Buckets: Jo Ann Fabrics
Galvanized Tray: Walmart
Clock: Target
Glass Jar: Hobby Lobby
Laundry Sign: DIY
Galvanized Bucket: Walmart
Open Wood Shelves: Ikea Hack (tutorial here!)
Light Up & Sign: Kohls
Galvanized Bins: Walmart
Glass Dispenser: Walmart
Paper Towel Holder: Walmart
Rug: Target
Barn Picture: HomeGoods
The project did take longer than what we were expecting (Brad thought it was going to be a weekend project… LOL), and in between the makeover, our dryer broke! Which delayed us even more.
For the budget, it’s easy to lose track with every little thing here and there. But adding up it all up to the best I could, for everything, we spent around $500, if not less. The biggest purchase was the base cabinet, which was $73, if that helps you get an idea.
Looking back at this project, absolutely worth the wait, time, effort, everything. It’s insane what a little paint, shiplap and wood can do to a space 😉
More too come!