I can’t believe it’s the halfway mark of the One Room Challenge! How is that possible?! There is still so much to do, but we’re making progress… Just slowly. You may look at the photos and think, “what did you even get done?” ?
It doesn’t look like much, but we got the most important part done – the plumbing! Next week though, we’ll be moving full steam ahead! At least, that’s my goal. LOL.
Our One Room Challenge Progress
If you read last week’s post, I listed what I wanted to get completed for the week. We basically were able to check all of that off! Well, for the most part…
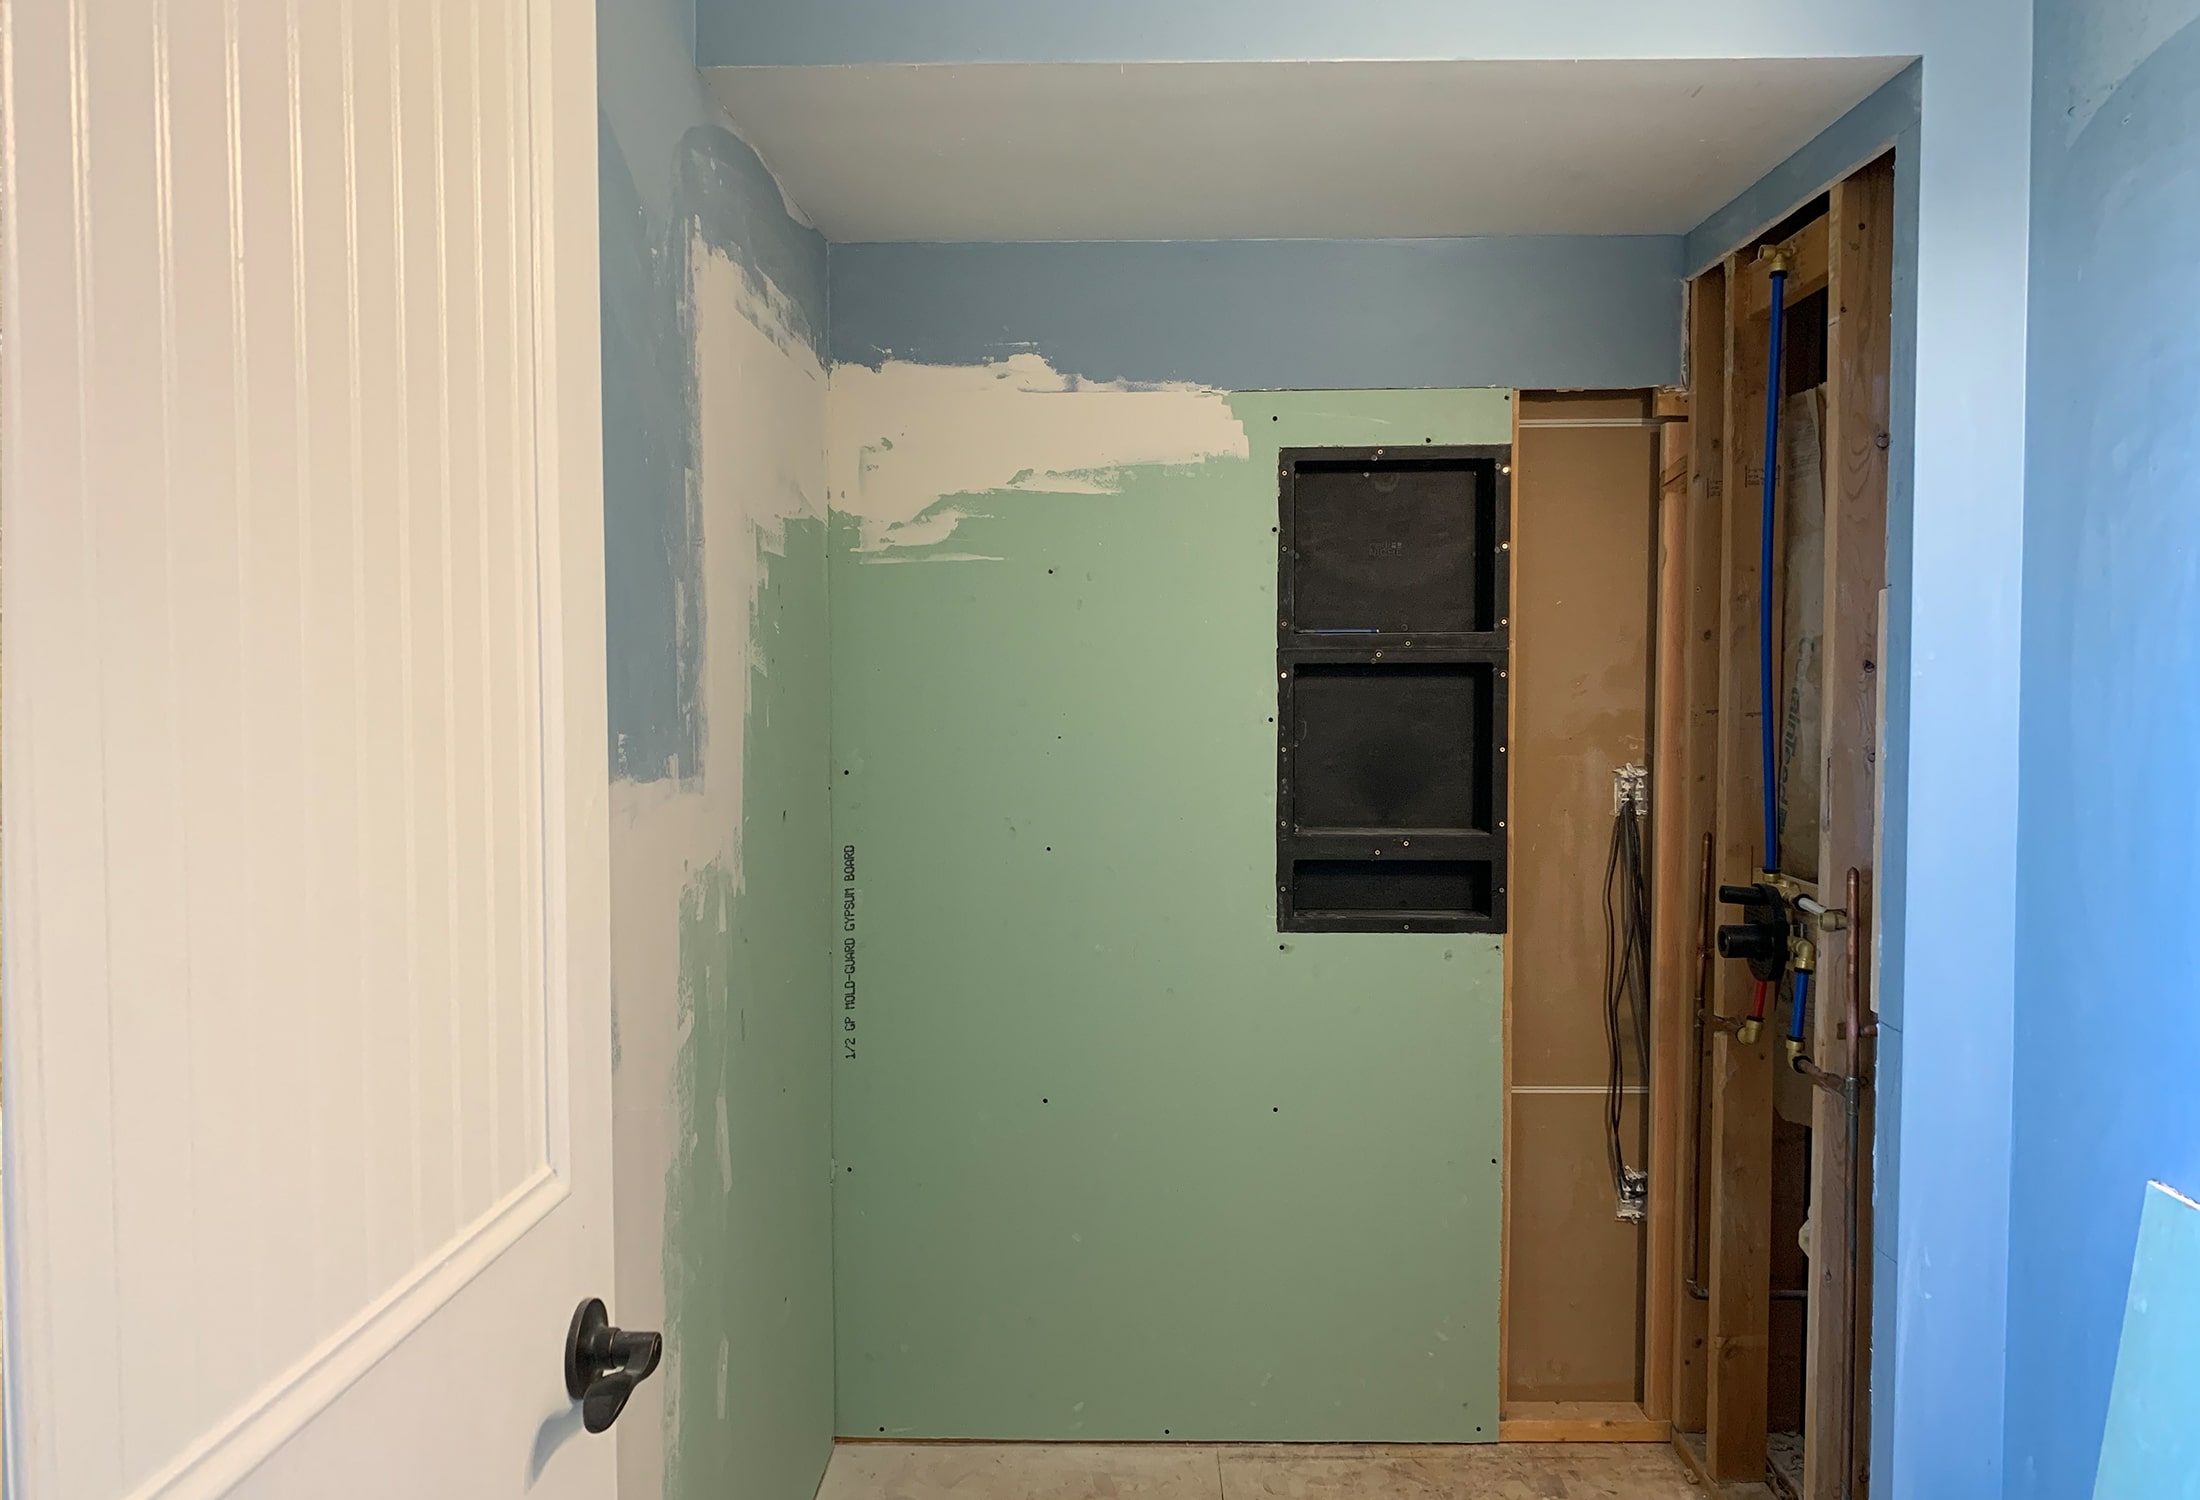
Installed Shower Niches
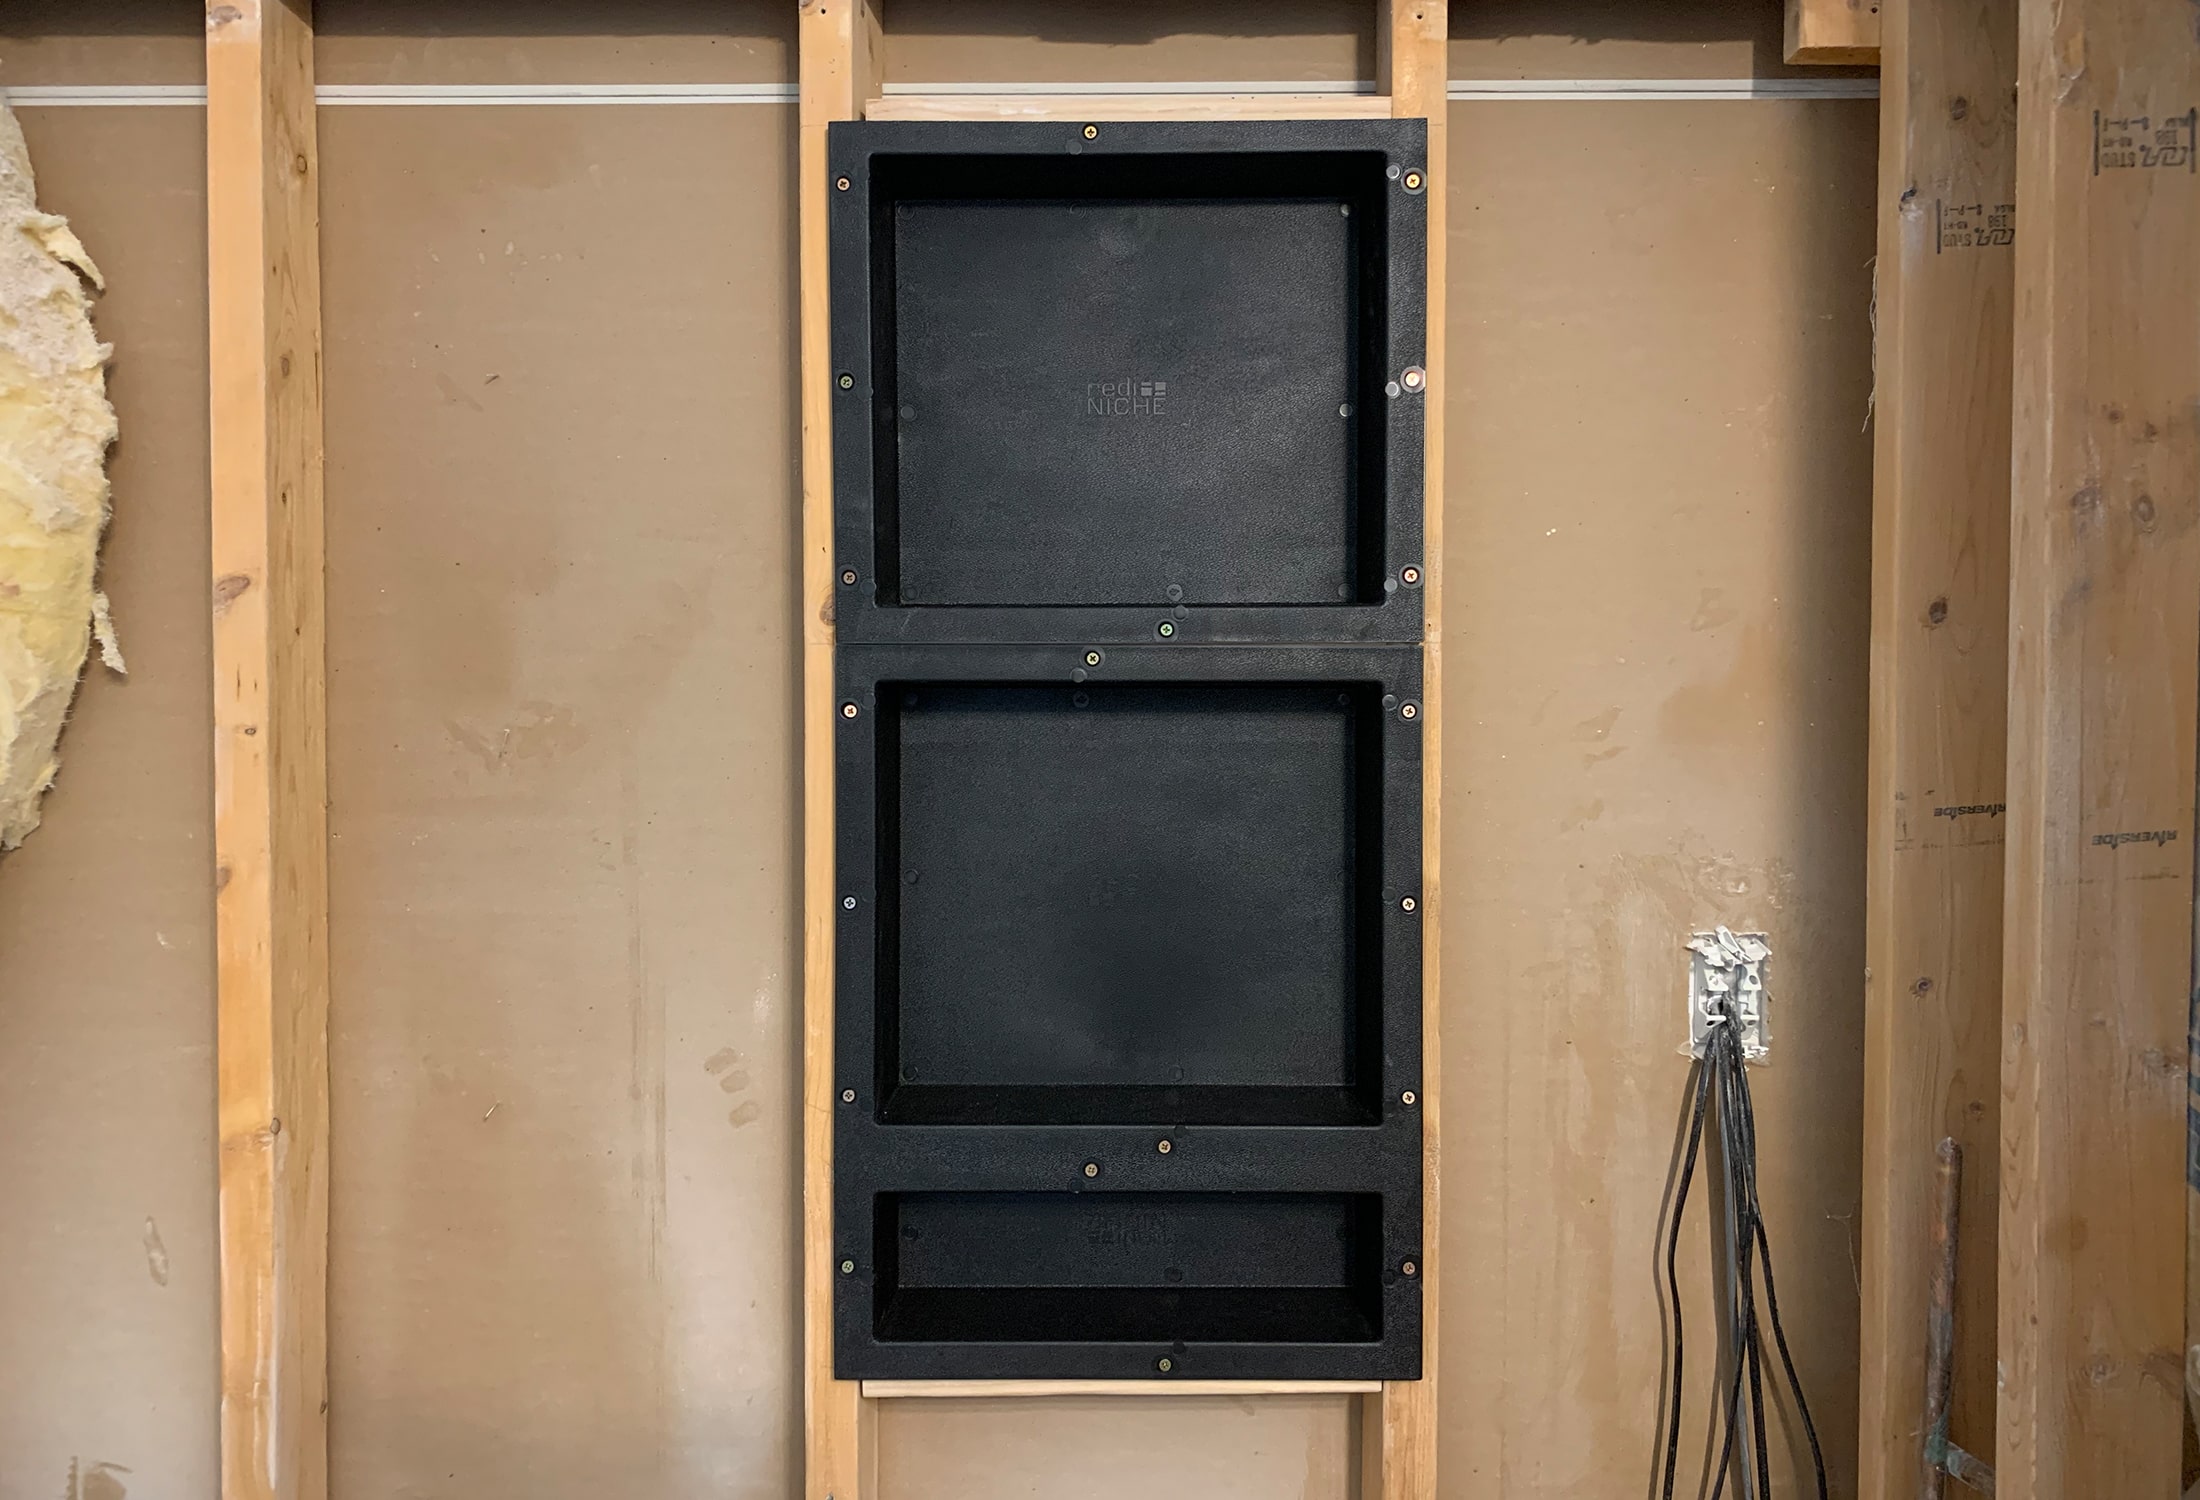
These were easy to install and was one of the checklist items I was able to complete within a few hours. We decided to go with Tile-Redi prefabricated shower niches. These shower niches are tile ready (as it says in their name -clever 😉 ) and pre-sloped! Which is awesome – no sitting water on the shelves.
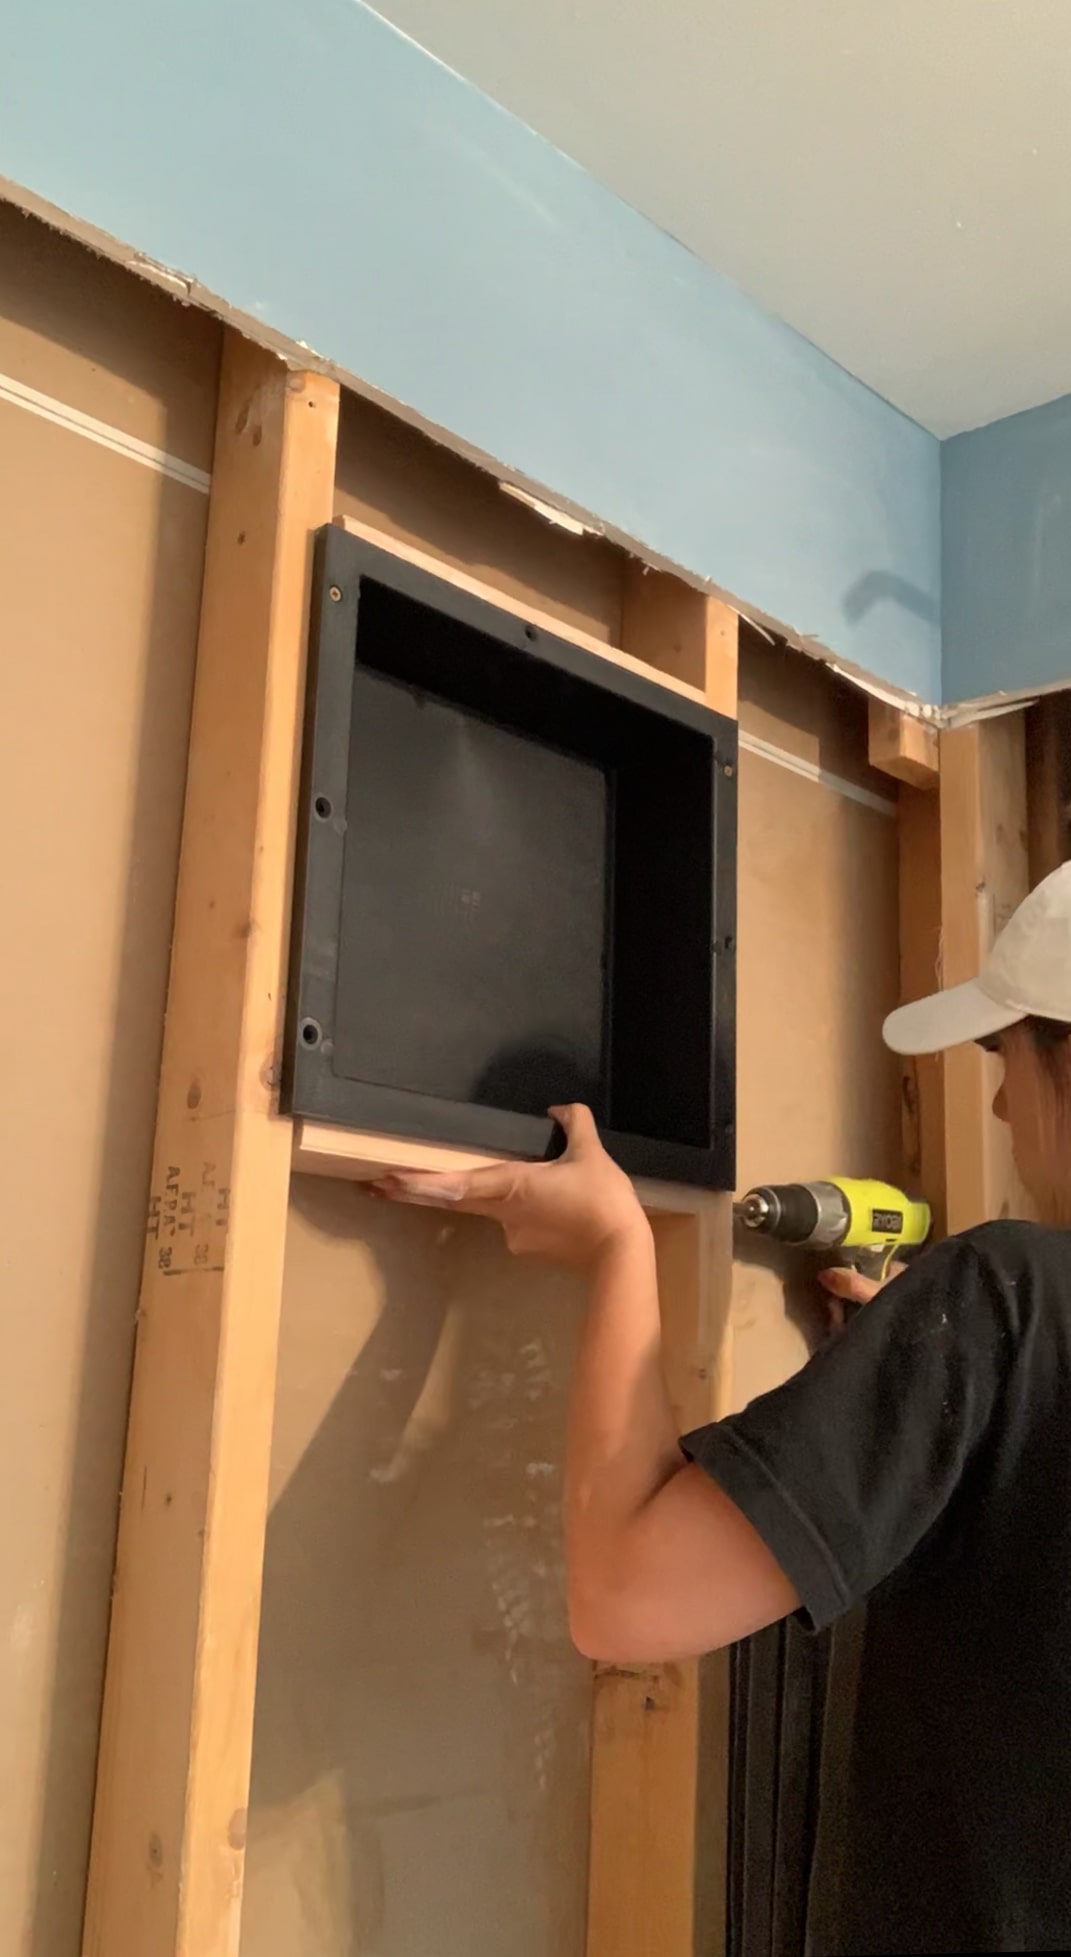
We decided to go with 3 shelves, two large ones, and then a short one, perfect for razors or bars of soap.
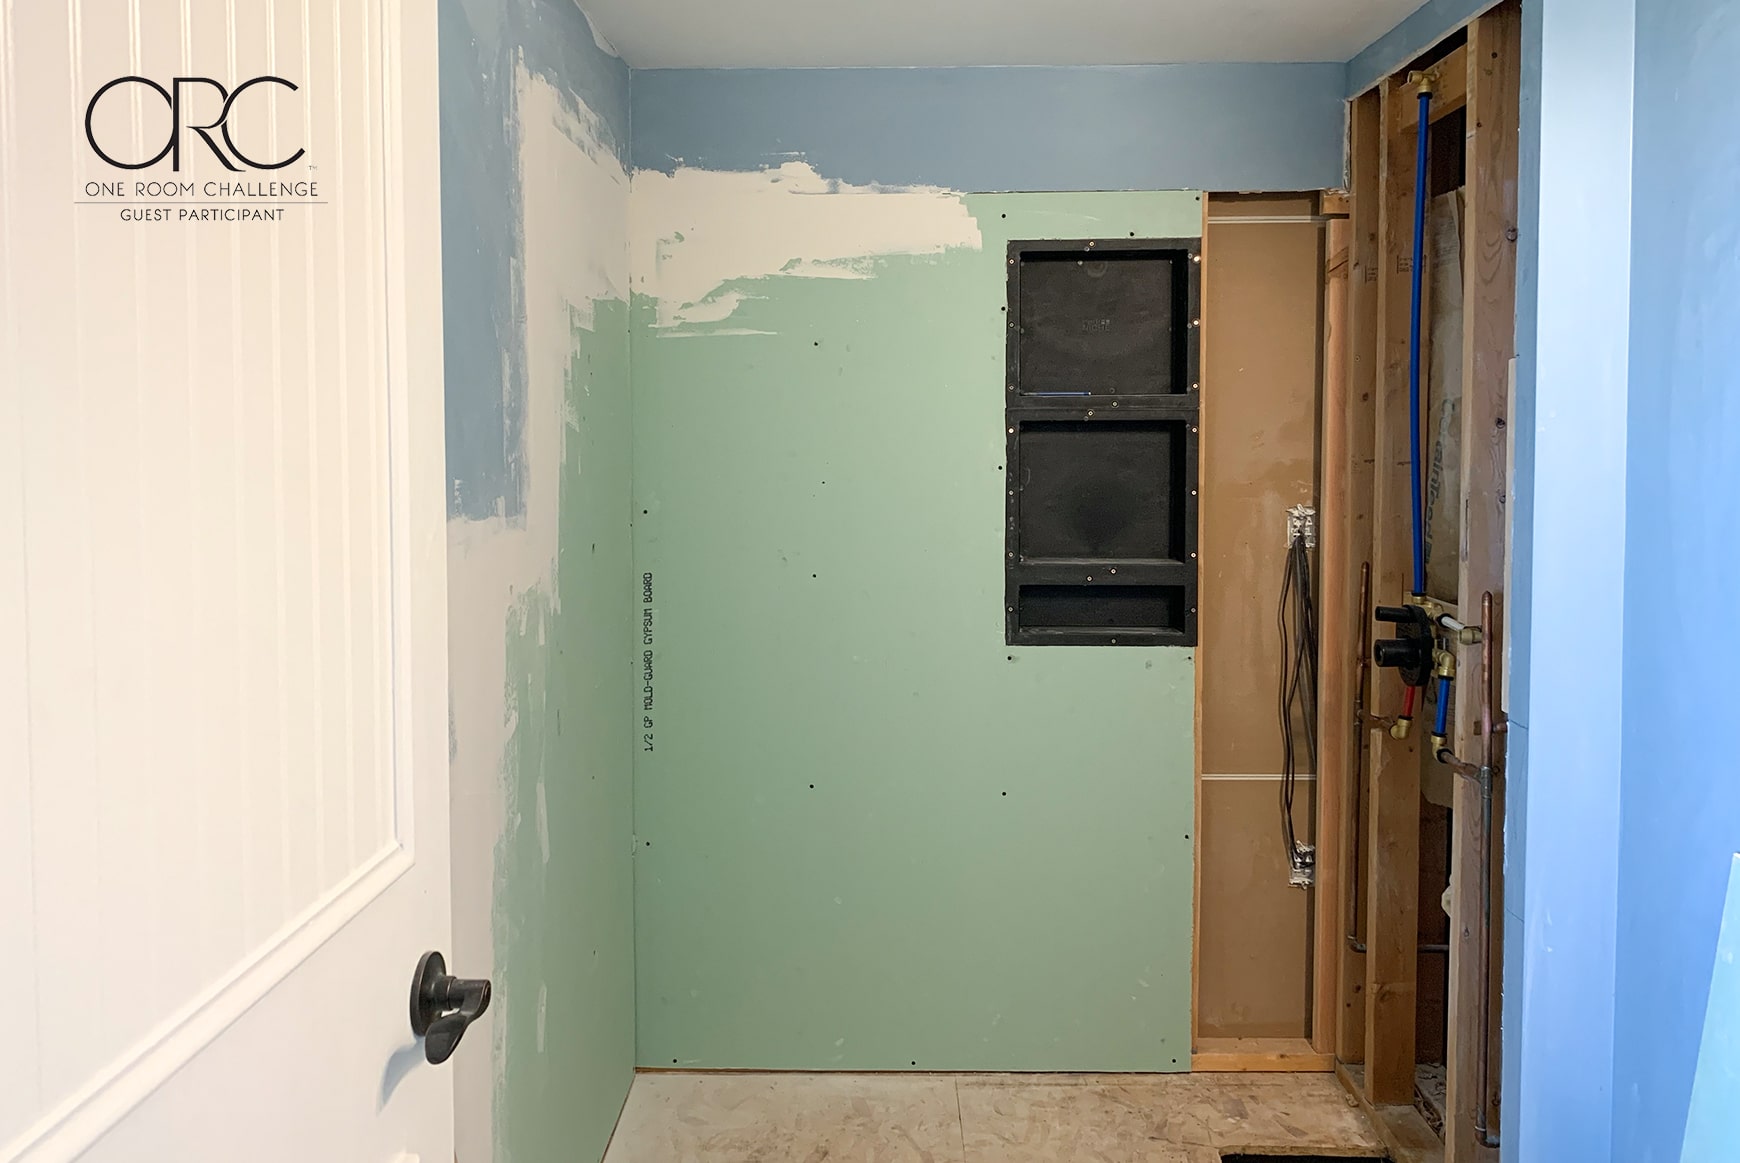
Drywall
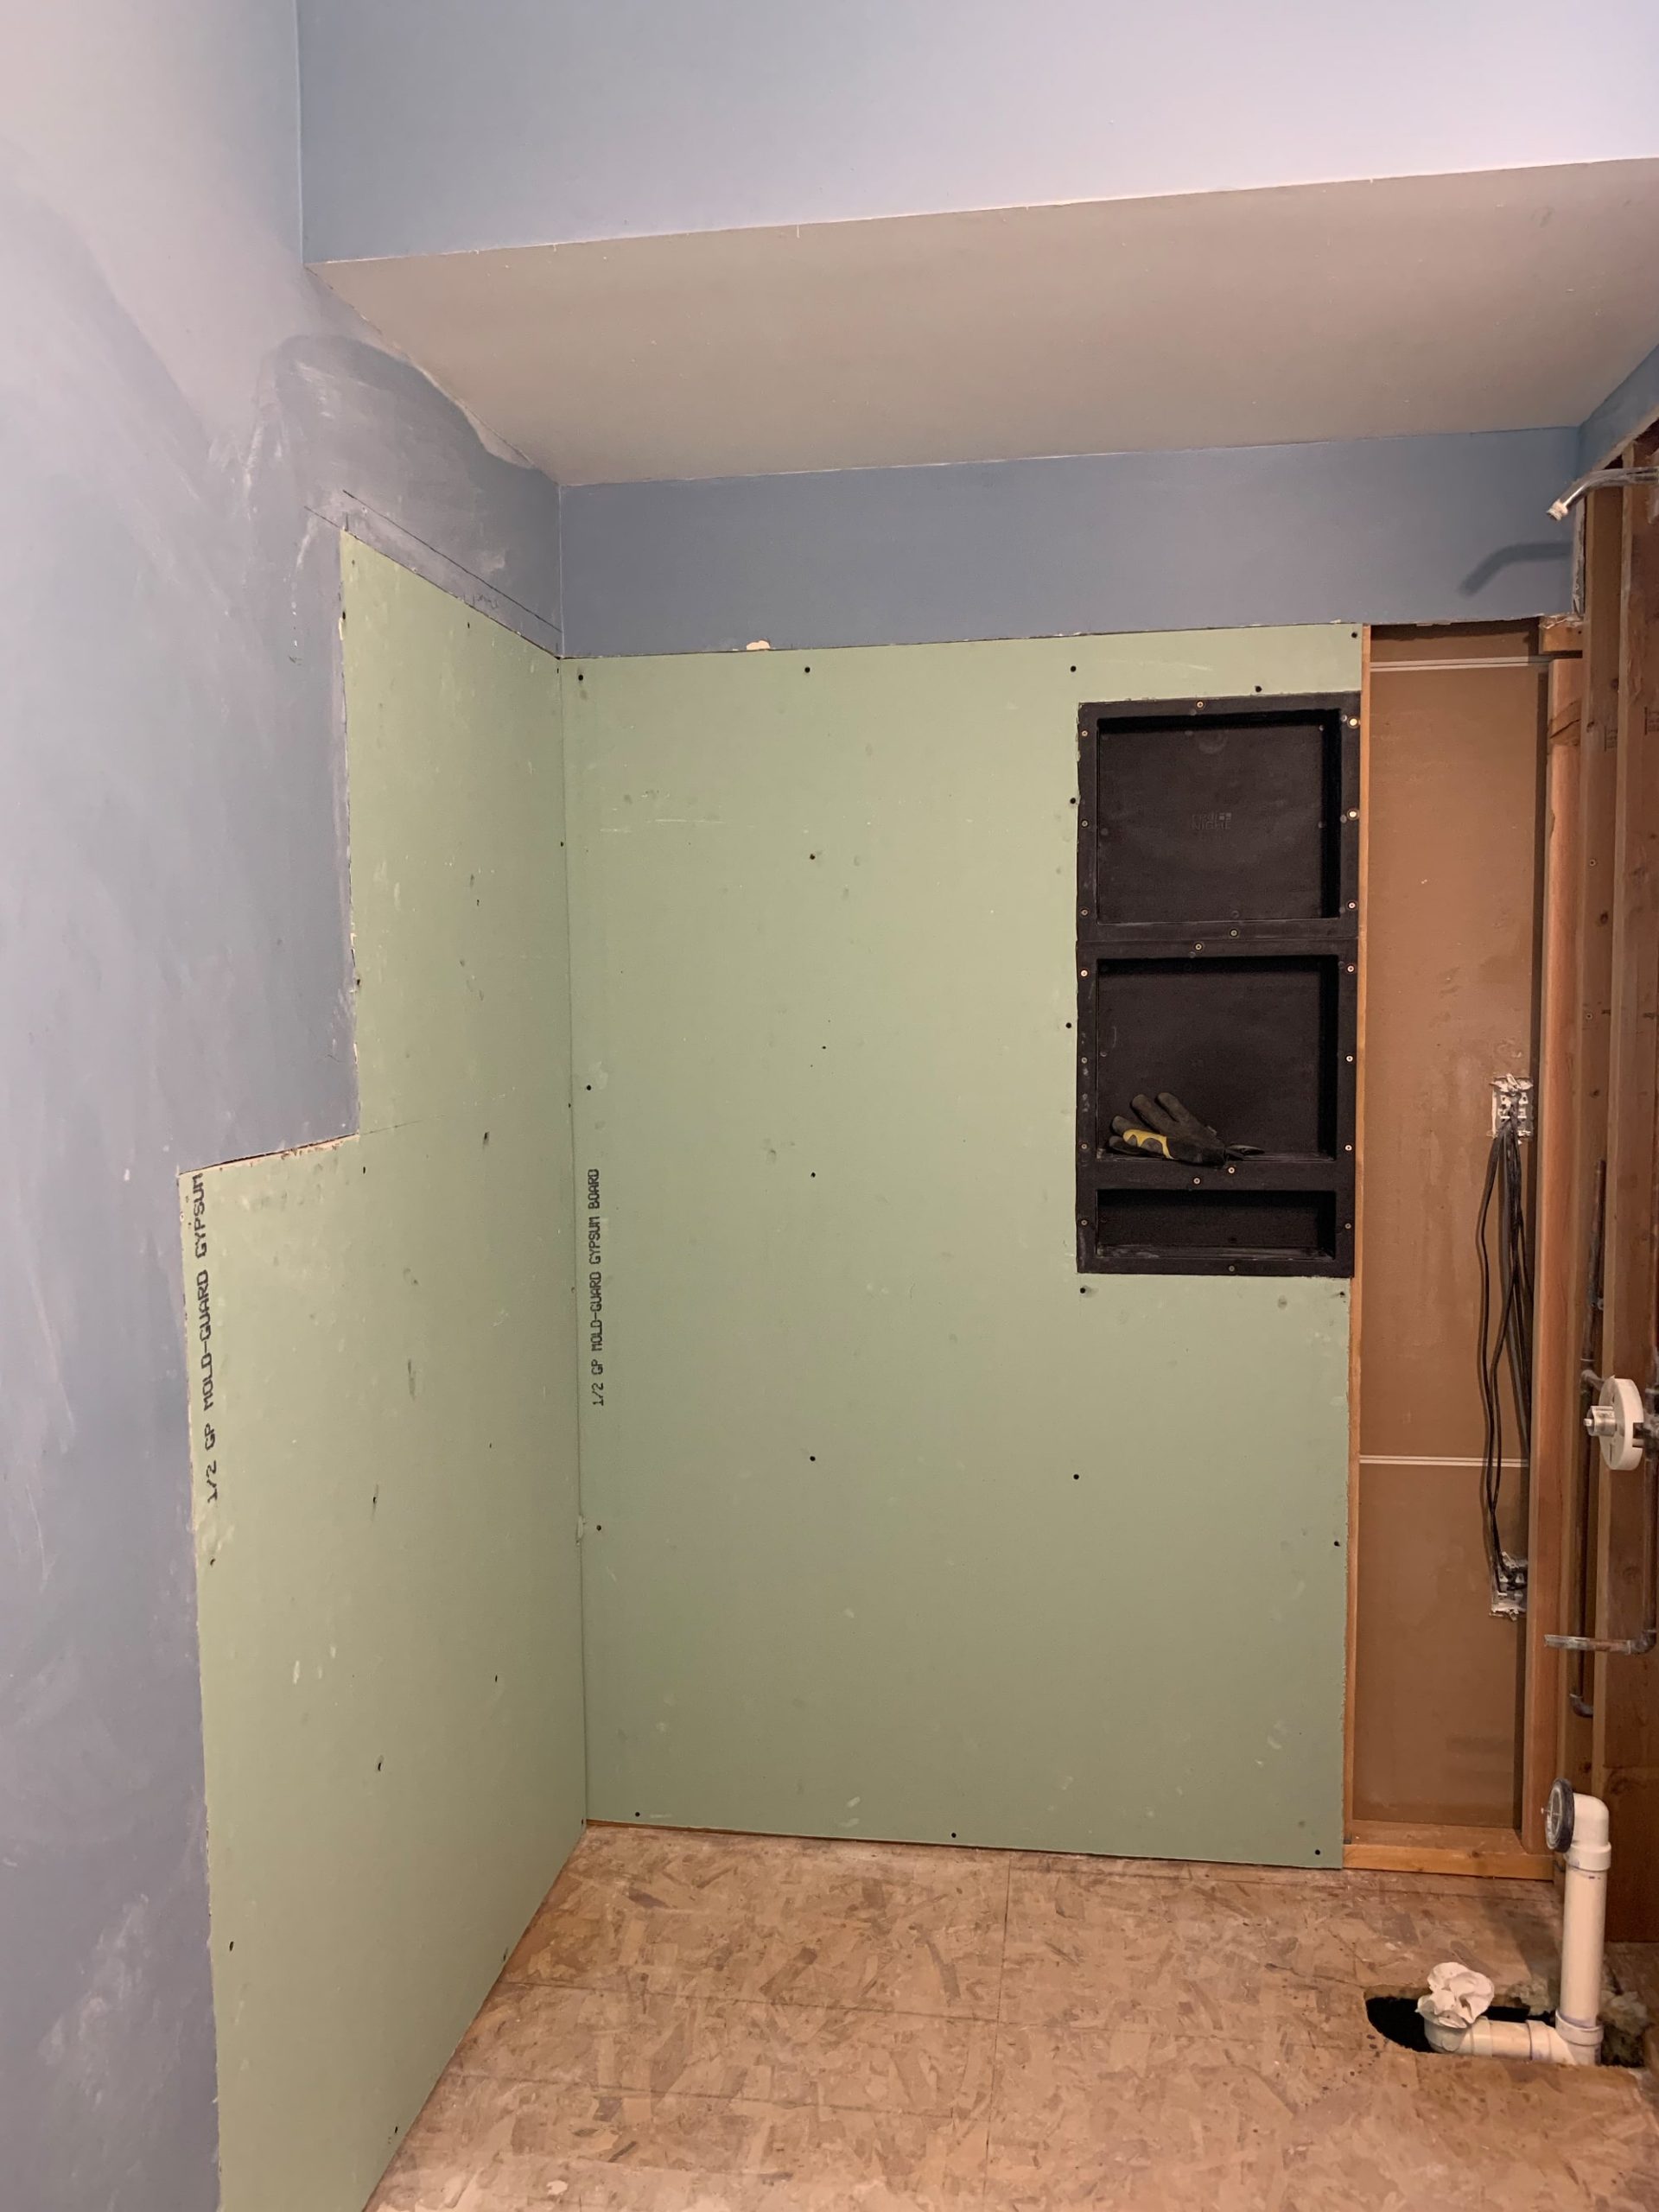
This is where we are “sort of” done. We got all the drywall complete on the left side of the shower niche. The right side, we obviously had to wait to complete the plumbing.
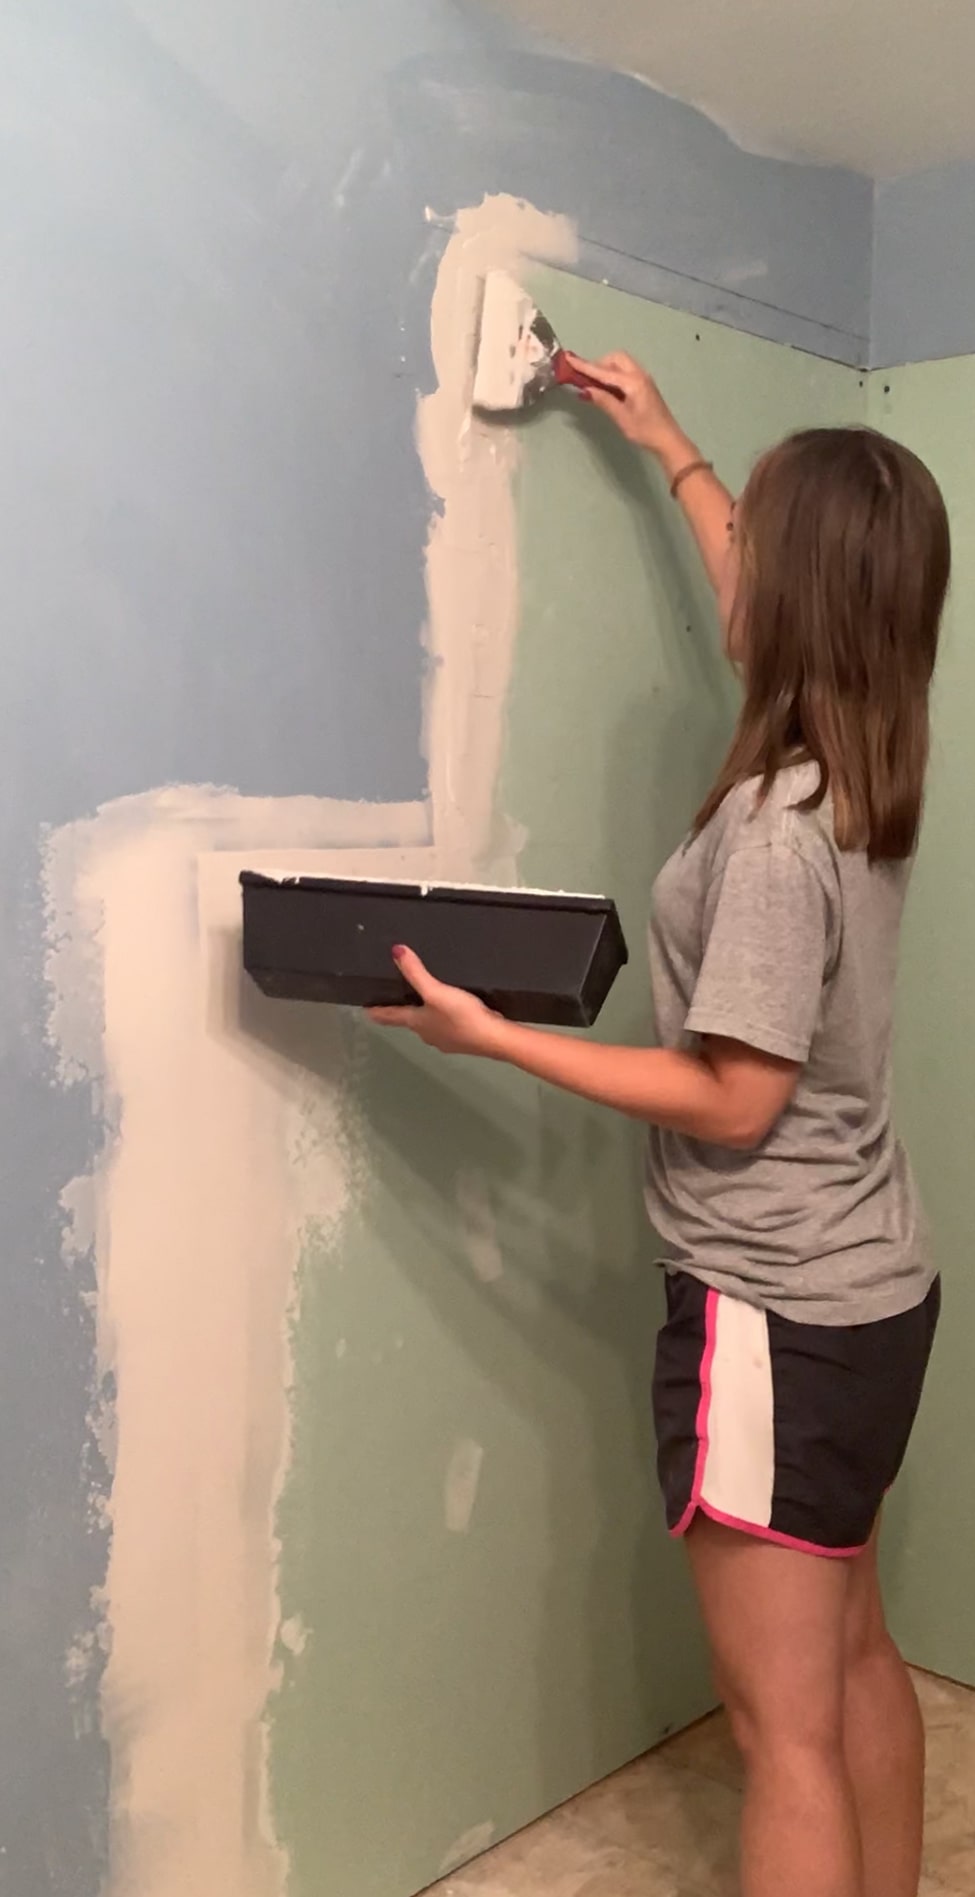
This was our first time drywalling and it wasn’t difficult, but I’m definitely not a fan of the whole mudding part. It’s just… yeah. No, thanks!
Some may ask “why are you using drywall in a shower area?”. Even though most code requirements are just using the green drywall (moisture and mold resistance), it’s not really waterproof. There are newer and better options to use in a shower area, that last longer and are completely waterproof. A few examples are cement board, Wedi Board, Schulter Kerdi boards, or what we are using, Schulter Kerdi Waterproof Membrane.
The membrane gets added on top of the drywall, making it waterproof! I don’t even have to mud the seems in there, since we’ll be using thin-set mortar to attach the membrane to the drywall. Pretty cool stuff, right?! 😉
Plumbing
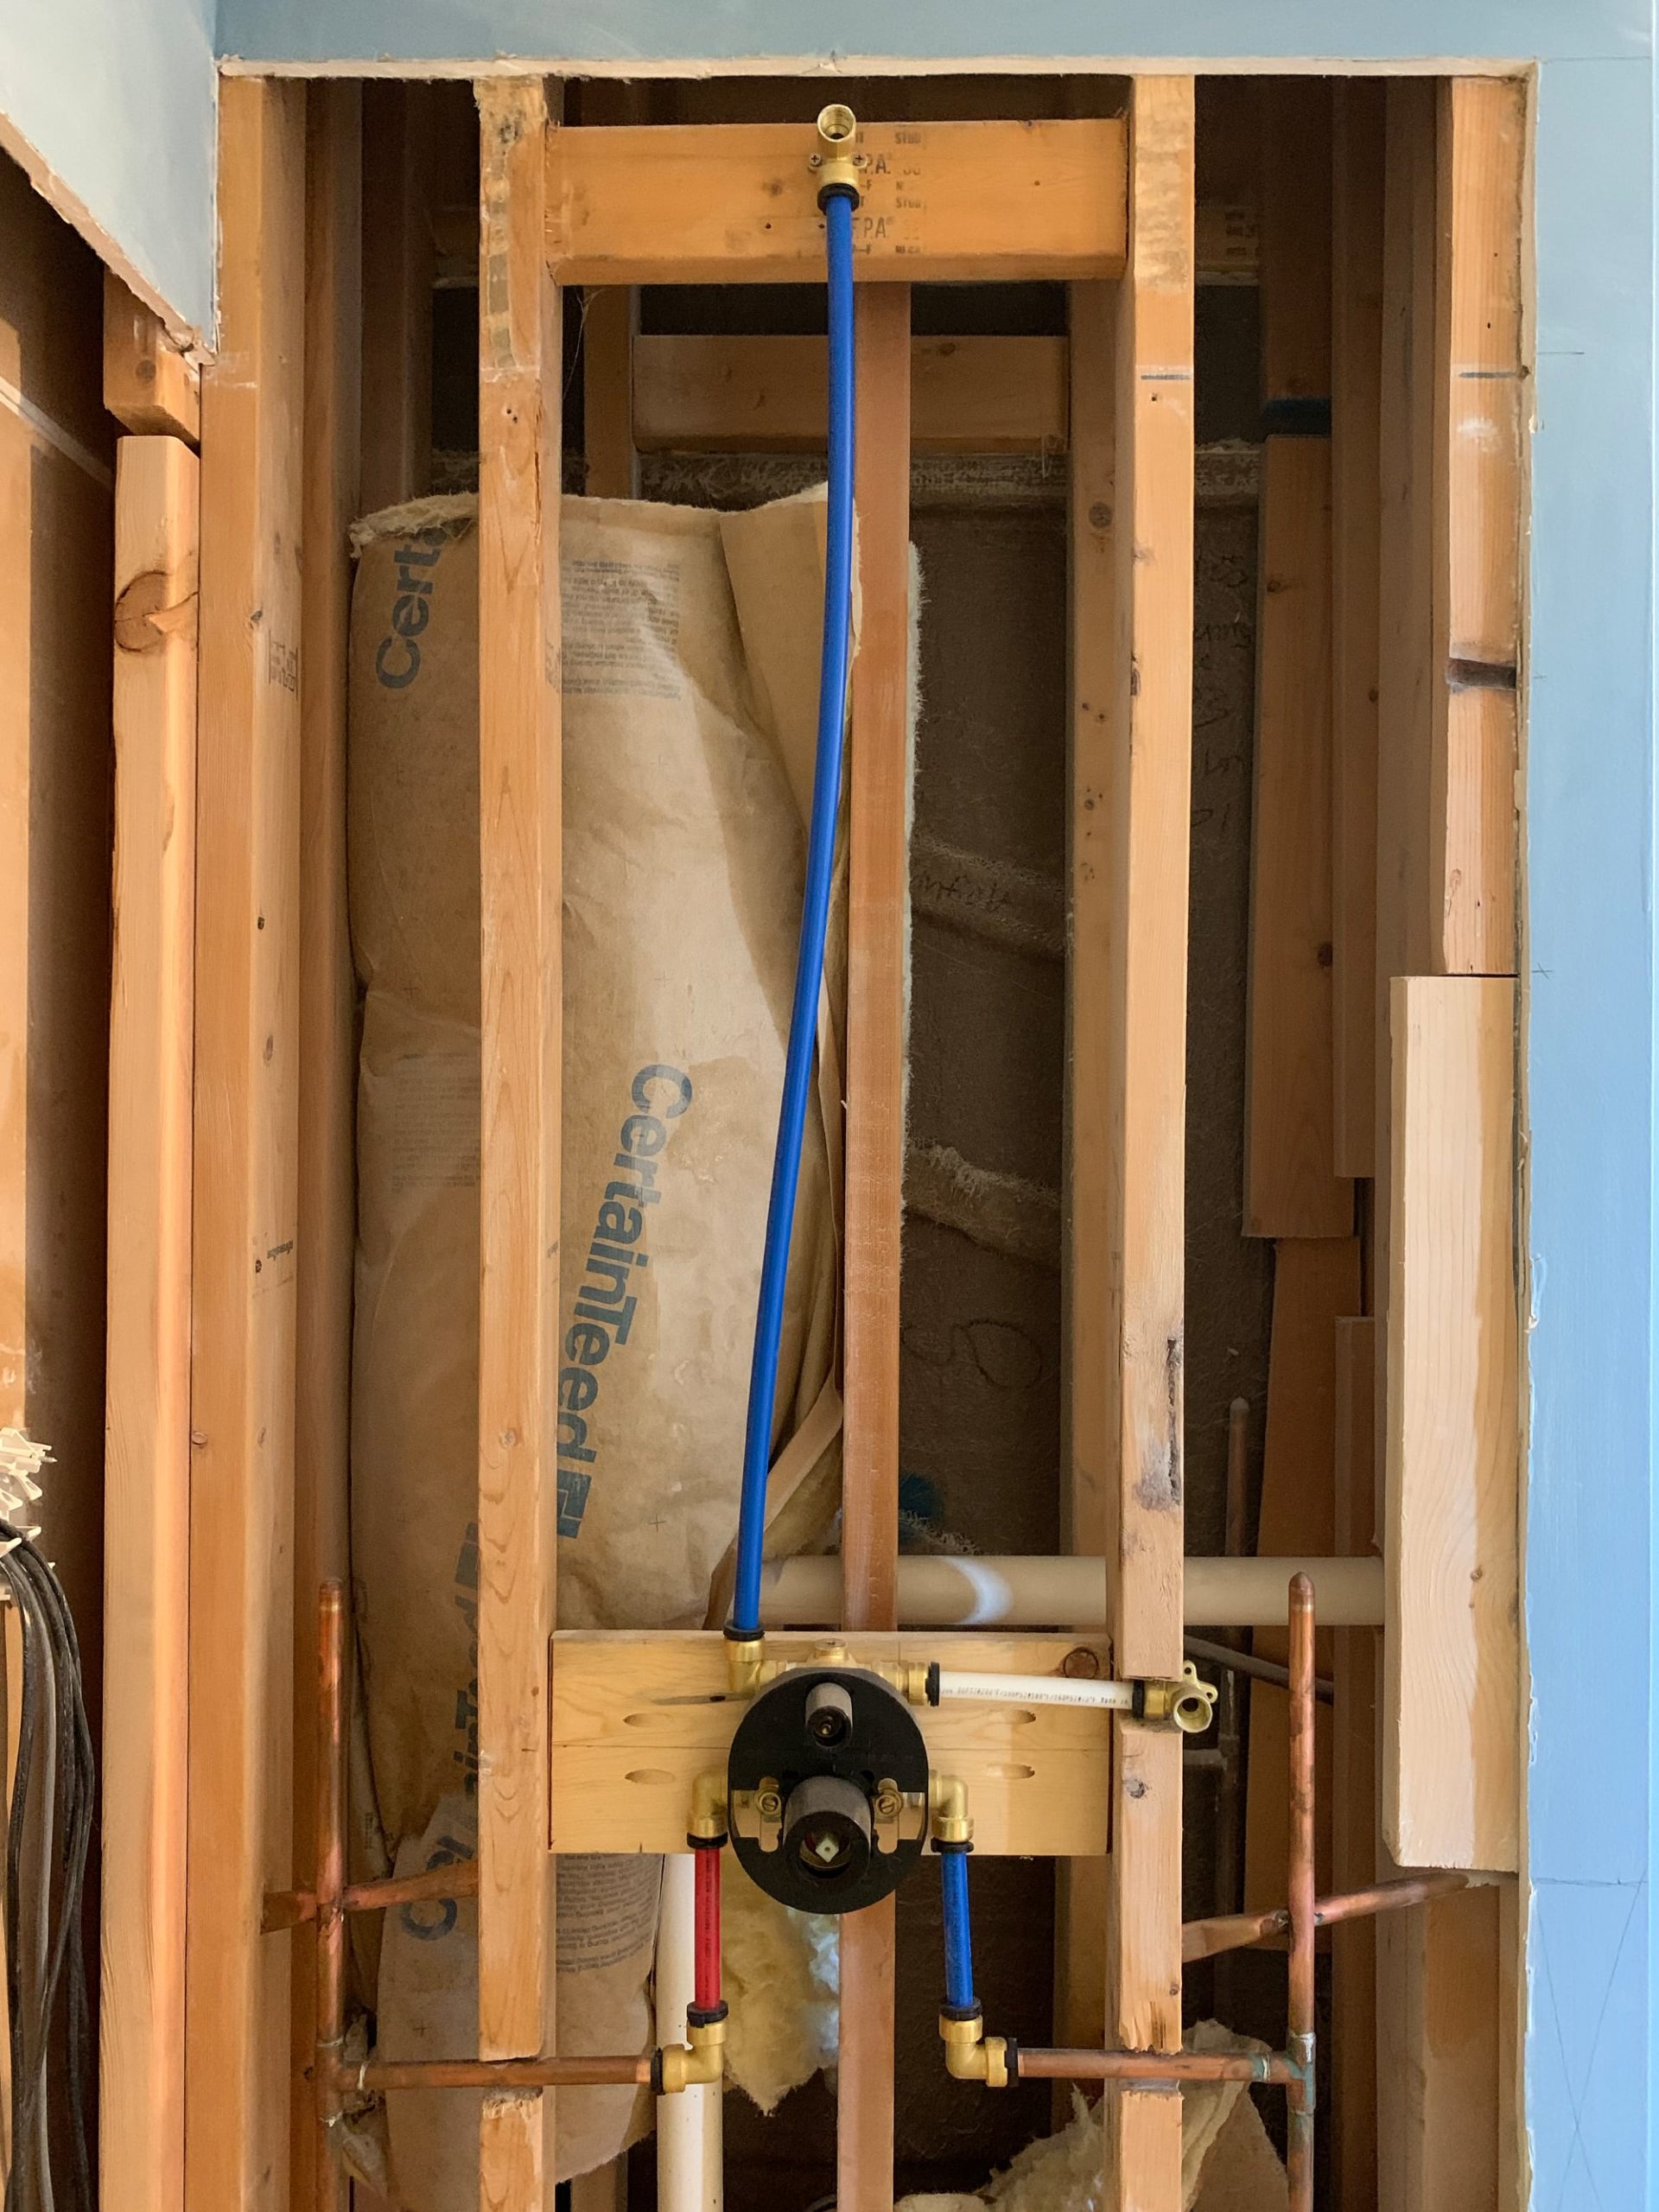
Shout out to my dad for helping out in this department! Plumbing is totally new for us, and we really had no idea what to do here. I gave my dad a call to see if he could help out and we got it done!
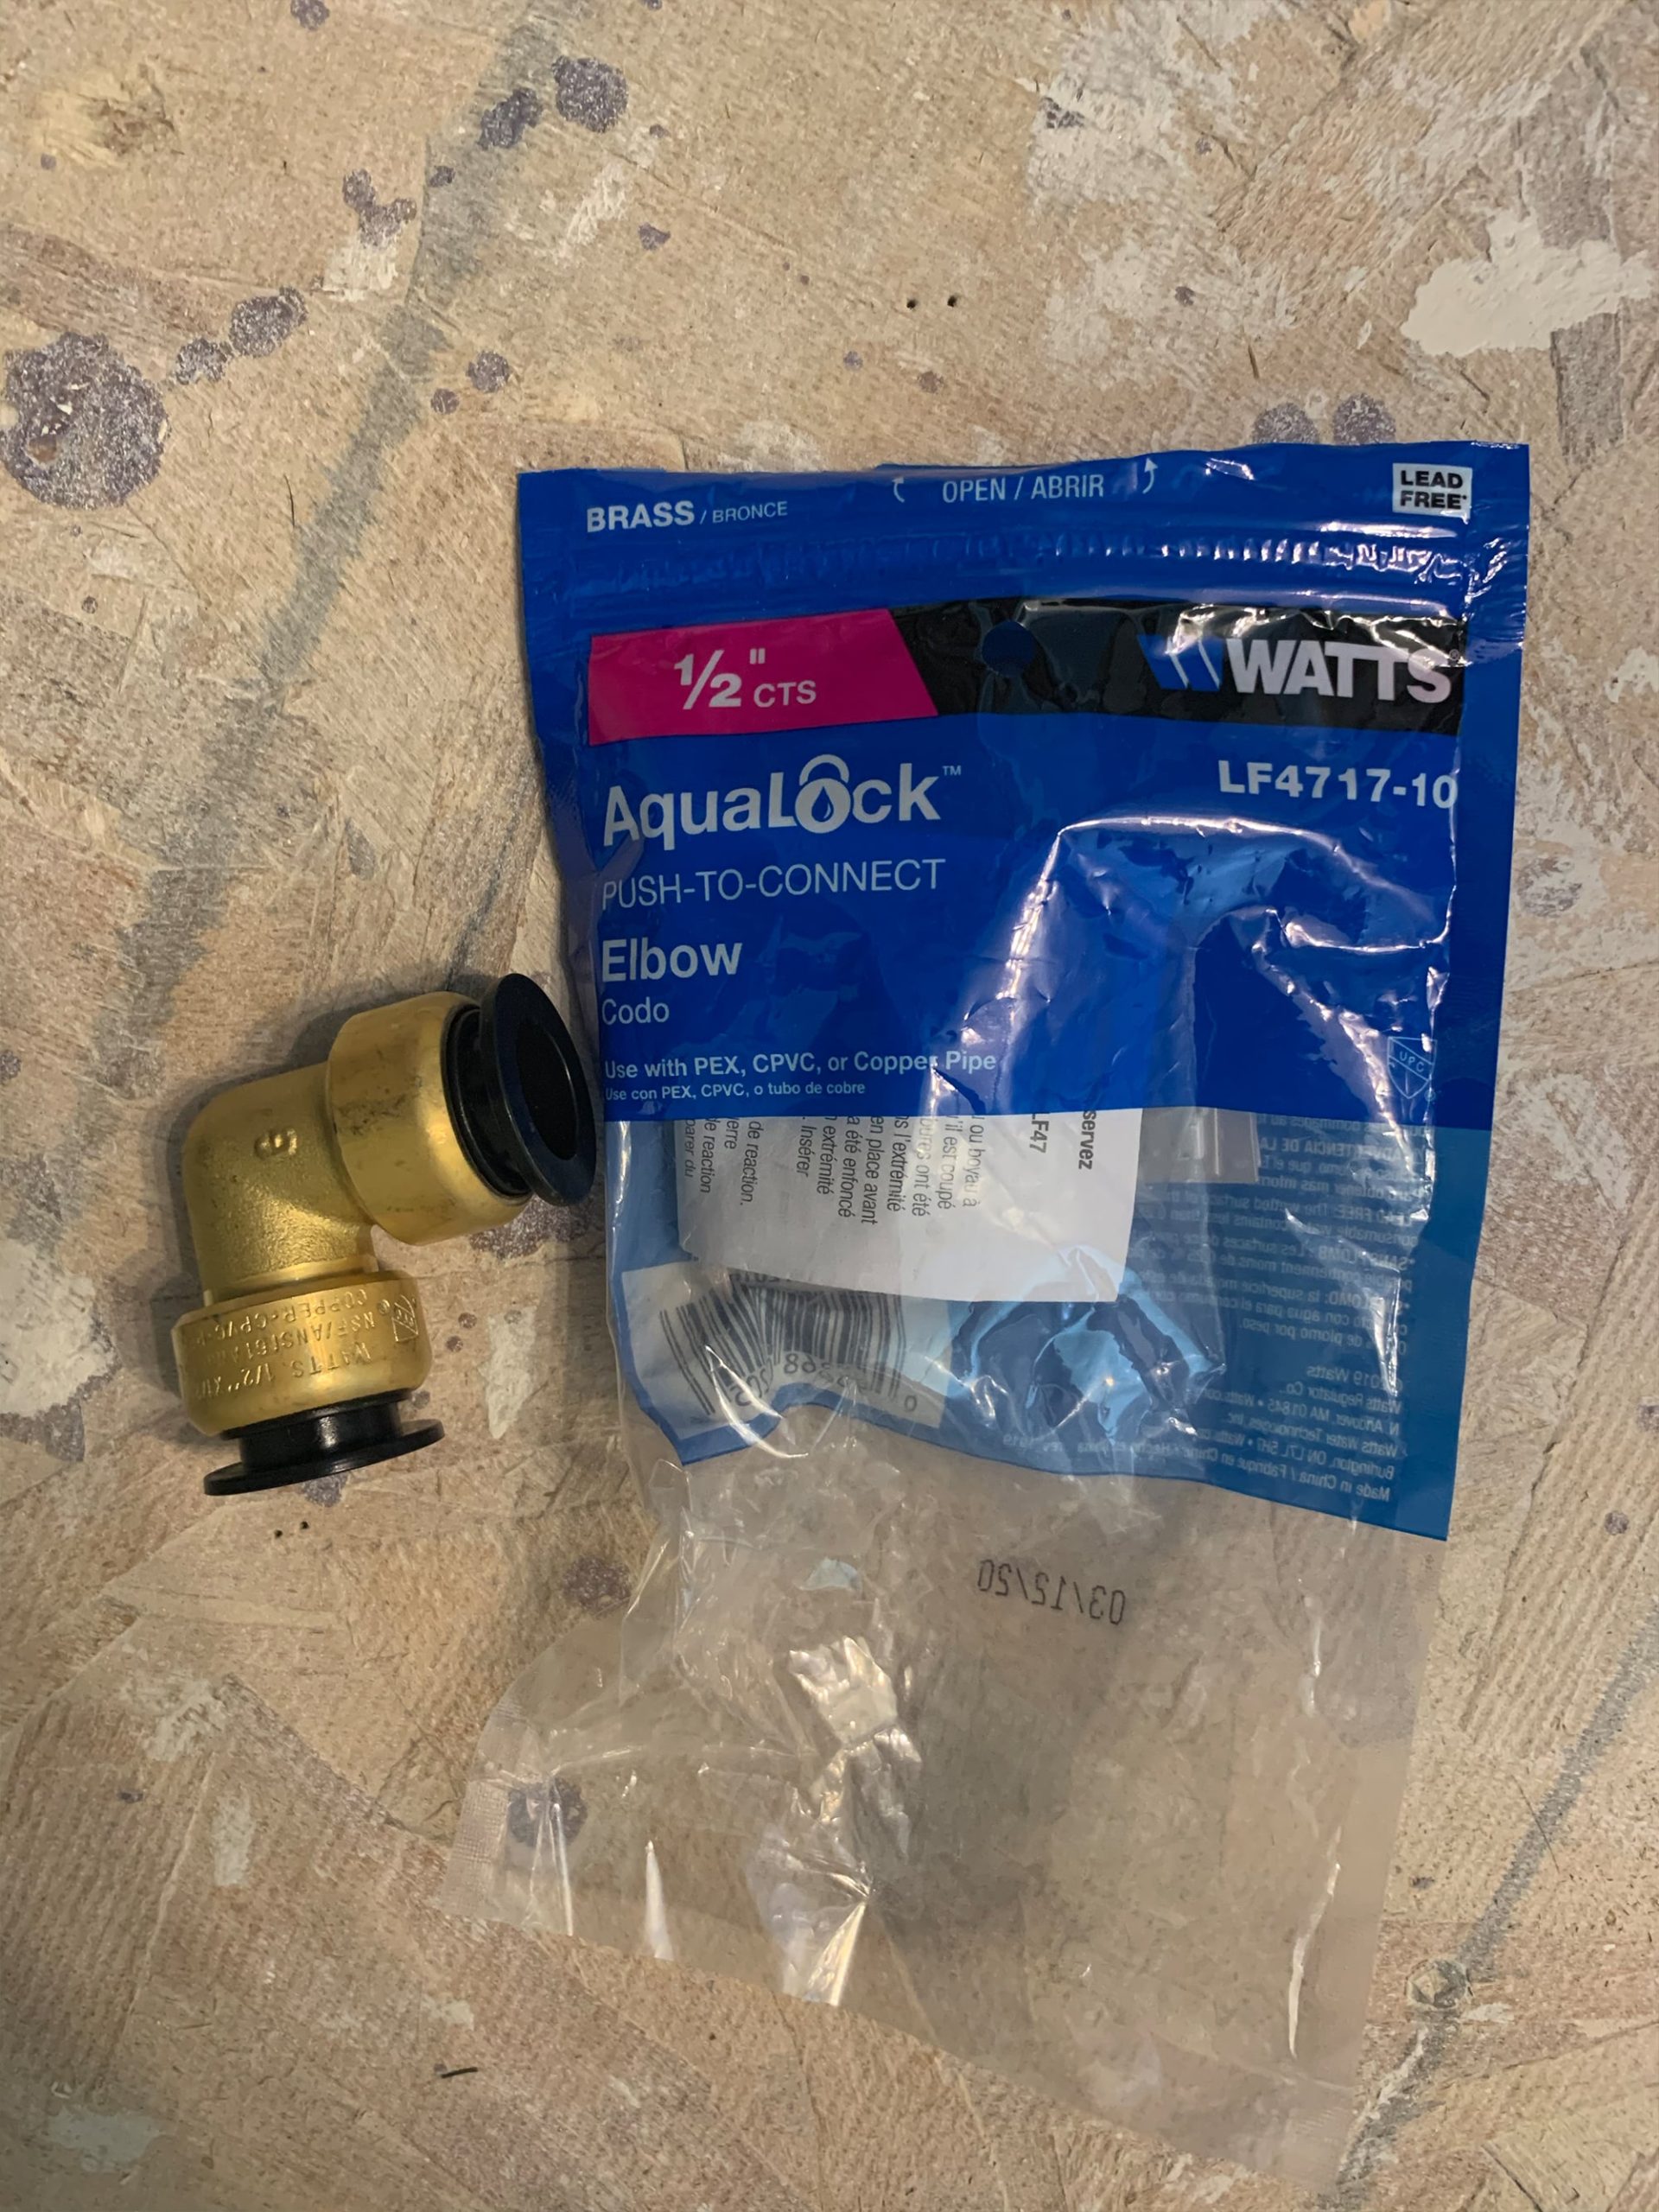
We decided to use PEX pipes and these awesome push-to-connect fittings, called AquaLock, by Watts. They’re referred to as “shark bites”. Wow! Did those make this so much easier. No soldering involved!
We tested both the showerhead and handheld to make sure there we no leaks. We did the handheld first, no leaks (whoo-hoo!). Then we switched to the showerhead… there was a small leak (ahh!). We shut the water down and found where it was leaking. The issue was, that we cut the PEX pipe just a bit too short, and the pipe was not fully seated into the AquaLock push-to-connect fitting. We had leftover PEX piping, so we cut a new piece at the correct size, tested again, and no leaks!
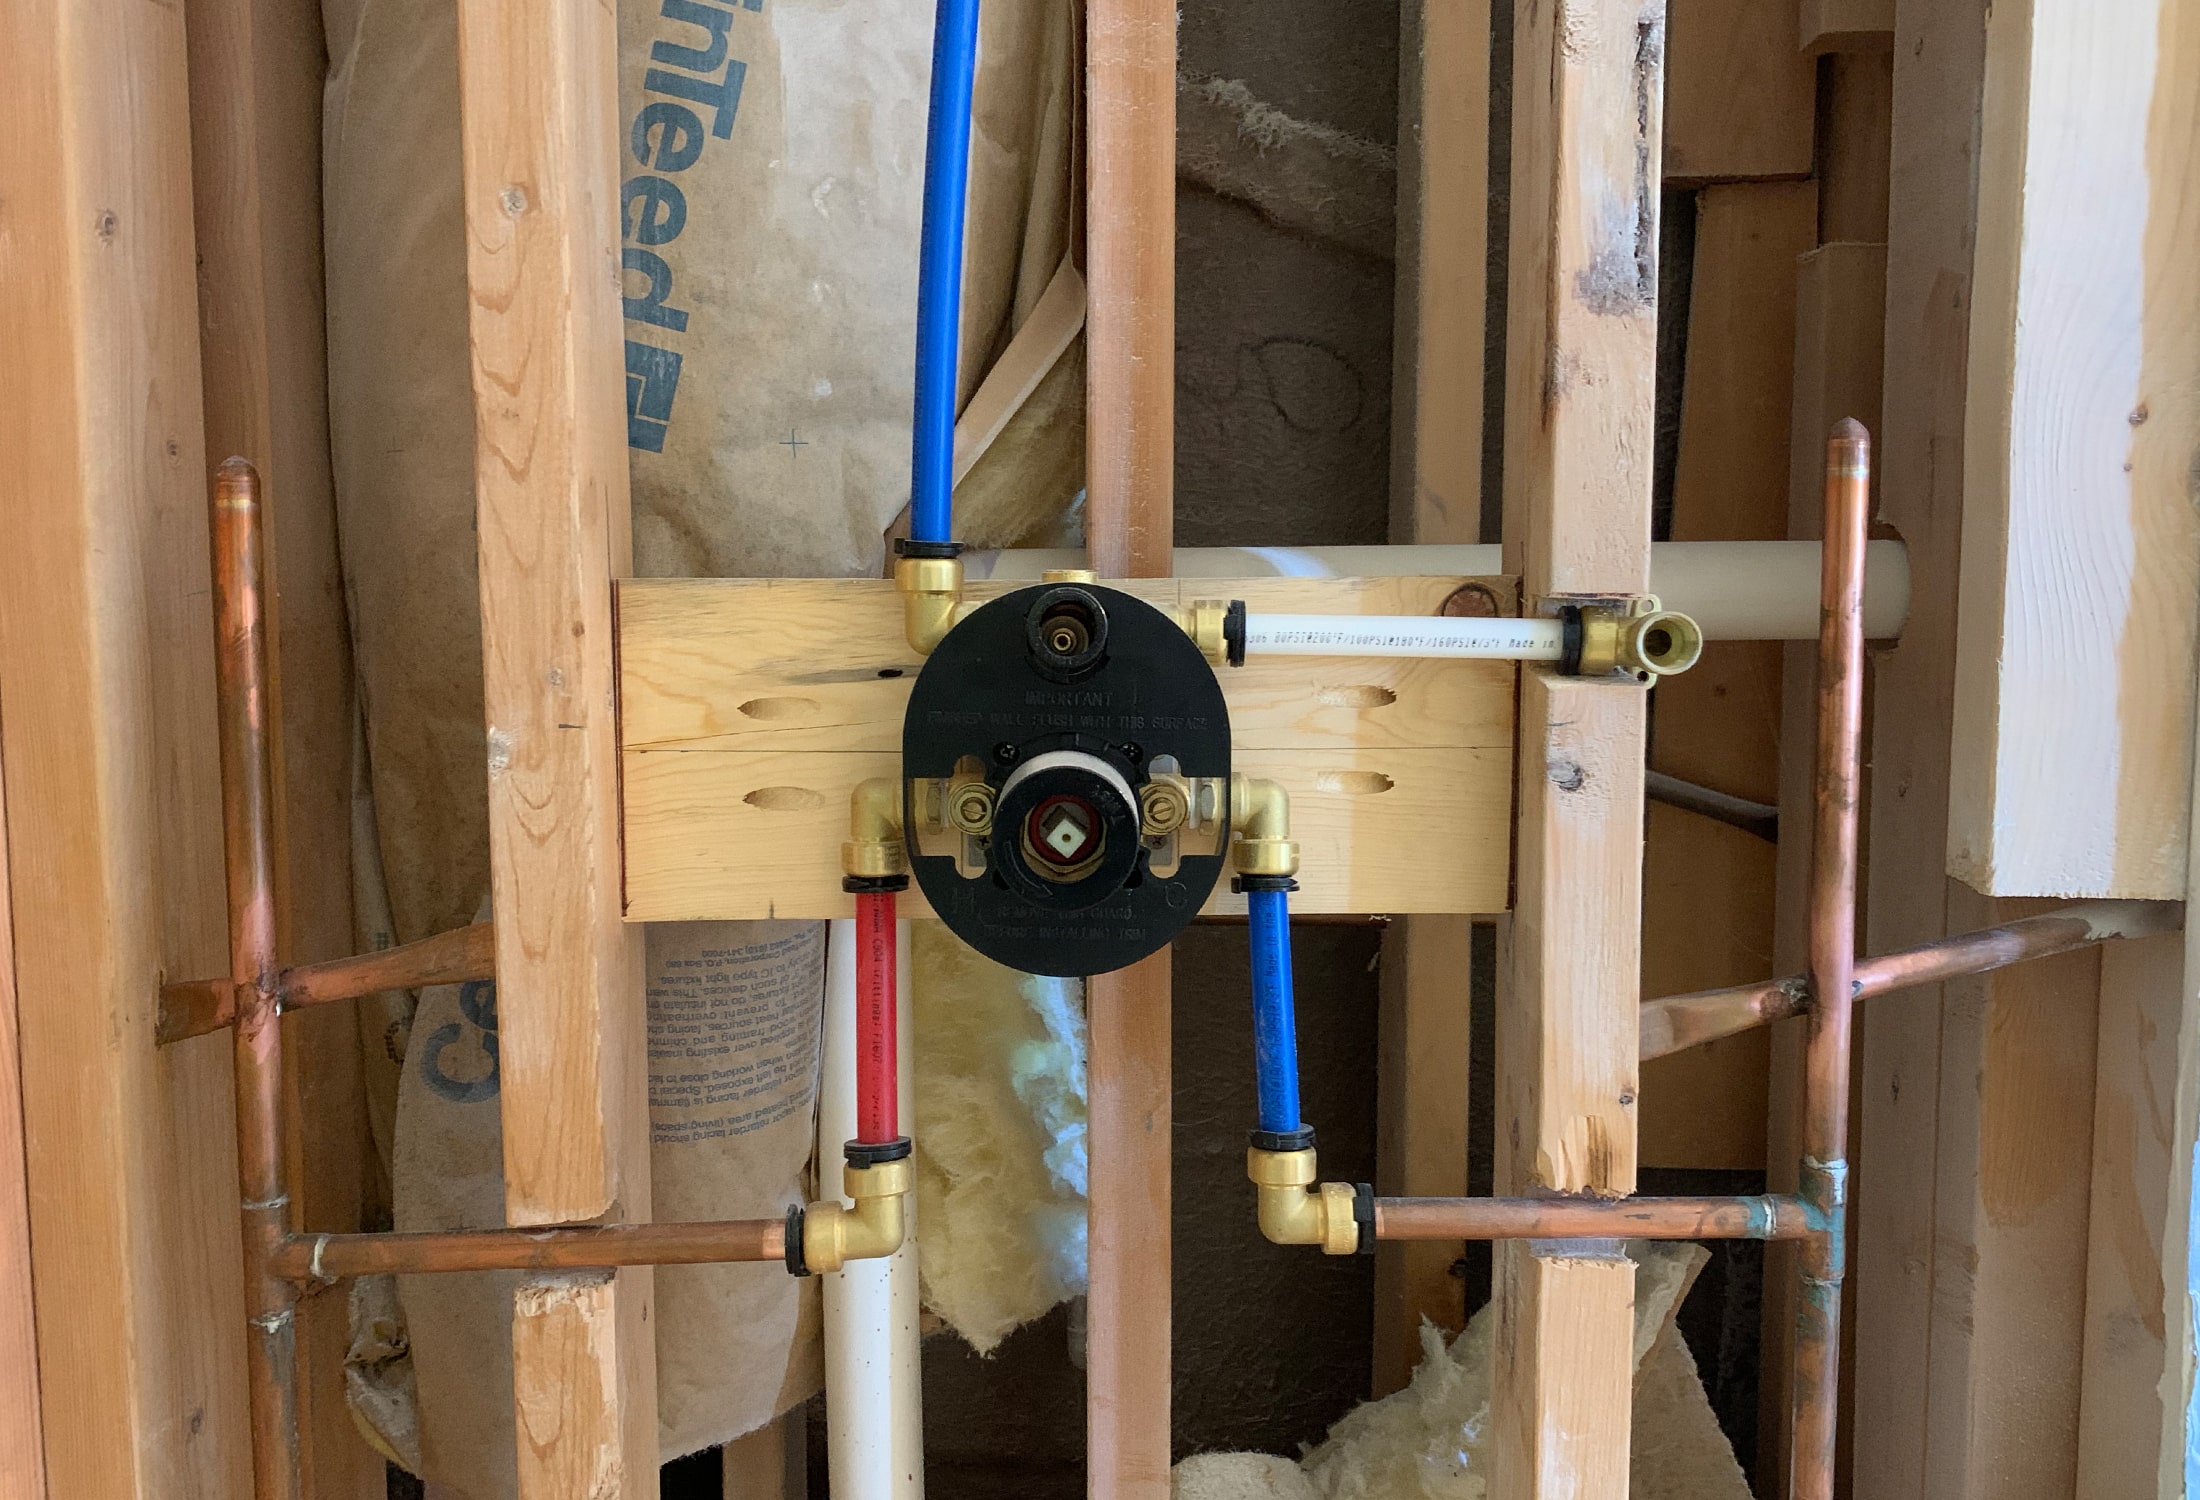
However, we still need to do one more final test… which involves capping each pipe and turning on the water. This will build up maximum pressure within the pipes to make sure there are absolutely no leaks anywhere.
After helping my dad and learning more about PEX and these fittings, I’m a little bit confident (just a little) that we could do it by ourselves the next time. That’s saying a lot, but it honestly made plumbing not so scary!
Next Week’s Game Plan!
Like I mentioned earlier, we’re hitting the ground running this week! Here’s what we plan to get done next week for the ORC:
- Finish plumbing – the final test!
- Complete drywall
- Drain Plumbing
- Paint
- Install Schulter Kerdi Shower System & Ditra flooring underlayment!
Big list, huh? Do you think we’ll get it all done? Odds are, probably not, but we’re going to try!
To wager your bet if we’ll get it all done or not, be sure to follow us on Instagram. That’s where I’ll be posting any updates on the daily. Or, be sure to subscribe to our blog to get notifications for any new ORC posts!
Looking for more project inspiration or ideas? Check out what the other Guest Participants are up to over at the One Room Challenge Blog! There are so many projects that I can’t wait to see completed!
Wish us luck for this week!


It’s been so fun following along on this space ! I can’t for next weeks !